2018 MERCEDES-BENZ AMG GT COUPE charging
[x] Cancel search: chargingPage 7 of 294

Anti-skid chainssee Snow chains
Anti-theft ala rmsystem
see ATA (Anti-Theft Alarm system)
Asht ray.............................................. .217
Assistance display (on-board com-
puter) ..................................................1 62
Assistance menu (on-board com-
puter) ..................................................1 63
Assistance system
see Driving systems
ASSYST PLUS
Displaying a service message ........2 38
Hiding a service message .............. 237
Resetting the service interval dis-
play ................................................ 238
Service message ............................ 237
Special service requirements ......... 238
ATA (Anti-Theft Alarm system)
Activating/deactivating ................... 63
Function ...........................................6 3
Switching off the alarm .................... 63
ATTENTION ASSIST
Activating/deactivating ................. 163
Display message ............................ 183
Function/notes ............................. 148
Authorized Mercedes-Benz Center
see Qualified specialist workshop
Authorized workshop
see Qualified specialist workshop
AUTO lights
Display message ............................ 180
see Lights
Automatic car wash (care) ............... 239
Automatic engine start (ECO start/
stop function) .................................... 109
Automatic engine switch-off (ECO
start/stop function) .......................... 108
Automatic headlamp mode ................ 91
Automatic transmission
Accelerator pedal position ............. 115
Automatic drive program ............... 117
Changing gear ............................... 115
Display message ............................ 188
Double-clutch function .................. 115
Drive program display .................... 114
Driving tips .................................... 115 Emergency running mode
.............. 120
Eng
aging neutral ............................ 113
Engaging park position automati-
cally ............................................... 113
Engaging reverse gear ................... 113
Engaging the park position ............ 113
Gearshift recommendation ............ 118
Gliding mode ................................. 115
Important safety notes .................. 112
Kickdown ....................................... 115
Manual drive program .................... 117
Manual mode ................................. 118
Oil temperature (on-board com-
puter) ............................................. 165
Overview ........................................ 112
Problem (malfunction) ................... 120
Pulling away ................................... 107
Rocking the vehicle free ................ 115
Shift override ................................. 119
Starting the engine ........................ 107
Steering wheel paddle shifters ...... 116
Transmission position display ........ 114
Transmission positions .................. 114
Automatic transmission emer-
gency mode ....................................... 120
B
Back button ....................................... 205
BAS (Brake Assist System) ................. 58
Basic settings
see Settings
Battery (SmartKey)
Checking .......................................... 68
Important safety notes .................... 67
Replacing ......................................... 68
Battery (vehicle)
Charging ........................................ 251
Display message ............................ 182
Important safety notes .................. 250
Jump starting ................................. 251
Belt
see Seat belts
Belt warning ......................................... 43
Blind Spot Assist
Activating/deactivating (on-
board computer) ............................ 163
Display message ............................ 184
Index5
Page 96 of 294
On very rare occasions, Adaptive Highbeam
Assist may fail to recognize other road users
that have lights, or may recognize them too
late. In this, or in similar situations, the auto-
matic high-beam headlamps will not be deac-tivated or will be activated regardless. There is
a risk of an accident.
Always carefully observe the traffic conditions
and switch off the high-beam headlamps in
good time.
Adaptive Highbeam Assist cannot take into
account road, weather or traffic conditions.
Adaptive Highbeam Assist is only an aid. You are
responsible for adjusting the vehicle's lighting
to the prevailing light, visibility and traffic con-
ditions.
In particular, the detection of obstacles can be
restricted if there is:
Rpoor visibility, e.g. due to fog, heavy rain or
snow
Rdirt on the sensors or the sensors are
obscured
Switching Adaptive Highbeam Assist
on/off
XTo switch on: turn the light switch to the
à position.
XPress the combination switch beyond the
pressure point in the direction of arrow :.
The _ indicator lamp in the multifunction
display lights up when it is dark and the light
sensor activates the low-beam headlamps.
If you are driving at speeds above approx-
imately 16 mph (25 km/h):
The headlamp range is set automatically
depending on the distance between the vehi-
cle and other road users.
If you are driving at speeds above approx-
imately 19 mph (30 km/h) and no other road
users have been detected:
The high-beam headlamps are switched on
automatically. The Kindicator lamp in the
instrument cluster also lights up.
If you are driving at speeds below approx-
imately 16 mph (25 km/h) or other road users have been detected or the roads are ade-
quately lit:
The high-beam headlamps are switched off
automatically. The Kindicator lamp in the instrument cluster goes out. The
_indi-
cator lamp in the multifunction display
remains lit.
XTo switch off: move the combination switch
back to its normal position or move the light
switch to another position.
The _ indicator lamp in the instrument
cluster goes out.
Headlamps fogged up on the inside
Certain climatic and physical conditions may
cause moisture to form in the headlamp. This
moisture does not affect the functionality of the
headlamp.
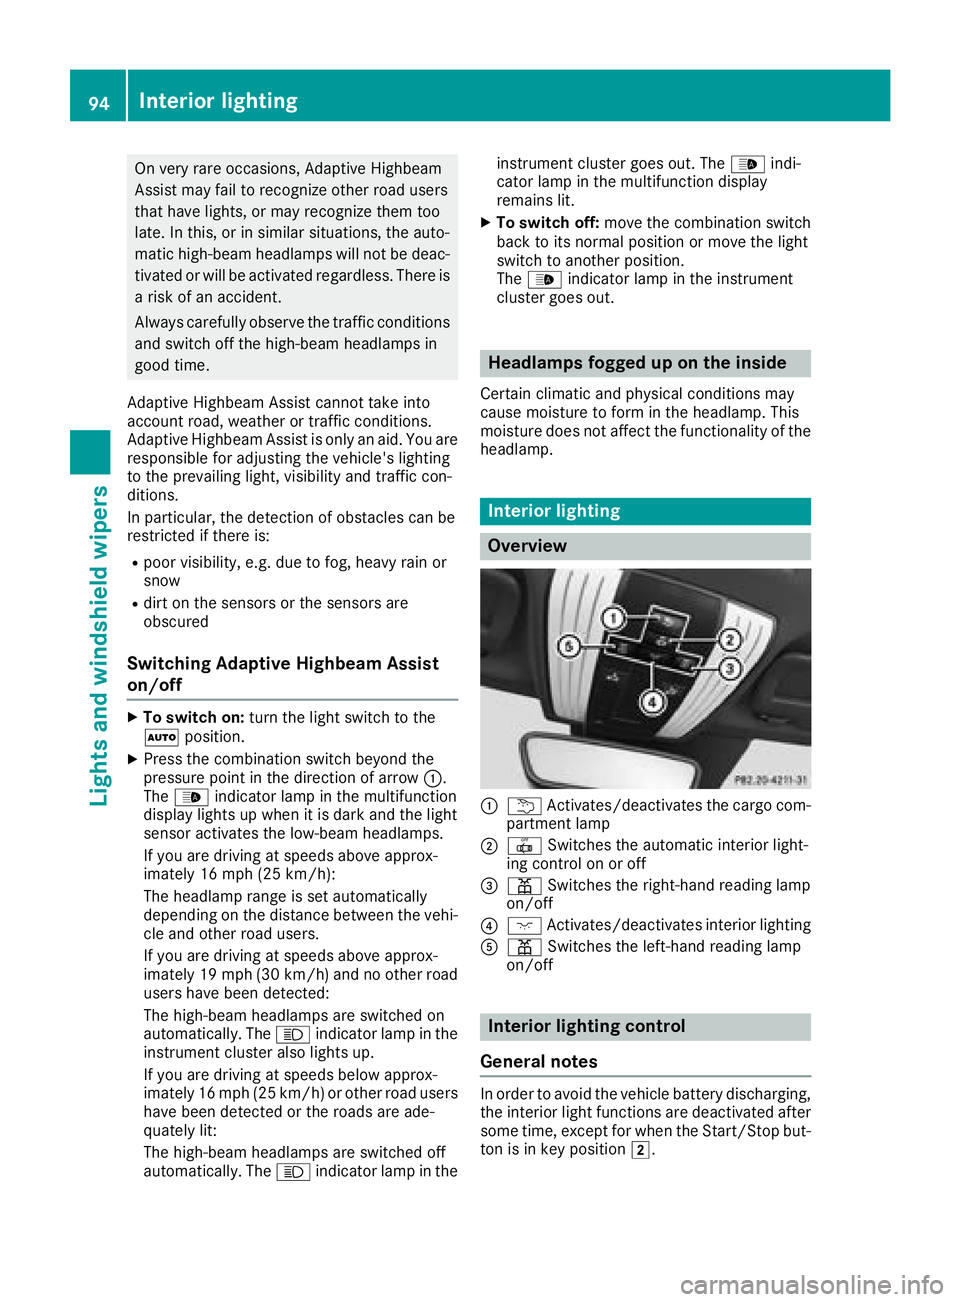
Interior lighting
Overview
:u Activates/deactivates the cargo com-
partment lamp
;| Switches the automatic interior light-
ing control on or off
=p Switches the right-hand reading lamp
on/off
?c Activates/deactivates interior lighting
Ap Switches the left-hand reading lamp
on/off
Interior lighting control
General notes
In order to avoid the vehicle battery discharging,
the interior light functions are deactivated after
some time, except for when the Start/Stop but-
ton is in key position 2.
94Interior lighting
Lights and windshield wipers
Page 127 of 294
In addition, at least one of the following condi-
tions must be fulfilled:
Rthere is a system malfunction
Rthe power supply is insufficient
Rthe vehicle is stationary for a lengthy period
The red F(USA only) or !(Canada only)
indicator lamp in the instrument cluster lights
up.
The electric parking brake is not automatically
engaged if the engine is switched off by the ECO
start/stop function.
Releasing automatically
The electric parking brake is released when the
following conditions are fulfilled:
Rthe engine is running
Rthe seat belt tongue is engaged in the belt
buckle
Rthe transmission is in position hork and
you depress the accelerator pedal or shift
from position jtoh ork
Rif the transmission is in position k, the tail-
gate must be closed
If the seat belt tongue is not engaged in the seat
belt buckle, the following conditions must be
fulfilled:
Rthe driver's door and front-passenger door
are closed
Ryou move the transmission out of position j
or you have previously driven at a speed
above 2 mph (3 km/h)
Rif the transmission is in position k, the tail-
gate must be closed
When the electric parking brake is released, the red F (USA only) or !(Canada only) indi-
cator lamp goes out in the instrument cluster.
Emergency braking
The vehicle can also be braked during an emer-
gency by using the electric parking brake.
XWhile driving, push handle :of the electric
parking brake (Ypage 124).
The vehicle is braked as long as you keep
handle :of the electric parking brake
pressed. The longer electric parking brake
handle :is depressed, the greater the brak-
ing force. During braking:
Ra warning tone sounds
Rthe
Please Release Parking Brakemes-
sage appears
Rthe red F(USA only) or !(Canada
only) indicator lamp in the instrument cluster
flashes
When the vehicle has been braked to a stand-
still, the electric parking brake is engaged.
Parking the vehicle for a long period
General notes
If you leave the vehicle parked for longer than
four weeks, the battery may be damaged by
exhaustive discharging.
If you leave the vehicle parked for longer than six
weeks, the vehicle may suffer damage as a
result of lack of use.
XVisit a qualified specialist workshop and seek
advice.
Trickle charging the on-board electrical
system battery
The battery may drain if the vehicle is left sta-
tionary for long periods. In this case, Mercedes-
Benz recommends attaching the trickle charger
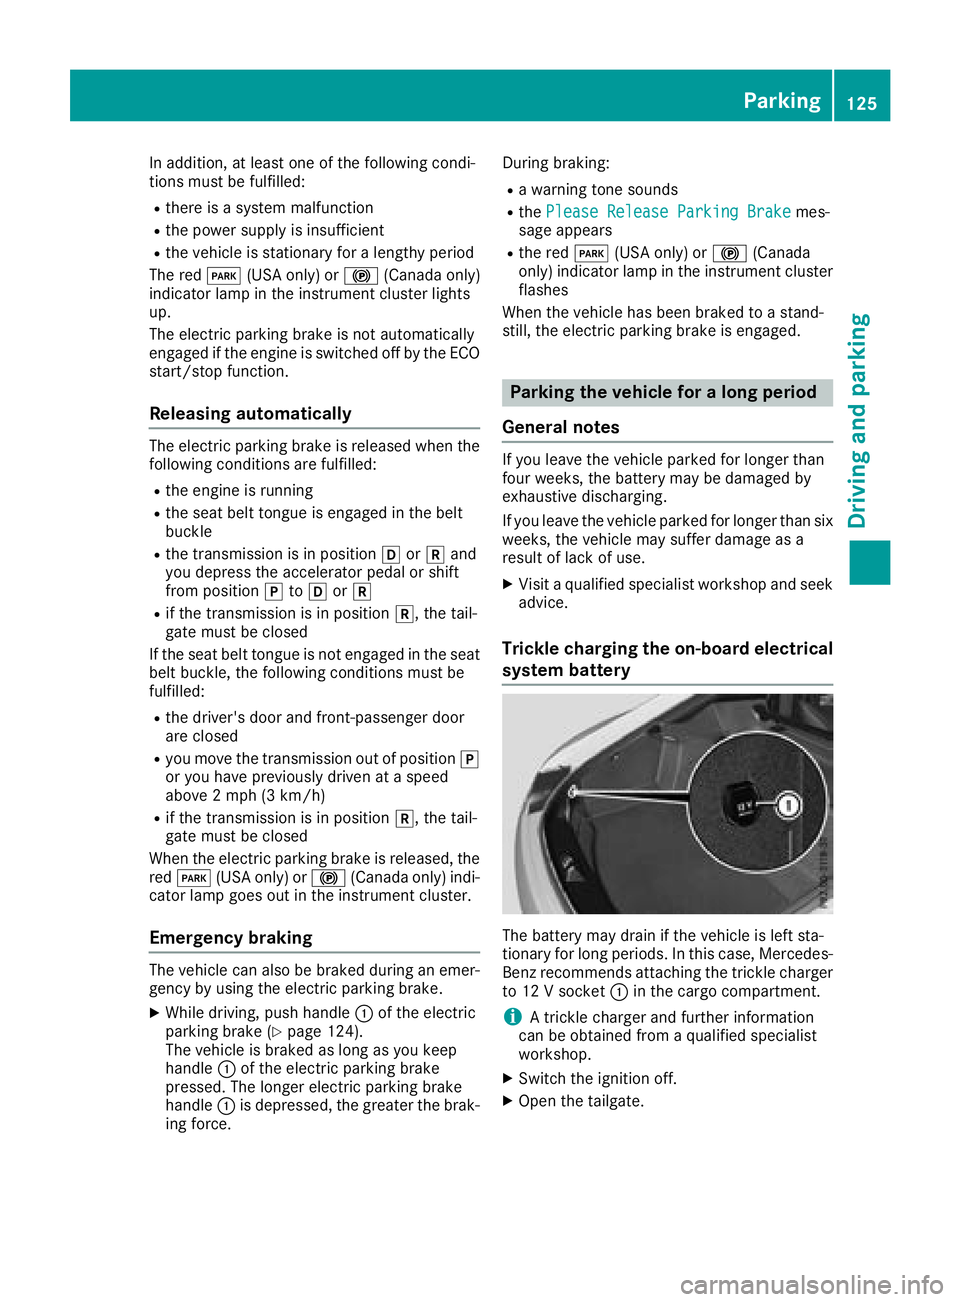
to 12 V socket :in the cargo compartment.
iA trickle charger and further information
can be obtained from a qualified specialist
workshop.
XSwitch the ignition off.
XOpen the tailgate.
Parking125
Driving and parking
Z
Page 176 of 294
Display messagesPossible causes/consequences andMSolutions
The yellow!warning lamp lights up. The red F(USAonly)
or ! (Canada only) indicator lamp flashes for about te nseconds
after th eelectric parking brak ehas been applie dor released. It then
goe sout or remain slit .
The electric parking brak eis malfunctioning .
XSwitchoff th eignition and tur nit bac kon .
XApply th eelectric parking brake.
If it is no tpossibl eto apply th eelectric parking brake:
XShift th etransmission to position j.
XVisitaqualified specialist workshop .
If it is no tpossibl eto release th eelectric parking brak emanually:
XReleas eth eelectric parking brak eautomatically (Ypage 125).
If th eelectric parking brak estill canno tbe released:
XConsult aqualified specialist workshop .
The yellow!warning lamp lights up. If you manually apply or
release th eelectric parking brake, th ered F (USAonly) or !
(Canada only) indicator lamp flashes .
The electric parking brak eis malfunctioning .It is no tpossibl eto apply
th eelectric parking brak emanually.
XShift th etransmission to position jas th eelectric parking brak eis
no tapplie dautomatically.
XVisit aqualified specialist workshop .
If it is no tpossibl eto release th eelectric parking brak emanually:
XReleas eth eelectric parking brak eautomatically (Ypage 125).
F(USA
only)
!(Canada
only)
Parkin gBrake Inop‐
erativ e
The yellow !warning lamp lights up. The red F(USAonly)
or ! (Canada only) indicator lamp flashes for about te nseconds
after th eelectric parking brak ehas been applie dor released. It then
goe sout or remain slit .
The electric parking brak eis malfunctioning ,e.g. because of over-
voltag eor undervoltage.
XRemove th ecaus efor th eovervoltage or undervoltage, e.g. by
charging th ebattery or restarting th eengine.
XApply or release th eelectric parking brake.
If it remain simpossible to apply or release th eelectric parking brake:
XSwitc hoff th eignition and tur nit bac kon .
XApply or release th eelectric parking brake.
If th eelectric parking brak estill canno tbe released:
XConsult aqualified specialist workshop .
If th eelectric parking brak estill canno tbe applied:
XVisit aqualified specialist workshop .
174Display messages
On-board computer and displays
Page 253 of 294
The electrolyte of the battery is cor-
rosive. Avoid contact with skin, eyes
or clothing.
Wear suitable protective clothing,
especially gloves, apron and face-
guard.
Immediately rinse electrolyte
splashes off with clean water. Con-
tact a physician if necessary.
Wear eye protection.
Keep children away.
Observe this Operator's Manual.
For safety reasons, Mercedes-Benz recom-
mends that you only use batteries which have
been tested and approved for your vehicle by
Mercedes-Benz. These batteries provide
increased impact protection to prevent vehicle
occupants from suffering acid burns should the
battery be damaged in the event of an accident.
In order for the battery to achieve the maximum
possible service life, it must always be suffi-
ciently charged.
Like other batteries, the vehicle battery may
discharge over time if you do not use the vehicle.
In this case, have the battery disconnected at a
qualified specialist workshop. You can also
charge the battery with a special charger rec-
ommended by Mercedes-Benz. Contact a quali- fied specialist workshop for further information.
Have the battery condition of charge checked
more frequently if you use the vehicle mainly for
short trips or if you leave it standing idle for a
lengthy period. Consult a qualified specialist
workshop if you wish to leave your vehicle
parked for a long period of time.
When you use the SmartKey in the ignition and
you park the car, remove the SmartKey if you do not require any electrical consumers. The vehi-
cle will then use very little energy, thus conserv-
ing battery power.
If the power supply has been interrupted, e.g. if
you reconnect the battery, you will have to:
Rreset the function for automatically folding
the exterior mirrors in/out by folding the mir-
rors out once (
Ypage 87)
Rreset the side windows, see (Ypage 77)
Charging the battery
!
Only use battery chargers with a maximum
charging voltage of 14.4 V.
!Only charge the battery using the jump-
starting connection point.
The jump-starting connection point is in the
engine compartment (
Ypage 251).
XOpen the hood.
XConnect the battery charger to the positive
terminal and ground point in the same order
as when connecting the donor battery in the
jump-starting procedure (
Ypage 251).
Keep away from fire and open flames. Do not
lean over a battery. Never charge the battery if it
is still installed in the vehicle, unless you use a
battery charger which has been tested and
approved by Mercedes-Benz. A battery charger
unit specially adapted for Mercedes-Benz vehi-
cles and tested and approved by Mercedes-
Benz is available as an accessory. It permits the
charging of the battery in its installed position.
Contact an authorized Mercedes-Benz Center
for further information and availability. Read the
battery charger's operating instructions before
charging the battery.
Do not charge a battery which has been
removed at low temperatures with a battery
charger. Allow the battery to warm up gently
first, if necessary. Otherwise, the service life can
be shortened and the starting characteristics
impaired, especially at low temperatures.
Jump-starting
XFor the jump-starting procedure, use only the jump-starting connection point in the engine com- partment, consisting of a positive terminal and a ground point.
Jump-starting251
Breakdown assistance
Z
Page 254 of 294
!Avoid repeated and lengthy starting attempts. Otherwise, the catalytic converter could be
damaged by the non-combusted fuel.
XDo not start the vehicle using a rapid charging device.
If your vehicle's battery is discharged, the engine can be jump-started from another vehicle or
from a donor battery using jumper cables.
The battery is not accessible in all vehicles. If the other vehicle's battery is not accessible, jump-start
the vehicle using a donor battery or a jump-starting device.
Observe the following during the jump-starting procedure:
Rthe jumper cables must not come into contact with parts that can move when the engine is
running, such as the V-belt pulley or the fan.
Rnon-insulated parts of the terminal clamps must not come into contact with other metal parts
while the jumper cables are connected to the battery and the jump-starting connection point.
Ronly use jumper cables that are not damaged and have a sufficient cross-section and insulated
terminal clamps.
Rjump-starting may be performed only using batteries with a nominal voltage of 12 V.
Ryou may only jump-start the vehicle when the engine and exhaust system are cold.
Rthe vehicles must not touch each other.
RIf the battery is fully discharged, leave the battery that is being used to jump-start connected for
a few minutes before attempting to start. This charges the battery slightly.
XSecure the vehicle by applying the electric parking brake.
XShift the transmission to position j.
XMake sure the ignition and all electrical consumers are switched off.
All indicator lamps in the instrument cluster must be off. When using the SmartKey, turn the
SmartKey to positionuin the ignition lock and remove it (
Ypage 106).
XOpen the hood.
iRight-hand-drive vehicle: the jump-starting connection points may be located on the other
side of the vehicle.
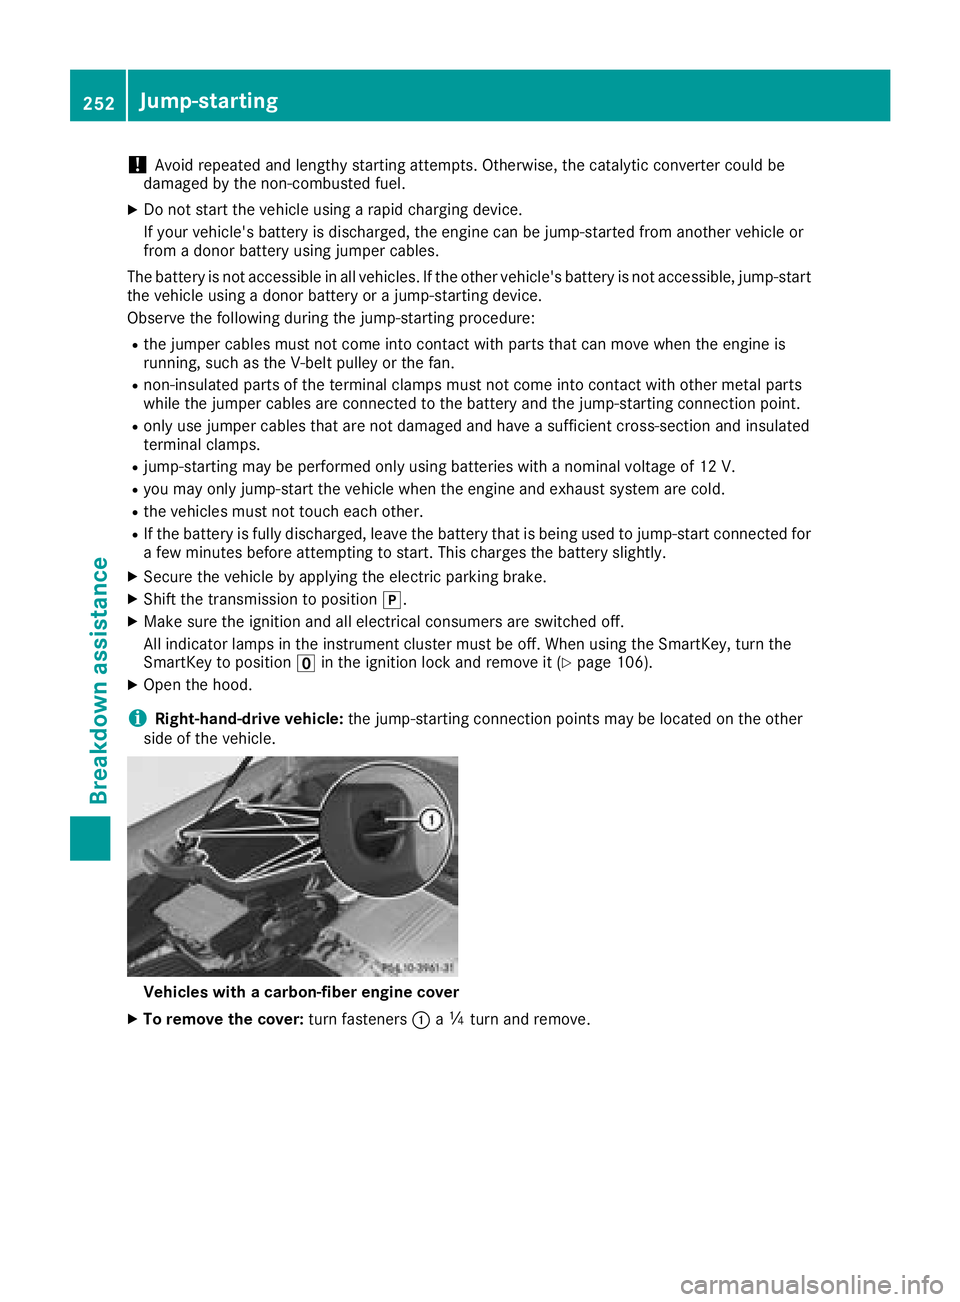
Vehicles with a carbon-fiber engine cover
XTo remove the cover: turn fasteners:aÕ turn and remove.
252Jump-starting
Breakdown assistance