2018 MERCEDES-BENZ AMG GT COUPE change wheel
[x] Cancel search: change wheelPage 240 of 294
Displaying service messages
XSwitchon th eignition .
XUseò on thesteerin gwhee lto cal lup th e
list of menus.
XPress 9or: on thesteerin gwhee lto
selec tth eServic emenuand confirm wit h
a.
XPress 9or: on thesteerin gwhee lto
selec tth eASSYST PLU Ssubmenuand con-
fir m wit ha.
The servic edue dat eappears in th emulti-
function display.
Information about Service
Resetting th eASSYS TPLUS service
interva ldisplay
!If th eASSYST PLU Sservic einterval display
has bee ninadvertentl yreset ,this setting can
be correcte dat aqualified specialis twork-
shop.
Hav eservic ewor kcarrie dout as described in
th eMaintenance Booklet .Thi smay otherwise
lead to increase dwear and damage to th e
major assemblies or th evehicle.
A qualified specialis tworkshop ,e.g. an author -
ized Mercedes-Ben zCenter, will reset th e
ASSYST PLU Sservic einterval display after th e
servic ewor khas bee ncarrie dout .You can also
obtain further information on maintenance
work, fo rexample.
Specia lservice requirement s
The specifiedmaintenance interval take sonly
th enormal operation of th evehicle into
account. Under arduous operatin gcondition sor
increase dload on th evehicle, maintenance
wor kmus tbe carrie dout more frequently, fo r
example:
RRegular city drivin gwit hfrequent intermedi-
at estops
RIf th evehicle is primarily used to trave lshort
distances
RUse in mountainous terrain or on poo rroad
surfaces
RIf th eengin eis ofte nlef tidling fo rlon gperiods
RIn racetrac kmode Under these or similar conditions, have, fo
r
example, th eair filter, engin eoil and oil filte r
replaced or changed more frequently. Under
arduous operatin gconditions, th etires mus tbe
checke dmore often. Further information can be
obtained at aqualified specialis tworkshop ,e.g.
an authorized Mercedes-Ben zCenter.
iIn racetrac kmode, th evehicle is subjec tto
higher loads, meaning that additional main -
tenance wor kis required. If you plan race-
track use, consult aqualified specialis twork-
sho pfirst .Mercedes-Ben zrecommends that
you use an authorized Mercedes-Ben zCente r
fo rthis purpose.
Drivin gabroad
An extensive Mercedes-Ben zServic enetwor kis
also available in other countries. You can obtain
further information from any authorized
Mercedes-Ben zCenter.
Car e
General notes
HEnvironmental not e
Dispose of empty packagin gand cleanin g
cloths in an environmentally responsible man -
ner.
!Whe ncleanin gyour car ,do no tuse:
Rdry, coars eor har dcloths
Rabrasiv ecleanin gagents
Rsolvents
Rcleanin gagents containin gsolvents
Do no tscrub .
Do no ttouch th esurfaces and films wit hhar d
objects ,e.g. rings or ic escrapers .Otherwise ,
you may scratch or damage th esurfaces and
films .
!Do no tpar kyour vehicle fo r alon gperiod of
time directl yafter cleaning, particularly after
cleanin gth ewhee lrim wit hwhee lcleaner.
Wheel cleaner can lead to th eincrease dcor-
rosio nof th ebrake discs and pads .Therefore,
drive fo r afew minutes after cleaning. By
heatin gup th ebrakes, th ebrake discs and
pads dry. The vehicle can then be parke dfo r a
lon gperiod of time.
238Care
Maintenance and care
Page 245 of 294
Always be particularly careful around the
exhaust tail pipe and the tail pipe trim. Allow
these components to cool down before touch-
ing them.
!Do not clean the exhaust pipe with acid-
based cleaning agents, such as bathroom
cleaner or wheel cleaner.
!Vehicles with black exhaust pipes: black
chromed screens should not be polished with
a chrome polish. They will otherwise lose their
black shine. For optimal care, the screens
should be rubbed with a lightly oiled cloth
after every car wash. Commercially available
engine and care oils are suitable for this.
For heavier soiling, you can apply a fine paint-
work polish with a microfiber cloth. Remove
the excess polish residue after polishing.
XClean the exhaust pipe with a chrome care
product tested and approved by Mercedes-
Benz.
Impurities combined with the effects of road grit
and corrosive environmental factors may cause flash rust to form on the surface. You can
restore the original shine of the exhaust pipe by
cleaning it regularly, especially in winter and
after washing.
Interior care
Cleaning the display
!For cleaning, do not use any of the following:
Ralcohol-based thinner or gasoline
Rabrasive cleaning agents
Rcommercially-available household cleaning
agents
These may damage the display surface. Do
not put pressure on the display surface when
cleaning. This could lead to irreparable dam-
age to the display.
XBefore cleaning the display, make sure that it
is switched off and has cooled down.
XClean the display surface using a commer-
cially available microfiber cloth and TFT/LCD
display cleaner.
XDry the display surface using a dry microfiber
cloth.
Cleaning the plastic trim
GWARNING
Care products and cleaning agents containing solvents cause surfaces in the cockpit to
become porous. As a result, plastic parts may
come loose in the event of air bag deploy-
ment. There is a risk of injury.
Do not use any care products and cleaning
agents to clean the cockpit.
!Never attach the following to plastic surfa-
ces:
Rstickers
Rfilms
Rperfume oil container or similar
You could otherwise damage the plastic.
!Do not allow cosmetics, insect repellent or
sunscreen to come into contact with the plas-
tic trim. This maintains the high-quality look of
the surfaces.
XWipe the plastic trim with a damp, lint-free
cloth, e.g. a microfiber cloth.
XHeavy soiling: use care and cleaning prod-
ucts recommended and approved by
Mercedes-Benz.
The surface may change color temporarily.
Wait until the surface is dry again.
Cleaning the steering wheel and gear or
selector lever
XThoroughly wipe with a damp cloth or use
leather care agents that have been recom-
mended and approved by Mercedes-Benz.
Cleaning the trim elements
!Do not use solvent-based cleaning agents
such as tar remover, wheel cleaners, polishes
or waxes. There is otherwise a risk of damag- ing the surface.
!Do not use chrome polish on trim pieces.
The trim pieces have a chrome look but are
mostly made of anodized aluminum and can
lose their shine if chrome polish is used. Use
a damp, lint-free cloth instead when cleaning
the trim pieces.
If the chrome-plated trim pieces are very
dirty, you can use a chrome polish. If you are
Care243
Maintenance and care
Z
Page 247 of 294
Where will I find...?
Reflective safety jacket
Removing/replacing the reflective
safety jacket
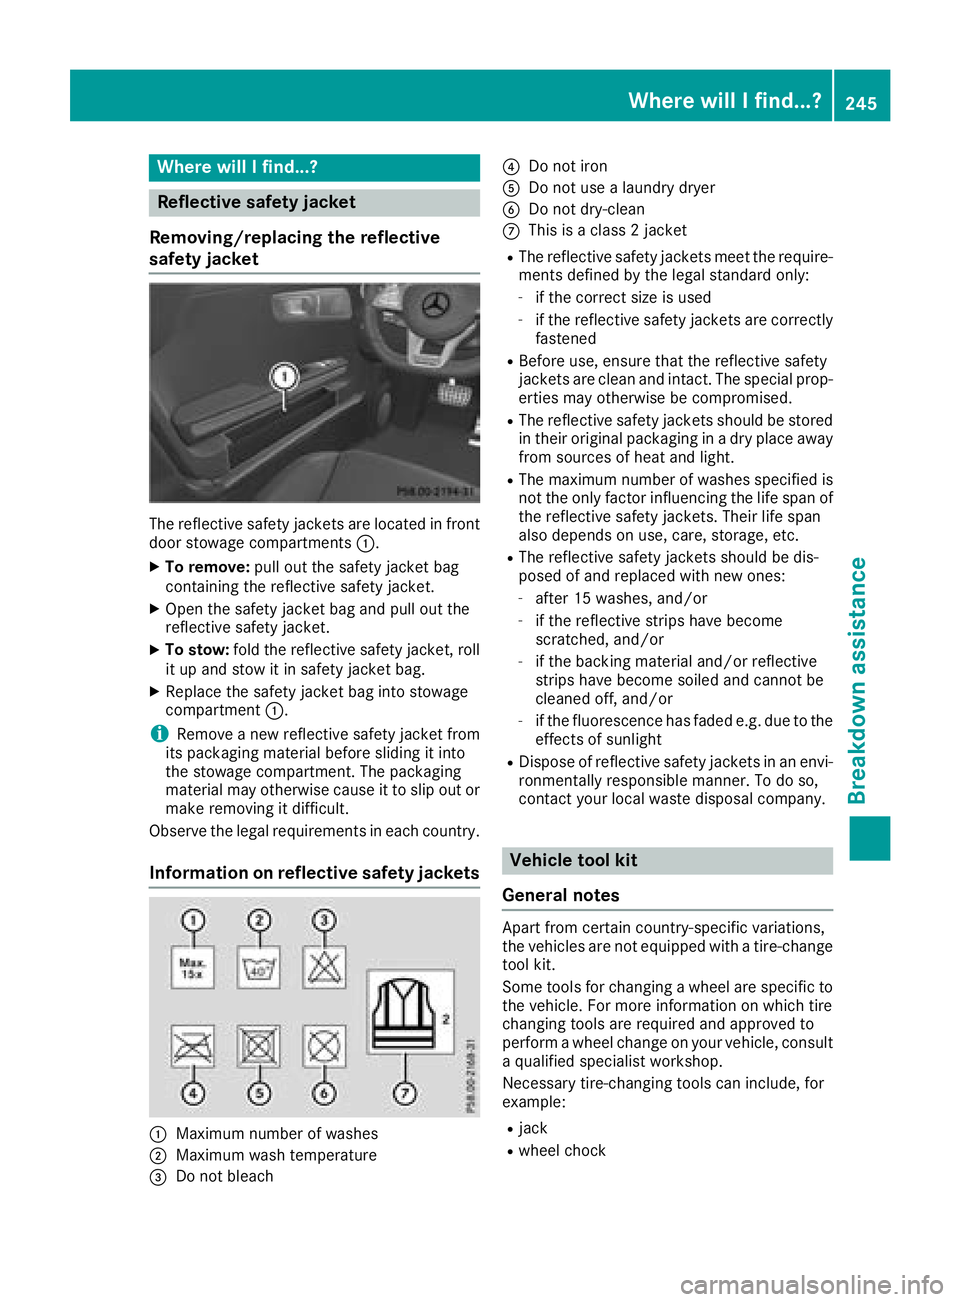
The reflective safety jackets are located in front
door stowage compartments :.
XTo remove:pull out the safety jacket bag
containing the reflective safety jacket.
XOpen the safety jacket bag and pull out the
reflective safety jacket.
XTo stow: fold the reflective safety jacket, roll
it up and stow it in safety jacket bag.
XReplace the safety jacket bag into stowage
compartment :.
iRemove a new reflective safety jacket from
its packaging material before sliding it into
the stowage compartment. The packaging
material may otherwise cause it to slip out or
make removing it difficult.
Observe the legal requirements in each country.
Information on reflective safety jackets
:Maximum number of washes
;Maximum wash temperature
=Do not bleach
?Do not iron
ADo not use a laundry dryer
BDo not dry-clean
CThis is a class 2 jacket
RThe reflective safety jackets meet the require-
ments defined by the legal standard only:
-if the correct size is used
-if the reflective safety jackets are correctly
fastened
RBefore use, ensure that the reflective safety
jackets are clean and intact. The special prop-
erties may otherwise be compromised.
RThe reflective safety jackets should be stored
in their original packaging in a dry place away
from sources of heat and light.
RThe maximum number of washes specified is not the only factor influencing the life span of
the reflective safety jackets. Their life span
also depends on use, care, storage, etc.
RThe reflective safety jackets should be dis-
posed of and replaced with new ones:
-after 15 washes, and/or
-if the reflective strips have become
scratched, and/or
-if the backing material and/or reflective
strips have become soiled and cannot be
cleaned off, and/or
-if the fluorescence has faded e.g. due to the
effects of sunlight
RDispose of reflective safety jackets in an envi-
ronmentally responsible manner. To do so,
contact your local waste disposal company.
Vehicle tool kit
General notes
Apart from certain country-specific variations,
the vehicles are not equipped with a tire-change
tool kit.
Some tools for changing a wheel are specific to the vehicle. For more information on which tire
changing tools are required and approved to
perform a wheel change on your vehicle, consult
a qualified specialist workshop.
Necessary tire-changing tools can include, for
example:
Rjack
Rwheel chock
Where will I find...?245
Breakdown assistance
Page 248 of 294
Rlug wrench
Ralignment bolt
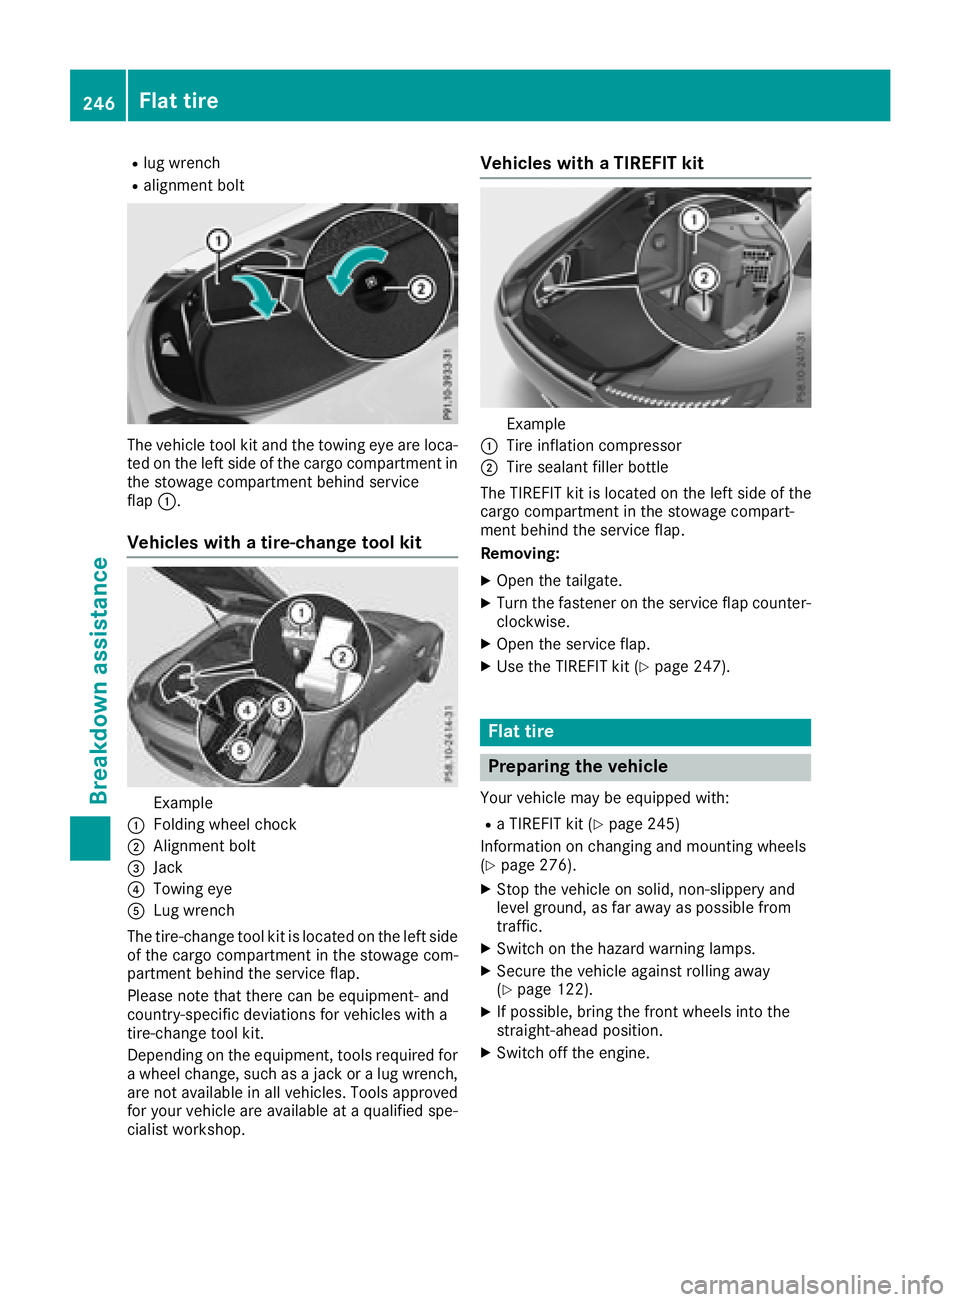
The vehicle tool kit and the towing eye are loca-
ted on the left side of the cargo compartment in
the stowage compartment behind service
flap:.
Vehicles with a tire-change tool kit
Example
:Folding wheel chock
;Alignment bolt
=Jack
?Towing eye
ALug wrench
The tire-change tool kit is located on the left side
of the cargo compartment in the stowage com-
partment behind the service flap.
Please note that there can be equipment- and
country-specific deviations for vehicles with a
tire-change tool kit.
Depending on the equipment, tools required for
a wheel change, such as a jack or a lug wrench, are not available in all vehicles. Tools approved
for your vehicle are available at a qualified spe-
cialist workshop.
Vehicles with a TIREFIT kit
Example
:Tire inflation compressor
;Tire sealant filler bottle
The TIREFIT kit is located on the left side of the
cargo compartment in the stowage compart-
ment behind the service flap.
Removing:
XOpen the tailgate.
XTurn the fastener on the service flap counter-
clockwise.
XOpen the service flap.
XUse the TIREFIT kit (Ypage 247).
Flat tire
Preparing the vehicle
Your vehicle may be equipped with:
Ra TIREFIT kit (Ypage 245)
Information on changing and mounting wheels
(
Ypage 276).
XStop the vehicle on solid, non-slippery and
level ground, as far away as possible from
traffic.
XSwitch on the hazard warning lamps.
XSecure the vehicle against rolling away
(Ypage 122).
XIf possible, bring the front wheels into the
straight-ahead position.
XSwitch off the engine.
246Flat tire
Breakdown assistance
Page 249 of 294
XWith KEYLESS-GO start function or vehi-
cles with KEYLESS-GO:open the driver's
door.
The vehicle electronics are now in key posi-
tion u. This is the same as the SmartKey
having been removed.
or
XRemove the SmartKey from the ignition lock.
XMake sure that the passengers are not endan-
gered as they do so. Make sure that no one is
near the danger area while a wheel is being
changed. Anyone who is not directly assisting in the wheel change should, for example,
stand behind the barrier.
XGet out of the vehicle. Pay attention to traffic
conditions when doing so.
XClose the driver's door.
TIREFIT kit
Important safety notes
TIREFIT is a tire sealant.
You can use TIREFIT to seal punctures of up to
0.16 in (4 mm), particularly those in the tire
tread. You can use TIREFIT at outside tempera-
tures down to Ò4 ‡ (Ò20 †).
GWARNING
In the following situations, the tire sealant is
unable to provide sufficient breakdown assis-
tance, as it is unable to seal the tire properly:
Rthere are cuts or punctures in the tire larger
than those mentioned above.
Rthe wheel rim is damaged.
Ryou have driven at very low tire pressures or on a flat tire.
There is a risk of an accident.
Do not drive the vehicle. Contact a qualified
specialist workshop.
GWARNING
The tire sealant is harmful and causes irrita-
tion. It must not come into contact with your
skin, eyes or clothing or be swallowed. Do not inhale TIREFIT fumes. Keep tire sealant away
from children. There is a risk of injury.
If you come into contact with the tire sealant,observe the following:
RRinse off the tire sealant from your skin
immediately with water.
RIf the tire sealant comes into contact with
your eyes, immediately rinse them thor-
oughly with clean water.
RIf tire sealant is swallowed, immediately
rinse your mouth out thoroughly and drink
plenty of water. Do not induce vomiting,
and seek medical attention immediately.
RImmediately change out of clothing which
has come into contact with tire sealant.
RIf an allergic reaction occurs, seek medical
attention immediately.
!Do not operate the tire inflation compressor
for longer than ten minutes at a time without a break. It may otherwise overheat.
The tire inflation compressor can be operated
again once it has cooled down.
Comply with the manufacturer's safety instruc-
tions on the tire inflation compressor label and
on the tire sealant bottle.
Using the TIREFIT kit
XDo not remove any foreign objects which have
penetrated the tire, e.g. screws or nails.
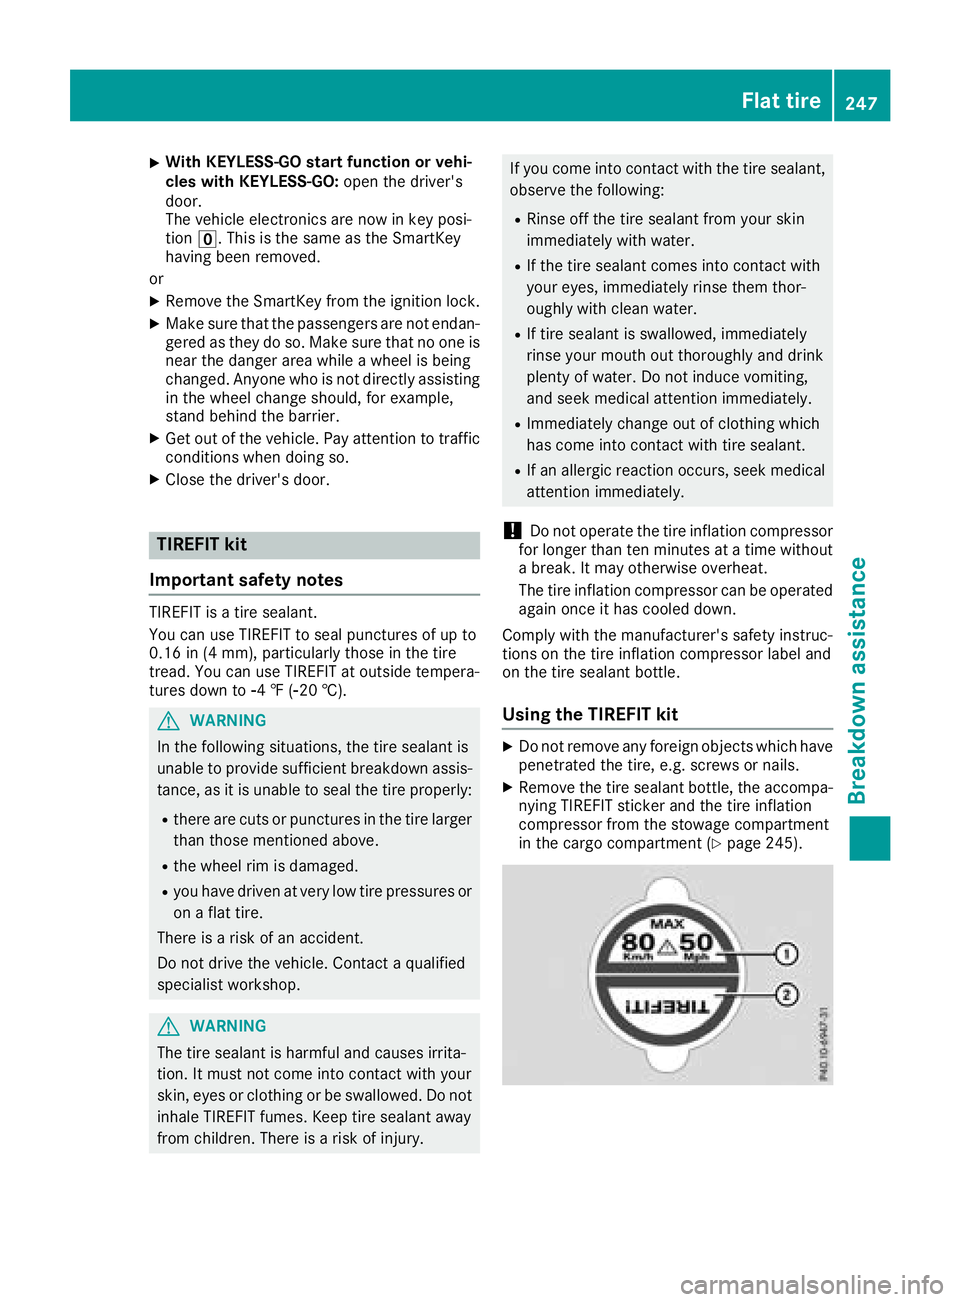
XRemove the tire sealant bottle, the accompa-
nying TIREFIT sticker and the tire inflation
compressor from the stowage compartment
in the cargo compartment (
Ypage 245).
Flat tire247
Breakdown assistance
Z
Page 258 of 294
In order to signal a change of direction when
towing the vehicle with the hazard warning
lamps switched on, use the combination switch
as usual. In this case, only the indicator lamps
for the direction of travel flash. After resetting
the combination switch, the hazard warning
lamp starts flashing again.
Transporting the vehicle
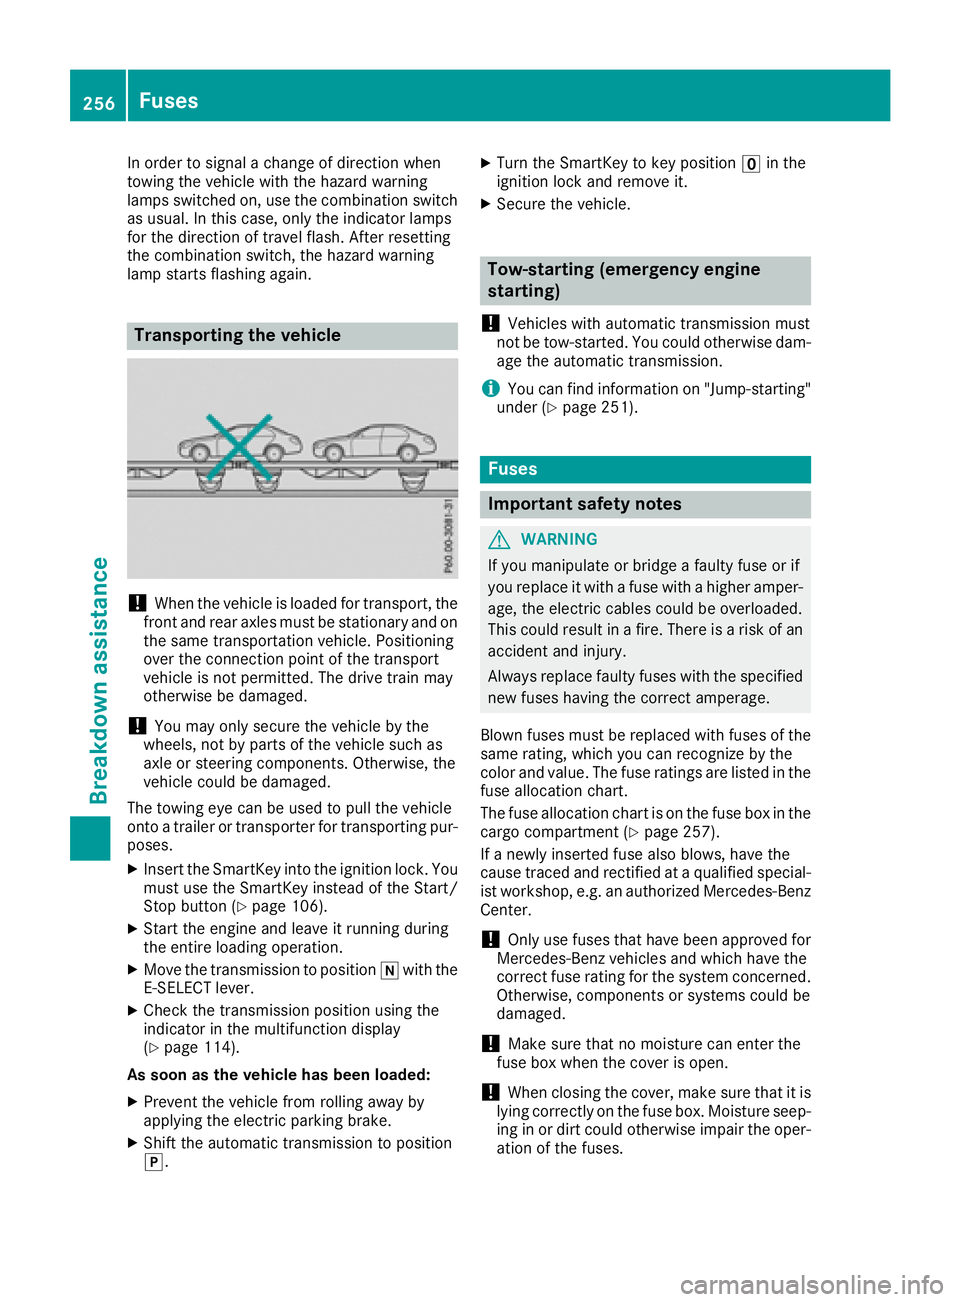
!When the vehicle is loaded for transport, the
front and rear axles must be stationary and on the same transportation vehicle. Positioning
over the connection point of the transport
vehicle is not permitted. The drive train may
otherwise be damaged.
!You may only secure the vehicle by the
wheels, not by parts of the vehicle such as
axle or steering components. Otherwise, the
vehicle could be damaged.
The towing eye can be used to pull the vehicle
onto a trailer or transporter for transporting pur- poses.
XInsert the SmartKey into the ignition lock. You
must use the SmartKey instead of the Start/
Stop button (
Ypage 106).
XStart the engine and leave it running during
the entire loading operation.
XMove the transmission to position iwith the
E-SELECT lever.
XCheck the transmission position using the
indicator in the multifunction display
(
Ypage 114).
As soon as the vehicle has been loaded:
XPrevent the vehicle from rolling away by
applying the electric parking brake.
XShift the automatic transmission to position
j.
XTurn the SmartKey to key position uin the
ignition lock and remove it.
XSecure the vehicle.
Tow-starting (emergency engine
starting)
!
Vehicles with automatic transmission must
not be tow-started. You could otherwise dam-
age the automatic transmission.
iYou can find information on "Jump-starting"
under (Ypage 251).
Fuses
Important safety notes
GWARNING
If you manipulate or bridge a faulty fuse or if
you replace it with a fuse with a higher amper- age, the electric cables could be overloaded.
This could result in a fire. There is a risk of an
accident and injury.
Always replace faulty fuses with the specified
new fuses having the correct amperage.
Blown fuses must be replaced with fuses of the
same rating, which you can recognize by the
color and value. The fuse ratings are listed in the
fuse allocation chart.
The fuse allocation chart is on the fuse box in the
cargo compartment (
Ypage 257).
If a newly inserted fuse also blows, have the
cause traced and rectified at a qualified special-
ist workshop, e.g. an authorized Mercedes-Benz Center.
!Only use fuses that have been approved for
Mercedes-Benz vehicles and which have the
correct fuse rating for the system concerned.
Otherwise, components or systems could be
damaged.
!Make sure that no moisture can enter the
fuse box when the cover is open.
!When closing the cover, make sure that it is
lying correctly on the fuse box. Moisture seep-
ing in or dirt could otherwise impair the oper-
ation of the fuses.
256Fuses
Breakdown assistance
Page 262 of 294
Exception: it is permissible to mount a differ-
ent type or make in the event of a flat tire.
ROnly mount tires of the correct size onto the
wheels.
RBreak in new tires at moderate speeds for the
first 60 miles (100 km). The new tires only
reach their full performance after this dis-
tance.
RDo not drive with tires which have too little
tread depth. This significantly reduces the
traction on wet roads (hydroplaning).
RReplace the tires after six years at the latest,
regardless of wear.
Winter operation
General notes
Have your vehicle winter-proofed at a qualified
specialist workshop at the onset of winter.
Observe the notes in the "Changing a wheel"
section (
Ypage 276).
Driving with summer tires
At temperatures below 45 ‡ (+7 †), summer
tires lose elasticity and therefore traction and
braking power. Change the tires on your vehicle
to M+S tire s. Usingsu mmer tires at very cold
temperatures could cause cracks to form,
thereby damaging the tires permanently.
Mercedes-Benz cannot accept responsibility for
this type of damage.
M+S tires
GWARNING
M+S tires with a tire tread depth of less than
ã in (4 mm) are not suitable for use in winter
and do not provide sufficient traction. There is
a risk of an accident.
M+S tires with a tread depth of less than ãin
(4 mm) must be replaced immediately.
At temperatures below 45 ‡(+7 †), use winter
tires or all-season tires. Both types of tire are
identified by the M+S marking.
Only winter tires bearing the isnowflake
symbol in addition to the M+S marking provide the best possible grip in wintry road conditions.
Only these tires will allow driving safety systems
such as ABS and ESP
®to function optimally in
winter. These tires have been developed specif-
ically for driving in snow.
Use M+S tires of the same make and tread on all
wheels to maintain safe handling characteris-
tics.
Always observe the maximum permissible
speed specified for the M+S tires you have
mounted.
When you have mounted the M+S tires:
XCheck the tire pressures (Ypage 261).
XRestart the tire pressure monitor
(Ypage 266).
Snow chains
GWARNING
If snow chains are installed to the front
wheels, they may drag against the vehicle
body or chassis components. This could
cause damage to the vehicle or the tires.
There is a risk of an accident.
To avoid hazardous situations:
Rnever install snow chains to the front
wheels
Ralways install snow chains in pairs to the
rear wheels.
For safety reasons, Mercedes-Benz recom-
mends that you only use snow chains that have
been specially approved for your vehicle by
Mercedes-Benz, or are of a corresponding
standard of quality. For more information,
please contact a qualified specialist workshop.
If you intend to mount snow chains, please bear
the following points in mind:
RSnow chains may not be mounted on all
wheel/tire combinations. Permissible
wheel/tire combinations (
Ypage 280).
ROnly use snow chains when driving on roads
completely covered by snow. Remove the
snow chains as soon as possible when you
come to a road that is not snow-covered.
260Winter operation
Wheels and tires
Page 263 of 294
RLocal regulations may restrict the use of snow
chains. Observe the appropriate regulations if
you wish to mount snow chains.
Rdo not exceed the maximum permissible
speed of 31 mph (50 km/h).
You may wish to deactivate ESP
®(Ypage 62)
when pulling away with snow chains mounted.
You can thereby allow the wheels to spin in a
controlled manner, achieving an increased driv-
ing force (cutting action).
Tire pressure
Tire pressure specifications
Important safety notes
GWARNING
Underinflated or overinflated tires pose the
following risks:
Rthe tires may burst, especially as the load
and vehicle speed increase.
Rthe tires may wear excessively and/or
unevenly, which may greatly impair tire
traction.
Rthe driving characteristics, as well as steer-
ing and braking, may be greatly impaired.
There is a risk of an accident.
Follow recommended tire inflation pressures
and check the pressure of all the tires includ-
ing the spare wheel:
Rmonthly, at least
Rif the load changes
Rbefore beginning a long journey
Runder different operating conditions, e.g.
off-road driving
If necessary, correct the tire pressure.
The data on the Tire and Loading Information
placard and tire pressure table shown here are
examples. Tire pressure specifications are vehi-
cle-specific and may deviate from the data
shown here. The tire pressure specifications
that are valid for your vehicle can be found on
the Tire and Loading Information placard and
tire pressure table on the vehicle.
General notes
The recommended tire pressures for the tires
mounted at the factory can be found on the
labels described here.
Further information on tire pressures can be
obtained at a qualified specialist workshop.
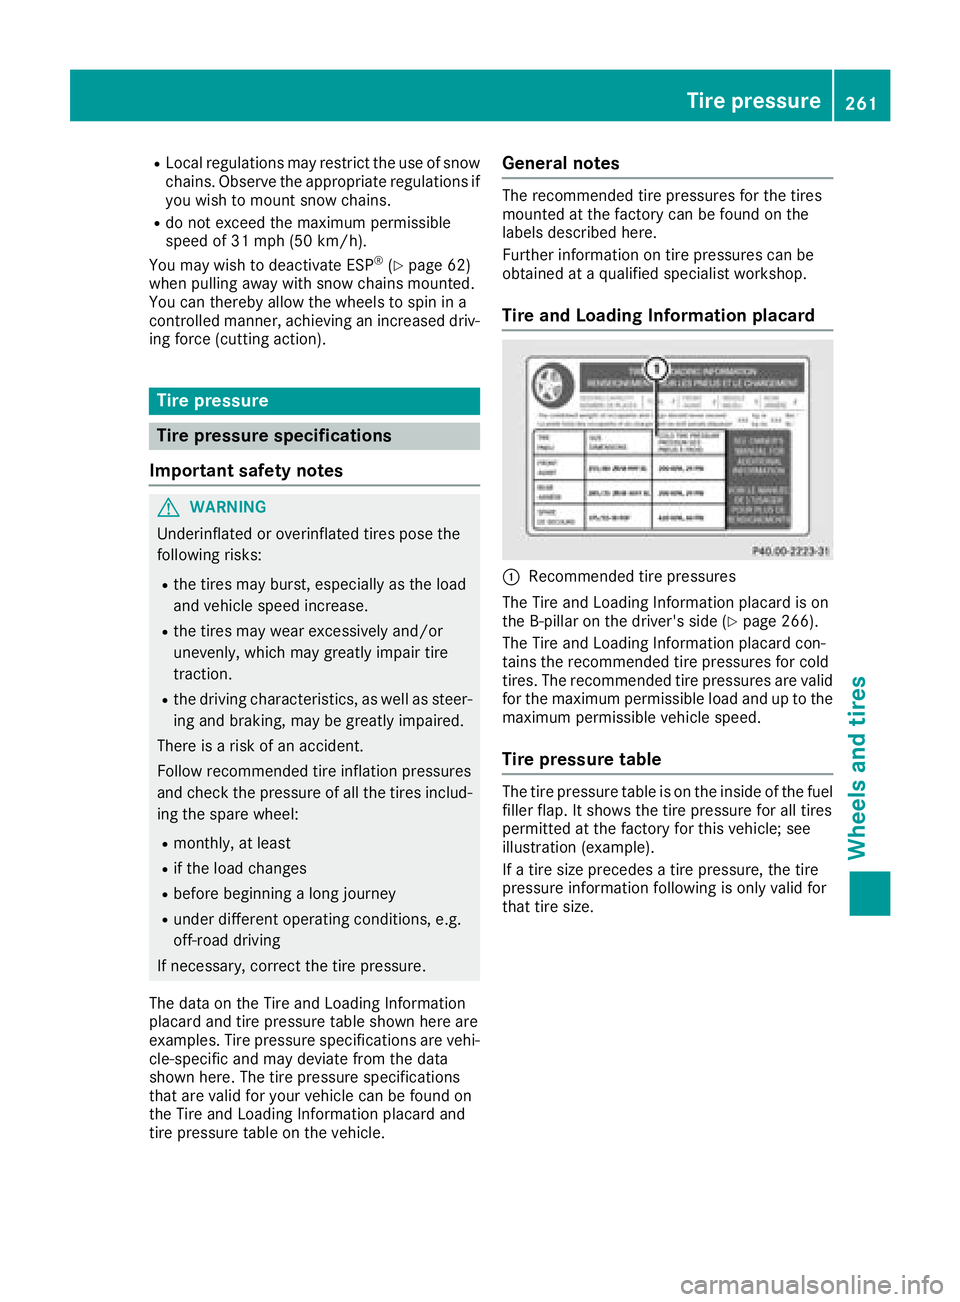
Tire and Loading Information placard
:Recommended tire pressures
The Tire and Loading Information placard is on
the B-pillar on the driver's side (
Ypage 266).
The Tire and Loading Information placard con-
tains the recommended tire pressures for cold
tires. The recommended tire pressures are valid
for the maximum permissible load and up to the
maximum permissible vehicle speed.
Tire pressure table
The tire pressure table is on the inside of the fuel
filler flap. It shows the tire pressure for all tires
permitted at the factory for this vehicle; see
illustration (example).
If a tire size precedes a tire pressure, the tire
pressure information following is only valid for
that tire size.
Tire pressure261
Wheels and tires
Z