Page 201 of 294

Engine
Warning/
indicator
lampNSignal type
Possible causes/consequences and M
Solutions
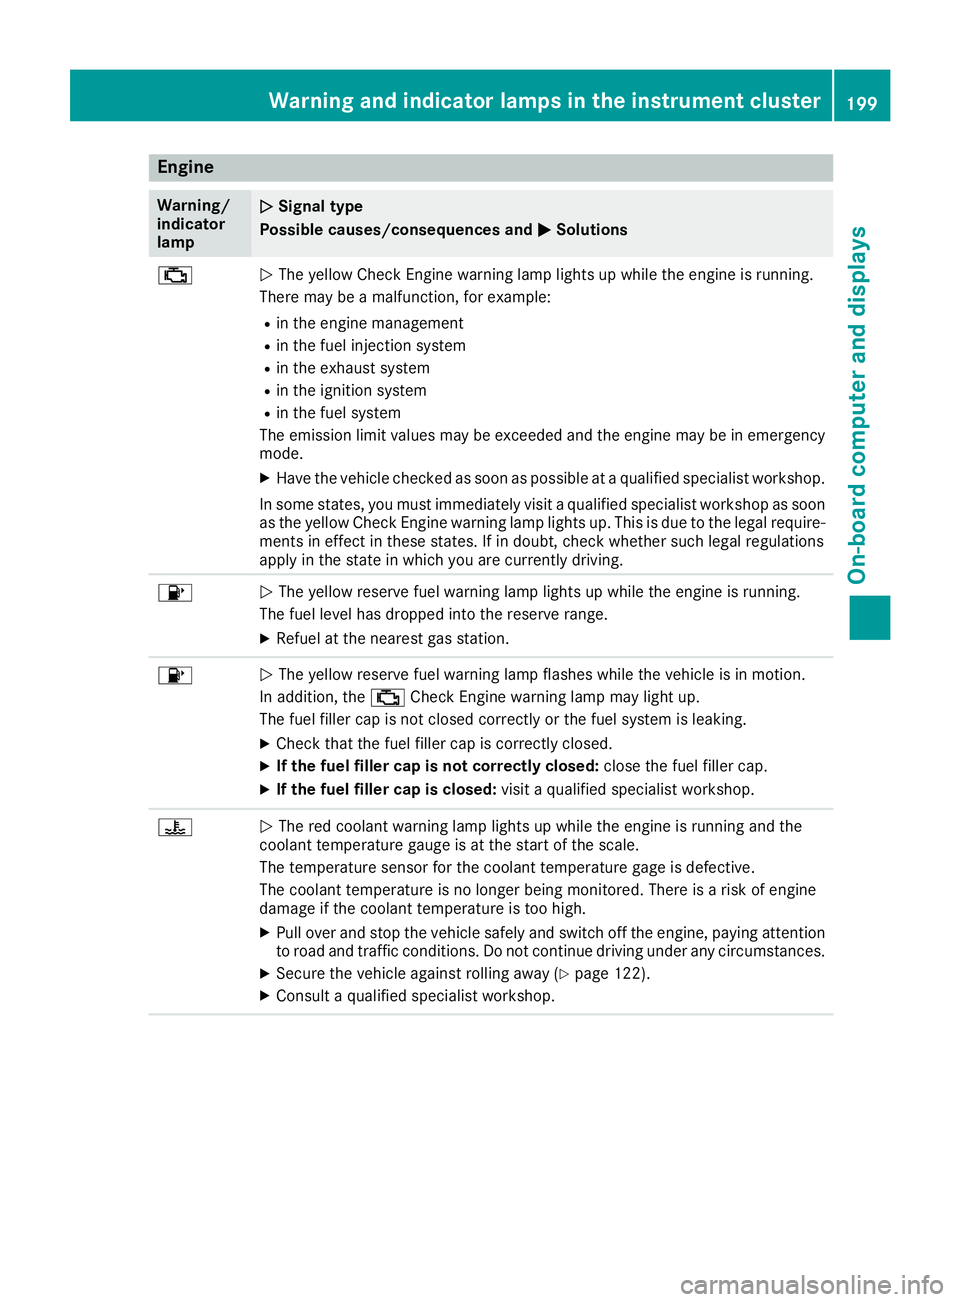
;NThe yellow Check Engine warning lamp lights up while the engine is running.
There may be a malfunction, for example:
Rin the engine management
Rin the fuel injection system
Rin the exhaust system
Rin the ignition system
Rin the fuel system
The emission limit values may be exceeded and the engine may be in emergency
mode.
XHave the vehicle checked as soon as possible at a qualified specialist workshop.
In some states, you must immediately visit a qualified specialist workshop as soon as the yellow Check Engine warning lamp lights up. This is due to the legal require-
ments in effect in these states. If in doubt, check whether such legal regulations
apply in the state in which you are currently driving.
8N The yellow reserve fuel warning lamp lights up while the engine is running.
The fuel level has dropped into the reserve range.
XRefuel at the nearest gas station.
8N The yellow reserve fuel warning lamp flashes while the vehicle is in motion.
In addition, the ;Check Engine warning lamp may light up.
The fuel filler cap is not closed correctly or the fuel system is leaking.
XCheck that the fuel filler cap is correctly closed.
XIf the fuel filler cap is not correctly closed: close the fuel filler cap.
XIf the fuel filler cap is closed:visit a qualified specialist workshop.
?NThe red coolant warning lamp lights up while the engine is running and the
coolant temperature gauge is at the start of the scale.
The temperature sensor for the coolant temperature gage is defective.
The coolant temperature is no longer being monitored. There is a risk of engine
damage if the coolant temperature is too high.
XPull over and stop the vehicle safely and switch off the engine, paying attention
to road and traffic conditions. Do not continue driving under any circumstances.
XSecure the vehicle against rolling away (Ypage 122).
XConsult a qualified specialist workshop.
Warning and indicator lamps in the instrument cluster199
On-board computer and displays
Z
Page 235 of 294

XMake sure that the windshield wipers are
turned off.
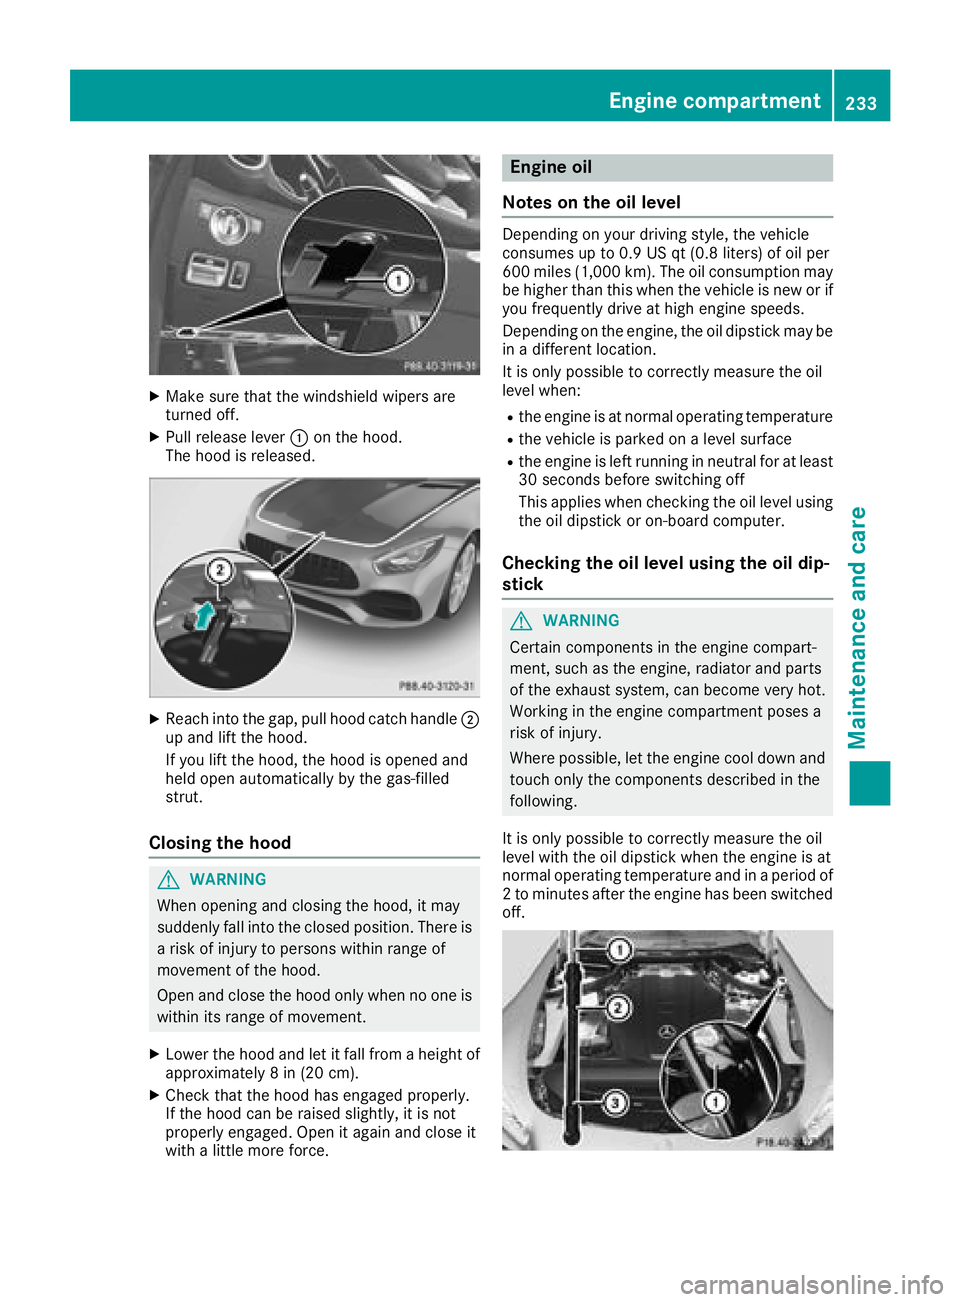
XPull release lever:on the hood.
The hood is released.
XReach into the gap, pull hood catch handle ;
up and lift the hood.
If you lift the hood, the hood is opened and
held open automatically by the gas-filled
strut.
Closing the hood
GWARNING
When opening and closing the hood, it may
suddenly fall into the closed position. There is a risk of injury to persons within range of
movement of the hood.
Open and close the hood only when no one is
within its range of movement.
XLower the hood and let it fall from a height of
approximately 8 in (20 cm).
XCheck that the hood has engaged properly.
If the hood can be raised slightly, it is not
properly engaged. Open it again and close it
with a little more force.
Engine oil
Notes on the oil level
Depending on your driving style, the vehicle
consumes up to 0.9 US qt (0.8 liters) of oil per
600 miles (1,000 km). The oil consumption may be higher than this when the vehicle is new or if
you frequently drive at high engine speeds.
Depending on the engine, the oil dipstick may be
in a different location.
It is only possible to correctly measure the oil
level when:
Rthe engine is at normal operating temperature
Rthe vehicle is parked on a level surface
Rthe engine is left running in neutral for at least
30 seconds before switching off
This applies when checking the oil level using
the oil dipstick or on-board computer.
Checking the oil level using the oil dip-
stick
GWARNING
Certain components in the engine compart-
ment, such as the engine, radiator and parts
of the exhaust system, can become very hot.
Working in the engine compartment poses a
risk of injury.
Where possible, let the engine cool down and touch only the components described in the
following.
It is only possible to correctly measure the oil
level with the oil dipstick when the engine is at
normal operating temperature and in a period of
2 to minutes after the engine has been switched
off.
Engine compartment233
Maintenance and care
Z
Page 255 of 294

All vehicles:
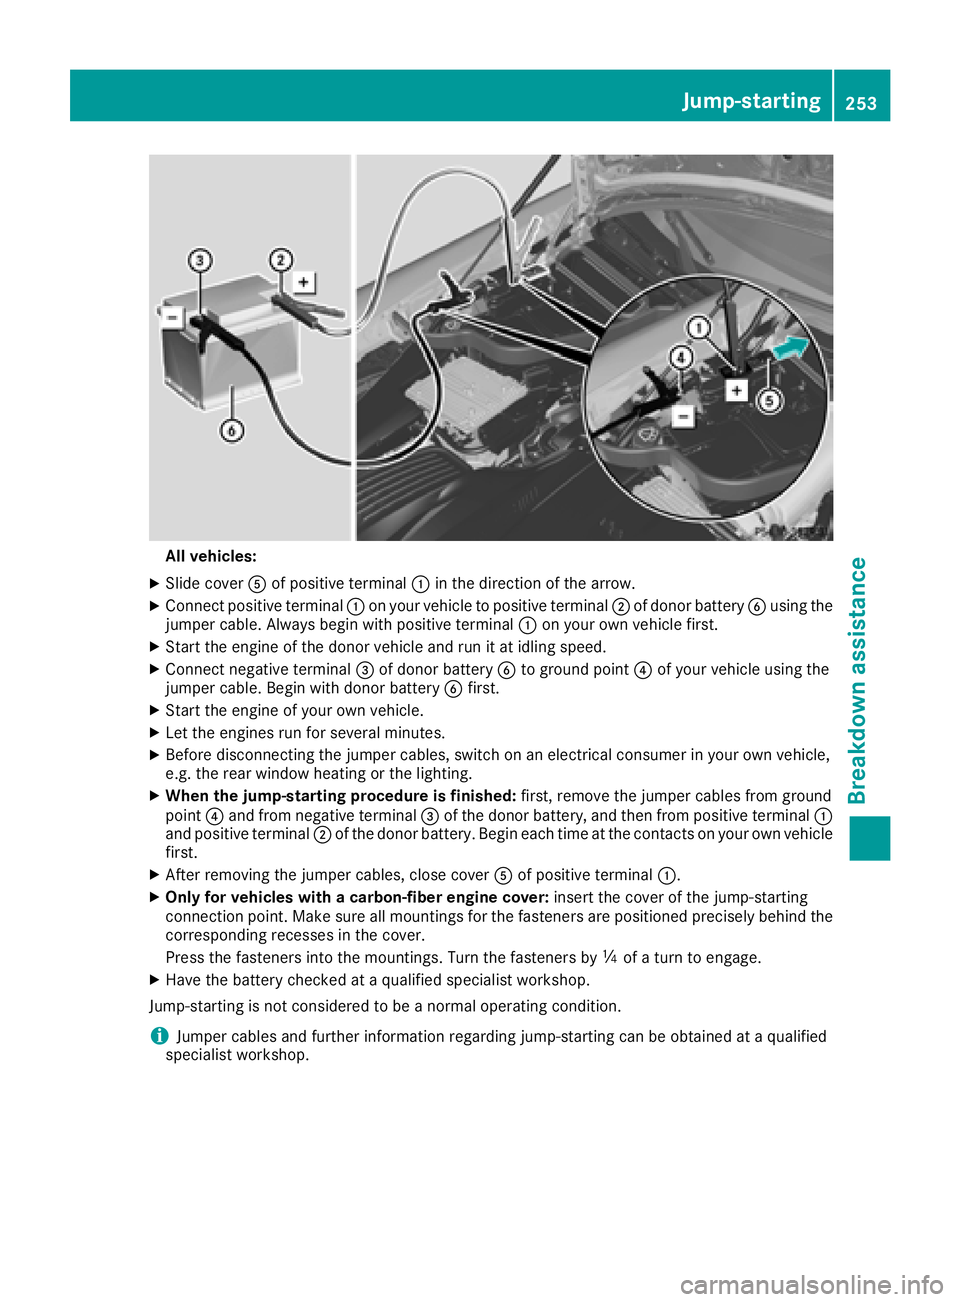
XSlide cover Aof positive terminal :inthe direction of the arrow.
XConnect positive terminal :on your veh icleto positive terminal ;of donor battery Busing the
jumper cable. Always begin with positive terminal :on your own vehicle first.
XStart the engine of the donor veh icleand run itat idling speed.
XConnect negative terminal =of donor battery Bto ground point ?of your vehicle using the
jumper cable. Beg in with donor battery Bfirst.
XStart the engine of your own veh icle.
XLet the engines run for several minutes.
XBefore disconnecting the jumper cables, switch on an electrical consumer inyour own vehicle,
e.g. the rear window heating or the lighting.
XWhen the jump-starting procedu reis finished: first, remove the jumper cables from ground
poin t? and from negative terminal =of the donor battery, and then from positive terminal :
and positive terminal ;of the donor battery. Begin each time at the contacts on your own vehicle
first.
XAfter removing the jumper cables, close cover Aof positive terminal :.
XOnly for vehicles with a carbon-fiber engine cover: insert the cover of the jump-starting
connection point. Make sure all mountings for the fasteners are positioned precisely behind the
corresponding recesses inthe cover.
Press the fasteners into the mountings. Turn the fasteners by Õof a turn to engage.
XHave the battery checked at a qualified specialist workshop.
Jump-starting isnot cons idered to bea normal operating condition.
iJumper cables and further information regarding jump-starting can be obtained at a qualified
specialist workshop.
Jump-starting253
Breakdown assistance
Z
Page:
< prev 1-8 9-16 17-24