2018 LINCOLN CONTINENTAL warning
[x] Cancel search: warningPage 78 of 615

WARNING: Keep keys out of the reachof children. Do not allow children to operateor play near an open or moving powerdecklid. You should supervise the operationof the power decklid at all times.
Note:Do not drive with the decklid openunless you switch off the power feature.Make sure you fully close the decklid beforeyou drive your vehicle.
You can switch the power decklid feature onor off in the information display. See GeneralInformation (page 115). The remote controland instrument panel button still operatesthe decklid regardless of the setting.
Opening and Closing the PowerDecklid
WARNING: Make sure all persons areclear of the power decklid area before usingthe power decklid control.
Note:You can reverse the decklidmovement. Press the instrument panel ordecklid button again, or press the remotecontrol button twice.
Note:Do not push or pull on the powerdecklid while it is under operation, as thismay cause damage to your vehicle.
The decklid only operates with thetransmission in park (P).
If the decklid starts to close after it has fullyopened, this indicates there may beexcessive weight on the decklid or a possiblestrut failure. A repetitive tone sounds andthe decklid closes under control. Removeany excessive weight from the decklid. If thedecklid continues to close after opening,have the system checked by an authorizeddealer.
From Inside Your Vehicle
Press the button on the instrumentpanel.
With the Remote Control
Press the button twice within threeseconds.
75
Continental (CPL) Canada/United States of America, enUSA, Edition date: 201706, Second-Printing
Doors and LocksE159323 E138630
Page 80 of 615

Stopping the Decklid Movement
Note:Do not apply sudden excessive forceto the decklid while it is in motion. This coulddamage the power decklid and itscomponents.
You can stop the decklid movement by doingany of the following:
•Pressing the decklid control button.
•Pressing the remote control button twice.
•Pressing the button on the instrumentpanel.
•Moving your foot under and away fromthe center rear bumper in a single-kickmotion.*
*This method only works for vehicles with the
hands-free decklid feature.
Resetting the Power Decklid
The decklid may not operate correctly andyou may need to reset it if:
•The vehicle battery charge is low.
•You disconnect the battery.
•You manually close the decklid and leaveit unlatched.
1. Disconnect the battery for 20 secondsthen reconnect the battery.
2. Manually close the decklid making sureit is fully closed.
3.Power open the decklid using the remotecontrol or instrument panel button.
Obstacle Detection
When Closing
The system stops when it detects anobstacle. A tone sounds and the systemreverses to open. Once you remove theobstacle, you can power close the decklid.
Note:Entering your vehicle while the decklidis closing can cause your vehicle to bounceand activate obstacle detection. To preventthis, let the power decklid close completelybefore you enter your vehicle. Before drivingyour vehicle, check the instrument clusterfor a trunk ajar or door ajar message orwarning indicator. Failure to do this couldresult in unintentionally leaving the decklidopen while driving.
When Opening
The system stops when it detects anobstacle and a tone sounds. Once youremove the obstacle, you can continue tooperate the decklid.
Hands-Free Feature (If Equipped)
The intelligent access key must be within 3 ft(1 m) of the decklid.
77
Continental (CPL) Canada/United States of America, enUSA, Edition date: 201706, Second-Printing
Doors and LocksE222494
2
1
Page 83 of 615

Note:All doors unlock if the two-stageunlocking feature is turned off. See Lockingand Unlocking (page 67).
INTERIOR LUGGAGE
COMPARTMENT RELEASE
WARNING: Keep vehicle doors andluggage compartment locked and keep keysand remote transmitters out of a child’sreach. Unsupervised children could lockthemselves in the trunk and risk injury.Children should be taught not to play invehicles.
WARNING: Do not leave children oranimals unattended in the vehicle. On hotdays, the temperature in the trunk or vehicleinterior can rise very quickly. Exposure ofpeople or animals to these hightemperatures for even a short time can causedeath or serious heat-related injuries,including brain damage. Small children areparticularly at risk.
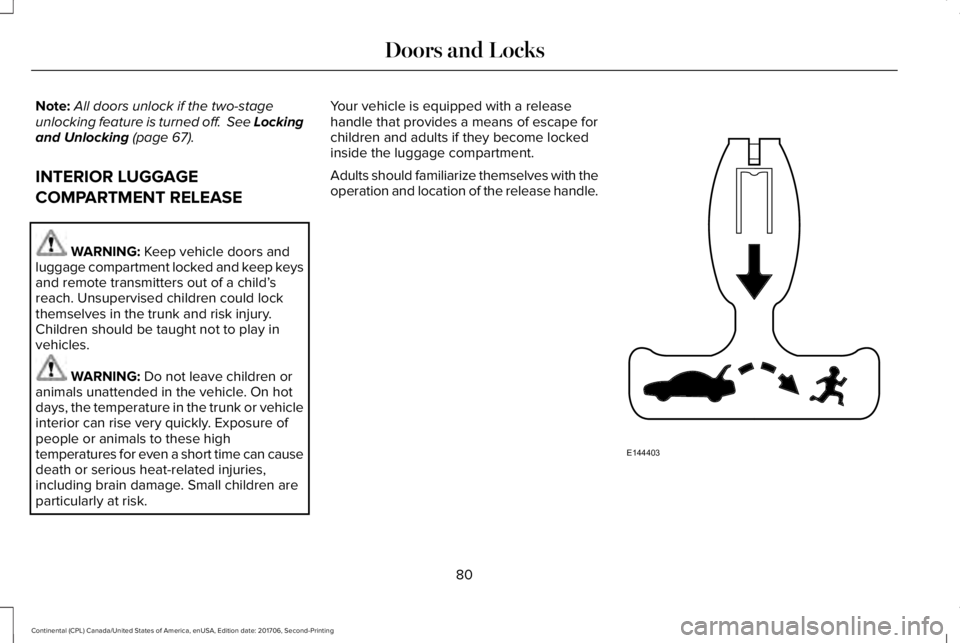
Your vehicle is equipped with a releasehandle that provides a means of escape forchildren and adults if they become lockedinside the luggage compartment.
Adults should familiarize themselves with theoperation and location of the release handle.
80
Continental (CPL) Canada/United States of America, enUSA, Edition date: 201706, Second-Printing
Doors and LocksE144403
Page 88 of 615

ADJUSTING THE STEERING WHEEL
WARNING: Do not adjust the steeringwheel when your vehicle is moving.
Note: Make sure that you are sitting in thecorrect position. See Sitting in the CorrectPosition (page 153).
Use the control on the side of the steeringcolumn to adjust the position.
To adjust:
•Tilt: Press the top or bottom of thecontrol.
•Telescope: Press the front or rear of thecontrol.
End of Travel Position
The steering column sets a stopping positionjust short of the end of the column positionto prevent damage to the steering column. A new stopping position sets if the steeringcolumn encounters an object when tilting ortelescoping.
To reset the steering column to its normalstopping position:
1. Confirm there is nothing obstructing themotion of the steering column.
2. Press and hold the steering columncontrol until the steering column stopsmoving.
3.Press the steering column control again.
Note:The steering column may begin tomove again.
4. When the steering column stops,continue holding the control for a fewseconds.
5. Repeat for each direction as necessary.
A new stopping position sets. The next timeyou tilt or telescope the steering column, itstops just short of the end of the columnposition.
Memory Feature (If Equipped)
You can save and recall the steering columnposition with the memory function. SeeMemory Function (page 163).
Pressing the adjustment control during amemory recall cancels the operation.
Easy Entry and Exit Feature
The column moves up when you switch theignition off. Switch the ignition on to returnthe system to its previous settings. You canswitch this feature on or off in the informationdisplay. See Information Displays (page115).
85
Continental (CPL) Canada/United States of America, enUSA, Edition date: 201706, Second-Printing
Steering WheelE261582
Page 96 of 615

Headlamp High Beam
Push the lever away from you toswitch the high beam on.
Push the lever away from you again or pullthe lever toward you to switch the high beamoff.
Flashing the Headlamp High Beam
Slightly pull the lever toward you and releaseit to flash the headlamps.
AUTOLAMPS
WARNING: The system does notrelieve you of your responsibility to drive withdue care and attention. You may need tooverride the system if it does not turn theheadlamps on in low visibility conditions, forexample daytime fog.
When the lighting control is in the autolampsposition, the headlamps turn on in low lightsituations, or when the wipers turn on.
The headlamps remain on for a period oftime after you switch the ignition off. Usethe information display controls to adjust theperiod of time that the headlamps remainon.
Note: If you switch the autolamps on, youcannot switch the high beams on until thesystem turns the low beams on.
93
Continental (CPL) Canada/United States of America, enUSA, Edition date: 201706, Second-Printing
LightingE273182 E273181 E142451
Page 97 of 615

Windshield Wiper Activated Headlamps
When you switch the autolamps on, theheadlamps turn on within 10 seconds ofswitching the wipers on. They turn offapproximately 60 seconds after you switchthe windshield wipers off.
The headlamps do not turn on with thewipers:
•During a single wipe.
•When using the windshield washers.
•If the wipers are in intermittent mode.
Note:If you switch the autolamps and theautowipers on, the headlamps turn on whenthe windshield wipers continuously operate.
INSTRUMENT LIGHTING DIMMER
Note:If you disconnect and connect thebattery, or fully discharge and charge thebattery, the illuminated components switchto the maximum setting.
Press repeatedly or press and holdto dim.A
Press repeatedly or press and holdto brighten.B
HEADLAMP EXIT DELAY
After you switch the ignition off, you canswitch the headlamps on by pulling thedirection indicator lever toward you. You willhear a short tone. The headlamps will switchoff automatically after three minutes with anydoor open or 30 seconds after the last doorhas been closed. You can cancel this featureby pulling the direction indicator toward youagain or switching the ignition on.
DAYTIME RUNNING LAMPS (If
Equipped)
WARNING: The daytime running lampssystem does not activate the rear lamps andmay not provide adequate lighting duringlow visibility driving conditions. Make sureyou switch the headlamps on, as appropriate,during all low visibility conditions. Failure todo so may result in a crash.
94
Continental (CPL) Canada/United States of America, enUSA, Edition date: 201706, Second-Printing
LightingE165337AB
Page 98 of 615

Type One - Conventional (Non-Configurable)
The daytime running lamps turn on when:
1. Switching the ignition on.
2. The transmission is not in park (P) forvehicles with automatic transmissions, orreleasing the parking brake for vehicleswith manual transmissions.
3. The lighting control is in the off, parkinglamp or autolamps positions.
4. The headlamps are off.
Type Two - Configurable
Switch the daytime running lamps on or offusing the information display. SeeInformation Displays (page 115).
The daytime running lamps turn on when:
1. The lamps are on in the informationdisplay.
2. Switching the ignition on.
3. The transmission is not in park (P) forvehicles with automatic transmissions, orreleasing the parking brake for vehicleswith manual transmissions.
4. The lighting control is in the autolampsposition.
5. The headlamps are off.
The other lighting control switch positionsdo not turn on the daytime running lamps.
If the daytime running lamps are off in theinformation display, the lamps stay off in allswitch positions.
AUTOMATIC HIGH BEAM
CONTROL (If Equipped)
WARNING: The system does notrelieve you of your responsibility to drive withdue care and attention. You may need tooverride the system if it does not turn thehigh beams on or off.
The system turns on high beams if it is darkenough and no other traffic is present. If itdetects an approaching vehicle’s headlampsor tail lamps, or street lighting ahead, thesystem turns off high beams before they candistract other road users. Low beams remainon.
Note:The system may not operate properlyif the sensor is blocked. Keep the windshieldfree from obstruction or damage.
Note:The system may not operate properlyin cold or inclement conditions. You canswitch on the high beams by overriding thesystem.
Note:If the system detects a blockage, forexample bird droppings, bug splatter, snowor ice, the system goes into low beam modeuntil you clear the blockage. A message mayappear in the information display if thecamera is blocked.
Note:Using much larger tires or equippingvehicle accessories such as snowplows canmodify your vehicle's ride height anddegrade automatic high beam controlperformance.
95
Continental (CPL) Canada/United States of America, enUSA, Edition date: 201706, Second-Printing
Lighting
Page 104 of 615

POWER WINDOWS
WARNING: Do not leave childrenunattended in your vehicle and do not letthem play with the power windows. Failureto follow this instruction could result inpersonal injury.
WARNING: When closing the powerwindows, verify they are free of obstructionand make sure that children and pets are notin the proximity of the window openings.
Note: You may hear a pulsing noise whenjust one of the windows is open. Lower theopposite window slightly to reduce thisnoise.
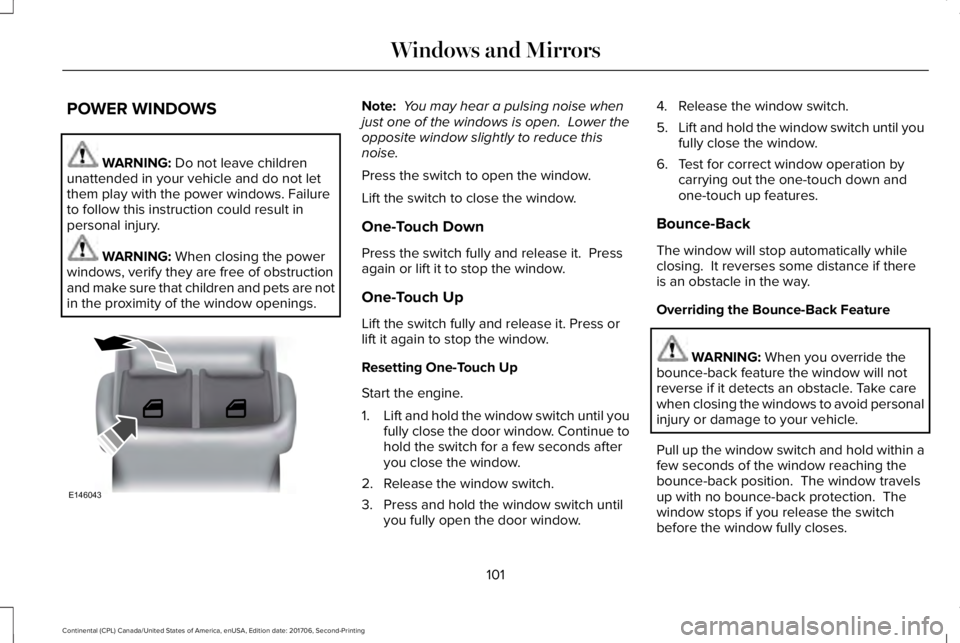
Press the switch to open the window.
Lift the switch to close the window.
One-Touch Down
Press the switch fully and release it. Pressagain or lift it to stop the window.
One-Touch Up
Lift the switch fully and release it. Press orlift it again to stop the window.
Resetting One-Touch Up
Start the engine.
1.Lift and hold the window switch until youfully close the door window. Continue tohold the switch for a few seconds afteryou close the window.
2. Release the window switch.
3. Press and hold the window switch untilyou fully open the door window.
4. Release the window switch.
5.Lift and hold the window switch until youfully close the window.
6. Test for correct window operation bycarrying out the one-touch down andone-touch up features.
Bounce-Back
The window will stop automatically whileclosing. It reverses some distance if thereis an obstacle in the way.
Overriding the Bounce-Back Feature
WARNING: When you override thebounce-back feature the window will notreverse if it detects an obstacle. Take carewhen closing the windows to avoid personalinjury or damage to your vehicle.
Pull up the window switch and hold within afew seconds of the window reaching thebounce-back position. The window travelsup with no bounce-back protection. Thewindow stops if you release the switchbefore the window fully closes.
101
Continental (CPL) Canada/United States of America, enUSA, Edition date: 201706, Second-Printing
Windows and MirrorsE146043