Page 5 of 496
2
1
Table of contents
3
4
5
6
7
8I
IntroductionVehicle data collection and event data recorders
Electric Vehicle GuideReview of Electric Vehicle / High voltage battery / Charge / Driving Electric Vehicle / Etc.
Your vehicle at a glance
Exterior overview / Interior overview / Instrument panel overview / Moto\
r room compartment
Safety features of your vehicle
Seats / Seat belts / Child restraint system / Air bag
Features of your vehicleSmart key / Door locks / Tailgate / Windows / Steering wheel / Mirrors / Instrument cluster / Lighting / Etc.
Driving your vehicleBefore driving / POWER button / Active ECO system / Reduction gear / Brake system / Etc.
What to do in an emergencyRoad warning / Emergency while driving / Emergency starting / Vehicle overheat / TPMS / Flat tire / Towing / Etc.
MaintenanceMotor room compartment / Maintenance service / Coolant / Brake fluid / Washer fluid / Lights bulbs / Etc.
Specifications, Consumer information and Reporting safety defects
Index
Page 30 of 496
25
Depending on the condition and
durability of the high voltage battery,
charger specifications, and ambient
temperature, the time required for
charging the battery may vary.11.You may prevent possible charg-
ing cable theft by taking the fol-
lowing steps. Lock the door after
the charging cable is connected,
by pressing the lock button on the
smart key or on the central door
lock switch.
When the door is locked, the
charging connector will become
locked and this will prevent possi-
ble theft.
So, after charging is complete,
you must release the door lock in
order to disconnect the charging
connector.
■ ■Unlock Charging Door in
Emergency
If the charging door does not open
due to battery discharge and failure
of the electric wires, open the hood
and slightly pull the emergency cable
as shown above. The charging door
will then open.
CHARGING ELECTRIC VEHICLE
(NORMAL CHARGE)
OPSE0Q4016
Page 43 of 496
38
Depending on the condition and
durability of the high voltage battery,
charger specifications, and ambient
temperature, the time required for
charging the battery may vary.14.You may prevent possible charg-
ing cable theft by taking the fol-
lowing steps. Lock the door after
the charging cable is connected,
by pressing the lock button on the
smart key or on the central door
lock switch.
When the door is locked, the
charging connector will become
locked and this will prevent possi-
ble theft.
So, after charging is complete,
you must release the door lock in
order to disconnect the charging
connector.
■ ■Unlock Charging Door in
Emergency
If the charging door does not open
due to battery discharge and failure
of the electric wires, open the hood
and slightly pull the emergency cable
as shown above. The charging door
will then open.
CHARGING ELECTRIC VEHICLE
(TRICKLE CHARGE)
OPSE0Q4016
Page 49 of 496
44
1. With the smart key, sit in the dri-ver's seat.
2. Fasten the safety belt before start- ing the vehicle.
3. Make sure to engage the parking brake for your safety.
4. Turn OFF all electrical devices. 5. Make sure the accelerator and
brake pedal have clearance with
your right foot.
6. Make sure to press and hold the brake pedal.
7. While pressing the brake pedal, place the shift lever in P (Park).
Vehicle only starts when the shift
lever is placed in P (Park).
8. Press and hold the brake while pressing the POWER button.
9. When (indicator lamp) is ON,you can drive the vehicle.
When (indicator lamp) is OFF,
you cannot drive the vehicle. Start
the vehicle again.
10.Press and hold the brake pedal and place the shift lever in the
desired position.
How to Start the Vehicle
DRIVING ELECTRIC VEHICLE
OPSE0Q4049
OPSE0Q4050
Page 78 of 496

35
Safety features of your vehicle
Feature of Seat Leather
Leather is made from the outerskin of an animal, which goes
through a special process to be
available for use. Since it is a nat-
ural substance, each part differs in
thickness or density.
Wrinkles may appear as a natural
result of stretching and shrinking
depending on the temperature and
humidity.
The seat is made of stretchable fabric to improve comfort.
The parts contacting the body are curved and the side supporting
area is high which provides driving
comfort and stability.
Wrinkles may appear naturally from usage. It is not a fault of the
product.
✽ ✽
NOTICE
Wrinkles or abrasions which appear
naturally from usage are not cov-
ered by warranty.
Front seat adjustment
Forward and backward
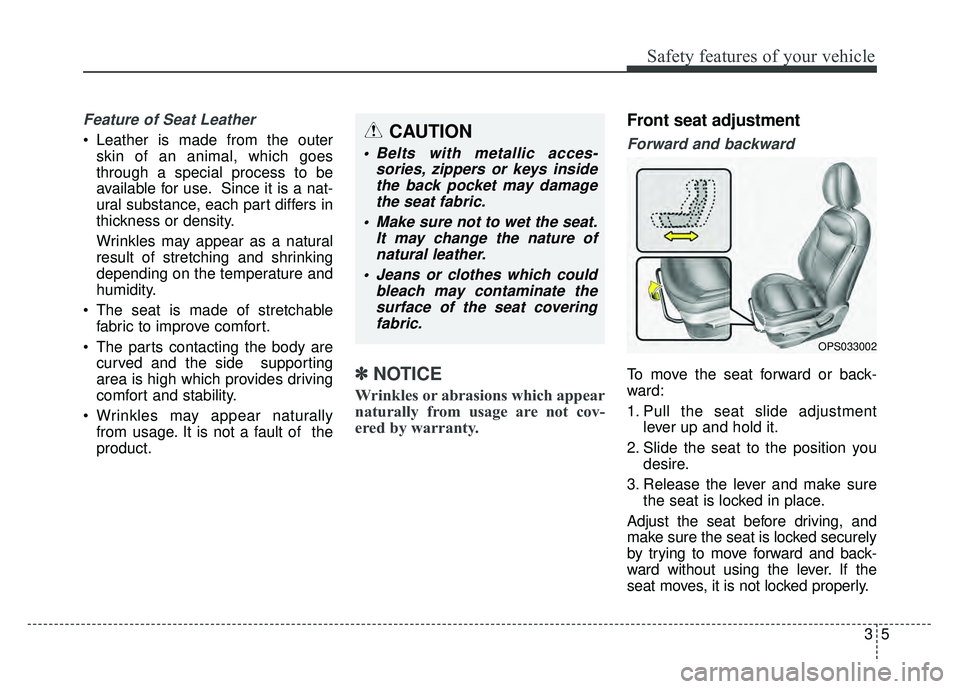
To move the seat forward or back-
ward:
1. Pull the seat slide adjustment
lever up and hold it.
2. Slide the seat to the position you desire.
3. Release the lever and make sure the seat is locked in place.
Adjust the seat before driving, and
make sure the seat is locked securely
by trying to move forward and back-
ward without using the lever. If the
seat moves, it is not locked properly.
OPS033002
CAUTION
Belts with metallic acces- sories, zippers or keys insidethe back pocket may damagethe seat fabric.
Make sure not to wet the seat. It may change the nature ofnatural leather.
Jeans or clothes which could bleach may contaminate thesurface of the seat coveringfabric.
Page 132 of 496

Features of your vehicle
Smart key . . . . . . . . . . . . . . . . . . . . . . . . . . . . . . . . . 4-4
• Record your key number . . . . . . . . . . . . . . . . . . . . . . . 4-4
. . . . . . . . . . . . . . . . . . . . . . . . . . . . 4-4
. . . . . . . . . . . . . . . . . . . . . . . . . . 4-7
. . . . . . . . . . . . . . . . . . . . . . . . . 4-7
. . . . . . . . . . . . . . . . . . . 4-8
. . . . . . . . . . . . . . . . . . . . . . . . . . . 4-9
Door locks . . . . . . . . . . . . . . . . . . . . . . . . . . . . . . . 4-10
. . . . 4-10
. . . . . . . . . . . . . . 4-13
. . . . . . . . . . . . . . . . . . 4-13
. . . . . . . . . . . . . . . . . 4-13
. . . . . . . . . . . . . . . . . 4-13
Tailgate . . . . . . . . . . . . . . . . . . . . . . . . . . . . . . . . . . 4-14\
. . . . . . . . . . . . . . . . . . . . . . . . . . 4-14
. . . . . . . . . . . . . . . . . . . . . . . . . . . 4-15
. . . . . . . . . . . . . . . 4-15
Windows . . . . . . . . . . . . . . . . . . . . . . . . . . . . . . . . . 4-17
. . . . . . . . . . . . . . . . . . . . . . . . . . . . . . 4-18
Hood. . . . . . . . . . . . . . . . . . . . . . . . . . . . . . . . . . . . \
. 4-22
. . . . . . . . . . . . . . . . . . . . . . . . . . . . 4-22
. . . . . . . . . . . . . . . . . . . . . . . . . . . . . 4-22
Panoramic sunroof . . . . . . . . . . . . . . . . . . . . . . . . . 4-24
. . . . . . . . . . . . . . . . . . . . . . . . . . . 4-25
. . . . . . . . . . . . . . . . . . . . . . . . . . . . 4-26
. . . . . . . . . . . . . . . . . . . . . . . . . . . . . . . . . . . 4-\
27
. . . . . . . . . . . . . . . . . . . . . . . . . . . 4-28
. . . . . . . . . . . . . . . . . . . . . . . . . 4-29
Steering wheel . . . . . . . . . . . . . . . . . . . . . . . . . . . . . 4-30
. . . . . . . . . . . . . . . . . . 4-30
. . . . . . . . . . . . . . . . . . . . 4-31
. . . . . . . . . . . . . . . . . . . . . . . . . 4-32
. . . . . . . . . . . . . . . . . . . . . . . . . . . . . . . . . . . . \
. . . 4-32
. . . . . . . . . . . . . . . . . . . . . . . . . . . . . . . 4-33
Mirrors . . . . . . . . . . . . . . . . . . . . . . . . . . . . . . . . . . 4-35\
. . . . . . . . . . . . . . . . . . . . . . . . 4-35
. . . . . . . . . . . . . . . . . . . . . . . 4-37
Instrument cluster . . . . . . . . . . . . . . . . . . . . . . . . . 4-40
. . . . . . . . . . . . . . . . . . . . 4-41
. . . . . . . . . . . . . . . . . . . . . . . . . 4-41
. . . . . . . . . . . . . . . . . . . . . . . . . . . . . . . . . . . . \
. 4-42
. . . . . . . . . . . . . . . . . . 4-45
LCD Display . . . . . . . . . . . . . . . . . . . . . . . . . . . . . . 4-46
. . . . . . . . . . . . . . . . . . . . . . . . . . . . . . . . . 4-46
. . . . . . . . . . . . . . . . . . . . . . . . . 4-47
4
Page 135 of 496

Features of your vehicle
44
Record your key number
The key code num-
ber is stamped on
the key code tag
attached to the key
set. Should you
lose your keys, this number will
enable an authorized Kia dealer to
duplicate the keys easily. Remove
the key code tag and store it in a safe
place. Also, record the key code
number and keep it in a safe and
handy place, but not in the vehicle.
Smart key function
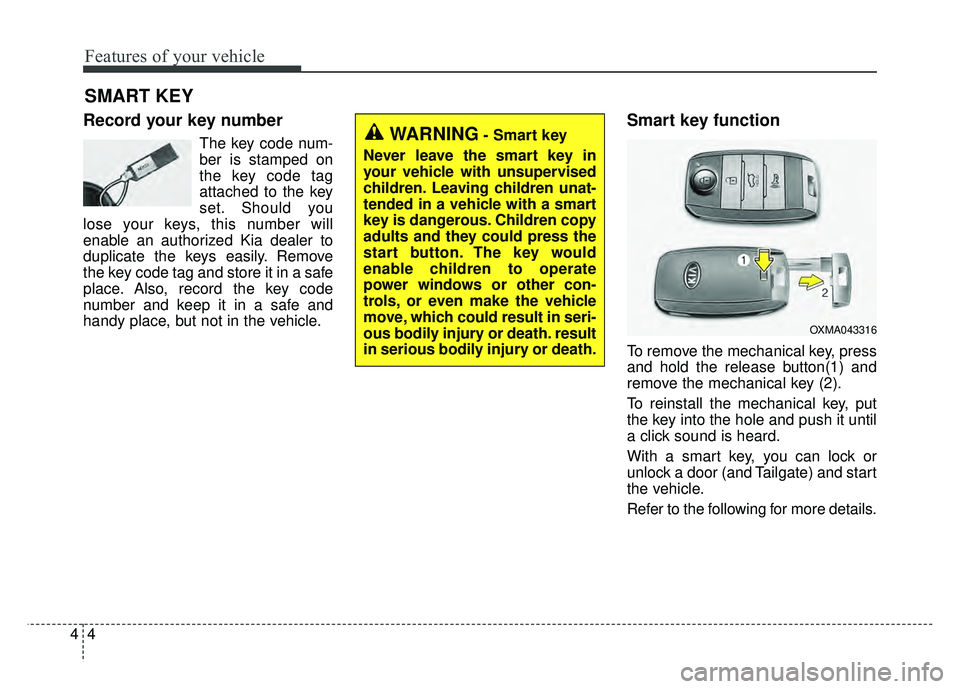
To remove the mechanical key, press
and hold the release button(1) and
remove the mechanical key (2).
To reinstall the mechanical key, put
the key into the hole and push it until
a click sound is heard.
With a smart key, you can lock or
unlock a door (and Tailgate) and start
the vehicle.
Refer to the following for more details.
SMART KEY
OXMA043316
WARNING- Smart key
Never leave the smart key in
your vehicle with unsupervised
children. Leaving children unat-
tended in a vehicle with a smart
key is dangerous. Children copy
adults and they could press the
start button. The key would
enable children to operate
power windows or other con-
trols, or even make the vehicle
move, which could result in seri-
ous bodily injury or death. result
in serious bodily injury or death.
Page 136 of 496
45
Features of your vehicle
Door Lock
Using the door handle button
1. Carry the smart key.
2. Close all doors, hood and tailgate.
3. Press the button of the outsidedoor handle.
4. The hazard warning lights will blink and the chime will sound once.
5. Make sure that doors are locked by pulling the outside door handle. The button will only operate when the
smart key is within 28~40 in. (0.7~1m)
from the outside door handle.
Even though you press the outside
door handle button, the doors will not
lock and the chime will sound for 3
seconds if any of following occur:
• The smart key is in the vehicle.
The POWER button is in ON posi-
tion.
Any door except the tailgate is open. Using the button on the smart key
1 Close all doors, hood and tailgate.
2. Press the lock button(1).
3. The hazard warning lights will blink
and the chime will sound once.
4. Make sure that doors are locked by pulling the outside door handle.
OXMA043316/Q
OPS043010