Page 5 of 496
2
1
Table of contents
3
4
5
6
7
8I
IntroductionVehicle data collection and event data recorders
Electric Vehicle GuideReview of Electric Vehicle / High voltage battery / Charge / Driving Electric Vehicle / Etc.
Your vehicle at a glance
Exterior overview / Interior overview / Instrument panel overview / Moto\
r room compartment
Safety features of your vehicle
Seats / Seat belts / Child restraint system / Air bag
Features of your vehicleSmart key / Door locks / Tailgate / Windows / Steering wheel / Mirrors / Instrument cluster / Lighting / Etc.
Driving your vehicleBefore driving / POWER button / Active ECO system / Reduction gear / Brake system / Etc.
What to do in an emergencyRoad warning / Emergency while driving / Emergency starting / Vehicle overheat / TPMS / Flat tire / Towing / Etc.
MaintenanceMotor room compartment / Maintenance service / Coolant / Brake fluid / Washer fluid / Lights bulbs / Etc.
Specifications, Consumer information and Reporting safety defects
Index
Page 29 of 496
24
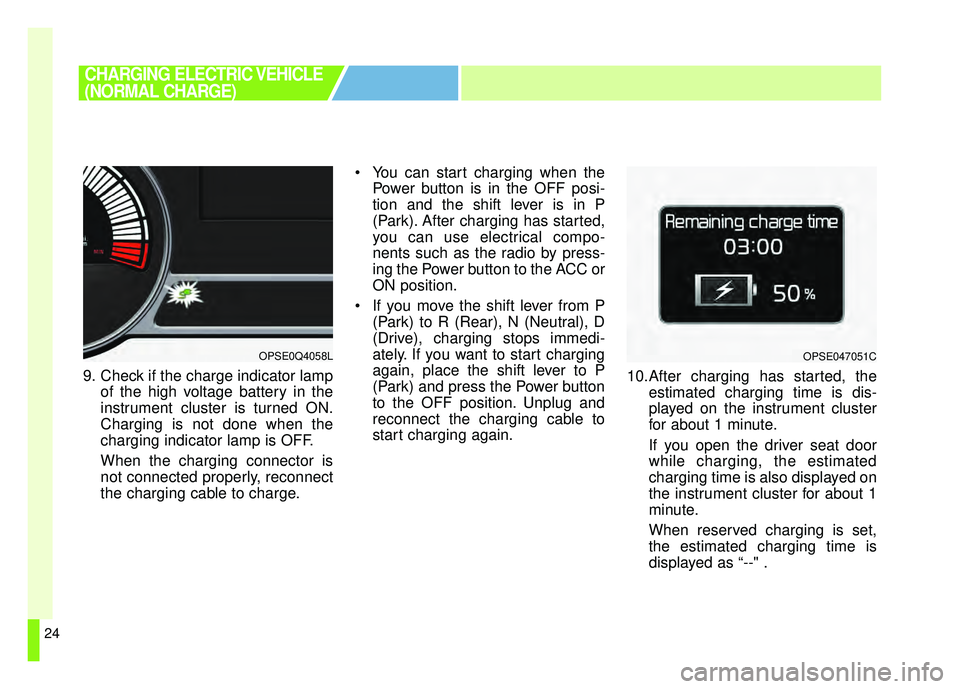
9. Check if the charge indicator lampof the high voltage battery in the
instrument cluster is turned ON.
Charging is not done when the
charging indicator lamp is OFF.
When the charging connector is
not connected properly, reconnect
the charging cable to charge. You can start charging when the
Power button is in the OFF posi-
tion and the shift lever is in P
(Park). After charging has started,
you can use electrical compo-
nents such as the radio by press-
ing the Power button to the ACC or
ON position.
If you move the shift lever from P (Park) to R (Rear), N (Neutral), D
(Drive), charging stops immedi-
ately. If you want to start charging
again, place the shift lever to P
(Park) and press the Power button
to the OFF position. Unplug and
reconnect the charging cable to
start charging again. 10.After charging has started, the
estimated charging time is dis-
played on the instrument cluster
for about 1 minute.
If you open the driver seat door
while charging, the estimated
charging time is also displayed on
the instrument cluster for about 1
minute.
When reserved charging is set,
the estimated charging time is
displayed as “--" .
OPSE0Q4058L
CHARGING ELECTRIC VEHICLE
(NORMAL CHARGE)
OPSE047051C
Page 35 of 496
30
❈Refer to the manual for each type
of quick charger for how to charge
and remove the charger.
❈ The shape of the charging con-
nector may vary depending on the
manufacturer.
8. Check if the charge indicator lampof the high voltage battery in the
instrument cluster is turned ON.
Charging is not done when the
charging indicator lamp is OFF.
When the charging connector is
not connected properly, reconnect
the charging cable to charge it
again. ❈
If you use a quick charger when
the vehicle is already fully
charged, some quick chargers will
send out an error message. When
the vehicle is fully charged, do not
charge the vehicle.
CHARGING ELECTRIC VEHICLE
(QUICK CHARGE)
OPSE0Q4058L
Page 42 of 496
37
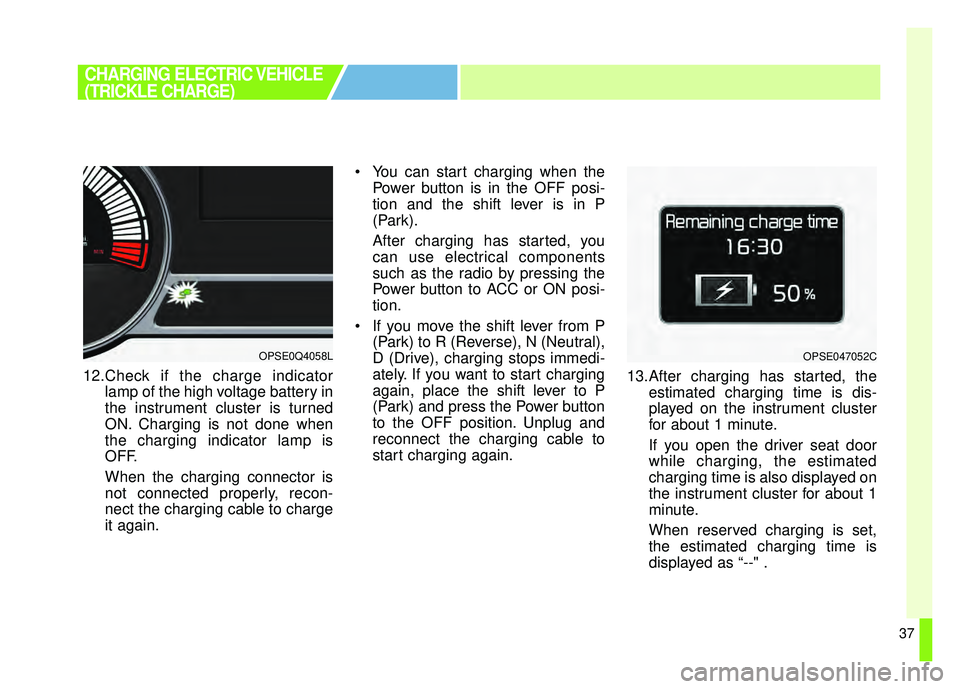
12.Check if the charge indicatorlamp of the high voltage battery in
the instrument cluster is turned
ON. Charging is not done when
the charging indicator lamp is
OFF.
When the charging connector is
not connected properly, recon-
nect the charging cable to charge
it again. You can start charging when the
Power button is in the OFF posi-
tion and the shift lever is in P
(Park).
After charging has started, you
can use electrical components
such as the radio by pressing the
Power button to ACC or ON posi-
tion.
If you move the shift lever from P (Park) to R (Reverse), N (Neutral),
D (Drive), charging stops immedi-
ately. If you want to start charging
again, place the shift lever to P
(Park) and press the Power button
to the OFF position. Unplug and
reconnect the charging cable to
start charging again. 13.After charging has started, the
estimated charging time is dis-
played on the instrument cluster
for about 1 minute.
If you open the driver seat door
while charging, the estimated
charging time is also displayed on
the instrument cluster for about 1
minute.
When reserved charging is set,
the estimated charging time is
displayed as “--" .
CHARGING ELECTRIC VEHICLE
(TRICKLE CHARGE)
OPSE0Q4058LOPSE047052C
Page 50 of 496
45
❈For vehicles with Shift Lock, you
have to press the POWER button
to the ON position, press and
hold the brake pedal, then press
the unlock button on the shift
lever while it is placed in P (Park)
in order to move the shift lever to
R (Reverse).
While the charging cable is con- nected, you cannot use the shift
lever for safety reasons.
11.Release the parking brake and slowly release the brake pedal.
Check if the vehicle slowly moves
forward, then press the accelera-
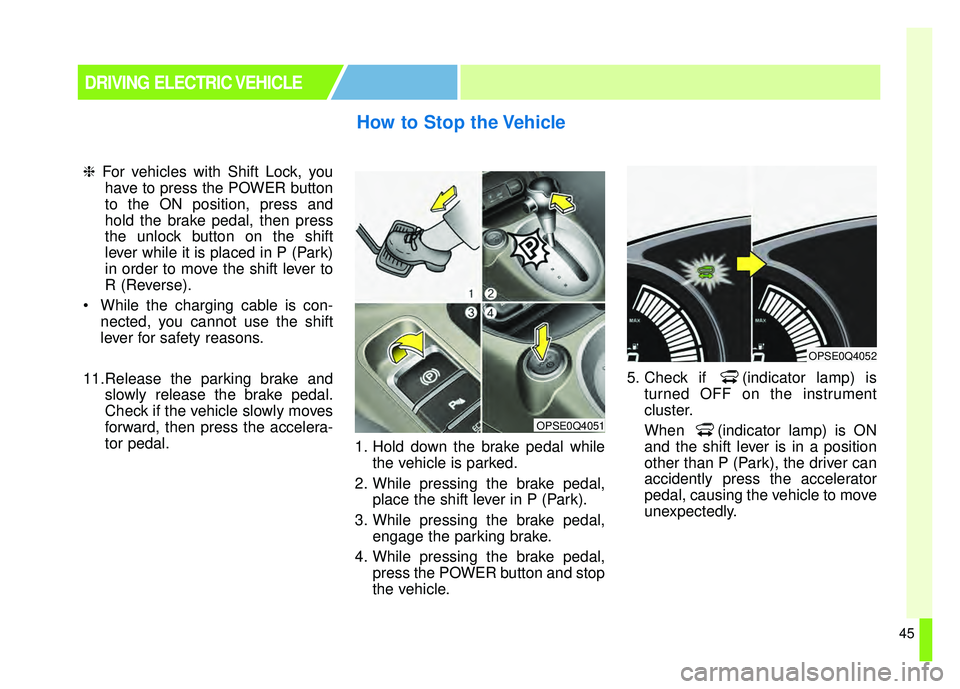
tor pedal. 1. Hold down the brake pedal while
the vehicle is parked.
2. While pressing the brake pedal, place the shift lever in P (Park).
3. While pressing the brake pedal, engage the parking brake.
4. While pressing the brake pedal, press the POWER button and stop
the vehicle. 5. Check if (indicator lamp) is
turned OFF on the instrument
cluster.
When (indicator lamp) is ON
and the shift lever is in a position
other than P (Park), the driver can
accidently press the accelerator
pedal, causing the vehicle to move
unexpectedly.
How to Stop the Vehicle
DRIVING ELECTRIC VEHICLE
OPSE0Q4051
OPSE0Q4052
Page 52 of 496
47
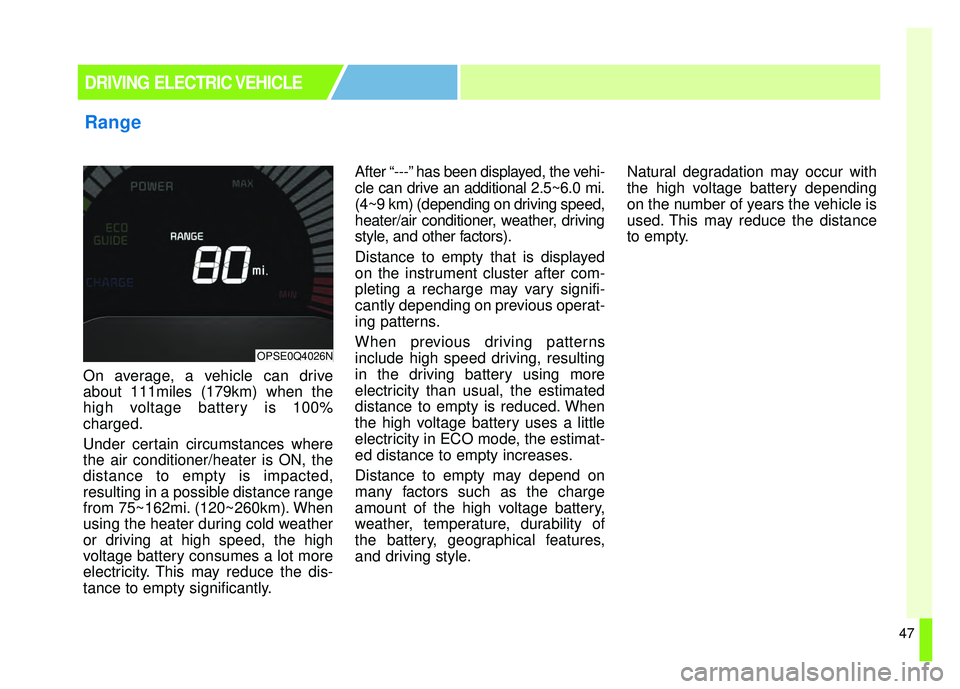
On average, a vehicle can drive
about 111miles (179km) when the
high voltage battery is 100%
charged.
Under certain circumstances where
the air conditioner/heater is ON, the
distance to empty is impacted,
resulting in a possible distance range
from 75~162mi. (120~260km). When
using the heater during cold weather
or driving at high speed, the high
voltage battery consumes a lot more
electricity. This may reduce the dis-
tance to empty significantly.After “---” has been displayed, the vehi-
cle can drive an additional 2.5~6.0 mi.
(4~9 km) (depending on driving speed,
heater/air conditioner, weather, driving
style, and other factors).
Distance to empty that is displayed
on the instrument cluster after com-
pleting a recharge may vary signifi-
cantly depending on previous operat-
ing patterns.
When previous driving patterns
include high speed driving, resulting
in the driving battery using more
electricity than usual, the estimated
distance to empty is reduced. When
the high voltage battery uses a little
electricity in ECO mode, the estimat-
ed distance to empty increases.
Distance to empty may depend on
many factors such as the charge
amount of the high voltage battery,
weather, temperature, durability of
the battery, geographical features,
and driving style.
Natural degradation may occur with
the high voltage battery depending
on the number of years the vehicle is
used. This may reduce the distance
to empty.
Range
DRIVING ELECTRIC VEHICLE
OPSE0Q4026N
Page 55 of 496
50
■
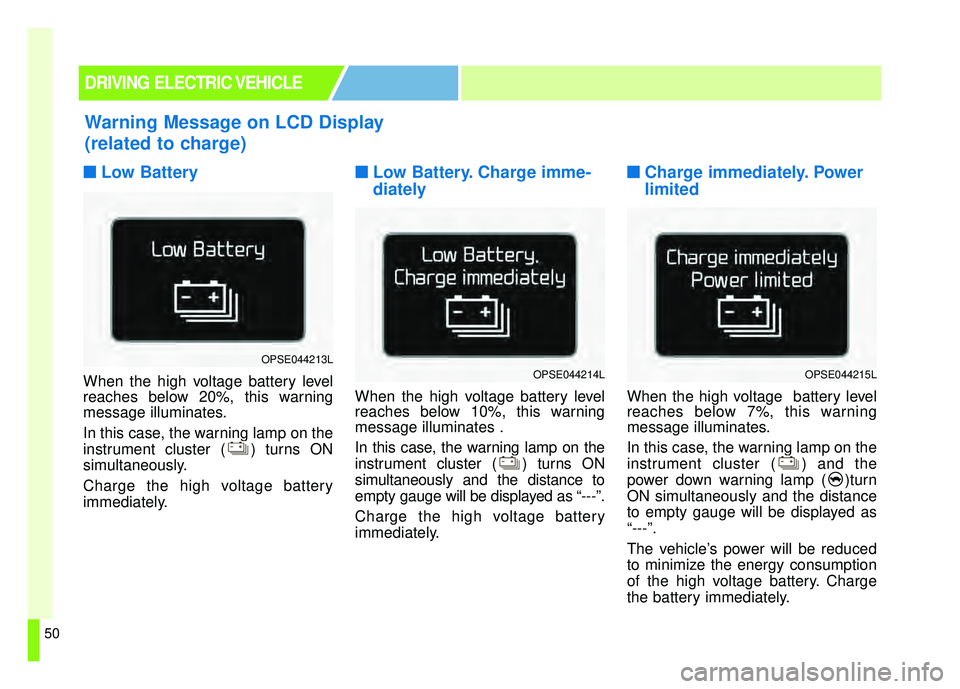
■Low Battery
When the high voltage battery level
reaches below 20%, this warning
message illuminates.
In this case, the warning lamp on the
instrument cluster ( ) turns ON
simultaneously.
Charge the high voltage battery
immediately.
■ ■Low Battery. Charge imme-
diately
When the high voltage battery level
reaches below 10%, this warning
message illuminates .
In this case, the warning lamp on the
instrument cluster ( ) turns ON
simultaneously and the distance to
empty gauge will be displayed as “---”.
Charge the high voltage battery
immediately.
■ ■Charge immediately. Power
limited
When the high voltage battery level
reaches below 7%, this warning
message illuminates.
In this case, the warning lamp on the
instrument cluster ( ) and the
power down warning lamp ( )turn
ON simultaneously and the distance
to empty gauge will be displayed as
“---”.
The vehicle’s power will be reduced
to minimize the energy consumption
of the high voltage battery. Charge
the battery immediately.
Warning Message on LCD Display
(related to charge)
DRIVING ELECTRIC VEHICLE
OPSE044213LOPSE044214LOPSE044215L
Page 72 of 496
25
Your vehicle at a glance
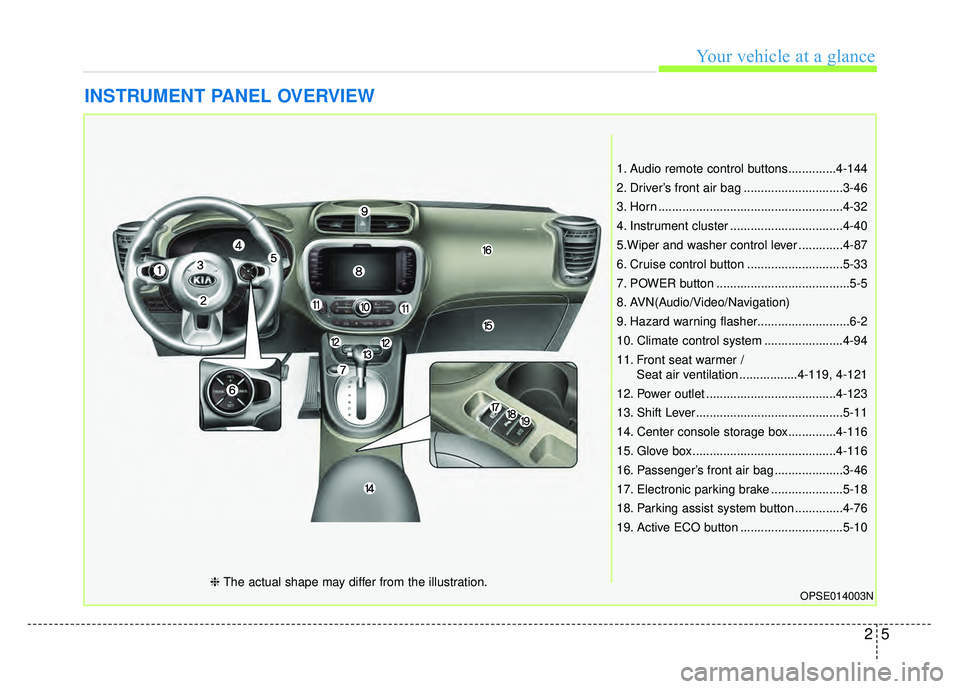
INSTRUMENT PANEL OVERVIEW
1. Audio remote control buttons..............4-144
2. Driver’s front air bag .............................3-46
3. Horn ......................................................4-32
4. Instrument cluster .................................4-40
5.Wiper and washer control lever .............4-87
6. Cruise control button ............................5-33
7. POWER button .......................................5-5
8. AVN(Audio/Video/Navigation)
9. Hazard warning flasher...........................6-2
10. Climate control system .......................4-94
11. Front seat warmer /Seat air ventilation .................4-119, 4-121
12. Power outlet ......................................4-123
13. Shift Lever...........................................5-11
14. Center console storage box..............4-116
15. Glove box ..........................................4-116
16. Passenger’s front air bag ....................3-46
17. Electronic parking brake .....................5-18
18. Parking assist system button ..............4-76
19. Active ECO button ..............................5-10
OPSE014003N❈ The actual shape may differ from the illustration.