2018 KIA RIO air condition
[x] Cancel search: air conditionPage 194 of 490
Features of your vehicle
122
4
Air conditioning system operation tips
If the vehicle has been parked in
direct sunlight during hot weather,
open the windows for a short time
to let the hot air inside the vehicle
escape.
To help reduce moisture inside of the windows on rainy or humid
days, decrease the humidity inside
the vehicle by operating the air
conditioning system.
During air conditioning system operation, you may occasionally
notice a slight change in engine
speed as the air conditioning com-
pressor cycles. This is a normal
system operation characteristic.
Use the air conditioning system every month only for a few minutes
to ensure maximum system per-
formance.
When using the air conditioning system, you may notice clear water
dripping (or even puddling) on the
ground under the passenger side
of the vehicle. This is a normal sys-
tem operation characteristic. Operating the air conditioning sys-
tem in the recirculated air position
provides maximum cooling, how-
ever, continual operation in this
mode may cause the air inside the
vehicle to become stale.
During cooling operation, you may occasionally notice a misty air flow
because of rapid cooling and
humid air intake. This is a normal
system operation characteristic.
If you operate air conditioner excessively, the difference between
the temperature of the outside air
and that of the windshield could
cause the outer surface of the
windshield to fog up, causing loss
of visibility. In this case, set the
mode selection knob or button to
the position and fan speed
control to the lower speed.CAUTION
When using the air condition- ing system, monitor the tem-perature gauge closely whiledriving up hills or in heavy traf-fic when outside temperaturesare high. Air conditioning sys-tem operation may causeengine overheating. Continueto use the blower fan but turnthe air conditioning system offif the temperature gauge indi-cates engine overheating.
When opening the windows in humid weather air conditioningmay create water dropletsinside the vehicle. Since exces-sive water droplets may causedamage to electrical equip-ment, air conditioning shouldonly be used with the windowsclosed.
Page 197 of 490
4125
Features of your vehicle
Defogging Logic
To reduce the probability of fogging
up inside of the windshield, the air
intake or air conditioning are con-
trolled automatically according to
certain conditions such as or
position. Logic can be disabled and
enabled by doing following :
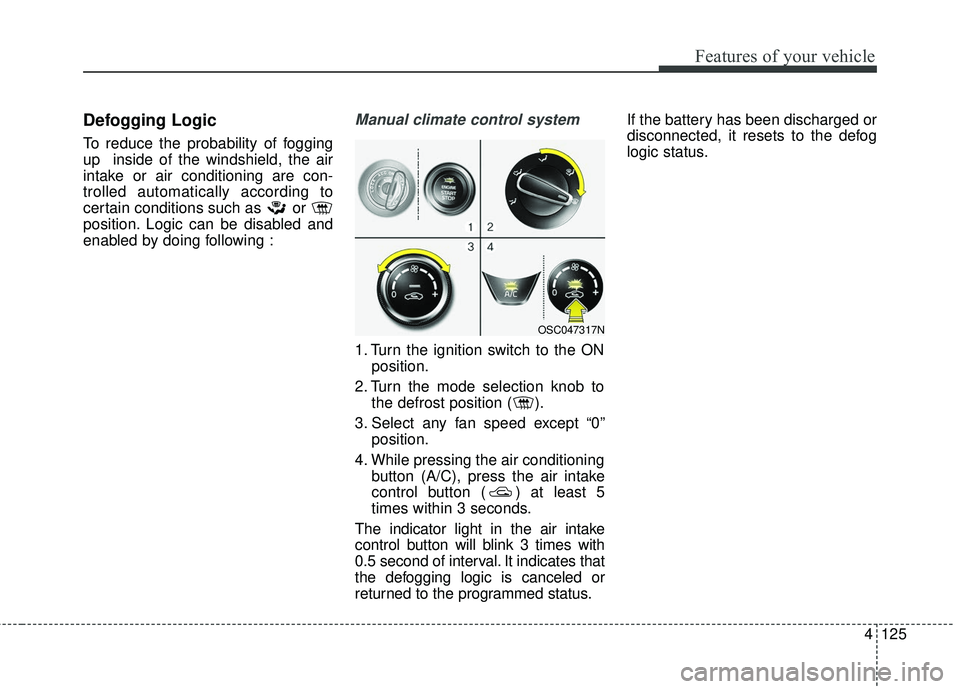
Manual climate control system
1. Turn the ignition switch to the ONposition.
2. Turn the mode selection knob to the defrost position ( ).
3. Select any fan speed except “0” position.
4. While pressing the air conditioning button (A/C), press the air intake
control button ( ) at least 5
times within 3 seconds.
The indicator light in the air intake
control button will blink 3 times with
0.5 second of interval. It indicates that
the defogging logic is canceled or
returned to the programmed status. If the battery has been discharged or
disconnected, it resets to the defog
logic status.
OSC047317N
Page 198 of 490
Features of your vehicle
126
4
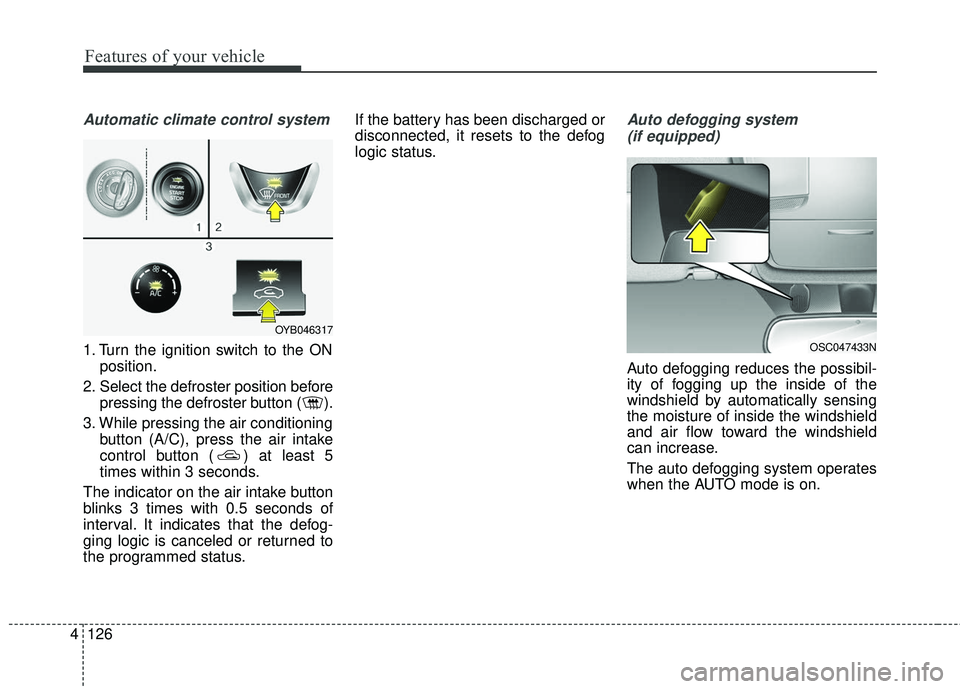
Automatic climate control system
1. Turn the ignition switch to the ON
position.
2. Select the defroster position before pressing the defroster button ( ).
3. While pressing the air conditioning button (A/C), press the air intake
control button ( ) at least 5
times within 3 seconds.
The indicator on the air intake button
blinks 3 times with 0.5 seconds of
interval. It indicates that the defog-
ging logic is canceled or returned to
the programmed status. If the battery has been discharged or
disconnected, it resets to the defog
logic status.
Auto defogging system
(if equipped)
Auto defogging reduces the possibil-
ity of fogging up the inside of the
windshield by automatically sensing
the moisture of inside the windshield
and air flow toward the windshield
can increase.
The auto defogging system operates
when the AUTO mode is on.
OSC047433N
OYB046317
Page 199 of 490
4127
Features of your vehicle
This indicator illuminates
when the auto defogging
system senses the mois-
ture of inside the wind-
shield and operates.
If more moisture is in the vehicle,
higher steps operate as follow.
Step 1 : Operating the air condition- ing
Step 2 : Outside air position
Step 3 : Blowing air flow toward the windshield
Step 4 : Increasing air flow toward the windshield
If your vehicle is equipped with the
auto defogging system, it is automat-
ically activated when the conditions
are met.
However, if you would like to deacti-
vate the auto defogging system,
keep the front defroster button
pressed longer than 3 seconds. The “ADS OFF” symbol will be
shown in the climate display to
inform you that the system is deacti-
vated.
To re-activate the auto defogging
system again, follow the procedure
mentioned above and the “ADS
OFF” symbol will disappear.
If the battery has been disconnected
or discharged, it resets to the auto
defogging status.
✽ ✽
NOTICE
• When the air conditioning is
turned on by Auto defogging sys-
tem, if you try to turn off the air
conditioning, the indicator will
blink 3 times and the air condi-
tioning will not be turned off.
• For efficiency, do not select recir- culated air position while Auto
defogging system is operating.
CAUTION
Do not remove the sensor cover
located on the upper end of thedriver side windshield glass.Damage to the system partscould occur and may not be cov-ered by your vehicle warranty.
Page 206 of 490
Features of your vehicle
134
4
Adjust the air-conditioner or heater to
the lowest operating level when
using the power outlet.
Close the cover when not in use.
Some electronic devices can cause
electronic interference when plugged
into a vehicle’s power outlet. These
devices may cause excessive audio
static and malfunctions in other elec-
tronic systems or devices used in
your vehicle.
Using electrical products which
exceed the limited capacity might
cause heating to the power outlet
and wiring that could lead to an elec-
trical breakdown. Always make sure
the electrical part is firmly plugged
into the power outlet. Incomplete
plugging may cause electrical break-
down.
Electrical products with a built-in bat-
tery might cause current flow, which
could lead to malfunction of the elec-
tric/electronic device in your vehicle.
Only use electrical products which
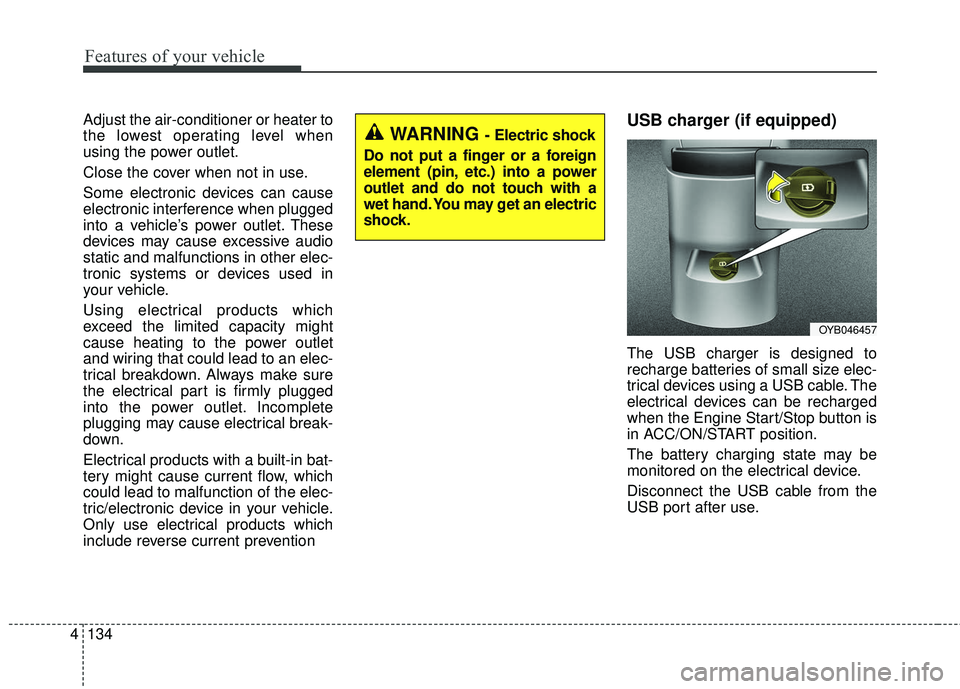
include reverse current preventionUSB charger (if equipped)
The USB charger is designed to
recharge batteries of small size elec-
trical devices using a USB cable. The
electrical devices can be recharged
when the Engine Start/Stop button is
in ACC/ON/START position.
The battery charging state may be
monitored on the electrical device.
Disconnect the USB cable from the
USB port after use.
WARNING - Electric shock
Do not put a finger or a foreign
element (pin, etc.) into a power
outlet and do not touch with a
wet hand. You may get an electric
shock.
OYB046457
Page 238 of 490
Audio system
29
5
Precautions when connecting Bluetooth®
Wireless Technology devices
The vehicle supports the following
Bluetooth®Wireless Technology
functions. Some
Bluetooth®
Wireless Technology devices may
not support some functions.
1)
Bluetooth®Wireless Technology
Handsfree phone calls
2) Operations during a call (Private, Switch, Out Vol. controls)
3) Download call history saved to the
Bluetooth®Wireless Technology
device
4) Download contacts saved to the
Bluetooth®Wireless Technology
device
5) Automatic contacts/call history download when
Bluetooth®
Wireless Technology is connected
6) Automatic
Bluetooth®Wireless
Technology device connection
when the vehicle is started
7)
Bluetooth®Wireless Technology
audio streaming playback
Before connecting the audio sys- tem to your device, make sure your
device supports
Bluetooth®Wireless
Technology. Even if your device supports
Bluetooth®Wireless Technology, a
Bluetooth®Wireless Technology
connection cannot be established
if the device’s
Bluetooth®Wireless
Technology function is switched off.
Search and connect with the
Bluetooth®
Wireless Technology function enabled.
Pair or connect
Bluetooth®Wireless
Technology devices to the audio
system with the vehicle at a standstill.
If a
Bluetooth®Wireless Technology
connection is lost due to abnormal
conditions while a
Bluetooth®
Wireless Technology device is connect-
ed (communication range exceed-
ed, device power OFF, communi-
cation errors, etc.), the disconnect-
ed
Bluetooth®Wireless Technology
device is searched for and auto-
matically reconnected.
If you want to disable the
Bluetooth®
Wireless Technology device auto-
connect function, turn the
Bluetooth®Wireless Technology
function OFF on your device.
Consult the user manuals for indi-
vidual devices to see whether
Bluetooth®Wireless Technology is
supported. Handsfree call quality and volume
may vary depending on the type of
Bluetooth®Wireless Technology
device.
Some
Bluetooth®Wireless Technology
devices are subject to intermittent
Bluetooth®Wireless Technology
connection failures. In this case,
use the following method.
1) Turn the
Bluetooth®Wireless
Technology function off on your
Bluetooth®Wireless Technology
device ➟Turn it on and try again.
2) Delete the paired device from both the audio system and
Bluetooth®Wireless Technology
device, then pair again.
3) Power down your
Bluetooth®
Wireless Technology device ➟
Turn it on and try again.
4) Completely remove the battery from your
Bluetooth®Wireless
Technology device; reinsert it,
reboot, and attempt connection.
5) Restart the vehicle and reat- tempt connection.
Page 272 of 490
Driving your vehicle
24
6
Disc brakes wear indicator
When your brake pads are worn and
new pads are required, you will hear
a high-pitched warning sound from
your front brakes or rear brakes (if
equipped). You may hear this sound
come and go or it may occur when-
ever you depress the brake pedal.
Please remember that some driving
conditions or climates may cause a
brake squeal when you first apply (or
lightly apply) the brakes. This is nor-
mal and does not indicate a problem
with your brakes.
Always replace the front or rear
brake pads as pairs.
Rear drum brakes (if equipped)
Your rear drum brakes do not have
wear indicators. Therefore, have the
rear brake linings inspected if you
hear a rear brake rubbing noise. Also
have your rear brakes inspected
each time you change or rotate your
tires and when you have the front
brakes replaced.
CAUTION- Replace brake
pads
Do not continue to drive withworn brake pads. Continuing todrive with worn brake pads candamage the braking system andresult in costly brake repairs.
WARNING- Brake wear
Do not ignore high pitched wear
sounds from your brakes. If you
ignore this audible warning, you
will eventually lose braking per-
formance, which could lead to a
serious accident.
Page 275 of 490
627
Driving your vehicle
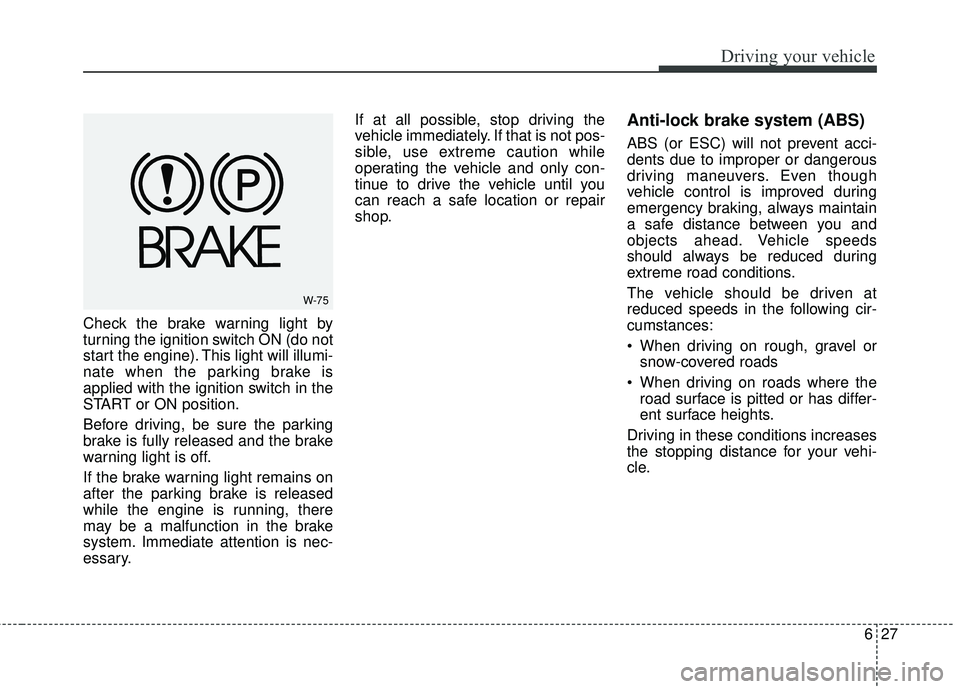
Check the brake warning light by
turning the ignition switch ON (do not
start the engine). This light will illumi-
nate when the parking brake is
applied with the ignition switch in the
START or ON position.
Before driving, be sure the parking
brake is fully released and the brake
warning light is off.
If the brake warning light remains on
after the parking brake is released
while the engine is running, there
may be a malfunction in the brake
system. Immediate attention is nec-
essary.If at all possible, stop driving the
vehicle immediately. If that is not pos-
sible, use extreme caution while
operating the vehicle and only con-
tinue to drive the vehicle until you
can reach a safe location or repair
shop.
Anti-lock brake system (ABS)
ABS (or ESC) will not prevent acci-
dents due to improper or dangerous
driving maneuvers. Even though
vehicle control is improved during
emergency braking, always maintain
a safe distance between you and
objects ahead. Vehicle speeds
should always be reduced during
extreme road conditions.
The vehicle should be driven at
reduced speeds in the following cir-
cumstances:
When driving on rough, gravel or
snow-covered roads
When driving on roads where the road surface is pitted or has differ-
ent surface heights.
Driving in these conditions increases
the stopping distance for your vehi-
cle.
W-75