2018 KIA RIO service indicator
[x] Cancel search: service indicatorPage 267 of 490
619
Driving your vehicle
For smooth operation, depress thebrake pedal when shifting from N(Neutral) to a forward or reversegear.When stopped on an upgrade, do not
hold the vehicle with engine power.
Use the service brake or the parking
brake.
Transaxle ranges
The indicator light in the instrument
cluster displays the shift lever posi-
tion when the ignition switch is in the
ON position.
P (Park)
Always come to a complete stop
before shifting into P (Park). This
position locks the transaxle and pre-
vents the front wheels from rotating.
Shifting into P (Park) while the vehi-
cle is in motion will cause the drive
wheels to lock which will cause you
to lose control of the vehicle. R (Reverse)
Use this position to drive the vehicle
backward.
N (Neutral)
The wheels and transaxle are not
engaged. The vehicle will roll freely
even on the slightest incline unless
the parking brake or service brakes
are applied.
CAUTION - Transaxle
To avoid damage to your
transaxle, do not accelerate theengine in R (Reverse) or any for-ward gear position with thebrakes on. The transaxle may bedamaged if you shift into P(Park) while the vehicle is inmotion.
WARNING- Automatic
Transaxle
Before leaving the driver's seat,
always make sure the shift lever
is engaged in P (Park), set the
parking brake fully and shut the
engine off. Unexpected and
sudden vehicle movement may
occur if these precautions are
not followed.
CAUTION - Shifting
Always come to a complete stop before shifting into or out of R(Reverse); you may damage thetransaxle if you shift into R(Reverse) while the vehicle is inmotion, except when “Rockingthe Vehicle” explained in thissection.
Page 326 of 490

What to do in an emergency
87
If the TPMS indicator does not illumi-
nate for 3 seconds when the ignition
switch is turned to the ON position or
engine is running, or if it comes on
after blinking for approximately one
minute, take your car to your nearest
authorized Kia dealer and have the
system checked.Low tire pressure
telltale
When the tire pressure monitoring
system warning indicator is illuminat-
ed, one or more of your tires is sig-
nificantly under-inflated.
If the telltale illuminates, immediately
reduce your speed, avoid hard cor-
nering and anticipate increased stop-
ping distances. You should stop and
check your tires as soon as possible.
Inflate the tires to the proper pres-
sure as indicated on the vehicle’s
placard or tire inflation pressure label
located on the driver’s side center pil-
lar outer panel. If you cannot reach a
service station or if the tire cannot
hold the newly added air, replace the
low pressure tire with the spare tire.
Then the Low Tire Pressure telltale
may flash for approximately one
minute and then remain continuously
illuminated after restarting and about
20 minutes of continuous driving
before you have the low pressure tire
repaired and replaced on the vehicle.In winter or cold weather, the low tire
pressure telltale may be illuminated if
the tire pressure was adjusted to the
recommended tire inflation pressure
in warm weather. It does not mean
your TPMS is malfunctioning
because the decreased temperature
leads to a proportional lowering of
tire pressure.
When you drive your vehicle from a
warm area to a cold area or from a
cold area to a warm area, or the out-
side temperature is greatly higher or
lower, you should check the tire infla-
tion pressure and adjust the tires to
the recommended tire inflation pres-
sure.
Page 328 of 490

What to do in an emergency
10
7
Changing a tire with TPMS
If you have a flat tire, the Low Tire
Pressure will come on. Have the flat
tire repaired by an authorized Kia
dealer as soon as possible or replace
the flat tire with the spare tire.
Each wheel is equipped with a tire
pressure sensor mounted inside the
tire behind the valve stem. You must
use TPMS specific wheels. It is rec-
ommended that you always have
your tires serviced by an authorized
Kia dealer. Even if you replace the low pressure
tire with the spare tire, the Low Tire
Pressure telltale will blink or remain
on until the low pressure tire is
repaired and placed on the vehicle.
After you replace the low pressure
tire with the TPMS spare tire, the
Low Tire Pressure telltale may blink
or illuminate after a few minutes
because the TPMS sensor mounted
on the spare wheel is not initiated.
Once the low pressure tire is reinflat-
ed to the recommended pressure
and installed on the vehicle or the
TPMS sensor mounted on the
replaced spare wheel is initiated by
an authorized Kia dealer, the TPMS
malfunction indicator and the low tire
pressure telltale will extinguish within
a few minutes of driving.
If the indicator is not extinguished
after a few minutes of driving, please
visit an authorized Kia dealer.
If an original mounted tire is replaced
with the spare tire, the TPMS sensor
on the replaced spare wheel should
be initiated and the TPMS sensor on
the original mounted wheel should
be deactivated. If the TPMS sensor
on the original mounted wheel locat-
ed in the spare tire carrier still acti-
vates, the tire pressure monitoring
system may not operate properly.
Have the tire with TPMS serviced or
replaced by an authorized Kia deal-
er.
CAUTION- Repair Agents
Never use a puncture-repairing
agent not approved by Kia torepair and/or inflate a low pres-sure tire. The tire sealant notapproved by Kia may damagethe tire pressure sensor.
Page 332 of 490
What to do in an emergency
14
7
✽ ✽
NOTICE
If the TPMS, Low Tire Pressure
indicator does not illuminate for 3
seconds when the ignition switch is
turned to the ON position or engine
is running, or if they remain illumi-
nated after coming on for approxi-
mately 3 seconds, take your vehicle
to your nearest authorized Kia deal-
er and have the system checked.
Low tire pressure
telltale
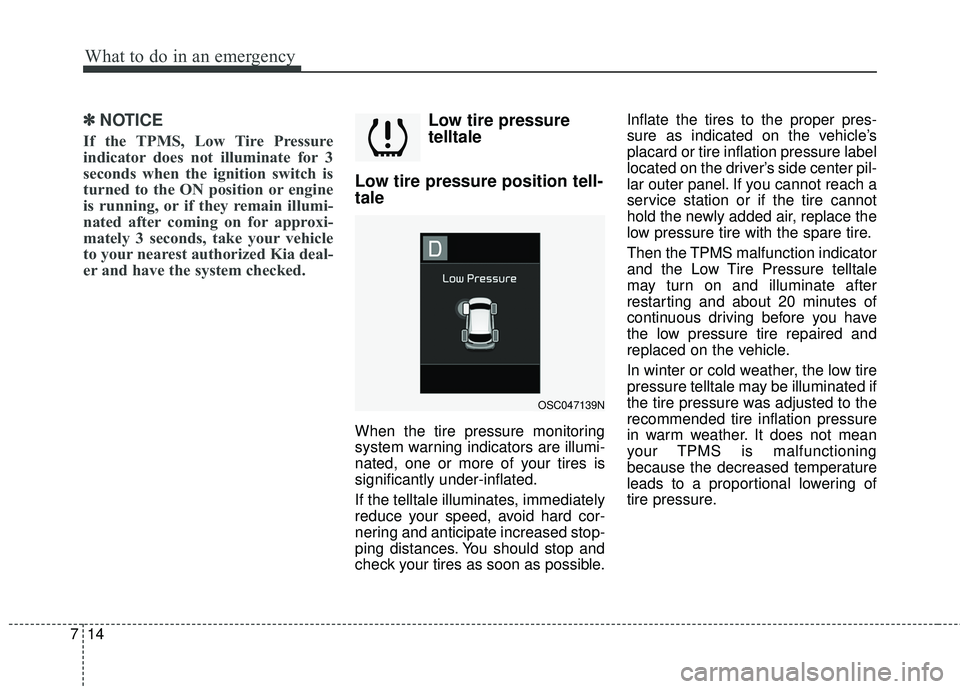
Low tire pressure position tell-
tale
When the tire pressure monitoring
system warning indicators are illumi-
nated, one or more of your tires is
significantly under-inflated.
If the telltale illuminates, immediately
reduce your speed, avoid hard cor-
nering and anticipate increased stop-
ping distances. You should stop and
check your tires as soon as possible. Inflate the tires to the proper pres-
sure as indicated on the vehicle’s
placard or tire inflation pressure label
located on the driver’s side center pil-
lar outer panel. If you cannot reach a
service station or if the tire cannot
hold the newly added air, replace the
low pressure tire with the spare tire.
Then the TPMS malfunction indicator
and the Low Tire Pressure telltale
may turn on and illuminate after
restarting and about 20 minutes of
continuous driving before you have
the low pressure tire repaired and
replaced on the vehicle.
In winter or cold weather, the low tire
pressure telltale may be illuminated if
the tire pressure was adjusted to the
recommended tire inflation pressure
in warm weather. It does not mean
your TPMS is malfunctioning
because the decreased temperature
leads to a proportional lowering of
tire pressure.
OSC047139N
Page 334 of 490
What to do in an emergency
16
7
Changing a tire with TPMS
If you have a flat tire, the Low Tire
Pressure telltale will come on. Have
the flat tire repaired by an authorized
Kia dealer as soon as possible or
replace the flat tire with the spare tire.
Each wheel is equipped with a tire
pressure sensor mounted inside the
tire behind the valve stem. You must
use TPMS specific wheels. It is rec-
ommended that you always have
your tires serviced by an authorized
Kia dealer. Even if you replace the low pressure
tire with the spare tire, the Low Tire
Pressure telltale will remain on until
the low pressure tire is repaired and
placed on the vehicle.
After you replace the low pressure
tire with the spare tire, the TPMS
malfunction indicator may illuminate
after a few minutes because the
TPMS sensor mounted on the spare
wheel is not initiated.
Once the low pressure tire is inflated
again to the recommended pressure
and installed on the vehicle or the
TPMS sensor mounted on the
replaced spare wheel is initiated by
an authorized Kia dealer, the TPMS
malfunction indicator and the low tire
pressure telltale will turn off within a
few minutes of driving.
If the indicator has not disappeared
after a few minutes of driving, please
visit an authorized Kia dealer.If an original mounted tire is replaced
with the spare tire, the TPMS sensor
on the replaced spare wheel should
be initiated and the TPMS sensor on
the original mounted wheel should be
deactivated. If the TPMS sensor on
the original mounted wheel located in
the spare tire carrier still activates,
the tire pressure monitoring system
may not operate properly. Have the
tire with TPMS serviced or replaced
by an authorized Kia dealer.
CAUTION- Repair Agents
Never use a puncture-repairing
agent not approved by Kia torepair and/or inflate a low pres-sure tire. The sealant notapproved by Kia may damagethe tire pressure sensor.
Page 485 of 490
I5
Index
In case of an emergency while driving............................7-3If engine stalls while driving ........................................7-3
If the engine stalls at a crossroad or crossing ..............7-3
If you have a flat tire while driving ..............................7-3
Instrument cluster ..........................................................4-53 Gauges ........................................................................\
4-55
Instrument cluster control ..........................................4-54
LCD window control ..................................................4-54
Transaxle shift indicator ............................................4-58
Instrument panel overview ..............................................2-6
Interior features............................................................4-131 Clothes hanger ..........................................................4-135
Covering shelf (5 door) ............................................4-137
Cup holder ................................................................4-131
Floor mat anchor(s) ..................................................4-136
Power outlet ..............................................................4-133
Seat warmer ..............................................................4-132
Shopping bag holder ................................................4-136
Sunvisor ....................................................................4-13\
1
USB charger ..............................................................4-134
Interior light ..................................................................4-98 Automatic turn off function ........................................4-98
Glove box lamp ........................................................4-101
Luggage room lamp ..................................................4-101
Map lamp ....................................................................4-98\
Room lamp ..................................................................4-99
Vanity mirror lamp ....................................................4-102
Interior overview ............................................................2-5 Key positions ..................................................................6-6
Ignition switch position ................................................6-6
Keys ........................................................................\
........4-4 Key operations ..............................................................4-4
Record your key number ..............................................4-4
LCD windows ................................................................4-60 LCD modes (for Type B cluster) ................................4-65
Over view ....................................................................4-60\
Service mode ..............................................................4-66
User settings mode (for Type B cluster) ....................4-66
Light bulbs ....................................................................8-75\
Back-up lamp bulb replacement (4 door) ..................8-94
Back-up lamp bulb replacement (5 door) ..................8-89
Bulb replacement precaution ......................................8-75
DRL (Bulb type) bulb replacement ............................8-85
Front fog lamp bulb replacement................................8-84
Front turn signal lamp bulb replacement (Headlamp Type A) ..................................................8-81
Front turn signal lamp bulb replacement (Headlamp Type B) ..................................................8-83
Glove box lamp bulb replacement ..............................8-99
Headlamp (Low/High beam) bulb replacement (Headlamp Type B) ..................................................8-82K
L
Page 489 of 490
I9
Index
Recommended cold tire inflation pressures................8-45
Snow tires ..................................................................8-57
Summer tires ..............................................................8-57
Tire care ......................................................................8-\
45
Tire maintenance ........................................................8-50
Tire pressure................................................................8-46
Tire replacement ........................................................8-49
Tire rotation ................................................................8-47
Tire sidewall labeling..................................................8-50
Tire traction ................................................................8-50
Wheel alignment and tire balance ..............................8-48
Wheel replacement ....................................................8-50
Towing ........................................................................\
..7-36 Emergency towing ......................................................7-37
Removable towing hook (Front) ................................7-37
Towing service ............................................................7-36
Trunk (4 door)................................................................4-22 Closing the trunk ........................................................4-22
Emergency trunk safety release ..................................4-23
Opening the trunk ......................................................4-22
Vehicle break-in process ..................................................1-6
Vehicle certificationlabel ..............................................9-10
Vehicle data collection and event data recorders ............1-7
Vehicle identification number (VIN) ............................9-10
Vehicle load limit ..........................................................6-65 Certification label ......................................................6-68
Tire and loading information label ............................6-65
Vehicle weight ..............................................................6-70 Base curb weight ........................................................6-70
Cargo weight ..............................................................6-70
GAW (Gross axle weight) ..........................................6-70
GAWR (Gross axle weight rating) ............................6-70
GVW (Gross vehicle weight) ....................................6-70
GVWR (Gross vehicle weight rating) ........................6-70
Vehicle curb weight ....................................................6-70
Warning and indicator lights..........................................4-74 Indicator lights ............................................................4-82
Warning lights ............................................................4-74
Washer fluid ..................................................................8-33 Checking the washer fluid level ................................8-33
Weight/volume ................................................................9-6
Windows ........................................................................\
4-31 Manual windows ........................................................4-36
Power windows ..........................................................4-32
Windshield defrosting and defogging..........................4-123 Automatic climate control system ............................4-124
Defogging logic ........................................................4-125
Manual climate control system ................................4-123
V
W