Page 38 of 630
If the vehicle security alarm is armed and the battery
becomes disconnected, the vehicle security alarm will
remain armed when the battery is reconnected; the exterior
lights will flash, and the horn will sound. If this occurs,
disarm the vehicle security alarm.
Rearming Of The System
If something triggers the alarm, and no action is taken to
disarm it, the vehicle security alarm will turn the horn off
after 29 seconds, five seconds between cycles, up to eight
cycles if the trigger remains active and the vehicle security
alarm will rearm itself.
Security System Manual Override
The vehicle security alarm will not arm if you lock the
doors using the manual door lock plunger.
Tamper Alert
If something has triggered the vehicle security alarm in
your absence, the horn will sound three times and the
exterior lights will blink three times when you disarm the
vehicle security alarm. Check the vehicle for tampering.
DOORS
Manual Door Locks
The power door locks can be manually locked from inside
the vehicle by using the door lock knob. To lock each door,
push the door lock knob on each door trim panel down-
ward. To unlock the front doors, pull the inside door
handle to the first detent. To unlock the rear doors, pull the
door lock knob on the door trim panel upward. If the lock
knob is down when the door is closed, the door will lock.
Therefore, make sure the key fob is not inside the vehicle
before closing the door.
NOTE:Manually locking the vehicle will not arm the
vehicle security alarm.
Page 58 of 630
Rear Heated Seats — If Equipped
On some models, the two rear outboard seats may be
equipped with heated seats. There are two heated seat
switches that allow the rear passengers to operate the seats
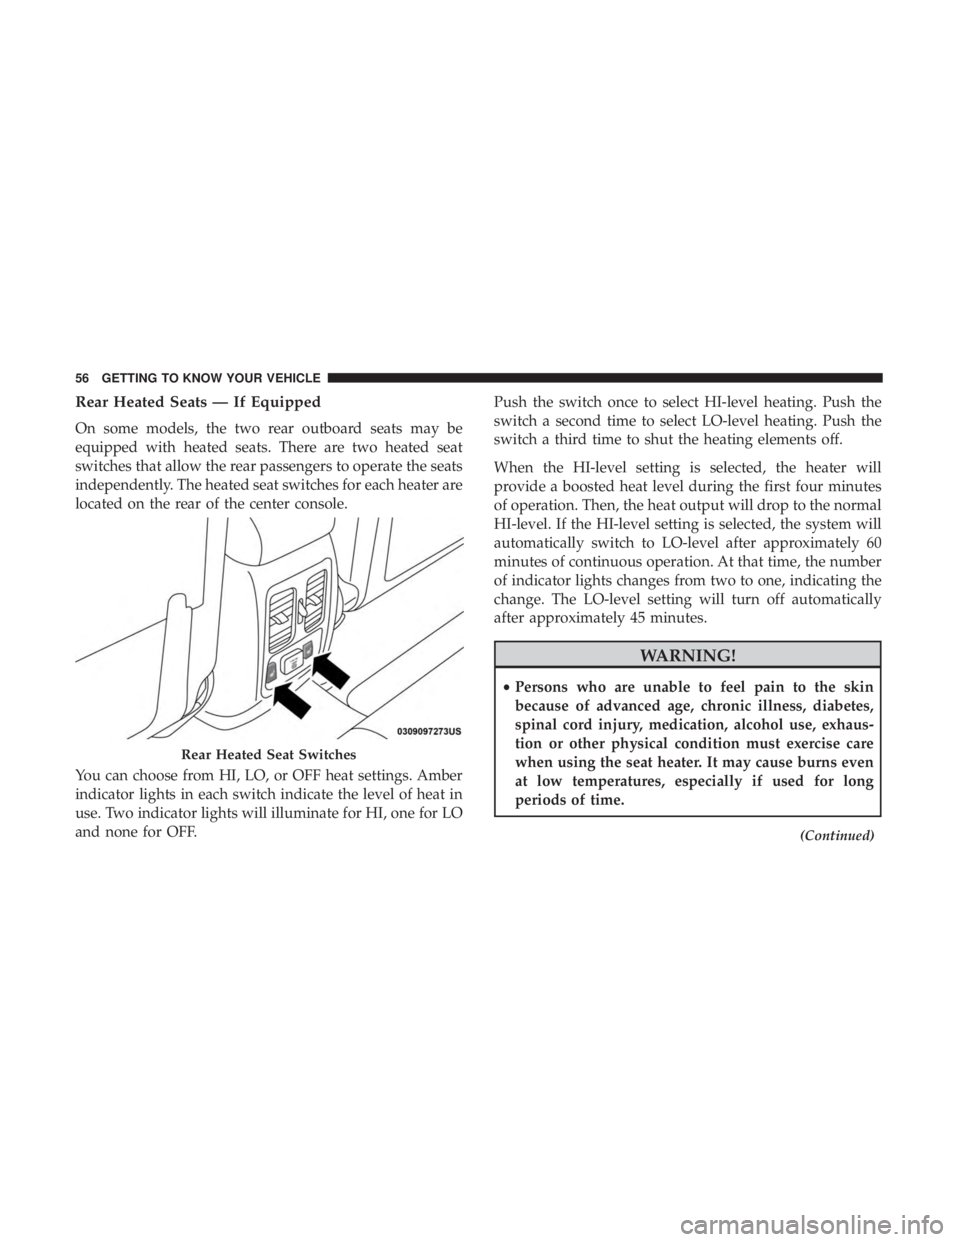
independently. The heated seat switches for each heater are
located on the rear of the center console.
You can choose from HI, LO, or OFF heat settings. Amber
indicator lights in each switch indicate the level of heat in
use. Two indicator lights will illuminate for HI, one for LO
and none for OFF.Push the switch once to select HI-level heating. Push the
switch a second time to select LO-level heating. Push the
switch a third time to shut the heating elements off.
When the HI-level setting is selected, the heater will
provide a boosted heat level during the first four minutes
of operation. Then, the heat output will drop to the normal
HI-level. If the HI-level setting is selected, the system will
automatically switch to LO-level after approximately 60
minutes of continuous operation. At that time, the number
of indicator lights changes from two to one, indicating the
change. The LO-level setting will turn off automatically
after approximately 45 minutes.
Page 69 of 630
WARNING!(Continued)
•Do not place anything on the steering wheel that
insulates against heat, such as a blanket or steering
wheel covers of any type and material. This may
cause the steering wheel heater to overheat.
MIRRORS
Inside Day/Night Mirror — If Equipped
The mirror head can be adjusted up, down, left, and right
for various drivers. The mirror should be adjusted to center
on the view through the rear window.
Headlight glare from vehicles behind you can be reduced
by moving the small control under the mirror to the night
position (toward the rear of the vehicle). The mirror should
be adjusted while set in the day position (toward the
windshield).
Automatic Dimming Mirror — If Equipped
The mirror head can be adjusted up, down, left, and right
for various drivers. The mirror should be adjusted to center
on the view through the rear window.
Page 70 of 630
This mirror automatically adjusts for headlight glare from
vehicles behind you.
NOTE:The Automatic Dimming Mirror feature is disabled
when the vehicle is in REVERSE to improve the driver ’s
rear view.
You can turn the feature on or off by pushing the button at
the base of the mirror. A light in the button will illuminate
to indicate when the dimming feature is activated.
Page 100 of 630
Auto-Down Feature
The driver door power window switch and the front and
rear passenger doors window switches have an Auto-
Down feature.
Push the window switch down for half a second and
release. The window will go down automatically.
To stop the window from going all the way down during
the Auto-Down operation, pull up or push down on the
switch briefly.
To open the window part way (manually), push the
window switch down briefly and release.
Auto-Up Feature With Anti-Pinch Protection
Lift the window switch up, for a short period of time, and
release and the window will go up automatically.
To stop the window from going all the way up during the
Auto-Up operation, push down on the switch briefly.
To close the window part way, lift the window switch
briefly and release it when you want the window to stop.NOTE:
•
If the window runs into any obstacle during auto-
closure, it will reverse direction and then go back down.
Remove the obstacle and use the window switch again
to close the window.
• Any impact due to rough road conditions may trigger
the auto-reverse function unexpectedly during auto-
closure. If this happens, pull the switch lightly and hold
to close the window manually.
Page 117 of 630
WARNING!(Continued)
•Place as much cargo as possible in front of the rear
axle. Too much weight or improperly placed weight
over or behind the rear axle can cause the rear of the
vehicle to sway.
• Do not pile luggage or cargo higher than the top of
the seatback. This could impair visibility or become
a dangerous projectile in a sudden stop or accident.
GARAGE DOOR OPENER — IF EQUIPPED
HomeLink replaces up to three hand-held transmitters that
operate devices such as garage door openers, motorized
gates, lighting or home security systems. The HomeLink
unit is powered by your vehicle’s 12 Volt battery.
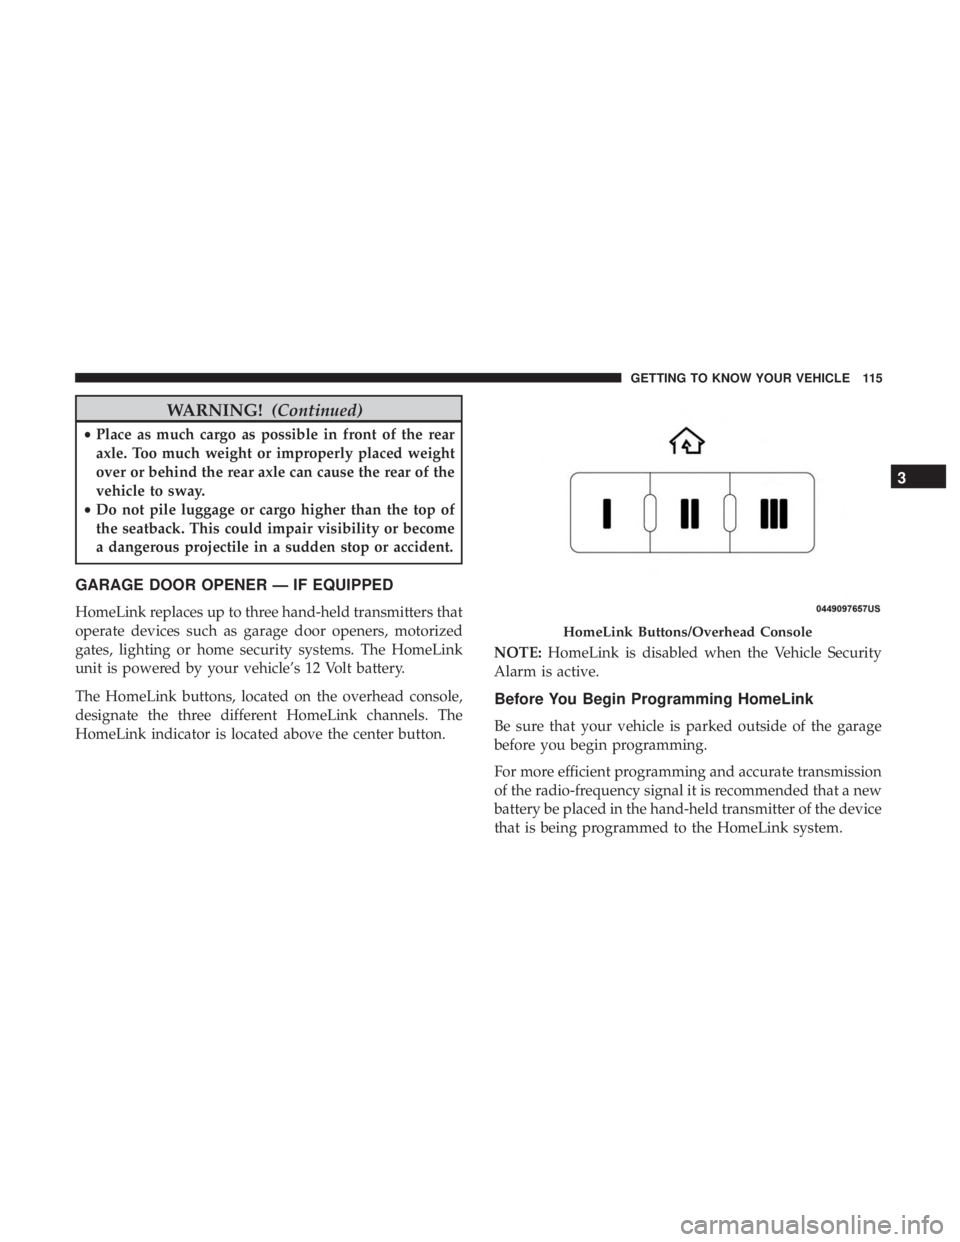
The HomeLink buttons, located on the overhead console,
designate the three different HomeLink channels. The
HomeLink indicator is located above the center button. NOTE:
HomeLink is disabled when the Vehicle Security
Alarm is active.
Before You Begin Programming HomeLink
Be sure that your vehicle is parked outside of the garage
before you begin programming.
For more efficient programming and accurate transmission
of the radio-frequency signal it is recommended that a new
battery be placed in the hand-held transmitter of the device
that is being programmed to the HomeLink system.
Page 122 of 630
Using HomeLink
To operate, push and release the programmed HomeLink
button. Activation will now occur for the programmed
device (i.e. garage door opener, gate operator, security
system, entry door lock, home/office lighting, etc.). The
hand-held transmitter of the device may also be used at
any time.
Security
It is advised to erase all channels before you sell or turn in
your vehicle.
To do this, push and hold the two outside buttons for 20
seconds until the orange indicator flashes. Note that all
channels will be erased. Individual channels cannot be
erased.
The HomeLink Universal Transceiver is disabled when the
Vehicle Security Alarm is active.
Troubleshooting Tips
If you are having trouble programming HomeLink, here
are some of the most common solutions:
•Replace the battery in the Garage Door Opener hand-
held transmitter. •
Push the LEARN button on the Garage Door Opener to
complete the training for a Rolling Code.
• Did you unplug the device for programming and re-
member to plug it back in?
If you have any problems, or require assistance, please
call toll-free 1-800-355-3515 or, on the Internet at
HomeLink.com for information or assistance.
Page 151 of 630
If the light remains on when the parking brake has been
disengaged, and the fluid level is at the full mark on the
master cylinder reservoir, it indicates a possible brake
hydraulic system malfunction or that a problem with the
Brake Booster has been detected by the Anti-Lock Brake
System (ABS) / Electronic Stability Control (ESC) system.
In this case, the light will remain on until the condition has
been corrected. If the problem is related to the brake
booster, the ABS pump will run when applying the brake,
and a brake pedal pulsation may be felt during each stop.
The dual brake system provides a reserve braking capacity
in the event of a failure to a portion of the hydraulic
system. A leak in either half of the dual brake system is
indicated by the Brake Warning Light, which will turn on
when the brake fluid level in the master cylinder has
dropped below a specified level.
The light will remain on until the cause is corrected.
NOTE:The light may flash momentarily during sharp
cornering maneuvers, which change fluid level conditions.
The vehicle should have service performed, and the brake
fluid level checked.
If brake failure is indicated, immediate repair is necessary.