Page 225 of 630
tank before resetting the system and starting the engine.
If there are no fuel leaks or damage to the vehicle electrical
devices (e.g. headlights) after an accident, reset the system
by following the procedure described below.
Enhanced Accident Response System Reset
Procedure
In order to reset the Enhanced Accident Response System
functions after an event, the ignition switch must be
changed from ignition START or ON/RUN to ignition OFF.
Carefully check the vehicle for fuel leaks in the engine
compartment and on the ground near the engine compart-
ment and fuel tank before resetting the system and starting
the engine.
Maintaining Your Air Bag System
Page 249 of 630

WARNING!(Continued)
•ALWAYS make sure objects cannot fall or slide into
the driver ’s side floor area when the vehicle is
moving. Objects can become trapped under accelera-
tor, brake, or clutch pedals and could cause a loss of
vehicle control.
• NEVER place any objects under the floor mat (e.g.,
towels, keys, etc.). These objects could change the
position of the floor mat and may cause interference
with the accelerator, brake, or clutch pedals.
• If the vehicle carpet has been removed and re-
installed, always properly attach carpet to the floor
and check the floor mat fasteners are secure to the
vehicle carpet. Fully depress each pedal to check for
interference with the accelerator, brake, or clutch
pedals then re-install the floor mats.
• It is recommended to only use mild soap and water
to clean your floor mats. After cleaning, always check
your floor mat has been properly installed and is
secured to your vehicle using the floor mat fasteners
by lightly pulling mat.
Periodic Safety Checks You Should Make Outside
The Vehicle
Tires
Examine tires for excessive tread wear and uneven wear
patterns. Check for stones, nails, glass, or other objects
lodged in the tread or sidewall. Inspect the tread for cuts
and cracks. Inspect sidewalls for cuts, cracks, and bulges.
Check the wheel nuts for tightness. Check the tires (includ-
ing spare) for proper cold inflation pressure.
Lights
Have someone observe the operation of brake lights and
exterior lights while you work the controls. Check turn
signal and high beam indicator lights on the instrument
panel.
Door Latches
Check for proper closing, latching, and locking.
Fluid Leaks
Check area under the vehicle after overnight parking for fuel,
coolant, oil, or other fluid leaks. Also, if gasoline fumes are
detected or if fuel, or brake fluid leaks are suspected. The
cause should be located and corrected immediately.
5
SAFETY 247
Page 280 of 630

The system requires that the engine be running for all
changes. When lowering the vehicle all of the doors,
including the liftgate, must be closed. If a door is opened at
any time while the vehicle is lowering the change will not
be completed until the open door(s) is/are closed.
The Quadra-Lift air suspension system uses a lifting and
lowering pattern which keeps the headlights from incor-
rectly shining into oncoming traffic. When raising the
vehicle, the rear of the vehicle will move up first and then
the front. When lowering the vehicle, the front will move
down first and then the rear.
After the engine is turned off, it may be noticed that the air
suspension system operates briefly, this is normal. The
system is correcting the position of the vehicle to ensure a
proper appearance.
To assist with changing a spare tire, the Quadra-Lift air
suspension system has a feature which allows the auto-
matic leveling to be disabled. Refer to “Uconnect Settings”
in “Multimedia” for further information.
For further information refer to “Driving Tips” in “Starting
And Operating” section.NOTE:
If equipped with a touch screen radio all enabling/
disabling of air suspension features must be done through
the radio. Refer to “Uconnect Settings” in “Multimedia” for
further information.
Page 285 of 630
POWER STEERING
The electric power steering system will give you good
vehicle response and increased ease of maneuverability in
tight spaces. The system will vary its assist to provide light
efforts while parking and good feel while driving. If the
electric steering system experiences a fault that prevents it
from providing assist, you will still have the ability to steer
the vehicle manually.
6
STARTING AND OPERATING 283
Page 291 of 630

The driver’s preferred units can be selected through the
instrument cluster display. Refer to “Getting To Know Your
Instrument Panel” for more information. The speed decre-
ment shown is dependant on the chosen speed unit of U.S.
(mph) or Metric (km/h):
U.S. Speed (mph)
•Pushing the SET (-)button once will result in a 1 mph
decrease in set speed. Each subsequent tap of the button
results in a decrease of 1 mph.
• If the button is continually pushed, the set speed will
continue to decrease until the button is released, then the
new set speed will be established.
Metric Speed (km/h)
• Pushing the SET (-)button once will result in a 1 km/h
decrease in set speed. Each subsequent tap of the button
results in a decrease of 1 km/h.
• If the button is continually pushed, the set speed will
continue to decrease until the button is released, then the
new set speed will be established.
To Accelerate For Passing
Press the accelerator as you would normally. When the
pedal is released, the vehicle will return to the set speed.
Using Speed Control On Hills
The transmission may downshift on hills to maintain the
vehicle set speed.
NOTE: The Speed Control system maintains speed up and
down hills. A slight speed change on moderate hills is
normal.
On steep hills, a greater speed loss or gain may occur so it
may be preferable to drive without Speed Control.
Page 361 of 630

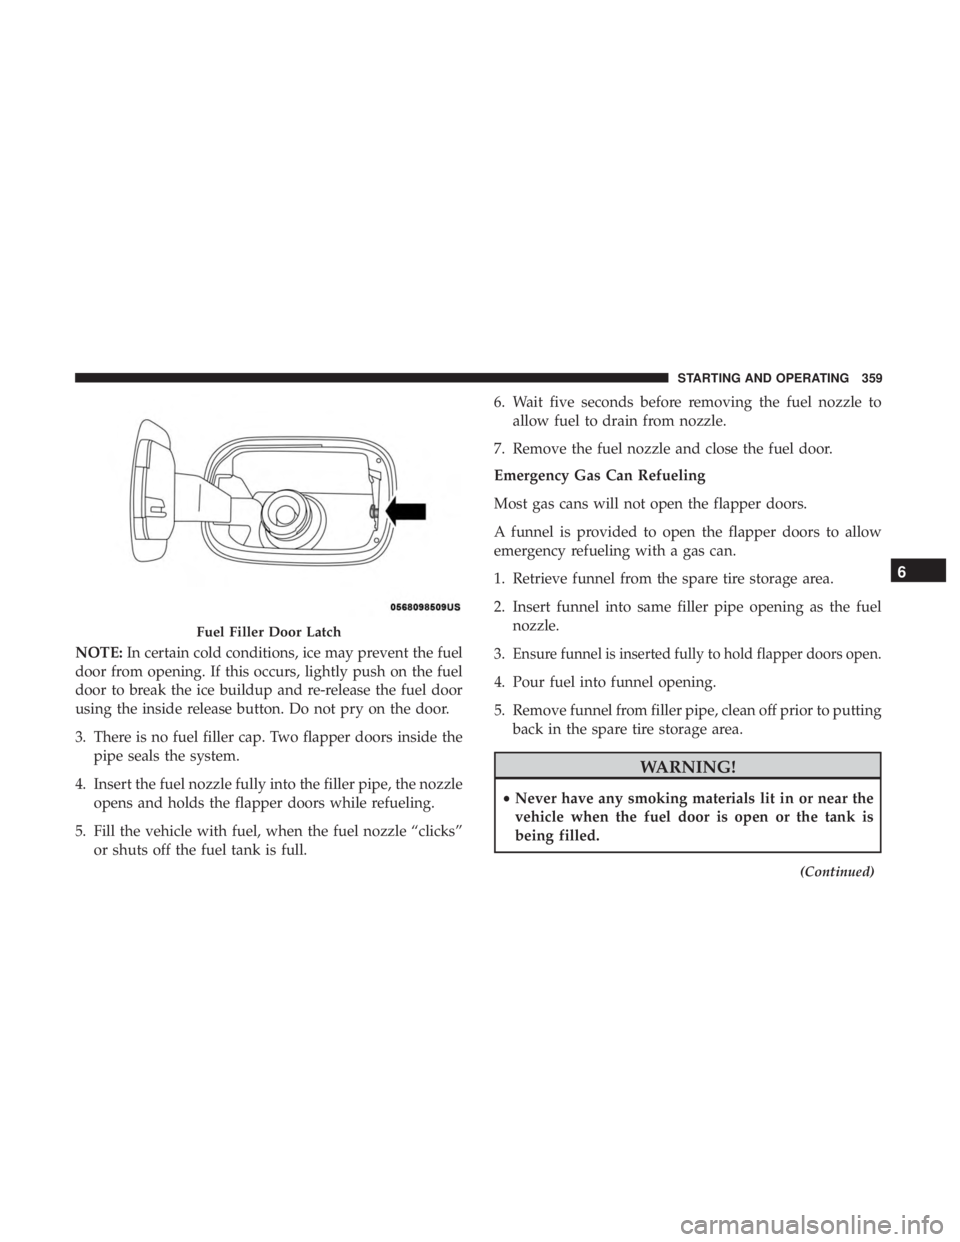
NOTE:In certain cold conditions, ice may prevent the fuel
door from opening. If this occurs, lightly push on the fuel
door to break the ice buildup and re-release the fuel door
using the inside release button. Do not pry on the door.
3. There is no fuel filler cap. Two flapper doors inside the pipe seals the system.
4. Insert the fuel nozzle fully into the filler pipe, the nozzle opens and holds the flapper doors while refueling.
5. Fill the vehicle with fuel, when the fuel nozzle “clicks” or shuts off the fuel tank is full. 6. Wait five seconds before removing the fuel nozzle to
allow fuel to drain from nozzle.
7. Remove the fuel nozzle and close the fuel door.
Emergency Gas Can Refueling
Most gas cans will not open the flapper doors.
A funnel is provided to open the flapper doors to allow
emergency refueling with a gas can.
1. Retrieve funnel from the spare tire storage area.
2. Insert funnel into same filler pipe opening as the fuel nozzle.
3.Ensure funnel is inserted fully to hold flapper doors open.
4. Pour fuel into funnel opening.
5. Remove funnel from filler pipe, clean off prior to putting back in the spare tire storage area.
Page 362 of 630
WARNING!(Continued)
•Never add fuel when the engine is running. This is
in violation of most state and federal fire regulations
and may cause the “Malfunction Indicator Light” to
turn on.
• A fire may result if fuel is pumped into a portable
container that is inside of a vehicle. You could be
burned. Always place fuel containers on the ground
while filling.
Page 389 of 630
If you stall or begin to lose forward motionwhile
climbing a steep hill, allow your vehicle to come to a stop
and immediately apply the brakes. Restart the engine, and
shift into REVERSE. Back slowly down the hill, allowing
the compression braking of the engine to help regulate
your speed. If the brakes are required to control vehicle
speed, apply them lightly and avoid locking or skidding
the tires.