2018 Hyundai Kona ESP
[x] Cancel search: ESPPage 114 of 497
3-36
Convenient features of your vehicle
•Use only approved portable
plastic fuel containers
designed to carry and store
petrol.
•Do not use matches or a
lighter and do not smoke or
leave a lit cigarette in your
vehicle whilst at a gas station,
especially during refuelling.
•Do not over-fill or top-off your
vehicle tank, which can cause
petrol spillage.
•If a fire breaks out during refu-
elling, leave the vicinity of the
vehicle, and immediately con-
tact the manager of the gas
station and then contact the
local fire department. Follow
any safety instructions they
provide.
•When refuelling, always move
the shift lever to the P (Park,
for dual clutch transmission)
or first gear or R (Reverse, for
manual transmission) posi-
tion, set the parking brake, and
place the ignition switch to the
LOCK/OFF position. Sparks
produced by electrical compo-
nents related to the engine can
ignite fuel
vapourscausing a
fire.
•When using an approved
portable fuel container, be
sure to place the container on
the ground prior to refuelling.
Static electricity discharge
from the container can ignite
fuel vapours causing a fire.
Once refuelling has begun,
contact between your bare
hand and the vehicle should
be maintained until the filling
is complete.
•Do not use mobile phones
whilst refuelling. Electric cur-
rent and/or electronic interfer-
ence from mobile phones can
potentially ignite fuel vapours
and cause a fire.
•Do not get back into a vehicle
once you have begun refu-
elling. You can generate a
build-up of static electricity by
touching, rubbing or sliding
against any item or fabric
capable of producing static
electricity.
Static electricity discharge
can ignite fuel vapours caus-
ing a fire. If you must re-enter
the vehicle, you should once
again eliminate potentially
dangerous static electricity
discharge by touching a metal
part of the vehicle, away from
the fuel filler neck, nozzle or
other petrol source, with your
bare hand.
Page 166 of 497
3-88
Convenient features of your vehicle
Turn signals and lane changesignals
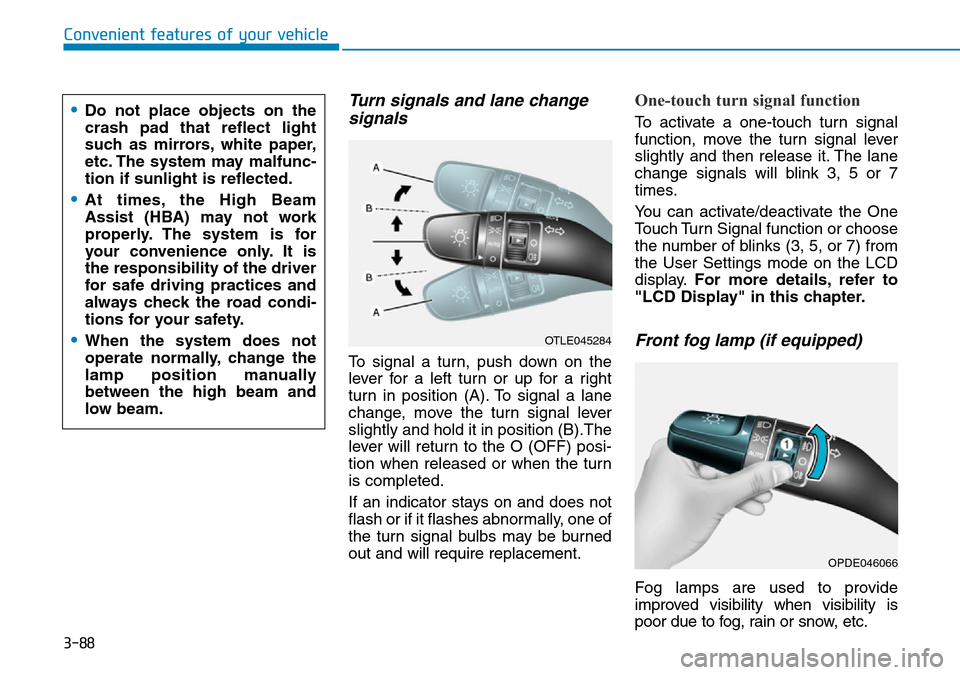
To signal a turn, push down on the
lever for a left turn or up for a right
turn in position (A). To signal a lane
change, move the turn signal lever
slightly and hold it in position (B).The
lever will return to the O (OFF) posi-
tion when released or when the turn
is completed.
If an indicator stays on and does not
flash or if it flashes abnormally, one of
the turn signal bulbs may be burned
out and will require replacement.
One-touch turn signal function
To activate a one-touch turn signal
function, move the turn signal lever
slightly and then release it. The lane
change signals will blink 3, 5 or 7
times.
You can activate/deactivate the One
Touch Turn Signal function or choose
the number of blinks (3, 5, or 7) from
the User Settings mode on the LCD
display. For more details, refer to
"LCD Display" in this chapter.
Front fog lamp (if equipped)
Fog lamps are used to provide
improved visibility when visibility is
poor due to fog, rain or snow, etc.
OPDE046066
OTLE045284
•Do not place objects on the
crash pad that reflect light
such as mirrors, white paper,
etc. The system may malfunc-
tion if sunlight is reflected.
•At times, the High Beam
Assist (HBA) may not work
properly. The system is for
your convenience only. It is
the responsibility of the driver
for safe driving practices and
always check the road condi-
tions for your safety.
•When the system does not
operate normally, change the
lamp position manually
between the high beam and
low beam.
Page 169 of 497
3-91
Convenient features of your vehicle
3
Daytime running light (DRL) (if equipped)
The Daytime Running Lights (DRL)
can make it easier for others to see
the front of your vehicle during the
day, especially after dawn and before
sunset.
The DRL system will turn the dedi-
cated lamp OFF when:
1. The headlamps or front fog lights
are in the ON position.
2. The position light switch is in the ON position.
3. The engine is turned off.
Headlamp levelling device (if equipped)
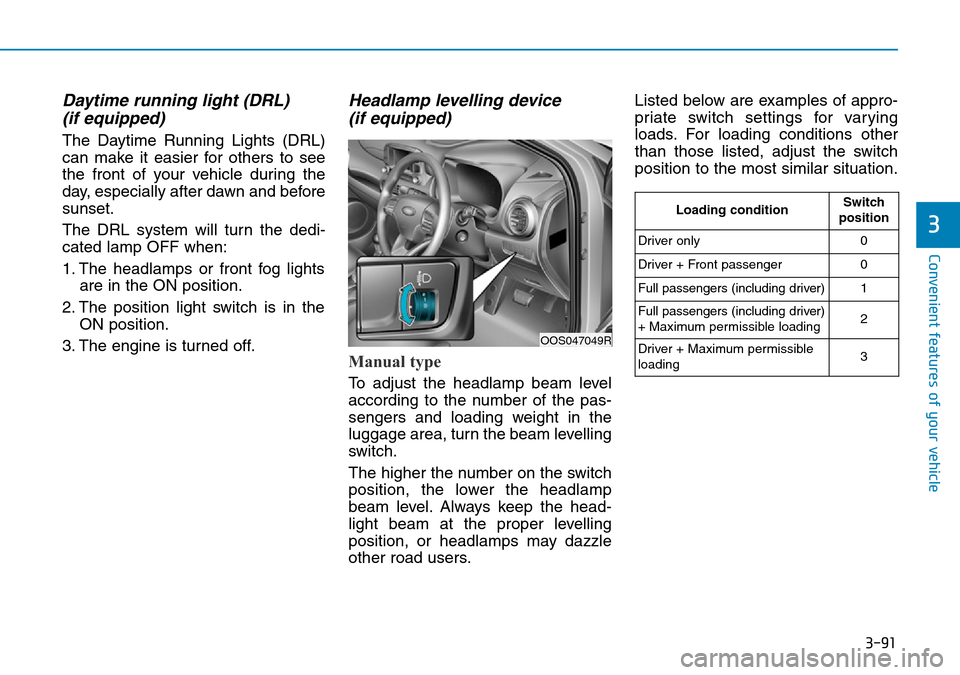
Manual type
To adjust the headlamp beam level
according to the number of the pas-
sengers and loading weight in the
luggage area, turn the beam levelling
switch.
The higher the number on the switch
position, the lower the headlamp
beam level. Always keep the head-
light beam at the proper levelling
position, or headlamps may dazzle
other road users. Listed below are examples of appro-
priate switch settings for varying
loads. For loading conditions other
than those listed, adjust the switch
position to the most similar situation.
OOS047049R
Loading conditionSwitch
position
Driver only0
Driver + Front passenger0
Full passengers (including driver)1
Full passengers (including driver)
+ Maximum permissible loading2
Driver + Maximum permissible
loading 3
Page 177 of 497
3-99
Convenient features of your vehicle
3
DRIVER ASSIST SYSTEM
Rear view monitor
(if equipped)
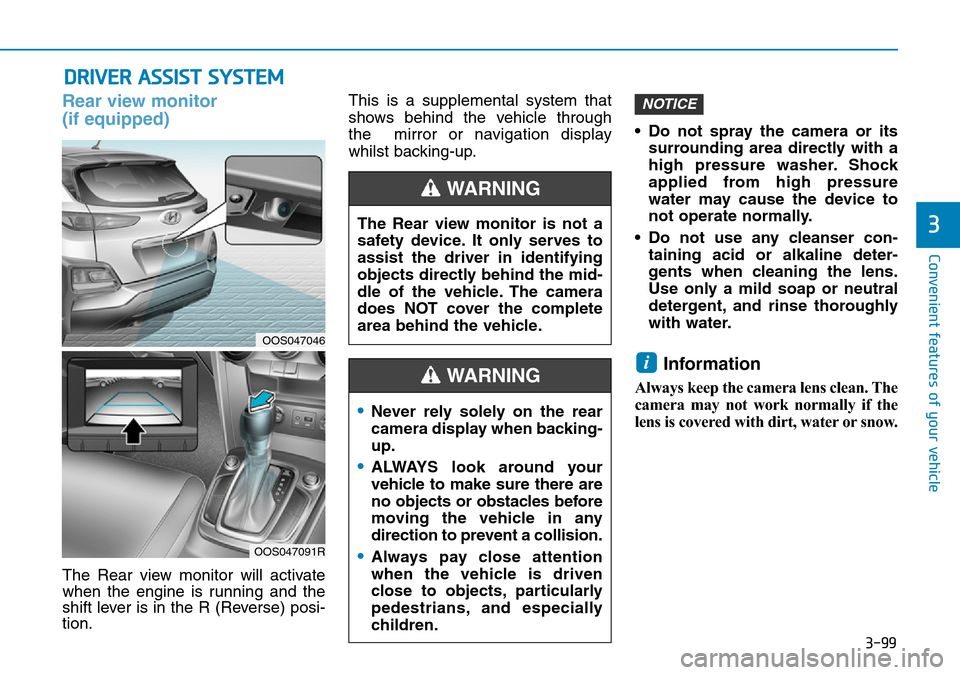
The Rear view monitor will activate
when the engine is running and the
shift lever is in the R (Reverse) posi-
tion.This is a supplemental system that
shows behind the vehicle through
the mirror or navigation display
whilst backing-up.
• Do not spray the camera or its
surrounding area directly with a
high pressure washer. Shock
applied from high pressure
water may cause the device to
not operate normally.
• Do not use any cleanser con- taining acid or alkaline deter-
gents when cleaning the lens.
Use only a mild soap or neutral
detergent, and rinse thoroughly
with water.
Information
Always keep the camera lens clean. The
camera may not work normally if the
lens is covered with dirt, water or snow.
i
NOTICE
The Rear view monitor is not a
safety device. It only serves to
assist the driver in identifying
objects directly behind the mid-
dle of the vehicle. The camera
does NOT cover the complete
area behind the vehicle.
WARNING
•Never rely solely on the rear
camera display when backing-
up.
•ALWAYS look around your
vehicle to make sure there are
no objects or obstacles before
moving the vehicle in any
direction to prevent a collision.
•Always pay close attention
when the vehicle is driven
close to objects, particularly
pedestrians, and especially
children.
WARNING
OOS047046
OOS047091R
Page 178 of 497
![Hyundai Kona 2018 Owners Manual - RHD (UK, Australia) 3-100
Convenient features of your vehicle
Parking Distance Warning
(Reverse) system (if equipped)
[A] : Sensor
The Parking Distance Warning
(Reverse) system assists the driver
during reverse movement Hyundai Kona 2018 Owners Manual - RHD (UK, Australia) 3-100
Convenient features of your vehicle
Parking Distance Warning
(Reverse) system (if equipped)
[A] : Sensor
The Parking Distance Warning
(Reverse) system assists the driver
during reverse movement](/manual-img/35/16232/w960_16232-177.png)
3-100
Convenient features of your vehicle
Parking Distance Warning
(Reverse) system (if equipped)
[A] : Sensor
The Parking Distance Warning
(Reverse) system assists the driver
during reverse movement of the vehi-
cle by chiming if any object is sensed
within the distance of 120 cm (50
inches) behind the vehicle.
This system is a supplemental sys-
tem that senses objects within the
range and location of the sensors, it
cannot detect objects in other areas
where sensors are not installed.
Operation of the ParkingDistance Warning (Reverse)system
Operating condition
• This system will activate when
backing up with the ignition switch
in the ON position. However, if vehi-
cle speed exceeds 3 mph (5 km/h),
the system may not detect objects.
• If vehicle speed exceeds 6 mph (10 km/h), the system will not warn you
even though objects are detected.
• When more than two objects are sensed at the same time, the clos-
est one will be recognised first.
•ALWAYS look around your vehi-
cle to make sure there are not
any objects or obstacles before
moving the vehicle in any direc-
tion to prevent a collision.
•Always pay close attention
when the vehicle is driven close
to objects, particularly pedestri-
ans, and especially children.
•Be aware that some objects
may not be visible on the
screen or be detected by the
sensors, due to the objects
distance, size or material, all of
which can limit the effective-
ness of the sensor.
WARNING
OOS047042
Page 182 of 497
![Hyundai Kona 2018 Owners Manual - RHD (UK, Australia) 3-104
Convenient features of your vehicle
Parking Distance Warning
(Reverse/Forward) system
(if equipped)
[A] : Rear Sensor, [B] : Front Sensor
The Parking Distance Warning
(Reverse/Forward) system a Hyundai Kona 2018 Owners Manual - RHD (UK, Australia) 3-104
Convenient features of your vehicle
Parking Distance Warning
(Reverse/Forward) system
(if equipped)
[A] : Rear Sensor, [B] : Front Sensor
The Parking Distance Warning
(Reverse/Forward) system a](/manual-img/35/16232/w960_16232-181.png)
3-104
Convenient features of your vehicle
Parking Distance Warning
(Reverse/Forward) system
(if equipped)
[A] : Rear Sensor, [B] : Front Sensor
The Parking Distance Warning
(Reverse/Forward) system assists
the driver during movement of the
vehicle by chiming if any object is
sensed within the distance of 100 cm
(39 inches) in front and 120 cm (47
inches) behind the vehicle.
This system is a supplemental sys-
tem that senses objects within the
range and location of the sensors, it
cannot detect objects in other areas
where sensors are not installed.
Operation of the ParkingDistance Warning(Reverse/Forward) system
Operating condition
• This system will activate when the
Parking Distance Warning
(Reverse/Forward) system button
is pressed with the engine running.
•ALWAYS look around your
vehicle to make sure there are
no objects or obstacles before
moving the vehicle in any
direction to prevent a collision.
•Always pay close attention
when the vehicle is driven
close to objects, particularly
pedestrians, and especially
children.
WARNING
OOS047136R
OOS047043
OOS047042
■ Front sensor
■Rear sensor
•Be aware that some objects
may not be visible on the
screen or be detected by the
sensors, due to the objects
distance, size or material, all
of which can limit the effec-
tiveness of the sensor.
Page 202 of 497
3-124
WINDSCREEN DEFROSTING AND DEFOGGING
Convenient features of your vehicle• For maximum windscreen defrost-ing, set the temperature control
knob to the highest temperature
setting and the fan control knob to
the highest fan speed. Select the
front defrost button on the climate
control display. After the engine
warm-up period, warm air will be
directed to the front windscreen.
• If warm air to the floor is desired whilst defrosting or defogging, set
the mode to the floor-defrost posi-
tion.
• Before driving, clear all snow and ice from the windscreen, rear win-
dow, outside rear view mirrors, and
all side windows.
• Clear all snow and ice from the bon- net and air inlet in the cowl grill to
improve heater and defroster effi-
ciency and to reduce the probability
of fogging up inside of the wind-
screen.
Information
If the engine temperature is still cold
after starting, then a brief engine warm
up period may be required for the
vented air flow to become warm or hot.
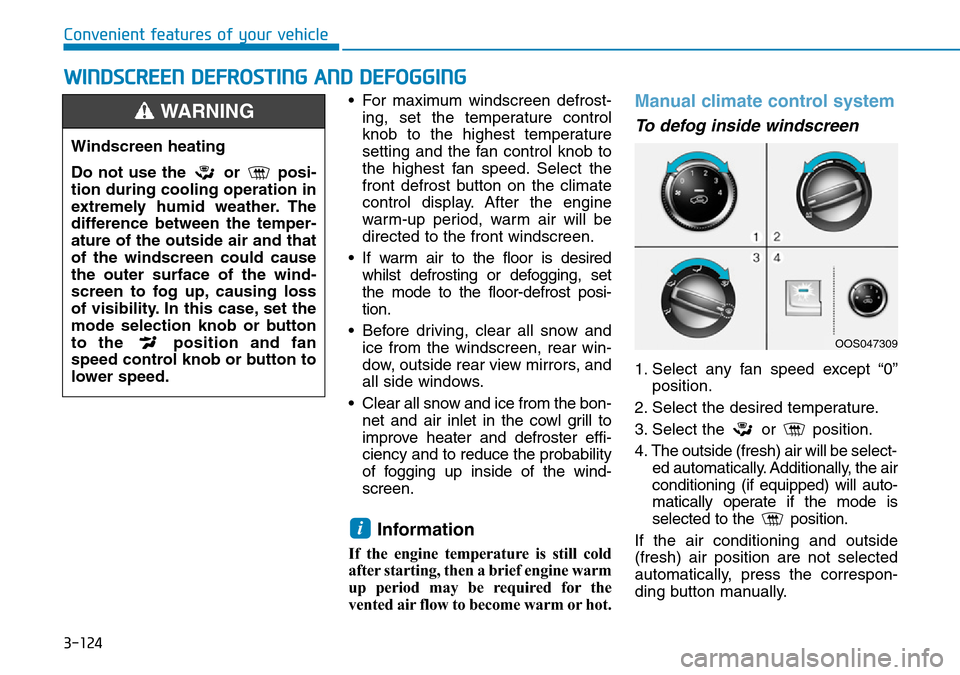
Manual climate control system
To defog inside windscreen
1. Select any fan speed except “0” position.
2. Select the desired temperature.
3. Select the or position.
4. The outside (fresh) air will be select- ed automatically. Additionally, the air
conditioning (if equipped) will auto-
matically operate if the mode is
selected to the position.
If the air conditioning and outside
(fresh) air position are not selected
automatically, press the correspon-
ding button manually.
i
Windscreen heating
Do not use the or posi-
tion during cooling operation in
extremely humid weather. The
difference between the temper-
ature of the outside air and that
of the windscreen could cause
the outer surface of the wind-
screen to fog up, causing loss
of visibility. In this case, set the
mode selection knob or button
to the position and fan
speed control knob or button to
lower speed.
WARNING
OOS047309
Page 216 of 497
3-138
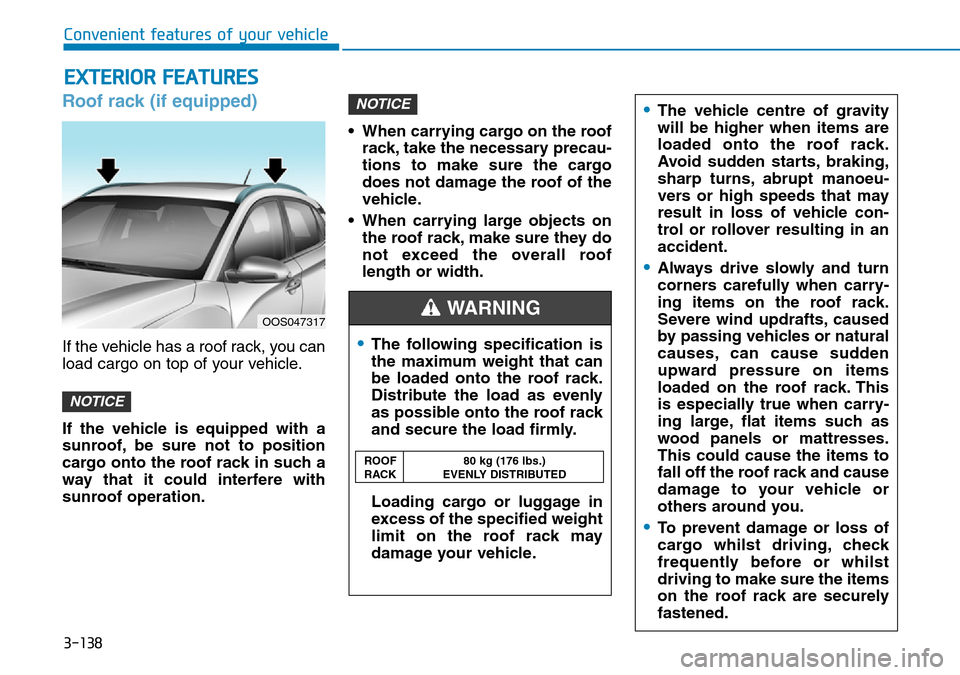
Roof rack (if equipped)
If the vehicle has a roof rack, you can
load cargo on top of your vehicle.
If the vehicle is equipped with a
sunroof, be sure not to position
cargo onto the roof rack in such a
way that it could interfere with
sunroof operation.• When carrying cargo on the roof
rack, take the necessary precau-
tions to make sure the cargo
does not damage the roof of the
vehicle.
• When carrying large objects on the roof rack, make sure they do
not exceed the overall roof
length or width.
NOTICE
NOTICE
EXTERIOR FEATURES
Convenient features of your vehicle
OOS047317
•The following specification is
the maximum weight that can
be loaded onto the roof rack.
Distribute the load as evenly
as possible onto the roof rack
and secure the load firmly.
Loading cargo or luggage in
excess of the specified weight
limit on the roof rack may
damage your vehicle.
•The vehicle centre of gravity
will be higher when items are
loaded onto the roof rack.
Avoid sudden starts, braking,
sharp turns, abrupt manoeu-
vers or high speeds that may
result in loss of vehicle con-
trol or rollover resulting in an
accident.
•Always drive slowly and turn
corners carefully when carry-
ing items on the roof rack.
Severe wind updrafts, caused
by passing vehicles or natural
causes, can cause sudden
upward pressure on items
loaded on the roof rack. This
is especially true when carry-
ing large, flat items such as
wood panels or mattresses.
This could cause the items to
fall off the roof rack and cause
damage to your vehicle or
others around you.
•To prevent damage or loss of
cargo whilst driving, check
frequently before or whilst
driving to make sure the items
on the roof rack are securely
fastened.
WARNING
ROOF 80 kg (176 lbs.)
RACK EVENLY DISTRIBUTED