2018 Hyundai Ioniq Electric format
[x] Cancel search: formatPage 115 of 541

3-30
Convenient features of your vehicle
Integrated HomeLink®Wireless
Control System
The HomeLink®Wireless Control
System can replace up to three hand-
held radio-frequency (RF) transmit-
ters with a single built-in device. This
innovative feature will learn the radio
frequency codes of most current
transmitters to operate devices such
as gate operators, garage door open-
ers, entry door locks, security sys-
tems, even home lighting. Both stan-
dard and rolling code-equipped trans-
mitters can be programmed by fol-
lowing the outlined procedures.
Additional HomeLink
®information
can be found at: www.homelink.com
or by calling 1-800-355-3515.
Retain the original transmitter of the
RF device you are programming for
use in other vehicles as well as for
future HomeLink
®programming. It is
also suggested that upon the sale of
the vehicle, the programmed
HomeLink
®buttons be erased for
security purposes.
Programming HomeLink®
Please note the following:
When programming a garage door opener, it is advised to park the
vehicle outside of the garage.
It is recommended that a new bat- tery be placed in the hand-held
transmitter of the device being pro-
grammed to HomeLink
®for quicker
training and accurate transmission
of the radio-frequency signal.
Some vehicles may require the POWER button to be placed in the
ACC (or "Accessories") position for
programming and/or operation of
HomeLink
®.
In the event that there are still pro- gramming difficulties or questions
after following the programming
steps listed below, contact
HomeLink
®at: www.homelink.com
or by calling 1-800-355-3515.
Before programming HomeLink
®
to a garage door opener or gate
operator, make sure people and
objects are out of the way of the
device to prevent potential harm
or damage. Do not use the
HomeLink
®with any garage door
opener that lacks the safety stop
and reverse features required by
U.S. federal safety standards (this
includes any garage door opener
model manufactured before April
1, 1982). A garage door that can-
not detect an object - signaling
the door to stop and reverse -
does not meet current U.S. feder-
al safety standards. Using a
garage door opener without
these features increases the risk
of serious injury or death.
WARNING
Page 118 of 541
3-33
Convenient features of your vehicle
3
Reprogramming a singleHomeLink®button
To program a new device to a previ-
ously trained HomeLink®button, fol-
low these steps:
1. Press and hold the desired HomeLink
®button. Do NOT
release until step 4 has been com-
pleted.
2. When the indicator light begins to flash slowly (after 20 seconds),
position the handheld transmitter 1
to 3 inches away from the
HomeLink
®surface.
3. Press and hold the handheld transmitter button. The HomeLink
®
indicator light will flash, first slowly
and then rapidly.
4. When the indicator light begins to flash rapidly, release both buttons.
5. Press and hold the just-trained HomeLink
®button and observe
the red Status Indicator LED. If the
indicator light stays on constantly,
programming is complete and
your new device should activate.
Erasing HomeLink®buttons
Individual buttons cannot be erased.
However, to erase all three pro-
grammed buttons:
1. Press and hold the two outer HomeLink
®buttons until the indi-
cator light begins to flash-after 20
seconds.
2. Release both buttons. Do not hold for longer than 30 seconds.
The Integrated HomeLink
®Wireless
Control System is now in the training
(learn) mode and can be pro-
grammed at any time following the
appropriate steps in the Programming
chapters above.
NVS
®is a registered trademark and
Z-Nav™ is a trademark of the Gentex
Corporation, Zeeland, Michigan.
HomeLink
®is a registered trademark
owned by Johnson Controls,
Incorporated, Milwaukee, Wisconsin.
FCC ID: NZLZTVHL3
IC: 4112A-ZTVHL3
Information
This device complies with Part 15 of
the FCC Rules.
Operation is subject to the following
three conditions:
1. This device may not cause harmful interference, and
2. This device must accept any interfer- ence received, including interference
that may cause undesired operation.
3. The transceiver has been tested and complies with FCC and Industry
Canada rules. Changes or modifica-
tions not expressly approved by the
party responsible for compliance
could void the user’s authority to
operate the device.
i
Page 124 of 541
3-39
Convenient features of your vehicle
3
Power Windows
The POWER button must be in the
ON position to be able to raise or
lower the windows. Each door has a
Power Window switch to control that
door’s window. The driver has a
Power Window Lock switch which
can block the operation of passenger
windows. The power windows will
operate for approximately 30 sec-
onds after the POWER button is
placed in the ACC or OFF position.
However, if the front doors are
opened, the Power Windows cannot
be operated even within the 30 sec-
ond period.
Information
• In cold and wet climates, power win-dows may not work properly due to
freezing conditions.
• While driving with the rear win- dows down or with the sunroof (if
equipped) opened (or partially
opened), your vehicle may demon-
strate a wind buffeting or pulsation
noise. This noise is normal and can
be reduced or eliminated by taking
the following actions. If the noise
occurs with one or both of the rear
windows down, partially lower both
front windows approximately 1 inch
(2.5 cm). If you experience the noise
with the sunroof open, slightly close
the sunroof.
Window opening and closing
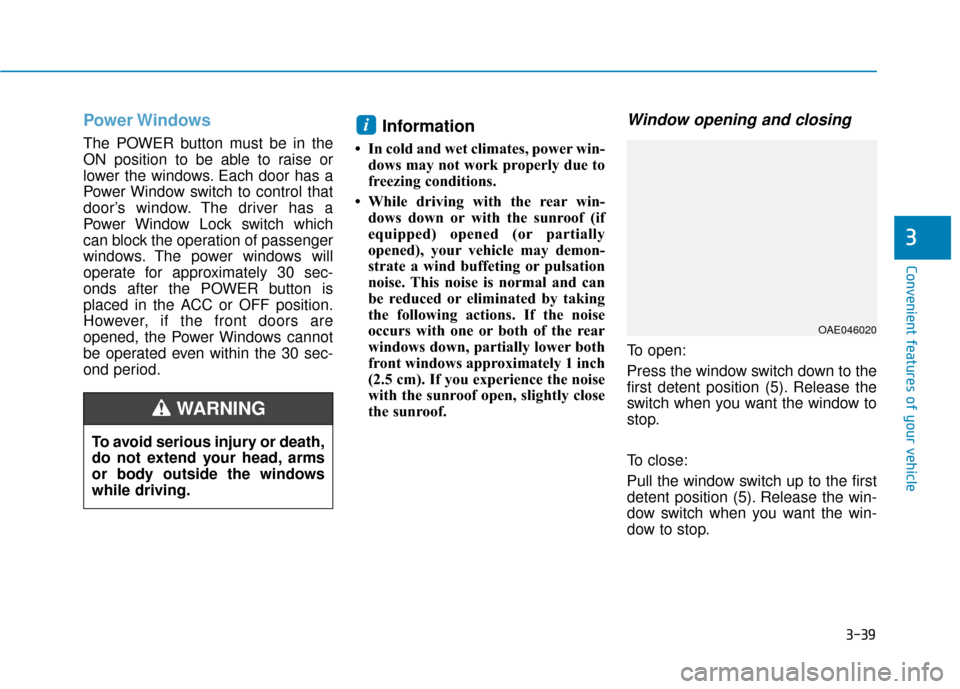
To open:
Press the window switch down to the
first detent position (5). Release the
switch when you want the window to
stop.
To close:
Pull the window switch up to the first
detent position (5). Release the win-
dow switch when you want the win-
dow to stop.
i
To avoid serious injury or death,
do not extend your head, arms
or body outside the windows
while driving.
WARNING
OAE046020
Page 126 of 541
3-41
Convenient features of your vehicle
3
Information
The automatic reverse feature is only
active when the "Auto Up" feature is
used by fully pulling up the switch to
the second detent.
Do not install any accessories on
the windows. The automatic
reverse feature may not operate.
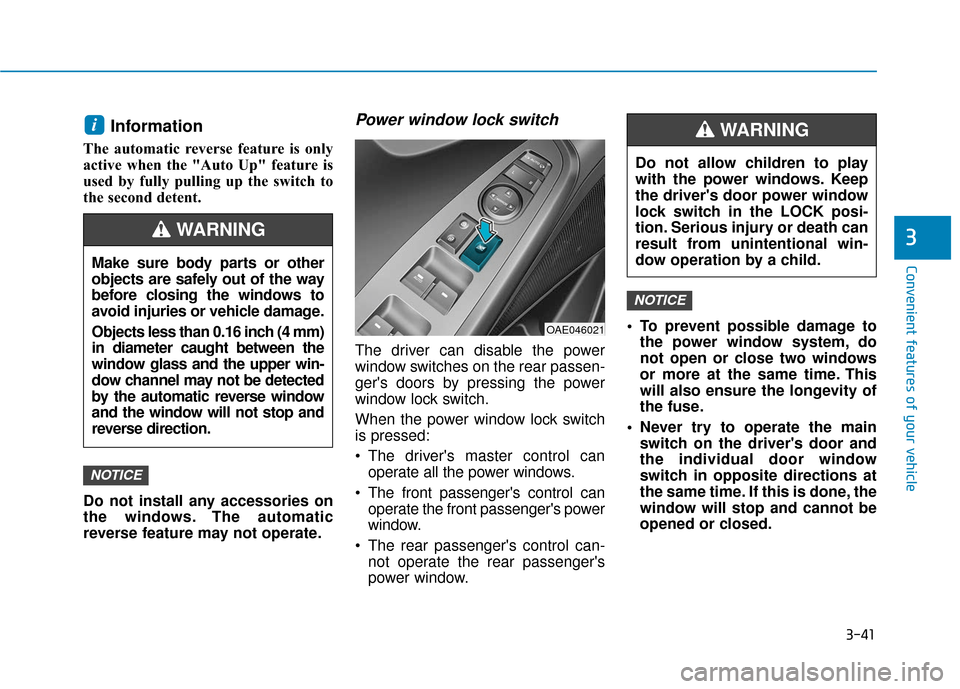
Power window lock switch
The driver can disable the power
window switches on the rear passen-
ger's doors by pressing the power
window lock switch.
When the power window lock switch
is pressed:
The driver's master control canoperate all the power windows.
The front passenger's control can operate the front passenger's power
window.
The rear passenger's control can- not operate the rear passenger's
power window. To prevent possible damage to
the power window system, do
not open or close two windows
or more at the same time. This
will also ensure the longevity of
the fuse.
Never try to operate the main switch on the driver's door and
the individual door window
switch in opposite directions at
the same time. If this is done, the
window will stop and cannot be
opened or closed.
NOTICE
NOTICE
i
OAE046021
Do not allow children to play
with the power windows. Keep
the driver's door power window
lock switch in the LOCK posi-
tion. Serious injury or death can
result from unintentional win-
dow operation by a child.
WARNING
Make sure body parts or other
objects are safely out of the way
before closing the windows to
avoid injuries or vehicle damage.
Objects less than 0.16 inch (4 mm)
in diameter caught between the
window glass and the upper win-
dow channel may not be detected
by the automatic reverse window
and the window will not stop and
reverse direction.
WARNING
Page 127 of 541
3-42
Convenient features of your vehicle
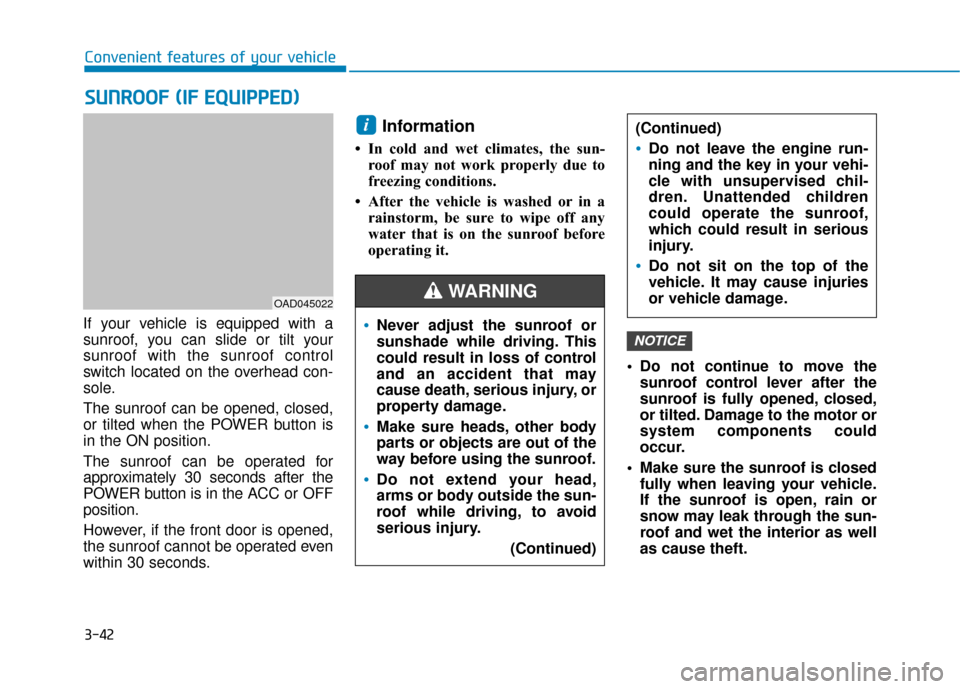
If your vehicle is equipped with a
sunroof, you can slide or tilt your
sunroof with the sunroof control
switch located on the overhead con-
sole.
The sunroof can be opened, closed,
or tilted when the POWER button is
in the ON position.
The sunroof can be operated for
approximately 30 seconds after the
POWER button is in the ACC or OFF
position.
However, if the front door is opened,
the sunroof cannot be operated even
within 30 seconds.
Information
• In cold and wet climates, the sun- roof may not work properly due to
freezing conditions.
• After the vehicle is washed or in a rainstorm, be sure to wipe off any
water that is on the sunroof before
operating it.
Do not continue to move thesunroof control lever after the
sunroof is fully opened, closed,
or tilted. Damage to the motor or
system components could
occur.
Make sure the sunroof is closed fully when leaving your vehicle.
If the sunroof is open, rain or
snow may leak through the sun-
roof and wet the interior as well
as cause theft.
NOTICE
i
S SU
U N
NR
RO
O O
OF
F
(
( I
IF
F
E
E Q
Q U
UI
IP
P P
PE
ED
D )
)
OAD045022
Never adjust the sunroof or
sunshade while driving. This
could result in loss of control
and an accident that may
cause death, serious injury, or
property damage.
Make sure heads, other body
parts or objects are out of the
way before using the sunroof.
Do not extend your head,
arms or body outside the sun-
roof while driving, to avoid
serious injury.
(Continued)
(Continued)
Do not leave the engine run-
ning and the key in your vehi-
cle with unsupervised chil-
dren. Unattended children
could operate the sunroof,
which could result in serious
injury.
Do not sit on the top of the
vehicle. It may cause injuries
or vehicle damage.
WARNING
Page 128 of 541
3-43
Convenient features of your vehicle
3
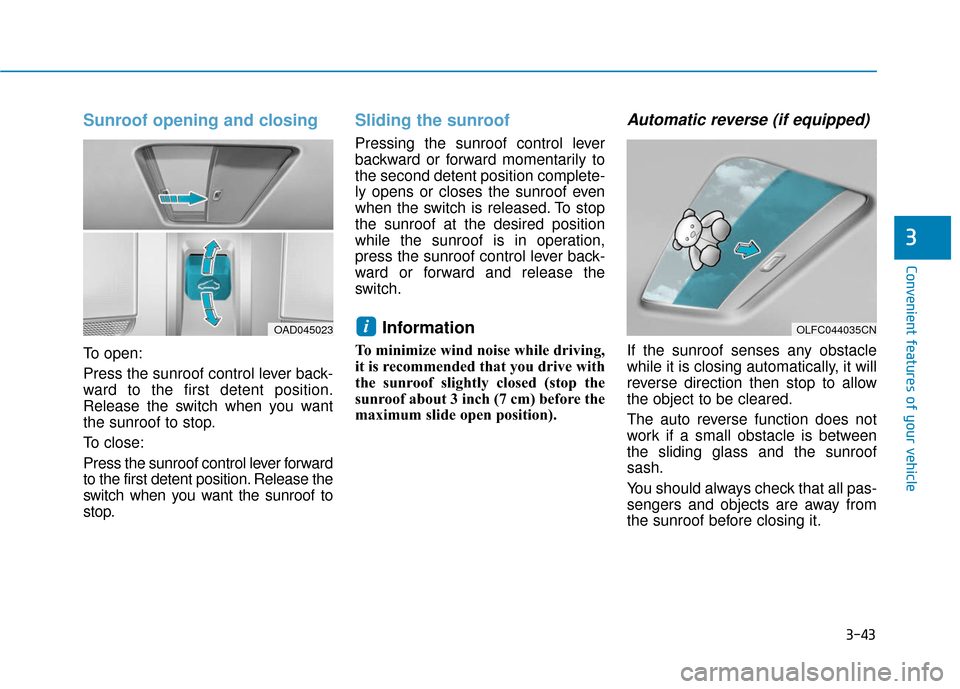
Sunroof opening and closing
To open:
Press the sunroof control lever back-
ward to the first detent position.
Release the switch when you want
the sunroof to stop.
To close:
Press the sunroof control lever forward
to the first detent position. Release the
switch when you want the sunroof to
stop.
Sliding the sunroof
Pressing the sunroof control lever
backward or forward momentarily to
the second detent position complete-
ly opens or closes the sunroof even
when the switch is released. To stop
the sunroof at the desired position
while the sunroof is in operation,
press the sunroof control lever back-
ward or forward and release the
switch.
Information
To minimize wind noise while driving,
it is recommended that you drive with
the sunroof slightly closed (stop the
sunroof about 3 inch (7 cm) before the
maximum slide open position).
Automatic reverse (if equipped)
If the sunroof senses any obstacle
while it is closing automatically, it will
reverse direction then stop to allow
the object to be cleared.
The auto reverse function does not
work if a small obstacle is between
the sliding glass and the sunroof
sash.
You should always check that all pas-
sengers and objects are away from
the sunroof before closing it.
iOAD045023OLFC044035CN
Page 130 of 541

3-45
Convenient features of your vehicle
3
Resetting the sunroof
Sunroof needs to be reset if the fol-
lowing occurs :
- Battery is discharged or discon-nected or the related fuse has been
replaced or disconnected
- The one-touch sliding function of the sunroof does not normally oper-
ate
Reset procedure :
1. Place the POWER button to the ON position or start the vehicle
( indicator ON). It is recom-
mended to reset the sunroof while
the vehicle is in the ready ( )
mode.
2. Push the control lever forward. The sunroof will close completely or tilt
depending on the condition of the
sunroof.
3. Release the control lever when the sunroof stops moving. 4. Push the control lever forward
about 10 seconds.
- When the sunroof is in the closed position :
The glass will tilt and slightly move up and down.
- When the sunroof is in the tilt position:
The glass will slightly move up and down.
Do not release the lever until the
operation is completed.
If you release the lever during opera-
tion, start the procedure again from
step 2.
5. Within 3 seconds, push and hold the control lever forward until the
sunroof operates as follows:
Tilt down → Slide Open → Slide
Close. Do not release the lever until the
operation is completed.
If you release the lever during opera-
tion, start the procedure again from
step 2.
6. Release the sunroof control lever
after all steps have completed. (The
sunroof system has been reset.)
Information
• If the sunroof is not reset when thevehicle battery is disconnected or
discharged, or the sunroof fuse is
blown, the sunroof may not operate
normally.
• For more detailed information, con- tact an authorized HYUNDAI deal-
er.
i
Page 134 of 541
3-49
Convenient features of your vehicle
3
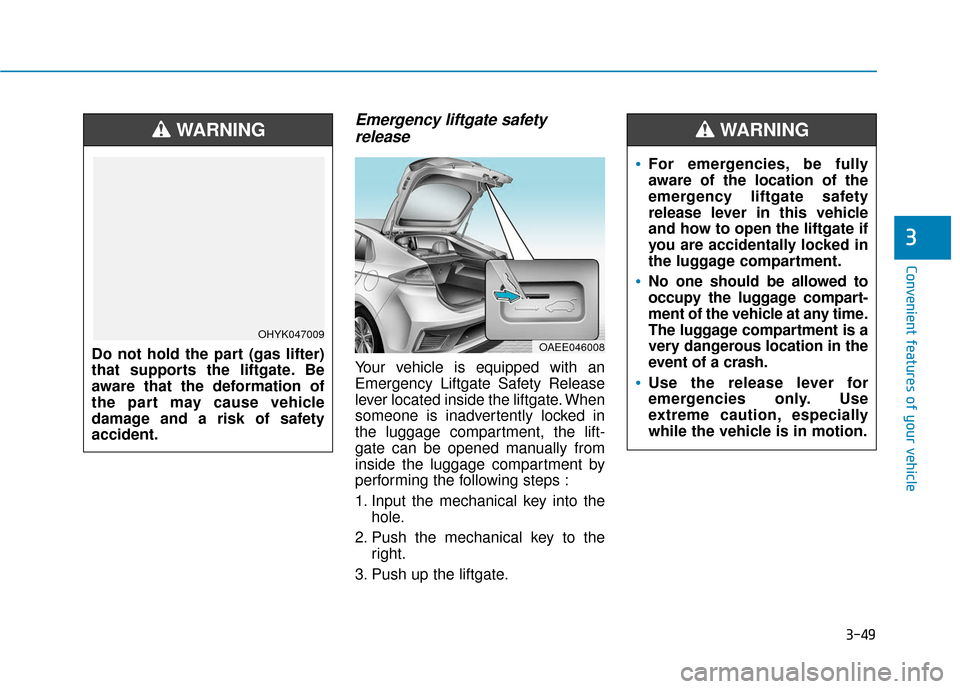
Emergency liftgate safetyrelease
Your vehicle is equipped with an
Emergency Liftgate Safety Release
lever located inside the liftgate. When
someone is inadvertently locked in
the luggage compartment, the lift-
gate can be opened manually from
inside the luggage compartment by
performing the following steps :
1. Input the mechanical key into the
hole.
2. Push the mechanical key to the right.
3. Push up the liftgate.
OAEE046008
For emergencies, be fully
aware of the location of the
emergency liftgate safety
release lever in this vehicle
and how to open the liftgate if
you are accidentally locked in
the luggage compartment.
No one should be allowed to
occupy the luggage compart-
ment of the vehicle at any time.
The luggage compartment is a
very dangerous location in the
event of a crash.
Use the release lever for
emergencies only. Use
extreme caution, especially
while the vehicle is in motion.
WARNING
Do not hold the part (gas lifter)
that supports the liftgate. Be
aware that the deformation of
the part may cause vehicle
damage and a risk of safety
accident.
WARNING
OHYK047009