2018 HONDA RIDGELINE outside air
[x] Cancel search: outside airPage 36 of 623

34
uuFor Safe Driving uSafety Checklist
Safe Driving
Safety Checklist
For the safety of you and your passenge rs, make a habit of checking these items
each time before you drive.
• After everyone has entered the vehicle, be sure all doors are closed and locked.
Locking the doors helps prevent an occupant from being ejected and an outsider
from unexpectedly opening a door.
2 Locking/Unlocking the Doors from the Inside P. 121
•Adjust your seat to a position suitable for driving. Be sure the front seats are
adjusted as far to the rear as possible while allowing the driver to control the
vehicle. Sitting too close to a front airbag can result in serious or fatal injury in a
crash.
2 Adjusting the Seats P. 163
•Adjust head restraints to the proper posi tion. Head restraints are most effective
when the center of the head restraint alig ns with the center of your head. Taller
persons should adjust their head restraint to the highest position.
2 Adjusting the front head restraint positions P. 168
•Always wear your seat belt, and make sure you wear it properly. Confirm that any
passengers are properly belted as well.
2 Fastening a Seat Belt P. 38
•Protect children by using seat belts or chil d seats according to a child’s age, height
and weight.
2 Child Safety P. 55
1Safety Checklist
If the door, trunk and/or tailgate open message
appears on the multi-inform ation display, the door,
the trunk and/or the tailgate is not completely closed.
Close all doors, the trunk and the tailgate tightly until
the message disappears.
Page 51 of 623

49
uuAirbags uSide Airbags
Continued
Safe Driving
Side Airbags
The side airbags help protect the torso and pelvis of the driver or a front passenger
during a moderate-to-severe side impact.
The side airbags are housed in the outside
edge of the driver’s and passenger’s seat-
backs.
Both are marked SIDE AIRBAG.
When the sensors detect a moderate-to-
severe side impact, the control unit signals the
side airbag on the impact side to immediately
inflate.
■Housing Locations
1 Side Airbags
Make sure you and your front seat passenger always
sit upright. Leaning into the path of a side airbag can
prevent the airbag from deploying properly and
increases your risk of serious injury.
Do not attach accessories on or near the side airbags.
They can interfere with the proper operation of the
airbags, or hurt someone if an airbag inflates.
Do not cover or replace the front seat-back covers
without consulting a dealer.
Improperly replac ing or covering front seat-back
covers can prevent your si de airbags from properly
deploying during a side impact.
Housing
Location
■Operation
When
inflated
Side
Airbag
Page 190 of 623

188
Controls
Climate Control System*
Using Automatic Climate Control
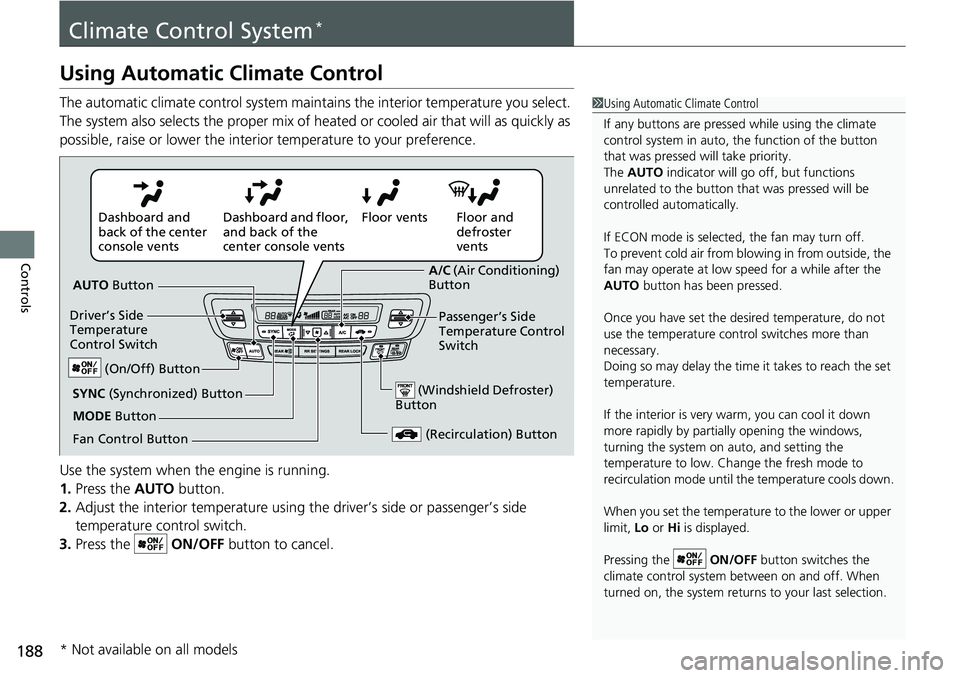
The automatic climate control system maintains the interior temperature you select.
The system also selects the proper mix of heated or cooled air that will as quickly as
possible, raise or lower the interior temperature to your preference.
Use the system when the engine is running.
1. Press the AUTO button.
2. Adjust the interior temperature using the driver’s side or passenger’s side
temperature control switch.
3. Press the ON/OFF button to cancel.1Using Automatic Climate Control
If any buttons are presse d while using the climate
control system in auto, the function of the button
that was pressed will take priority.
The AUTO indicator will go off, but functions
unrelated to the button th at was pressed will be
controlled automatically.
If ECON mode is selected, the fan may turn off.
To prevent cold air from bl owing in from outside, the
fan may operate at low speed for a while after the
AUTO button has been pressed.
Once you have set the de sired temperature, do not
use the temperature control switches more than
necessary.
Doing so may delay the time it takes to reach the set
temperature.
If the interior is very warm, you can cool it down
more rapidly by partial ly opening the windows,
turning the system on auto, and setting the
temperature to low. Change the fresh mode to
recirculation mode until the temperature cools down.
When you set the temperature to the lower or upper
limit, Lo or Hi is displayed.
Pressing the ON/OFF button switches the
climate control system be tween on and off. When
turned on, the system returns to your last selection.
Floor and
defroster
vents
Floor vents
Dashboard and floor,
and back of the
center console vents
Dashboard and
back of the center
console vents
AUTO Button
Driver’s Side
Temperature
Control Switch
(Recirculation) Button
Fan Control Button A/C
(Air Conditioning)
Button
Passenger’s Side
Temperature Control
Switch
(Windshield Defroster)
ButtonSYNC (Synchronized) Button
(On/Off) Button
MODE Button
* Not available on all models
Page 191 of 623

Continued189
uuClimate Control System*uUsing Automatic Climate Control
Controls
■Switching between the recirc ulation and fresh air modes
Press the button and switch the mode depending on environmental conditions.
Recirculation Mode (indicator on): Recirculates air from the vehicle’s interior through
the system.
Fresh Air Mode (indicator off): Maintains outside ventilation. Keep the system in
fresh air mode in normal situations.
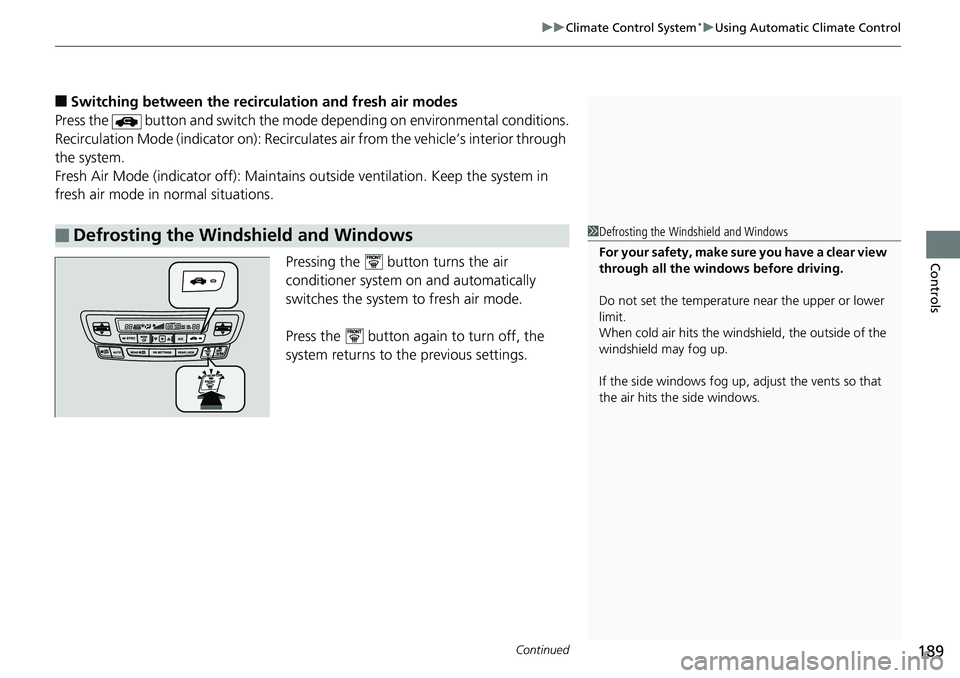
Pressing the button turns the air
conditioner system on and automatically
switches the system to fresh air mode.
Press the button again to turn off, the
system returns to the previous settings.
■Defrosting the Windshield and Windows1Defrosting the Windshield and Windows
For your safety, make sure you have a clear view
through all the windows before driving.
Do not set the temperatur e near the upper or lower
limit.
When cold air hits the windshield, the outside of the
windshield may fog up.
If the side windows fog up, adjust the vents so that
the air hits th e side windows.
Page 197 of 623

195Continued
Controls
Heating and Cooling System*
Using Vents, Heating and A/C
MODE ButtonChange airflow.
Floor and
defroster
vents
Floor vents
Dashboard
and floor
vents
Dashboard
vents
Fan Control Switch
Adjusts the fan speed.
ButtonTurns on the A/C, selects airflow from the dashboard vents,
and switches the mode to recirculation.
A/C ButtonPress to cool the interior or dehumidify while heating.
Windshield Defroster
Button
Turns on the A/C, selects airflow
from the defroster vents at the
base of the windshield, and
switches the mode to fresh air.
Temperature Control SwitchAdjusts the interior temperature.
(Recirculation) ButtonPress the button and switch the mode depending on
environmental conditions.
Recirculation Mode (indicator on):
Recirculates air from the vehicle’s interior through the system.
Fresh Air Mode (indicator off):
Maintains outside ventilation. Keep the system in fresh air mode in
normal situations.
(On/Off) Button
* Not available on all models
Page 200 of 623

uuHeating and Cooling System*uUsing Vents, Heating and A/C
198
Controls
Pressing the button turns the air
conditioning system on and automatically
switches the system to fresh air mode.
■To rapidly defrost the windows
1. Set the fan to the maximum speed.
2. Press the button.
3. Press the button.
4. Set the temperature to maximum heat.
■Defrosting the Windshield and Windows1Defrosting the Windshield and Windows
For your safety, make sure you have a clear view
through all the windows before driving.
Do not set the temperatur e near the upper or lower
limit.
When cold air hits the windshield, the outside of the
windshield may fog up.
If the side windows fog up, adjust the vents so that
the air hits th e side windows.
1To rapidly defrost the windows
After defrosting the windows, switch over to fresh air
mode.
If you keep the system in recirculation mode, the
windows may fog up from humidity. This impedes
visibility.
Page 409 of 623

Continued407
uuBluetooth ® HandsFreeLink ®u HFL Menus
Features
■Automatic collis ion notification
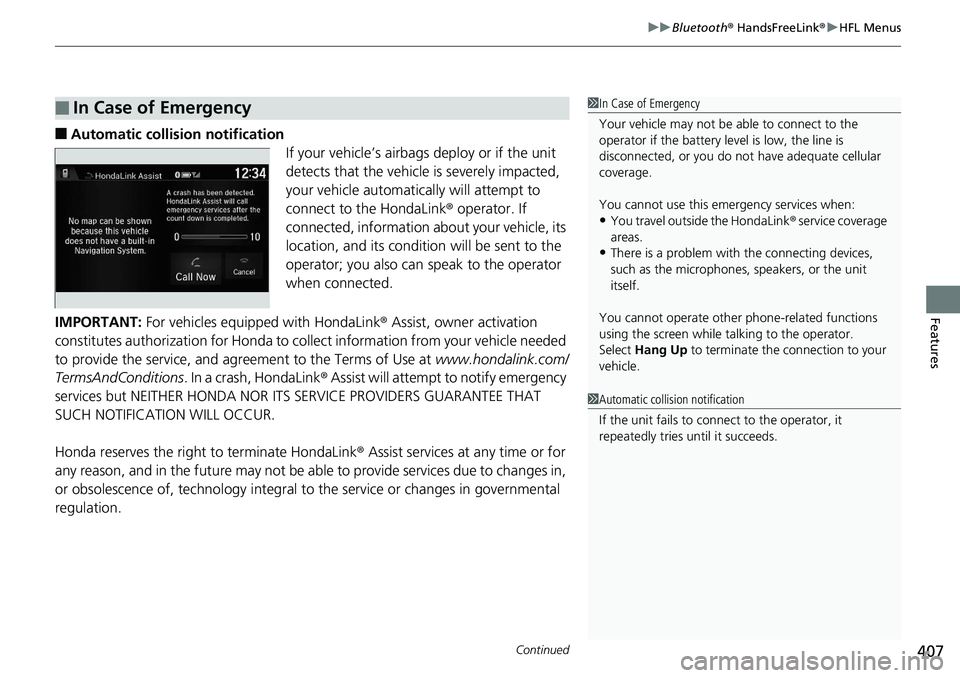
If your vehicle’s airbags deploy or if the unit
detects that the vehicle is severely impacted,
your vehicle automatically will attempt to
connect to the HondaLink ® operator. If
connected, information about your vehicle, its
location, and its condition will be sent to the
operator; you also can speak to the operator
when connected.
IMPORTANT: For vehicles equipped with HondaLink ® Assist, owner activation
constitutes authorization for Honda to collect information from your vehicle needed
to provide the service, and agreement to the Terms of Use at www.hondalink.com/
TermsAndConditions . In a crash, HondaLink ® Assist will attempt to notify emergency
services but NEITHER HONDA NOR I TS SERVICE PROVIDERS GUARANTEE THAT
SUCH NOTIFICATION WILL OCCUR.
Honda reserves the right to terminate HondaLink® Assist services at any time or for
any reason, and in the future may not be ab le to provide services due to changes in,
or obsolescence of, technology integral to the service or changes in governmental
regulation.
■In Case of Emergency1 In Case of Emergency
Your vehicle may not be able to connect to the
operator if the battery level is low, the line is
disconnected, or you do not have adequate cellular
coverage.
You cannot use this emergency services when:
•You travel outside the HondaLink ® service coverage
areas.
•There is a problem with the connecting devices,
such as the microphones, speakers, or the unit
itself.
You cannot operate othe r phone-related functions
using the screen while talking to the operator.
Select Hang Up to terminate the connection to your
vehicle.
1 Automatic collision notification
If the unit fails to connect to the operator, it
repeatedly tries until it succeeds.
Page 456 of 623

454
uuWhen Driving uRoad Departure Mitigation (RDM) System*
Driving
■Roadway conditions
• Driving on a snowy or wet roadway (obscured lane marking, vehicle tracks,
reflected lights, road spray, high contrast).
• Driving on a road with temporary lane markings.
• Faint, multiple, or varied lane markings are visible on the roadway due to road
repairs or old lane markings.
• The roadway has merging, split, or crossing lines (e.g., such as at an intersection
or crosswalk).
• The lane markings are extremely narrow, wide, or changing.
• The vehicle in front of you is driving near the lane lines.
• The road is hilly or the vehicle is approaching the crest of a hill.
• Driving on rough or unpaved roads, or over bumpy surfaces.
• When objects on the road (curb, guard rail, pylons, etc.) are recognized as white
lines (or yellow lines).
• When driving on roads with double lines.
■Vehicle conditions
• Headlight lenses are dirty or the headlights are not properly adjusted.
• The outside of the windshield is streake d or blocked by dirt, mud, leaves, wet
snow, etc.
• The inside of the windshield is fogged.
• The camera temperature gets too hot.
• An abnormal tire or wheel condition (wro ng sized, varied size or construction,
improperly inflated, comp act spare tire, etc.).
• The vehicle is tilted due to a heav y load or suspension modifications.
• When tire chains are installed.