Page 72 of 263
70
System Setup
Clock Adjustment
HHOMEuSettingsuClock/InfouClock tab
Set the automatic adjustment of the system clock for daylight saving and
international time zones.
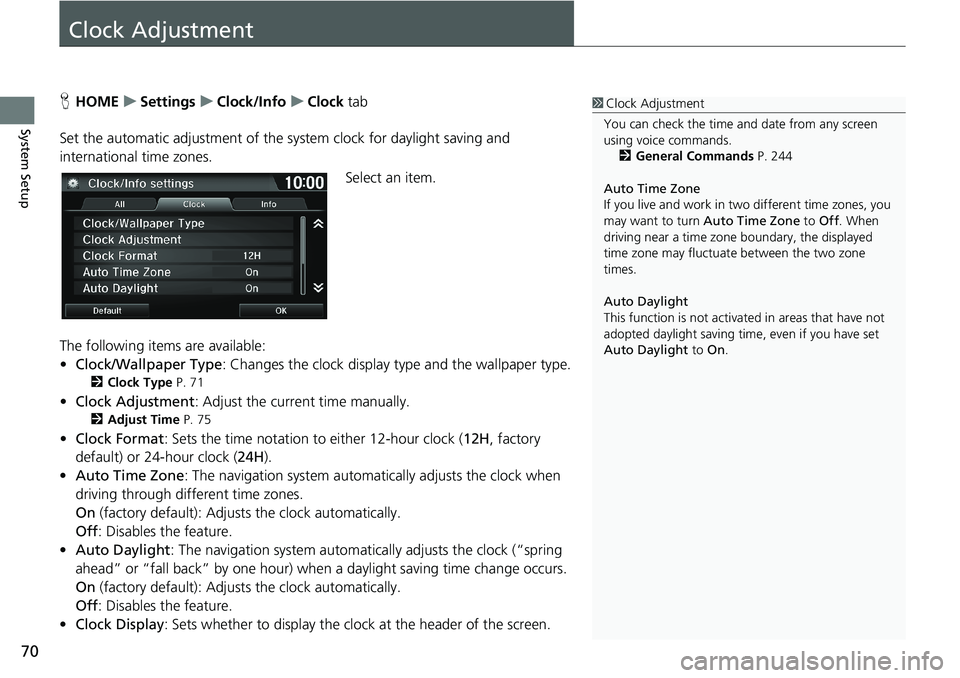
Select an item.
The following items are available:
•Clock/Wallpaper Type: Changes the clock display type and the wallpaper type.
2Clock Type P. 71
•Clock Adjustment: Adjust the current time manually.
2Adjust Time P. 75
•Clock Format: Sets the time notation to either 12-hour clock (12H, factory
default) or 24-hour clock (24H).
•Auto Time Zone: The navigation system automatically adjusts the clock when
driving through different time zones.
On (factory default): Adjusts the clock automatically.
Off: Disables the feature.
•Auto Daylight: The navigation system automatically adjusts the clock (“spring
ahead” or “fall back” by one hour) when a daylight saving time change occurs.
On (factory default): Adjusts the clock automatically.
Off: Disables the feature.
•Clock Display: Sets whether to display the clock at the header of the screen.
1Clock Adjustment
You can check the time and date from any screen
using voice commands.
2General Commands P. 244
Auto Time Zone
If you live and work in two different time zones, you
may want to turn Auto Time Zone to Off. When
driving near a time zone boundary, the displayed
time zone may fluctuate between the two zone
times.
Auto Daylight
This function is not activated in areas that have not
adopted daylight saving time, even if you have set
Auto Daylight to On.
Page 74 of 263
72
uuClock AdjustmentuWallpaper Settings
System Setup
Wallpaper Settings
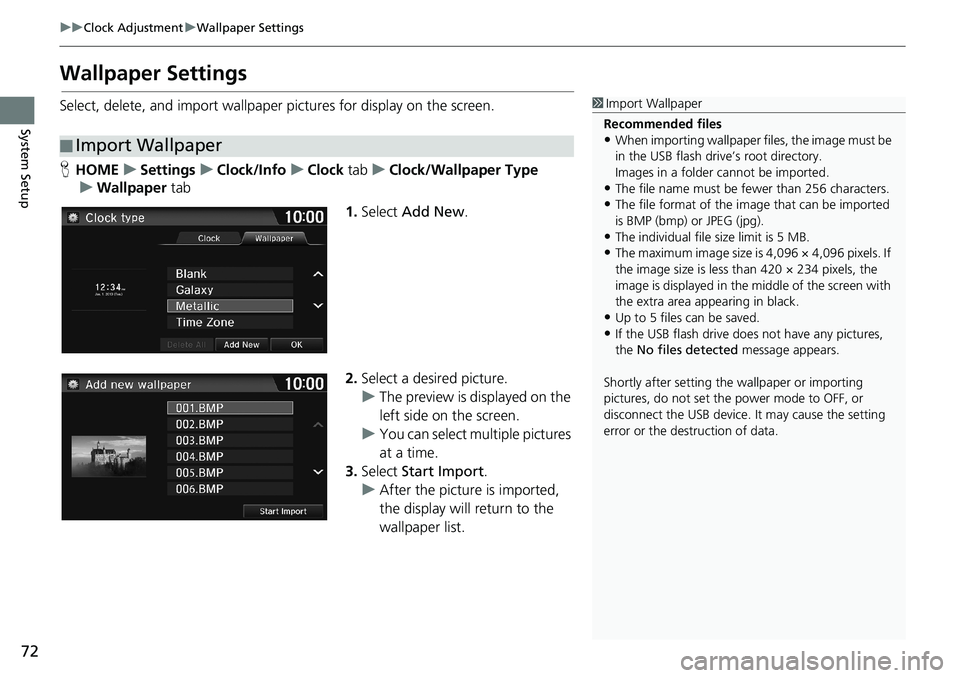
Select, delete, and import wallpaper pictures for display on the screen.
HHOMEuSettingsuClock/InfouClock tabuClock/Wallpaper Type
uWallpaper tab
1.Select Add New.
2.Select a desired picture.
uThe preview is displayed on the
left side on the screen.
uYou can select multiple pictures
at a time.
3.Select Start Import.
uAfter the picture is imported,
the display will return to the
wallpaper list.
■Import Wallpaper
1Import Wallpaper
Recommended files
•When importing wallpaper files, the image must be
in the USB flash drive’s root directory.
Images in a folder cannot be imported.
•The file name must be fewer than 256 characters.•The file format of the image that can be imported
is BMP (bmp) or JPEG (jpg).
•The individual file size limit is 5 MB.•The maximum image size is 4,096 × 4,096 pixels. If
the image size is less than 420 × 234 pixels, the
image is displayed in the middle of the screen with
the extra area appearing in black.
•Up to 5 files can be saved.
•If the USB flash drive does not have any pictures,
the No files detected message appears.
Shortly after setting the wallpaper or importing
pictures, do not set the power mode to OFF, or
disconnect the USB device. It may cause the setting
error or the destruction of data.
Page 75 of 263
Continued73
uuClock AdjustmentuWallpaper Settings
System SetupHHOMEuSettingsuClock/InfouClock tabuClock/Wallpaper Type
uWallpaper tab
1.Select a desired wallpaper.
uThe preview is displayed on the
left side on the screen.
2.Select Set.
uSelect Preview to see a preview
at full-size screen.
3.Select OK.
■Select Wallpaper1Select Wallpaper
When the file size is large, it takes a while to be
previewed.
Page 76 of 263
uuClock AdjustmentuWallpaper Settings
74
System SetupHHOMEuSettingsuClock/InfouClock tabuClock/Wallpaper Type
uWallpaper tab
1.Select a wallpaper that you want
to delete.
uThe preview is displayed on the
left side on the screen.
2.Select Delete.
uThe confirmation message will
appear.
3.Select Yes.
uThe display will return to the
wallpaper list.
■Delete Wallpaper1Delete Wallpaper
Select Delete All to delete all imported wallpapers.
“Blank”, “Galaxy”, “Metallic” and “Time Zone”
cannot be deleted.
Page 78 of 263
76
System Setup
Other Settings
HHOMEuSettingsuSystemuOthers tab
Set the map units to either miles or kilometers, the system language, and various
settings for the navigation system.
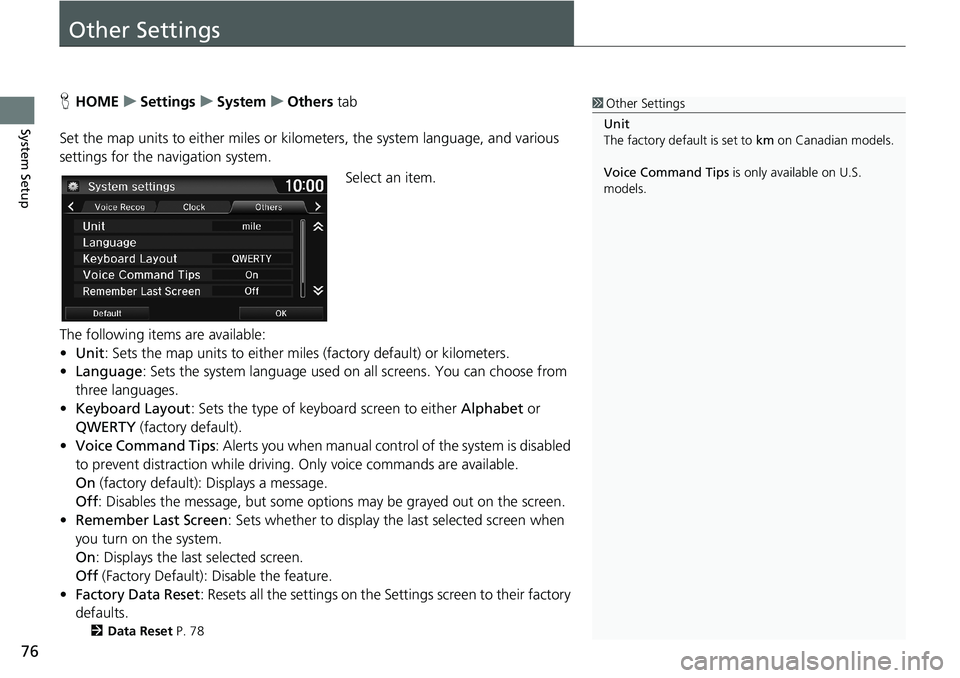
Select an item.
The following items are available:
•Unit: Sets the map units to either miles (factory default) or kilometers.
•Language: Sets the system language used on all screens. You can choose from
three languages.
•Keyboard Layout: Sets the type of keyboard screen to either Alphabet or
QWERTY (factory default).
•Voice Command Tips: Alerts you when manual control of the system is disabled
to prevent distraction while driving. Only voice commands are available.
On (factory default): Displays a message.
Off: Disables the message, but some options may be grayed out on the screen.
•Remember Last Screen: Sets whether to display the last selected screen when
you turn on the system.
On: Displays the last selected screen.
Off (Factory Default): Disable the feature.
•Factory Data Reset: Resets all the settings on the Settings screen to their factory
defaults.
2Data Reset P. 78
1Other Settings
Unit
The factory default is set to km on Canadian models.
Voice Command Tips is only available on U.S.
models.
Page 79 of 263
77
uuOther SettingsuLanguage
System Setup
Language
HHOMEuSettingsuSystemuOthers tabuLanguage
Set the system language used on all screens. You can choose from three languages:
English, Français (French), Español (Spanish).
Select the system language.1Language
Voice confirmation of cities and streets only occurs
when English is the system language.
When Français or Español is selected, some
messages continue to be displayed in English.
Page 81 of 263
79
Navigation
This section describes how to enter a destination, select a route to take, and follow the
route to your destination. It also describes how to change your route or destination along
the way.
Entering a Destination........................... 80
Address ................................................. 82
Address Book ......................................... 87
Place Name ............................................ 88
Place Phone Number .............................. 90
Place Category ....................................... 91
Previous Destination ............................... 93
Intersection ............................................ 94
Coordinate ............................................ 95
Map Input .............................................. 96Calculating the Route..............................98
Viewing the Routes .................................99
Driving to Your Destination.................100
Viewing the Route ................................100
Listening to Voice Guidance ..................104
Map Menu..............................................105
Displaying the Map Menu .....................105
Directions .............................................107
Traffic Rerouting
TM................................109
Changing Your Route............................111
Adding Waypoints ................................112
Editing the Destination List ....................116
Canceling the Route .............................118
Taking a Detour ....................................118Avoiding Streets ................................... 119
Changing Your Destination................. 120
Find Nearest Place ................................ 120
Selecting a Destination on the Map ...... 121
Entering a New Destination .................. 122
Resuming Your Trip.............................. 123
Page 82 of 263
80
Navigation
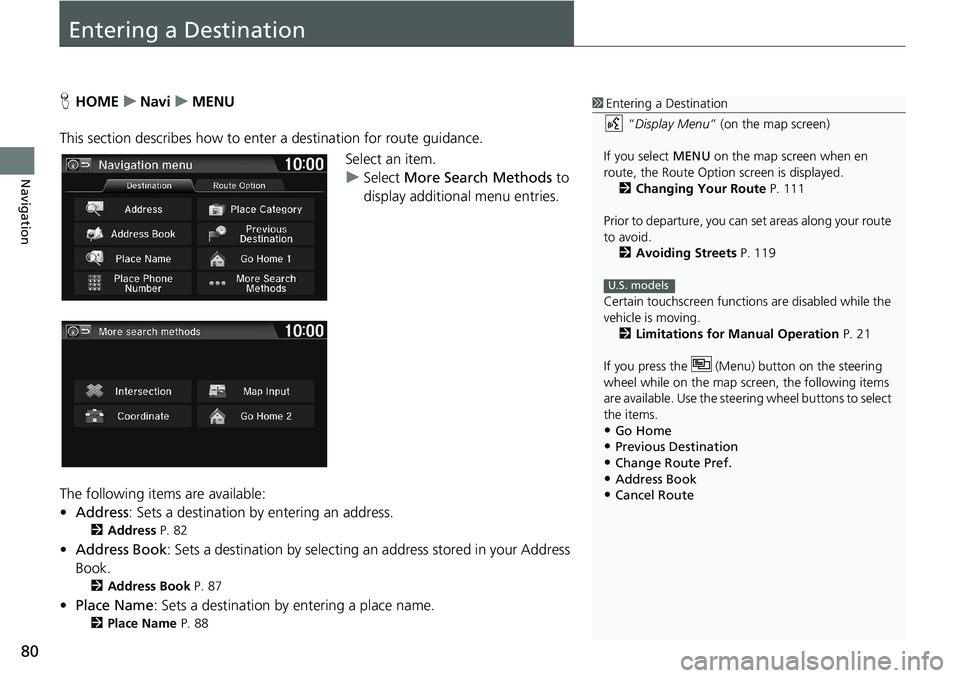
Entering a Destination
HHOMEuNaviuMENU
This section describes how to enter a destination for route guidance.
Select an item.
uSelect More Search Methods to
display additional menu entries.
The following items are available:
•Address: Sets a destination by entering an address.
2Address P. 82
•Address Book: Sets a destination by selecting an address stored in your Address
Book.
2Address Book P. 87
•Place Name: Sets a destination by entering a place name.
2Place Name P. 88
1Entering a Destination
“Display Menu” (on the map screen)
If you select MENU on the map screen when en
route, the Route Option screen is displayed.
2Changing Your Route P. 111
Prior to departure, you can set areas along your route
to avoid.
2Avoiding Streets P. 119
Certain touchscreen functions are disabled while the
vehicle is moving.
2Limitations for Manual Operation P. 21
If you press the (Menu) button on the steering
wheel while on the map screen, the following items
are available. Use the steering wheel buttons to select
the items.
•Go Home•Previous Destination
•Change Route Pref.
•Address Book•Cancel Route
U.S. models