2018 HONDA CLARITY PLUG-IN reset
[x] Cancel search: resetPage 479 of 591
477
uuMaintenance MinderTMuTo Use Maintenance MinderTM
Continued
Maintenance
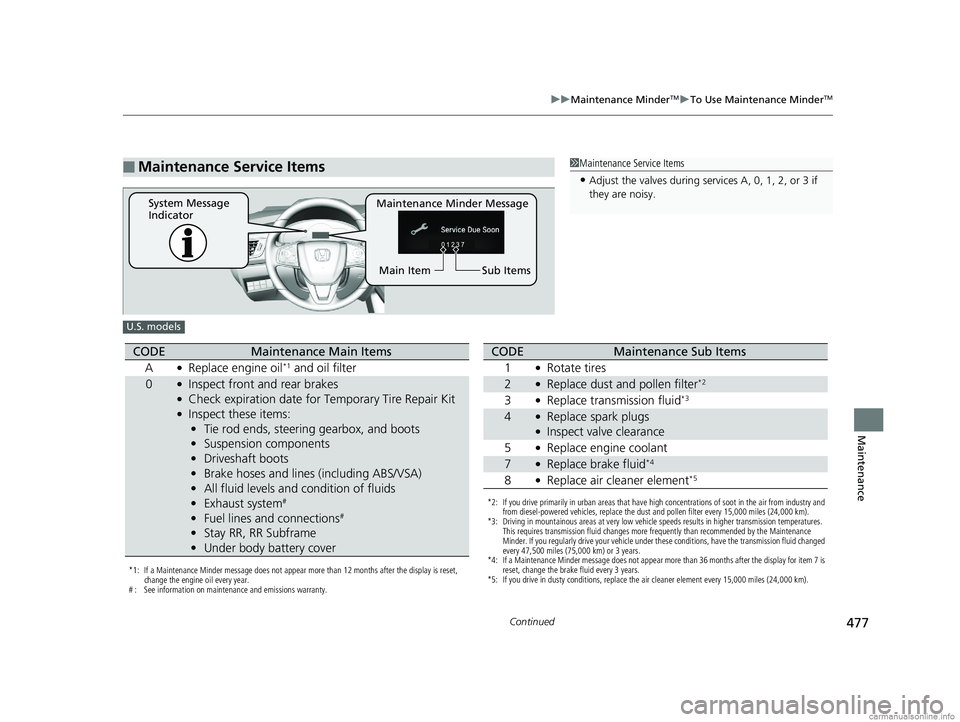
■Maintenance Service Items1Maintenance Service Items
•Adjust the valves during services A, 0, 1, 2, or 3 if
they are noisy.
Maintenance Minder Message
System Message
Indicator
Sub Items
Main Item
U.S. models
*1: If a Maintenance Minder message does not appear more than 12 months after the display is reset,
change the engine oil every year.
# : See information on maintenance and emissions warranty.
CODEMaintenance Main Items
A
●Replace engine oil*1 and oil filter
0●Inspect front and rear brakes●Check expiration date for Temporary Tire Repair Kit●Inspect these items: • Tie rod ends, steering gearbox, and boots
• Suspension components
• Driveshaft boots
• Brake hoses and lines (including ABS/VSA)
• All fluid levels and condition of fluids
• Exhaust system
#
•Fuel lines and connections#
•Stay RR, RR Subframe
• Under body battery cover
*2: If you drive primarily in urban areas that have high concentrations of soot in the air from industry and
from diesel-powered vehicles, replace the dust and pollen filter every 15,000 miles (24,000 km).
*3: Driving in mountainous areas at very low vehicle speeds results in higher transmission temperatures.
This requires transmission fluid changes more frequently than recommended by the Maintenance
Minder. If you regularly drive your vehicle under these conditions, have the transmission fluid changed
every 47,500 miles (75,000 km) or 3 years.
*4: If a Maintenance Minder message does not appear more than 36 months after the display for item 7 is reset, change the brake fluid every 3 years.
*5: If you drive in dusty conditions, replace the air cleaner element every 15,000 miles (24,000 km).
CODEMaintenance Sub Items
1
●Rotate tires
2●Replace dust and pollen filter*2
3●Replace transmission fluid*3
4●Replace spark plugs●Inspect valve clearance
5
●Replace engine coolant
7●Replace brake fluid*4
8●Replace air cleaner element*5
18 CLARITY PHEV CSS-31TRW6000.book 477 ページ 2017年12月25日 月曜日 午後2時22分
Page 480 of 591

478
uuMaintenance MinderTMuTo Use Maintenance MinderTM
Maintenance
1Maintenance Service Items
•Adjust the valves during services A, 9, 1, 2, or 3 if
they are noisy.
Canadian models
*1: If a Maintenance Minder message does not appear more than 12 months after the display is reset,
change the engine oil every year.
*2: If you drive primarily in urban areas that have high concentrations of soot in the air from industry and from diesel-powered vehicles, replace the dust and pollen filter every 24,000 km (15,000 miles).
*3: Driving in mountainous areas at very low vehicle speeds results in higher transmission temperatures.
This requires transmission fluid changes more frequently than recommended by the Maintenance
Minder. If you regularly drive your vehicle under these conditions, have the transmission fluid changed
every 75,000 km (47,500 miles) or 3 years.
*4: If a Maintenance Minder message does not appear more than 36 months after the display for item 7 is reset, change the brake fluid every 3 years.
*5: If you drive in dusty conditions, replace the air cleaner element every 24,000 km (15,000 miles).
# : See information on maintenance and emissions warranty.
CODEMaintenance Main Items
A
●Replace engine oil*1 and oil filter
CODEMaintenance Sub Items
1
●Rotate tires
2●Replace dust and pollen filter*2
3●Replace transmission fluid*3
4●Replace spark plugs●Inspect valve clearance
5
●Replace engine coolant
7●Replace brake fluid*4
8●Replace air cleaner element*5
9●Service front and rear brakes●Check expiration date for Temporary Tire Repair Kit●Inspect these items: • Tie rod ends, steering gearbox, and boots
• Suspension components
• Driveshaft boots
• Brake hoses and lines (including ABS/VSA)
• All fluid levels and condition of fluids
• Exhaust system
#
•Fuel lines and connections#
•Stay RR, RR Subframe
• Under body battery cover
18 CLARITY PHEV CSS-31TRW6000.book 478 ページ 2017年12月25日 月曜日 午後2時22分
Page 481 of 591
479
uuMaintenance MinderTMuTo Use Maintenance MinderTM
Maintenance
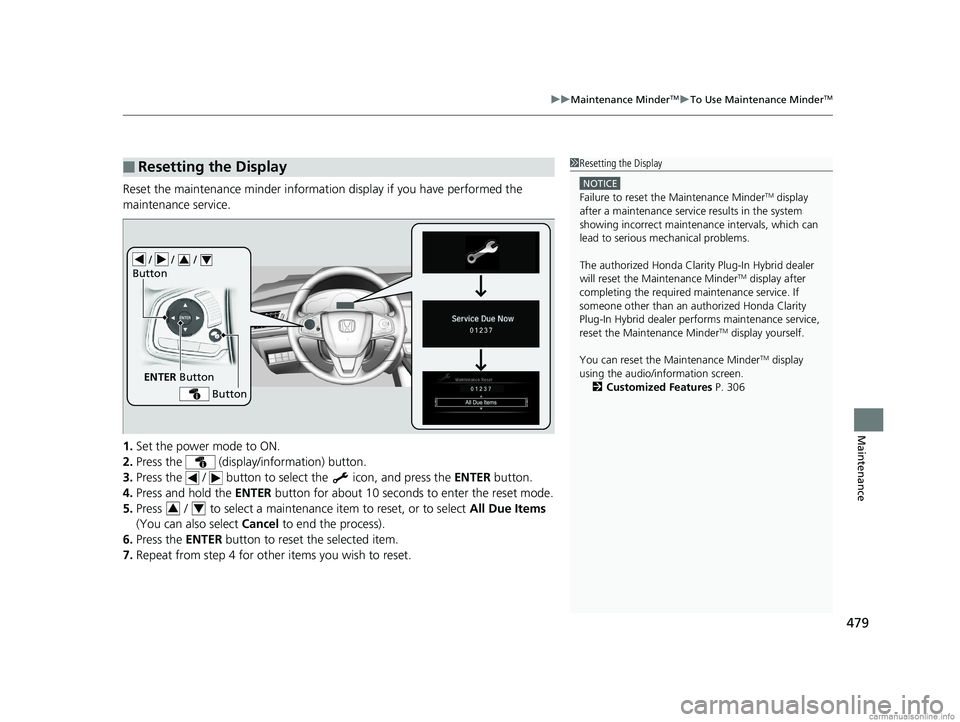
Reset the maintenance minder information display if you have performed the
maintenance service.
1. Set the power mode to ON.
2. Press the (display/information) button.
3. Press the / button to select the icon, and press the ENTER button.
4. Press and hold the ENTER button for about 10 second s to enter the reset mode.
5. Press / to select a maintenance item to reset, or to select All Due Items
(You can also select Cancel to end the process).
6. Press the ENTER button to reset the selected item.
7. Repeat from step 4 for other items you wish to reset.
■Resetting the Display1Resetting the Display
NOTICE
Failure to reset the Maintenance MinderTM display
after a maintenance servic e results in the system
showing incorrect maintenance intervals, which can
lead to serious mechanical problems.
The authorized Honda Clarity Plug-In Hybrid dealer
will reset the Maintenance Minder
TM display after
completing the required ma intenance service. If
someone other than an authorized Honda Clarity
Plug-In Hybrid dealer perf orms maintenance service,
reset the Maintenance Minder
TM display yourself.
You can reset the Maintenance Minder
TM display
using the audio/information screen. 2 Customized Features P. 306
/ / /
Button34
ENTER Button
Button
34
18 CLARITY PHEV CSS-31TRW6000.book 479 ページ 2017年12月25日 月曜日 午後2時22分
Page 498 of 591
496
Maintenance
Checking and Maintaining Wiper Blades
Checking Wiper Blades
If the wiper blade rubber has deteriorated, it will leave streaks and the hard surfaces
of the blade may scratch the window glass.
Changing the Wiper Blade Rubber
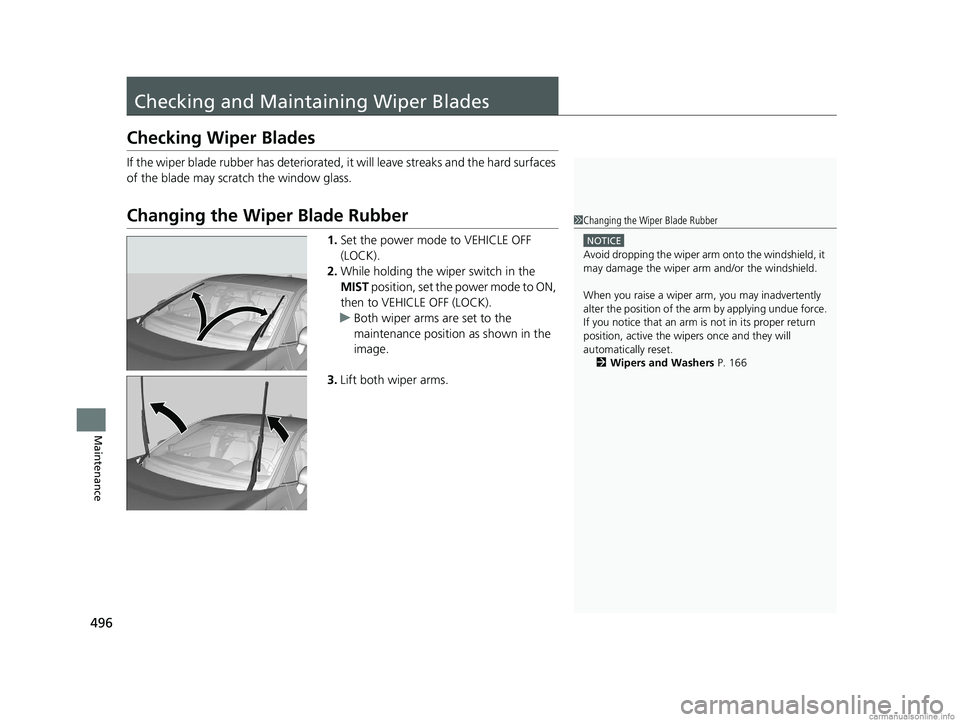
1. Set the power mode to VEHICLE OFF
(LOCK).
2. While holding the wiper switch in the
MIST position, set the power mode to ON,
then to VEHICLE OFF (LOCK).
u Both wiper arms are set to the
maintenance position as shown in the
image.
3. Lift both wiper arms.
1Changing the Wiper Blade Rubber
NOTICE
Avoid dropping the wiper arm onto the windshield, it
may damage the wiper arm and/or the windshield.
When you raise a wiper arm, you may inadvertently
alter the position of the arm by applying undue force.
If you notice that an arm is not in its proper return
position, active the wipers once and they will
automatically reset. 2 Wipers and Washers P. 166
18 CLARITY PHEV CSS-31TRW6000.book 496 ページ 2017年12月25日 月曜日 午後2時22分
Page 510 of 591
508
Maintenance
12-Volt Battery
Checking the 12-Volt Battery
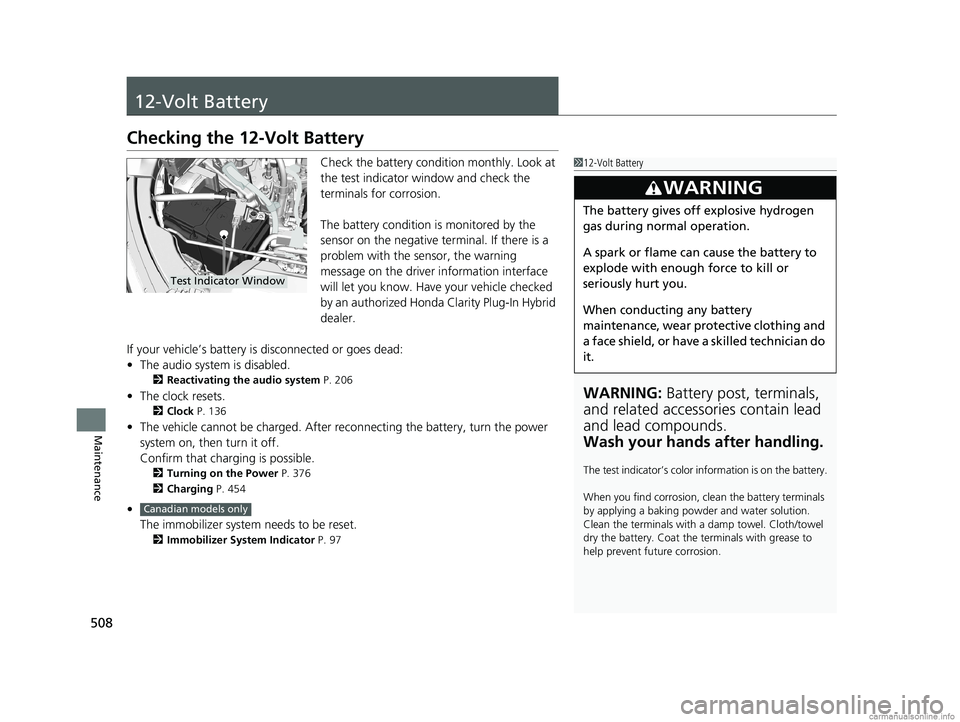
Check the battery condition monthly. Look at
the test indicator window and check the
terminals for corrosion.
The battery condition is monitored by the
sensor on the negative terminal. If there is a
problem with the sensor, the warning
message on the driver information interface
will let you know. Have your vehicle checked
by an authorized Honda Clarity Plug-In Hybrid
dealer.
If your vehicle’s battery is disconnected or goes dead:
• The audio system is disabled.
2 Reactivating the audio system P. 206
•The clock resets.
2 Clock P. 136
•The vehicle cannot be charged. After reconnecting the batte ry, turn the power
system on, then turn it off.
Confirm that charging is possible.
2 Turning on the Power P. 376
2 Charging P. 454
•
The immobilizer system needs to be reset.
2 Immobilizer System Indicator P. 97
112-Volt Battery
WARNING: Battery post, terminals,
and related accessories contain lead
and lead compounds.
Wash your hands after handling.
The test indicator’s color in formation is on the battery.
When you find corrosion, cl ean the battery terminals
by applying a baking powder and water solution.
Clean the terminals with a damp towel. Cloth/towel
dry the battery. Coat the terminals with grease to
help prevent future corrosion.
3WARNING
The battery gives off explosive hydrogen
gas during normal operation.
A spark or flame can cause the battery to
explode with enough force to kill or
seriously hurt you.
When conducting any battery
maintenance, wear prot ective clothing and
a face shield, or have a skilled technician do
it.
Test Indicator Window
Canadian models only
18 CLARITY PHEV CSS-31TRW6000.book 508 ページ 2017年12月25日 月曜日 午後2時22分
Page 518 of 591
uuCleaning uExterior Care
516
Maintenance
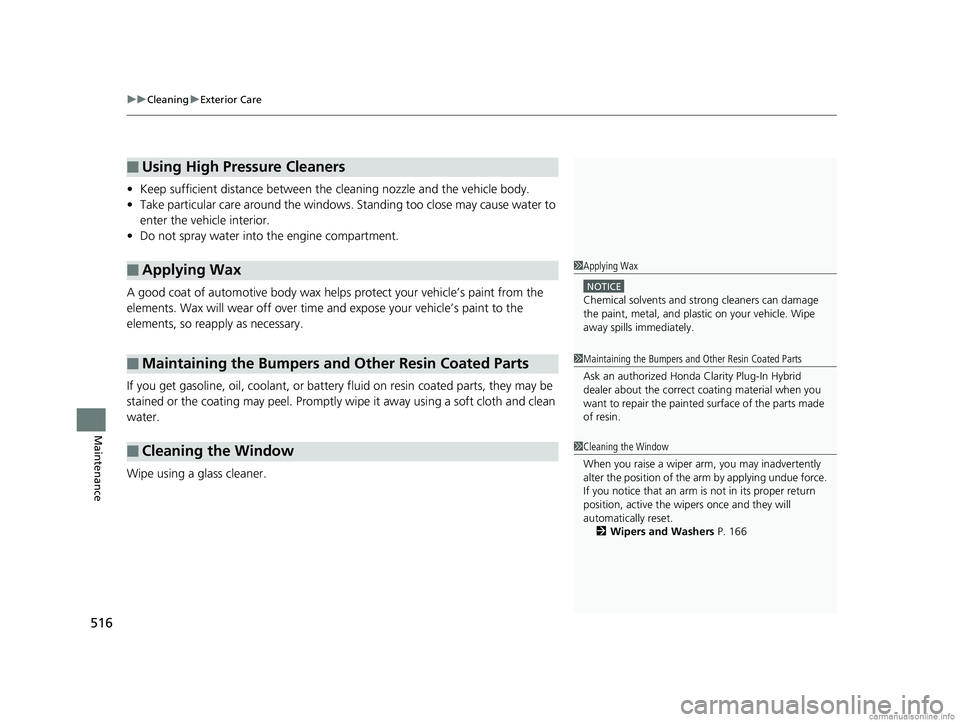
• Keep sufficient distance between the cleaning nozzl e and the vehicle body.
• Take particular care around the windows. St anding too close may cause water to
enter the vehicle interior.
• Do not spray water into the engine compartment.
A good coat of automotive body wax helps protect your vehicle’s paint from the
elements. Wax will wear off over time and expose your vehicle’s paint to the
elements, so reapply as necessary.
If you get gasoline, oil, coolant, or battery fluid on resin coated parts, they may be
stained or the coating may peel. Promptly wipe it away using a soft cloth and clean
water.
Wipe using a glass cleaner.
■Using High Pressure Cleaners
■Applying Wax
■Maintaining the Bumpers and Other Resin Coated Parts
■Cleaning the Window
1 Applying Wax
NOTICE
Chemical solvents and st rong cleaners can damage
the paint, metal, and plasti c on your vehicle. Wipe
away spills immediately.
1 Maintaining the Bumpers an d Other Resin Coated Parts
Ask an authorized Honda Clarity Plug- In Hybrid
dealer about the correct coating material when you
want to repair the painted surface of the parts made
of resin.
1 Cleaning the Window
When you raise a wiper arm, you may inadvertently
alter the position of the arm by applying undue force.
If you notice that an arm is not in its proper return
position, active the wipers once and they will
automatically reset. 2 Wipers and Washers P. 166
18 CLARITY PHEV CSS-31TRW6000.book 516 ページ 2017年12月25日 月曜日 午後2時22分
Page 551 of 591
549
uuIndicator, Coming On/Blinking uIf the Electric Power Steering (EPS) System Indicator Comes On
Handling the Unexpected
If the Electric Power Steeri ng (EPS) System Indicator
Comes On
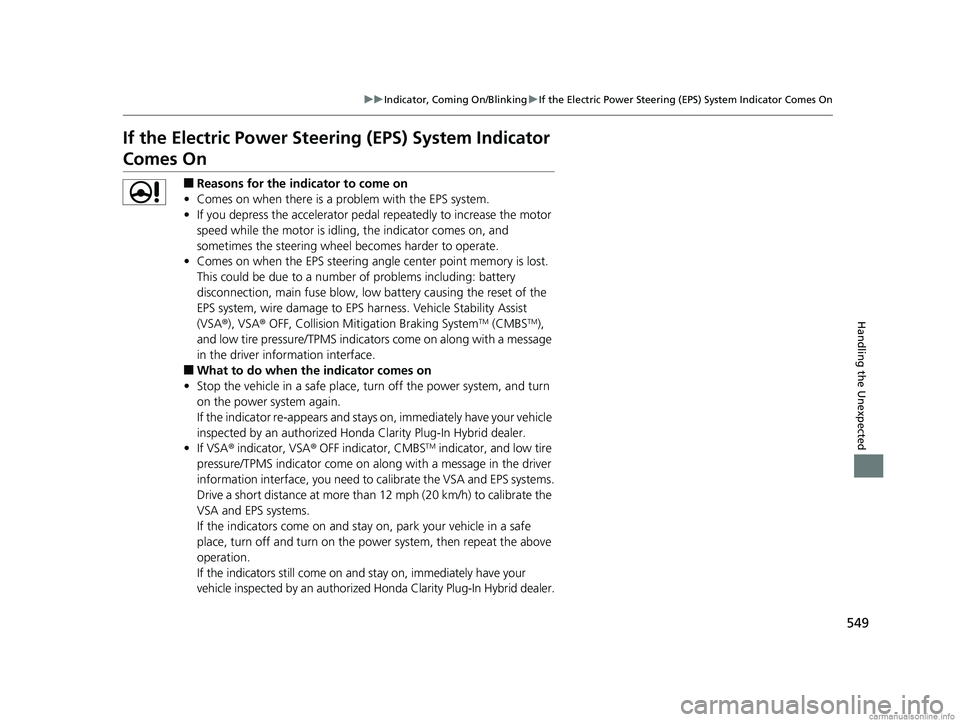
■Reasons for the indicator to come on
• Comes on when there is a problem with the EPS system.
• If you depress the accelerator peda l repeatedly to increase the motor
speed while the motor is idling, the indicator comes on, and
sometimes the steering wheel becomes harder to operate.
• Comes on when the EPS steering angle center point memory is lost.
This could be due to a number of problems including: battery
disconnection, main fuse blow, low battery causing the reset of the
EPS system, wire damage to EPS ha rness. Vehicle Stability Assist
(VSA ®), VSA ® OFF, Collision Mitigation Braking System
TM (CMBSTM),
and low tire pressure/TPMS indicato rs come on along with a message
in the driver information interface.
■What to do when th e indicator comes on
• Stop the vehicle in a safe place, turn off the power system, and turn
on the power system again.
If the indicator re-appears and stay s on, immediately have your vehicle
inspected by an authorized Honda Clarity Plug-In Hybrid dealer.
• If VSA ® indicator, VSA ® OFF indicator, CMBS
TM indicator, and low tire
pressure/TPMS indicator come on al ong with a message in the driver
information interface, you need to calibrate the VSA and EPS systems.
Drive a short distance at more than 12 mph (20 km/h) to calibrate the
VSA and EPS systems.
If the indicators come on and stay on, park your vehicle in a safe
place, turn off and turn on the po wer system, then repeat the above
operation.
If the indicators still come on and stay on, immediately have your
vehicle inspected by an authorized Honda Clarity Plug-In Hybrid dealer.
18 CLARITY PHEV CSS-31TRW6000.book 549 ページ 2017年12月25日 月曜日 午後2時22分
Page 587 of 591
585
Index
READY Indicator........................................ 90
Rear Defogger Button ............................. 169
Rear Seats ................................................. 181
Rearview Mirror ....................................... 173
Refueling .................................................. 451
Fuel ........................................................ 566
Fuel Gauge ............................................. 121
Gasoline ................................................. 451
Regulations ...................... 427, 464, 502, 569
Remote Transmitter ................................. 143
Replacement
Battery .................................................... 510
Bulbs ...................................................... 494
Fuses .............................................. 553, 556
Tires........................................................ 505
Wiper Blade Rubber ................................ 496
Reporting Safety Defects ......................... 571
Resetting a Trip Meter ............................. 126
Road Departure Mitigation (RDM) ......... 396
On and Off ............................................. 398
S
Safe Driving ................................................ 41
Safety Checklist .......................................... 46
Safety Labels .............................................. 83
Safety Message ............................................ 4
Seat Belts .................................................... 47
Adjusting the Shoulder Anchor ................. 51
Automatic Seat Belt Tensioners ................. 49
Checking .................................................. 53 Fastening ................................................... 50
Installing a Child Seat with a Lap/Shoulder
Seat Belt .................................................. 76
Pregnant Women ...................................... 52
Reminder............................................. 49, 93
Warning Indicator ................................ 49, 93
Seat Heaters .............................................. 191
Seats .......................................................... 175
Adjusting ................................................. 175
Front Seats .............................................. 175
Rear Seats ............................................... 181
Seat Heaters ............................................ 191
Security System ......................................... 153
Immobilizer System Indicator ..................... 97
Security System Alarm Indicator ................. 98
Selecting a Child Seat ................................. 73
Setting the Clock ...................................... 136
Shift Button ........................................ 31, 382
Operation ................................................ 384
Shifting (Transmission) ....................... 31, 382
Shoulder Anchor ......................................... 51
Side Airbags ................................................ 63
Side Curtain Airbags ................................... 65
Siri Eyes Free ............................................. 276
SiriusXM ® Radio ................................ 247, 288
Smart Entry System ................................... 139
Snow Tires ................................................. 507
Song By Voice
TM (SBV) .............................. 258
Specifications ............................................ 566
Specified Fuel .................................... 451, 566 SPORT HYBRID i-MMD Plug-in (Intelligent
Multi-mode Drive Plug-in) ....................... 11
SPORT Mode ............................................. 389
SPORT Mode Indicator ....................... 98, 389
SRS Airbags (Airbags) ................................. 57
Status Area ............................................... 232
Steering Wheel Adjusting ................................................ 172
Stopping ................................................... 447
Summer Tires ............................................ 507
Sunglasses Holder ..................................... 192
Supplemental Restraint System (SRS) ........ 57
Switches (Around the Steering Wheel) ............................................. 6, 7, 158
Synchronization Mode ............................. 198
System Message Indicator .......................... 98
T
Telematics Control Unit........................... 133
Temperature Sensor ................................. 201
Temporary Tire Repair Kit ....................... 523
Time (Setting) ........................................... 136
Timer ......................................................... 467
Tire Pressure Monitoring System (TPMS) ..................................................... 425
Indicator............................................ 96, 551
18 CLARITY PHEV CSS-31TRW6000.book 585 ページ 2017年12月25日 月曜日 午後2時22分