Page 71 of 559
69
uuChild Safety uSafety of Infants and Small Children
Continued
Safe Driving
Safety of Infants and Small Children
An infant must be properly restrained in a rear-facing, reclining child seat until the
infant reaches the seat manufacturer’s weig ht or height limit for the seat, and the
infant is at least one year old.
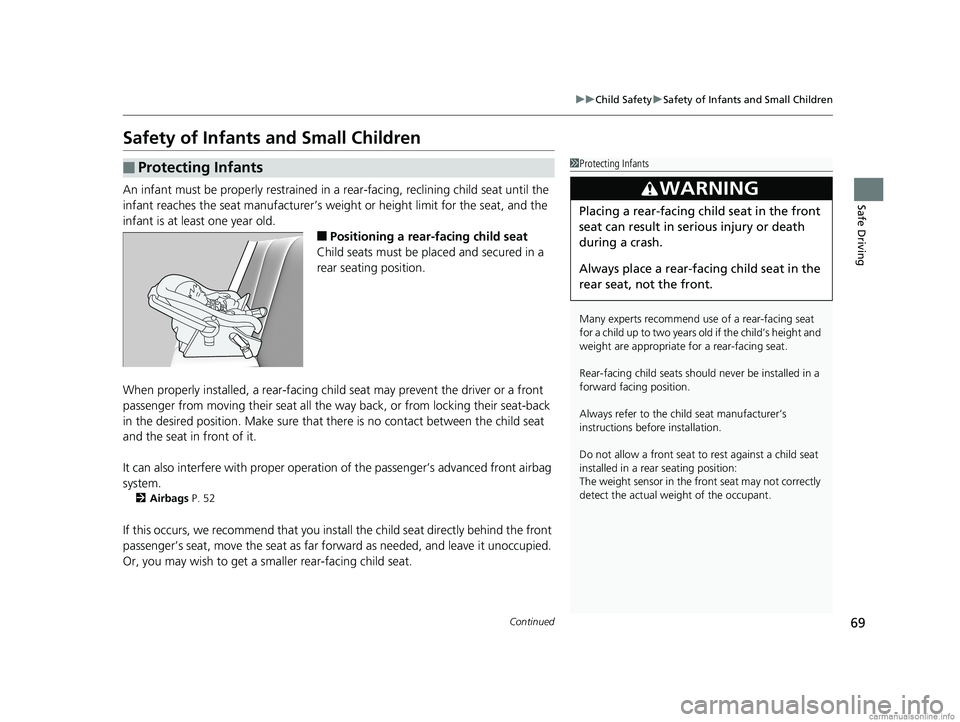
■Positioning a rear-facing child seat
Child seats must be placed and secured in a
rear seating position.
When properly installed, a rear-facing chil d seat may prevent the driver or a front
passenger from moving their seat all the wa y back, or from locking their seat-back
in the desired position. Make sure that there is no contact between the child seat
and the seat in front of it.
It can also interfere with proper operation of the passenger’s advanced front airbag
system.
2 Airbags P. 52
If this occurs, we recommend that you insta ll the child seat directly behind the front
passenger’s seat, move the seat as far fo rward as needed, and leave it unoccupied.
Or, you may wish to get a smaller rear-facing child seat.
■Protecting Infants1 Protecting Infants
Many experts recommend us e of a rear-facing seat
for a child up to two years old if the child’s height and
weight are appropriate for a rear-facing seat.
Rear-facing child seats should never be installed in a
forward facing position.
Always refer to the child seat manufacturer’s
instructions before installation.
Do not allow a front seat to rest against a child seat
installed in a rear seating position:
The weight sensor in the fr ont seat may not correctly
detect the actual weight of the occupant.
3WARNING
Placing a rear-facing child seat in the front
seat can result in serious injury or death
during a crash.
Always place a rear-fac ing child seat in the
rear seat, not the front.
18 CLARITY ELECTRIC CSS-31TRV6100.book 69 ページ 2018年2月5日 月曜日 午後12時0分
Page 72 of 559
uuChild Safety uSafety of Infants and Small Children
70
Safe DrivingIf a child is at least one year old and has exceeded the weight an d height limitations
of a rearward facing child seat, the child should be properly restrained in a firmly
secured forward facing child seat until they exceed the weight and height limitations
for the forward facing child seat.
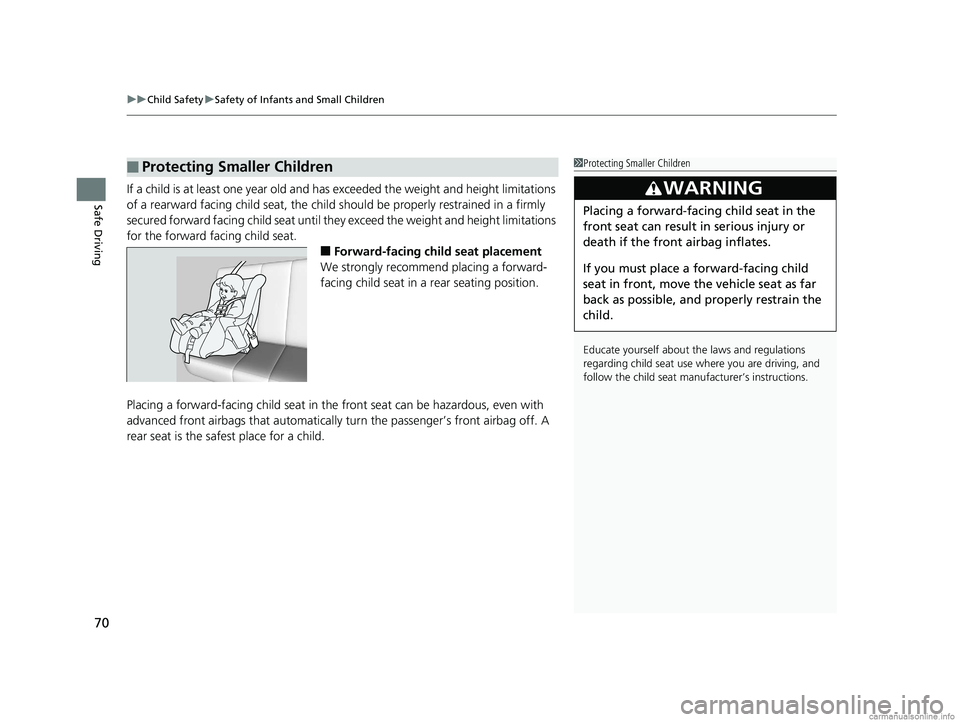
■Forward-facing child seat placement
We strongly recommend placing a forward-
facing child seat in a rear seating position.
Placing a forward-facing child seat in the front seat can be hazardous, even with
advanced front airbags that automatically turn the passenger’s front airbag off. A
rear seat is the safest place for a child.
■Protecting Smaller Children1 Protecting Smaller Children
Educate yourself about th e laws and regulations
regarding child seat use wh ere you are driving, and
follow the child seat manufacturer’s instructions.
3WARNING
Placing a forward-facing child seat in the
front seat can result in serious injury or
death if the front airbag inflates.
If you must place a forward-facing child
seat in front, move the vehicle seat as far
back as possible, and properly restrain the
child.
18 CLARITY ELECTRIC CSS-31TRV6100.book 70 ページ 2018年2月5日 月曜日 午後12時0分
Page 74 of 559
uuChild Safety uSafety of Infants and Small Children
72
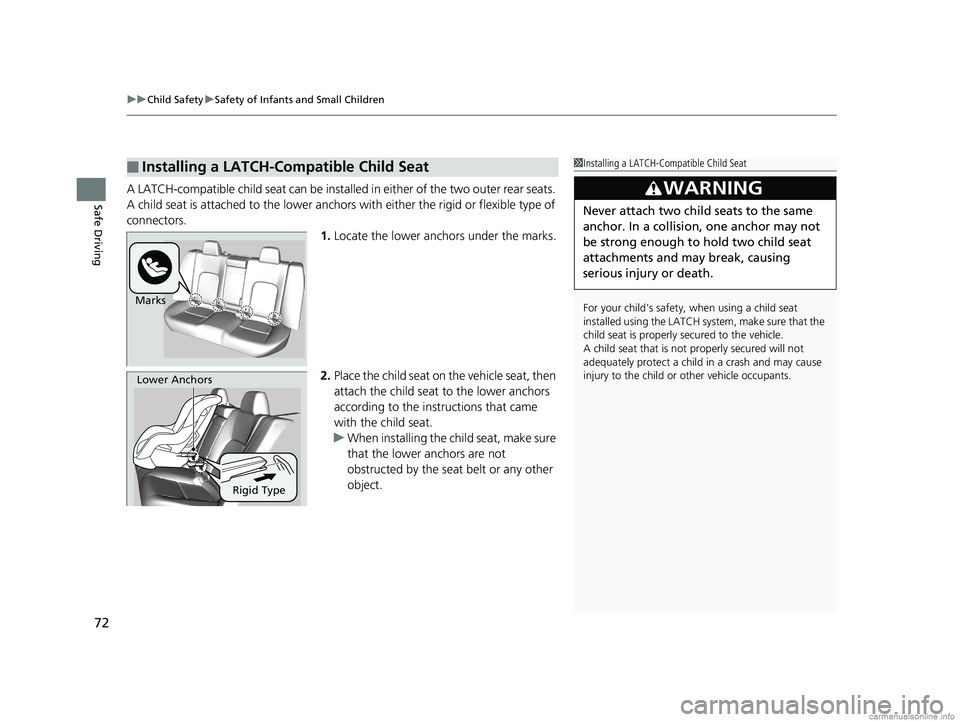
Safe DrivingA LATCH-compatible child seat can be installe d in either of the two outer rear seats.
A child seat is attached to the lower anchors with either the rigid or flexible type of
connectors. 1.Locate the lower anchors under the marks.
2. Place the child seat on the vehicle seat, then
attach the child seat to the lower anchors
according to the instructions that came
with the child seat.
u When installing the child seat, make sure
that the lower anchors are not
obstructed by the seat belt or any other
object.
■Installing a LATCH-Compatible Child Seat1Installing a LATCH-Compatible Child Seat
For your child’s safety, when using a child seat
installed using the LATCH system, make sure that the
child seat is properly secured to the vehicle.
A child seat that is not properly secured will not
adequately protect a child in a crash and may cause
injury to the child or other vehicle occupants.
3WARNING
Never attach two child seats to the same
anchor. In a collision, one anchor may not
be strong enough to hold two child seat
attachments and may break, causing
serious injury or death.
Marks
Rigid Type
Lower Anchors
18 CLARITY ELECTRIC CSS-31TRV6100.book 72 ページ 2018年2月5日 月曜日 午後12時0分
Page 75 of 559
Continued73
uuChild Safety uSafety of Infants and Small Children
Safe Driving
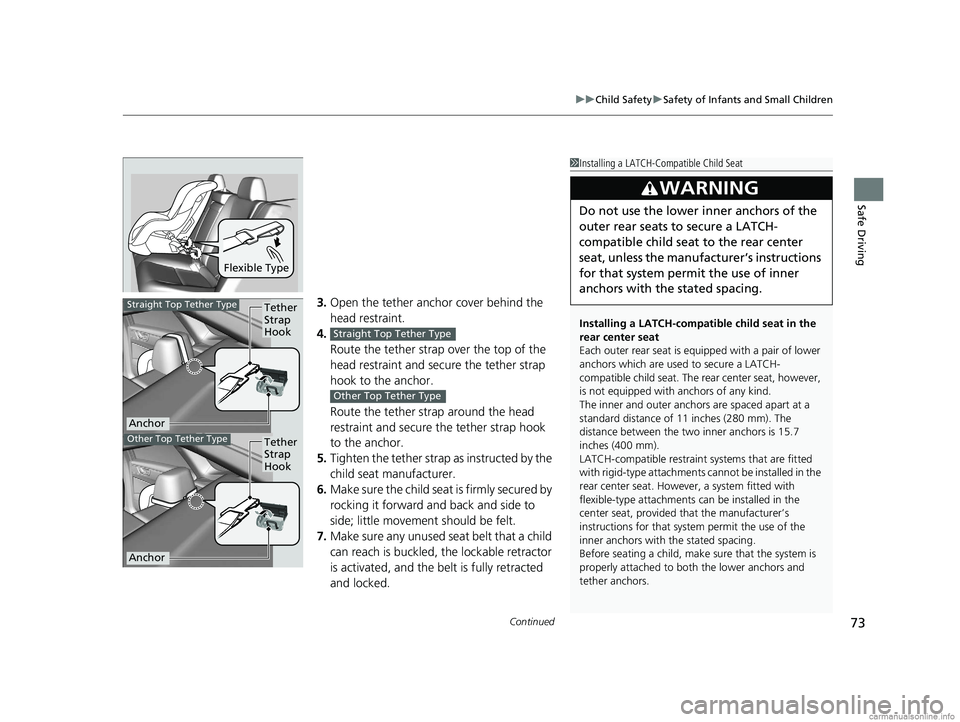
3. Open the tether anchor cover behind the
head restraint.
4. Route the tether strap over the top of the
head restraint and secure the tether strap
hook to the anchor.
Route the tether strap around the head
restraint and secure the tether strap hook
to the anchor.
5. Tighten the tether strap as instructed by the
child seat manufacturer.
6. Make sure the child seat is firmly secured by
rocking it forward and back and side to
side; little movement should be felt.
7. Make sure any unused seat belt that a child
can reach is buckled, the lockable retractor
is activated, and the be lt is fully retracted
and locked.
Flexible Type
1 Installing a LATCH-Compatible Child Seat
Installing a LATCH-compatible child seat in the
rear center seat
Each outer rear seat is equi pped with a pair of lower
anchors which are used to secure a LATCH-
compatible child seat. The rear center seat, however,
is not equipped with anchors of any kind.
The inner and outer anchors are spaced apart at a
standard distance of 11 inches (280 mm). The
distance between the two inner anchors is 15.7
inches (400 mm).
LATCH-compatible restraint systems that are fitted
with rigid-type attachments cannot be installed in the
rear center seat. However, a system fitted with
flexible-type attachments can be installed in the
center seat, provided that the manufacturer’s
instructions for that system permit the use of the
inner anchors with the stated spacing.
Before seating a child, make sure that the system is
properly attached to both the lower anchors and
tether anchors.
3WARNING
Do not use the lower inner anchors of the
outer rear seats to secure a LATCH-
compatible child seat to the rear center
seat, unless the manufacturer’s instructions
for that system permit the use of inner
anchors with the stated spacing.
Tether
Strap
Hook
Anchor
Straight Top Tether Type
Tether
Strap
Hook
Anchor
Other Top Tether Type
Straight Top Tether Type
Other Top Tether Type
18 CLARITY ELECTRIC CSS-31TRV6100.book 73 ページ 2018年2月5日 月曜日 午後12時0分
Page 80 of 559
78
uuChild Safety uSafety of Larger Children
Safe Driving
Safety of Larger Children
The following pages give instructions on how to check proper seat belt fit, what kind
of booster seat to use if one is needed, and important precautions for a child who
must sit in front.
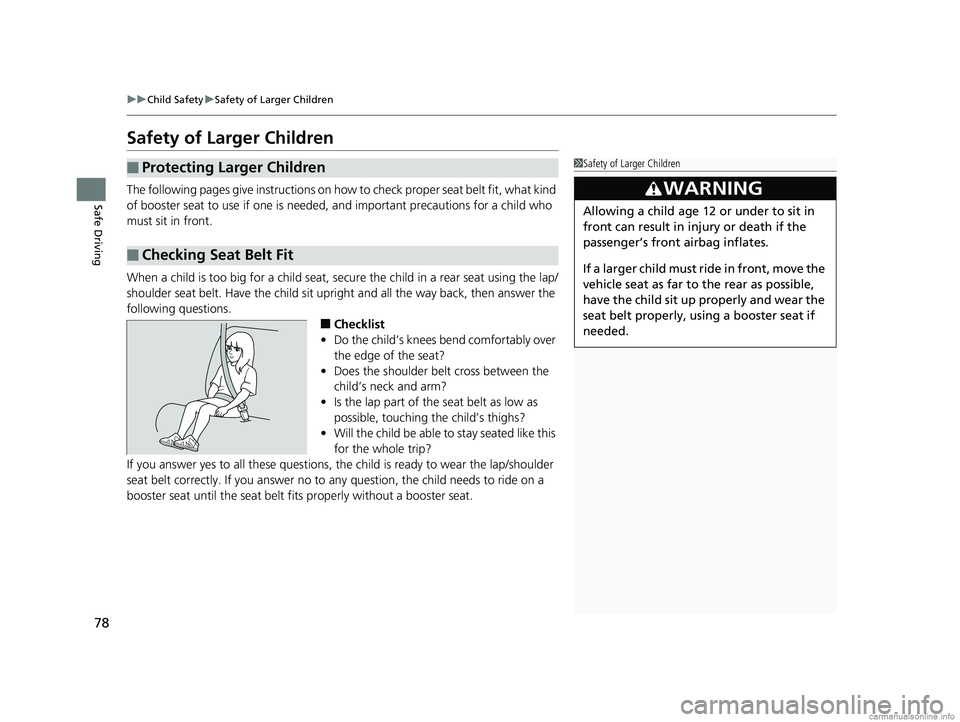
When a child is too big for a child seat, secure the child in a rear seat using the lap/
shoulder seat belt. Have the child sit upright and all the way back, then answer the
following questions.
■Checklist
• Do the child’s knees bend comfortably over
the edge of the seat?
• Does the shoulder belt cross between the
child’s neck and arm?
• Is the lap part of the seat belt as low as
possible, touching the child’s thighs?
• Will the child be able to stay seated like this
for the whole trip?
If you answer yes to all thes e questions, the child is read y to wear the lap/shoulder
seat belt correctly. If you answer no to any question, the child needs to ride on a
booster seat until the seat belt fits properly without a booster seat.
■Protecting Larger Children
■Checking Seat Belt Fit
1 Safety of Larger Children
3WARNING
Allowing a child age 12 or under to sit in
front can result in injury or death if the
passenger’s front airbag inflates.
If a larger child must ri de in front, move the
vehicle seat as far to the rear as possible,
have the child sit up properly and wear the
seat belt properly, using a booster seat if
needed.
18 CLARITY ELECTRIC CSS-31TRV6100.book 78 ページ 2018年2月5日 月曜日 午後12時0分
Page 83 of 559
81
Instrument Panel
This chapter describes the buttons, indicators, and gauges that are used while driving.
Indicators............................................ 82
Driver Information Interface Warning and Information Messages ..................... 100
Gauges and Driver Information Interface ....................................... 116
Gauges ............................................ 116
Driver Information Interface ............. 120
18 CLARITY ELECTRIC CSS-31TRV6100.book 81 ページ 2018年2月5日 月曜日 午後12時0分
Page 89 of 559
87
uuIndicators u
Continued
Instrument Panel
IndicatorNameOn/BlinkingExplanationMessage
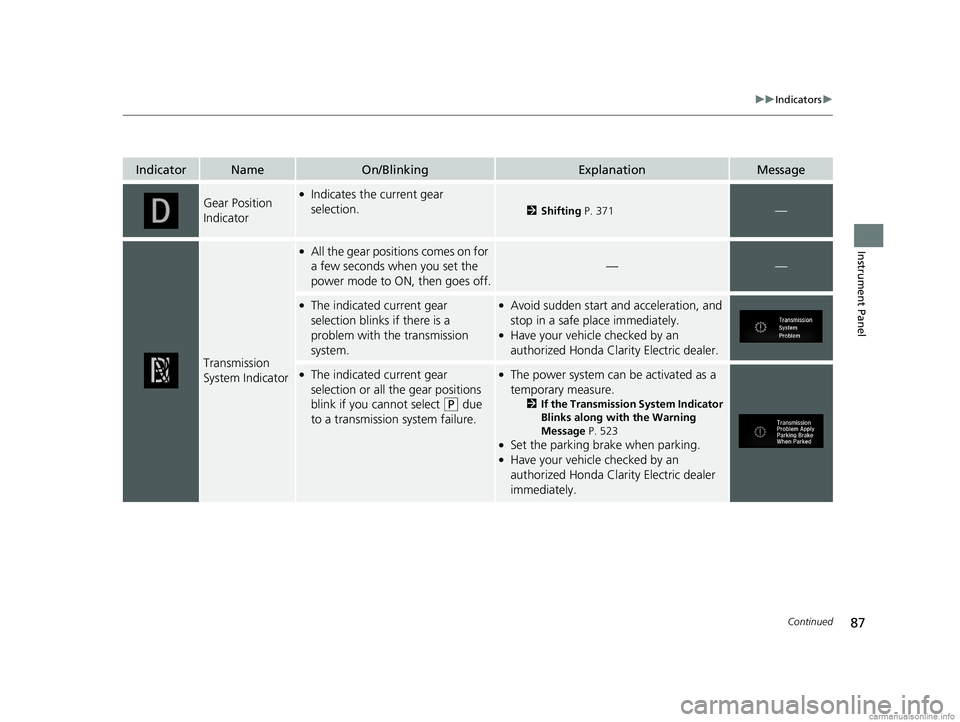
Gear Position
Indicator●Indicates the current gear
selection.
2Shifting P. 371—
Transmission
System Indicator
●All the gear positions comes on for
a few seconds when you set the
power mode to ON, then goes off.
——
●The indicated current gear
selection blinks if there is a
problem with the transmission
system.●Avoid sudden start and acceleration, and
stop in a safe place immediately.
●Have your vehicle checked by an
authorized Honda Clarity Electric dealer.
●The indicated current gear
selection or all the gear positions
blink if you cannot select
(P due
to a transmission system failure.
●The power system can be activated as a
temporary measure.
2 If the Transmission System Indicator
Blinks along with the Warning
Message P. 523
●Set the parking brake when parking.●Have your vehicle checked by an
authorized Honda Clarity Electric dealer
immediately.
18 CLARITY ELECTRIC CSS-31TRV6100.book 87 ページ 2018年2月5日 月曜日 午後12時0分
Page 95 of 559
93
uuIndicators u
Continued
Instrument Panel
IndicatorNameOn/BlinkingExplanationMessage
System Message
Indicator
●Comes on along with a beep when
a problem is detected. A system
message on the driver information
interface appears at the same time.●While the indicator is on, press the
(display/information) button to see the
message again.
●Refer to the Indicators information in this
chapter when a system message appears
on the driver informa tion interface. Take
the appropriate action for the message.
●The driver information interface does not
return to the normal screen unless the
warning is canceled, or the button is
pressed.
—
18 CLARITY ELECTRIC CSS-31TRV6100.book 93 ページ 2018年2月5日 月曜日 午後12時0分