2018 FORD F-450 tow
[x] Cancel search: towPage 219 of 660
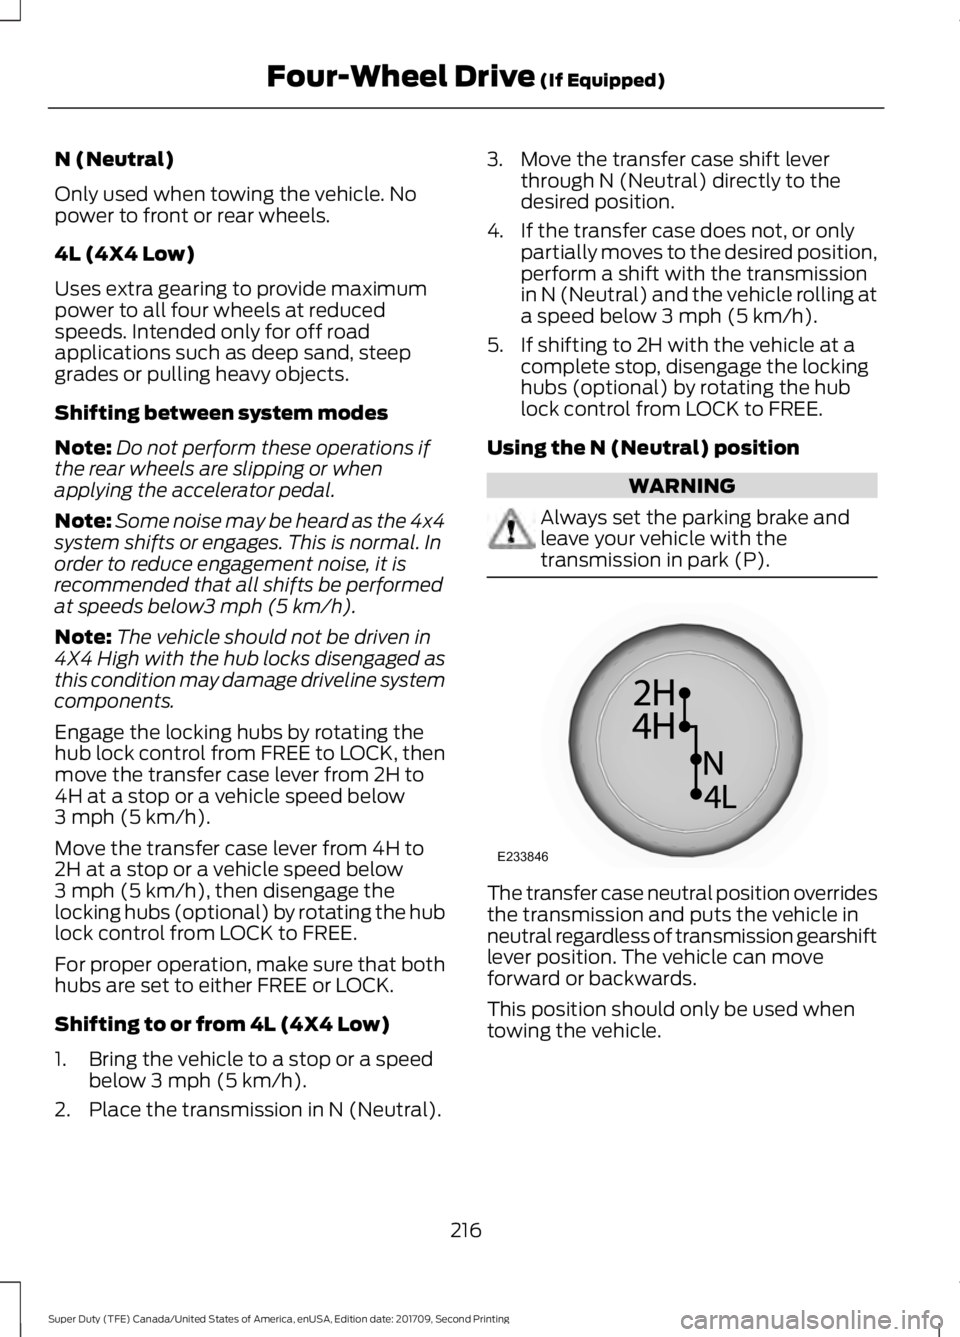
N (Neutral)
Only used when towing the vehicle. No
power to front or rear wheels.
4L (4X4 Low)
Uses extra gearing to provide maximum
power to all four wheels at reduced
speeds. Intended only for off road
applications such as deep sand, steep
grades or pulling heavy objects.
Shifting between system modes
Note:
Do not perform these operations if
the rear wheels are slipping or when
applying the accelerator pedal.
Note: Some noise may be heard as the 4x4
system shifts or engages. This is normal. In
order to reduce engagement noise, it is
recommended that all shifts be performed
at speeds below3 mph (5 km/h).
Note: The vehicle should not be driven in
4X4 High with the hub locks disengaged as
this condition may damage driveline system
components.
Engage the locking hubs by rotating the
hub lock control from FREE to LOCK, then
move the transfer case lever from 2H to
4H at a stop or a vehicle speed below
3 mph (5 km/h)
.
Move the transfer case lever from 4H to
2H at a stop or a vehicle speed below
3 mph (5 km/h)
, then disengage the
locking hubs (optional) by rotating the hub
lock control from LOCK to FREE.
For proper operation, make sure that both
hubs are set to either FREE or LOCK.
Shifting to or from 4L (4X4 Low)
1. Bring the vehicle to a stop or a speed below
3 mph (5 km/h).
2. Place the transmission in N (Neutral). 3. Move the transfer case shift lever
through N (Neutral) directly to the
desired position.
4. If the transfer case does not, or only partially moves to the desired position,
perform a shift with the transmission
in N (Neutral) and the vehicle rolling at
a speed below
3 mph (5 km/h).
5. If shifting to 2H with the vehicle at a complete stop, disengage the locking
hubs (optional) by rotating the hub
lock control from LOCK to FREE.
Using the N (Neutral) position WARNING
Always set the parking brake and
leave your vehicle with the
transmission in park (P).
The transfer case neutral position overrides
the transmission and puts the vehicle in
neutral regardless of transmission gearshift
lever position. The vehicle can move
forward or backwards.
This position should only be used when
towing the vehicle.
216
Super Duty (TFE) Canada/United States of America, enUSA, Edition date: 201709, Second Printing Four-Wheel Drive
(If Equipped)E233846
Page 227 of 660
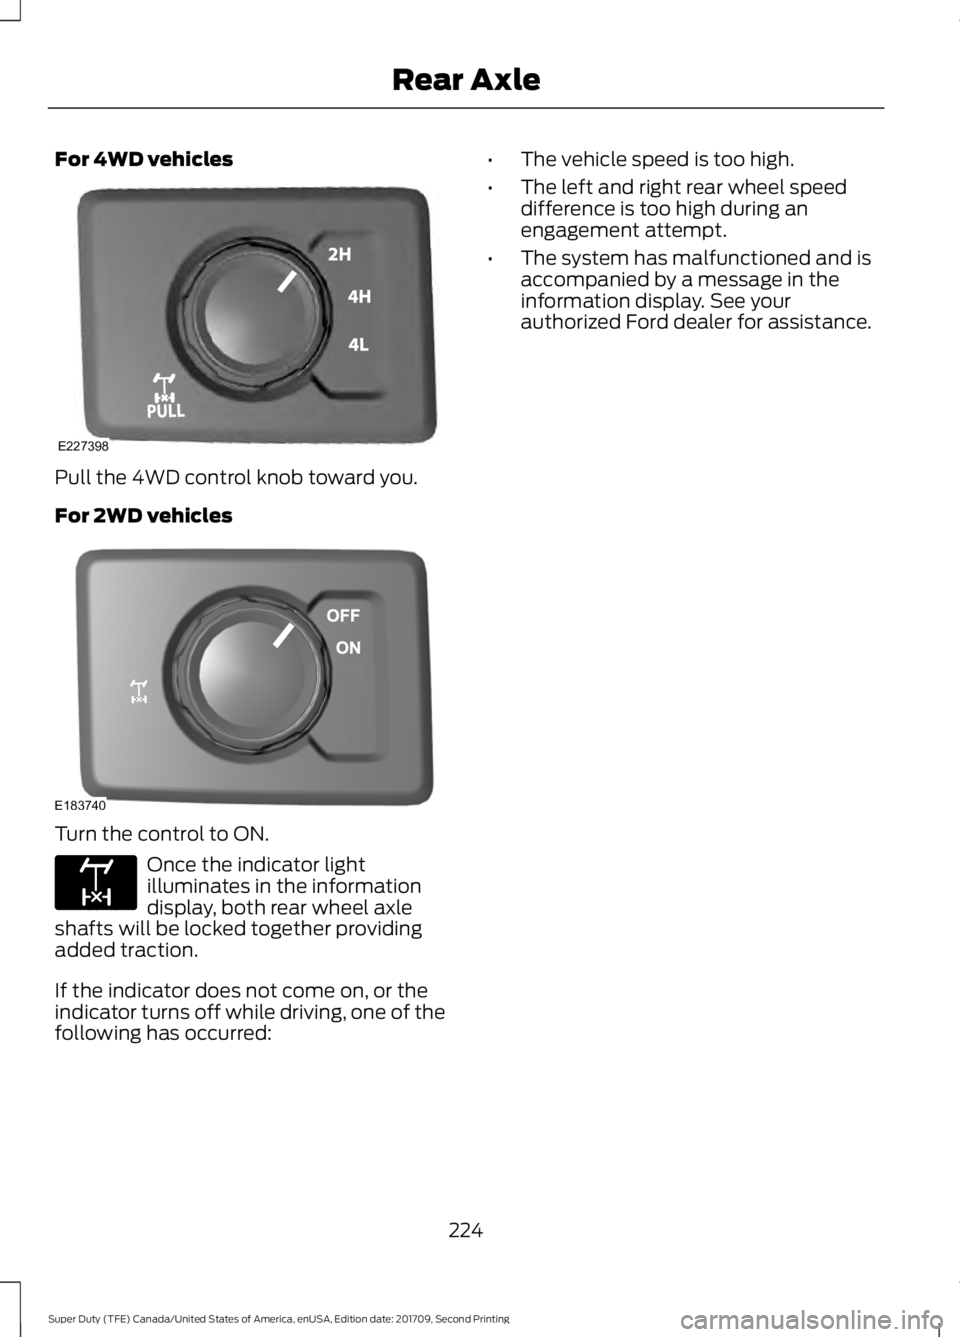
For 4WD vehicles
Pull the 4WD control knob toward you.
For 2WD vehicles
Turn the control to ON.
Once the indicator light
illuminates in the information
display, both rear wheel axle
shafts will be locked together providing
added traction.
If the indicator does not come on, or the
indicator turns off while driving, one of the
following has occurred: •
The vehicle speed is too high.
• The left and right rear wheel speed
difference is too high during an
engagement attempt.
• The system has malfunctioned and is
accompanied by a message in the
information display. See your
authorized Ford dealer for assistance.
224
Super Duty (TFE) Canada/United States of America, enUSA, Edition date: 201709, Second Printing Rear AxleE227398 E183740 E163170
Page 228 of 660
GENERAL INFORMATION
Note:
Occasional brake noise is normal. If
a metal-to-metal, continuous grinding or
continuous squeal sound is present, the
brake linings may be worn-out. Have the
system checked by an authorized dealer. If
your vehicle has continuous vibration or
shudder in the steering wheel while braking,
have it checked by an authorized dealer.
Note: Brake dust may accumulate on the
wheels, even under normal driving
conditions. Some dust is inevitable as the
brakes wear and does not contribute to
brake noise. See Warning Lamps and
Indicators (page 108).
Wet brakes result in reduced braking
efficiency. Gently press the brake pedal a
few times when driving from a car wash or
standing water to dry the brakes.
Brake Over Accelerator
In the event the accelerator pedal
becomes stuck or entrapped, apply steady
and firm pressure to the brake pedal to
slow the vehicle and reduce engine power.
If you experience this condition, apply the
brakes and bring your vehicle to a safe
stop. Shift the transmission to park (P),
switch the engine off and apply the parking
brake. Inspect the accelerator pedal for
any interference. If none are found and the
condition persists, have your vehicle towed
to the nearest authorized dealer.
Brake Assist
Brake assist detects when you brake
rapidly by measuring the rate at which you
press the brake pedal. It provides
maximum braking efficiency as long as you
press the pedal, and can reduce stopping
distances in critical situations. Anti-lock Brake System
This system helps you maintain steering
control during emergency stops by keeping
the brakes from locking. This lamp momentarily
illuminates when you switch the
ignition on. If the light does not
illuminate during start up, remains on or
flashes, the system may be disabled. Have
the system checked by an authorized
dealer. If the anti-lock brake system is
disabled, normal braking is still effective. If the brake warning lamp
remains illuminated after you
release the parking brake, have
the system checked by an authorized
dealer.
It also illuminates momentarily when you
switch the ignition on to confirm the lamp
is functional. If it does not illuminate when
you switch the ignition on, or begins to
flash at any time, have the system checked
by an authorized dealer.
Diesel Engine Exhaust Braking
(If
Equipped) WARNINGS
Do not use tow/haul when the road
surface is slippery. Failure to follow
this instruction could result in the
loss of control of your vehicle. Do not use diesel engine exhaust
braking when the road surface is
slippery. Failure to follow this
instruction could result in the loss of
control of your vehicle. This feature increases engine braking at
higher engine speeds to provide better
grade descent control with less brake and
transmission wear and tear.
Note:
Use this when driving downhill and
carrying heavy loads or trailering.
225
Super Duty (TFE) Canada/United States of America, enUSA, Edition date: 201709, Second Printing BrakesE144522 E144522
Page 229 of 660
Benefits of engine braking are:
•
Lower brake temperature.
• Reduced brake fade.
• Longer brake life.
• Improved driving and trailering control. Press the button on the switch
bank next to the audio unit to
switch the system on or off.
There are two engine brake modes, manual
and automatic.
Manual Engine Braking
1. Press the button to switch on manual engine braking.
2. Release the accelerator pedal to maximize engine braking.
3. Apply the brakes. The transmission downshifts to lower gears.
Note: The engine braking feature only
functions when you release the accelerator.
Note: You can shift the transmission to
lower gears with progressive range selection
(PRS) or manual shifting independent of
pressing the brakes.
Note: You can also use manual engine
braking with cruise control to improve grade
descent control.
Note: If your vehicle has Adaptive Cruise
Control, the speed control system uses the
selected engine brake mode, transmission
gears, and brakes to maintain the set speed
and distance to the vehicle being followed.
Automatic Engine Braking
1. Press the button twice to switch on automatic engine braking.
2. Release the accelerator or brake pedal.
The system remembers your vehicle
speed. Note:
This feature offers smoother, less
aggressive engine braking during downhill
descents. It may not apply braking if the
vehicle speed is not increasing, although it
will apply full engine braking force when
needed to prevent acceleration. The system
automatically activates the engine brake
and, if necessary, downshifts the
transmission to lower gears to not exceed
your vehicle's set speed when the brake or
accelerator were last released.
Warning Lamp Conditions
• Illuminates when this feature is
switched on and the system is
operating properly. See Warning
Lamps and Indicators (page 108).
• Flashes when the engine brake is
disabled due to a fault or the engine
does not meet the required braking
conditions.
• Does not illuminate when the switch
or indicator is faulty.
You can switch the system on at anytime.
The system becomes active once the
braking conditions are met.
Braking Conditions
• Your vehicle is in a forward gear.
• The engine speed is above about 1500
RPM.
• Your foot is off the accelerator.
You can use this feature with tow/haul or
progressive range selection to provide
further increased engine braking. The
transmission automatically upshifts to
prevent the engine from entering the red
zone on the tachometer.
See Automatic
Transmission (page 208).
226
Super Duty (TFE) Canada/United States of America, enUSA, Edition date: 201709, Second Printing BrakesE171217
Page 239 of 660

Coverage area of up to 6 ft (1.8 m) from
the rear bumper. There may be decreased
coverage area at the outer corners of the
bumper.
The system detects certain objects while
the transmission is in reverse (R) :
• Your vehicle is moving toward a
stationary object at a speed of
3 mph
(5 km/h) or less.
• Your vehicle is not moving, but a
moving object is approaching the rear
of your vehicle at a speed of
3 mph
(5 km/h) or less.
• Your vehicle is moving at a speed of
less than 3 mph (5 km/h) and a moving
object is approaching the rear of your
vehicle at a speed of less than
3 mph
(5 km/h).
The system provides audio warnings only
when your vehicle is moving or when your
vehicle is stationary and the detected
obstacle is less than
12 in (30 cm) away
from the bumper.
Obstacle Distance Indicator
(If
Equipped)
The system provides obstacle distance
indication through the display screen. See
Rear View Camera
(page 236). REAR VIEW CAMERA
(If Equipped) WARNINGS
The rear view camera system is a
reverse aid supplement device that
still requires the driver to use it in
conjunction with the interior and exterior
mirrors for maximum coverage. Objects that are close to either
corner of the bumper or under the
bumper, might not be seen on the
screen due to the limited coverage of the
camera system. Reverse your vehicle as slow as
possible, higher speeds may limit
your reaction time to stop your
vehicle. Use caution when the tailgate is ajar.
If the tailgate is ajar, the camera will
be out of position and the video
image may be incorrect. All guidelines
disappear when the tailgate is ajar. Some
vehicles may not come equipped with
guidelines. Use caution when turning camera
features on or off when the
transmission is not in park (P). Make
sure your vehicle is not moving. The rear view camera system displays
what is behind your vehicle when you shift
the transmission into reverse (R).
During operation, lines appear in the
display that represents the path of your
vehicle and proximity to objects behind it.
236
Super Duty (TFE) Canada/United States of America, enUSA, Edition date: 201709, Second Printing Parking AidsE231381
Page 240 of 660
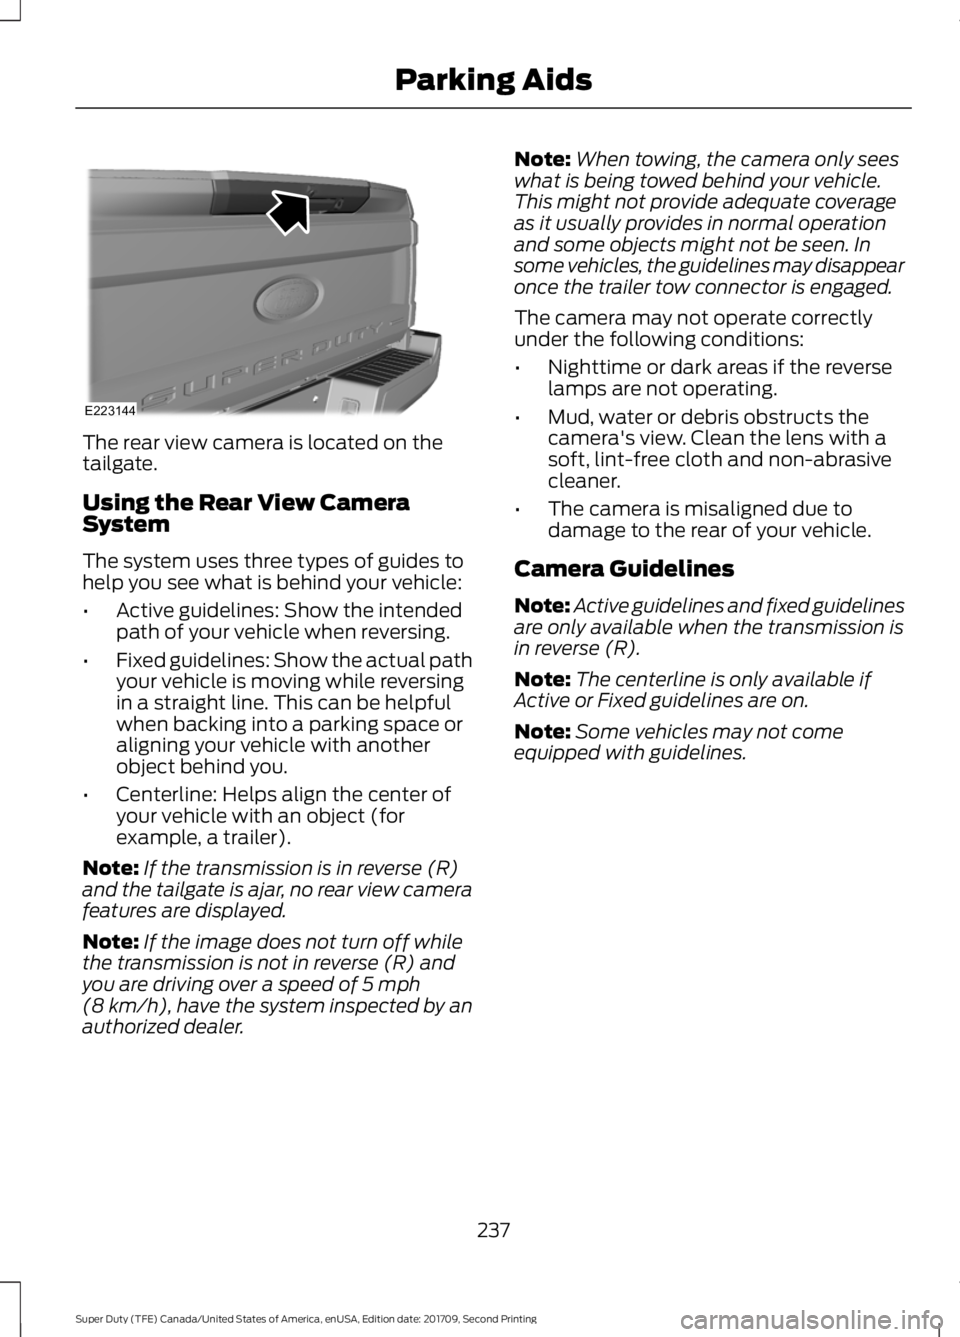
The rear view camera is located on the
tailgate.
Using the Rear View Camera
System
The system uses three types of guides to
help you see what is behind your vehicle:
•
Active guidelines: Show the intended
path of your vehicle when reversing.
• Fixed guidelines: Show the actual path
your vehicle is moving while reversing
in a straight line. This can be helpful
when backing into a parking space or
aligning your vehicle with another
object behind you.
• Centerline: Helps align the center of
your vehicle with an object (for
example, a trailer).
Note: If the transmission is in reverse (R)
and the tailgate is ajar, no rear view camera
features are displayed.
Note: If the image does not turn off while
the transmission is not in reverse (R) and
you are driving over a speed of 5 mph
(8 km/h), have the system inspected by an
authorized dealer. Note:
When towing, the camera only sees
what is being towed behind your vehicle.
This might not provide adequate coverage
as it usually provides in normal operation
and some objects might not be seen. In
some vehicles, the guidelines may disappear
once the trailer tow connector is engaged.
The camera may not operate correctly
under the following conditions:
• Nighttime or dark areas if the reverse
lamps are not operating.
• Mud, water or debris obstructs the
camera's view. Clean the lens with a
soft, lint-free cloth and non-abrasive
cleaner.
• The camera is misaligned due to
damage to the rear of your vehicle.
Camera Guidelines
Note: Active guidelines and fixed guidelines
are only available when the transmission is
in reverse (R).
Note: The centerline is only available if
Active or Fixed guidelines are on.
Note: Some vehicles may not come
equipped with guidelines.
237
Super Duty (TFE) Canada/United States of America, enUSA, Edition date: 201709, Second Printing Parking AidsE223144
Page 241 of 660

Active guidelines
A
Centerline
B
Fixed guideline: Green zone
C
Fixed guideline: Yellow zone
D
Fixed guideline: Red zone
E
Rear bumper
F
To use active guidelines, turn the steering
wheel to point the guidelines toward an
intended path. If the steering wheel
position is changed while reversing, the
vehicle might deviate from the original
intended path.
The active guidelines fade in and out
depending on the steering wheel position.
The active guidelines are not shown when
the steering wheel position is straight. Always use caution while reversing.
Objects in the red zone are closest to your
vehicle and objects in the green zone are
farther away. Objects are getting closer to
your vehicle as they move from the green
zone to the yellow or red zones. Use the
side view mirrors and rear view mirror to
get better coverage on both sides and rear
of your vehicle.
Obstacle Distance Indicator
The system will provide an image of your
vehicle and the sensor zones. The zones
will highlight green, yellow and red when
the parking aid sensors detect an object in
the coverage area.
Rear Camera Delay
Selectable settings for this feature are ON
and OFF.
238
Super Duty (TFE) Canada/United States of America, enUSA, Edition date: 201709, Second Printing Parking AidsABCD
F
E
E142436 E190459
Page 247 of 660

USING ADAPTIVE CRUISE
CONTROL (If Equipped)
WARNINGS
Always pay close attention to
changing road conditions when using
adaptive cruise control. The system
does not replace attentive driving. Failing
to pay attention to the road may result in
a crash, serious injury or death. Do not use the adaptive cruise
control when entering or leaving a
highway, on roads with intersections
or roundabouts or non-vehicular traffic or
roads that are winding, slippery, unpaved,
or steep slopes. Do not use the system in poor
visibility, for example fog, heavy rain,
spray or snow.
Do not use the system when towing
a trailer with aftermarket trailer
brake controls. Aftermarket trailer
brakes will not function properly when you
switch the system on because the brakes
are electronically controlled. Failing to do
so may result in loss of vehicle control,
which could result in serious injury. Do not use tire sizes other than those
recommended because this can
affect the normal operation of the
system. Failure to do so may result in a loss
of vehicle control, which could result in
serious injury. Adaptive cruise control may not
detect stationary or slow moving
vehicles below
6 mph (10 km/h).
Adaptive cruise control does not
detect pedestrians or objects in the
road.
Adaptive cruise control does not
detect oncoming vehicles in the
same lane. WARNINGS
Adaptive cruise control is not a crash
warning or avoidance system.
Do not use adaptive cruise control
with a snow plow blade installed.
Note:
It is your responsibility to stay alert,
drive safely and be in control of the vehicle
at all times.
The system adjusts your vehicle speed to
maintain the set gap between you and the
vehicle in front of you in the same lane.
You can select four gap settings.
The system uses a radar sensor that
projects a beam directly in front of your
vehicle. The adaptive cruise controls are on the
steering wheel.
Switching Adaptive Cruise Control
On
Press ON.
The indicator, current gap setting
and set speed appear in the
information display.
244
Super Duty (TFE) Canada/United States of America, enUSA, Edition date: 201709, Second Printing Cruise Control
(If Equipped)E183737 E144529