2018 FORD F-450 ECO mode
[x] Cancel search: ECO modePage 185 of 660

We recommend the following cold
weather idling guidelines:
•
You can use Motorcraft® cetane
improvers or non-alcohol-based
cetane improvers from a reputable
manufacturer as needed.
• Maintain the engine cooling system
properly.
• Avoid shutting the engine down after
an extensive idling period. Drive your
vehicle for several miles with the
engine at normal operating
temperatures under a moderate load.
• Consider using an engine block heater.
• For extended idle times use an
approved idle speed increase device.
Winter Operating Tips for Arctic
Operation -20°F (-29°C) and Below
The following information is a guideline
only and is not to be the only source of
possible solutions in resolving extreme
cold temperature issues.
Starting Aids WARNING
Do not use starting fluid, for example
ether, in the air intake system. Such
fluid could cause immediate
explosive damage to the engine and
possible personal injury. The use of the factory engine block heater
assists in engine starting in extreme cold
ambient temperatures See Engine Block
Heater (page 183). Idle Control
Your vehicle may have a factory option for
a stationary elevated idle control through
the upfitter switches in the overhead
console. This allows the operator to
elevate the idle RPM for extended idle
periods, as well as aftermarket equipment
such as PTO operation. You must configure
this feature even if ordered from the
factory. See your authorized dealer for
required upfitting.
Operation in Snow and Rain
Vehicle operation in heavy snowfall or
extreme rain conditions may feed
excessive amounts of snow or water into
the air intake system. This could plug the
air filter with snow and may cause the
engine to lose power and possibly shut
down.
We recommend the following actions after
operating your vehicle up to
200 mi
(320 km) in snowfall or extreme rain:
• Snow: At the earliest opportunity, open
the hood and clear all the snow and ice
from the air filter housing inlet (do not
remove the foam filter) and reset the
air filter restriction gauge.
Note: Removal of the foam filter degrades
your vehicle performance during snow and
hot weather conditions.
• Extreme rain: The air filter dries after
about 15– 30 minutes at highway
speeds. At the earliest opportunity,
open the hood and reset the air filter
restriction gauge.
Refer to Air filter and restriction gauge in
the Maintenance chapter for more
information. See
Changing the Engine
Air Filter (page 363).
182
Super Duty (TFE) Canada/United States of America, enUSA, Edition date: 201709, Second Printing Starting and Stopping the Engine
Page 186 of 660

Operation in Standing Water
Ingestion of water into the diesel engine
can result in immediate and severe
damage to the engine. If driving through
water, slow down to avoid splashing water
into the intake. If the engine stalls, and you
suspect ingestion of water into the engine,
do not try to restart the engine. Consult
your dealer for service immediately.
Your fuel tank vents to the atmosphere by
valves on top of the tank and through the
fuel cap. If water reaches the top of the
tank, the valves may pull water into the
fuel tank. Water in the fuel can cause
performance issues and damage the fuel
injection system.
SWITCHING OFF THE ENGINE
- 6.7L DIESEL
Switch the ignition off.
To help prolong engine life, we
recommended you allow the engine to idle
for three to five minutes, especially after
any of the following:
•
Continuous engine speed.
• High ambient temperature.
• High GVW or GCW operation, for
example heavy loads or trailers.
This allows the turbo charged engine to
cool down.
ENGINE IDLE SHUTDOWN
Your vehicle may be equipped with an
engine idle shutdown system. This system
automatically shuts down your engine
when it has been idling in P (Park) or N
(Neutral) for five minutes (parking brake
set) or 15 minutes (parking brake not set).
When the engine idle shutdown process
has started: •
A chime sounds and the information
display will show ENGINE TURNS OFF
IN 30 (seconds) and start counting
down
• You can restart the five or 15-minute
timer by changing the position of the
accelerator pedal, brake pedal or the
park brake within the final 30 seconds
• When the timer reaches zero, the
engine shuts down and this message
will appear in your information display
ENGINE TURNED OFF
• One minute after the engine has shut
down, the electrical system simulates
key off, even though the ignition is still
in the on position, initiating normal
accessory delay period
• You must move the ignition to the off
position to reset the system before
restarting your vehicle.
The engine idle shutdown idle timer does
not start if:
• The engine is operating in power
take-off mode.
• The engine coolant temperature is
below 60°F (16°C).
• The exhaust emission control device is
regenerating.
ENGINE BLOCK HEATER
(If
Equipped) WARNINGS
Failure to follow engine block heater
instructions could result in property
damage or serious personal injury.
Do not use your heater with
ungrounded electrical systems or
two-pronged adapters. There is a risk
of electrical shock. 183
Super Duty (TFE) Canada/United States of America, enUSA, Edition date: 201709, Second Printing Starting and Stopping the Engine
Page 204 of 660

Continued driving without refilling results
in the following actions as required by the
California Air Resources Board (CARB) and
the U.S. Environmental Protection Agency
(EPA):
•
Within a preset distance to empty,
speed is limited upon vehicle restart.
Prior to this occurring a message
appears in the information display.
• Further vehicle operation without
refilling the diesel exhaust fluid tank
causes the engine to enter an idle-only
condition. This only occurs upon vehicle
refueling or at an extended idle. A
message indicates the required actions
to resume normal operation. It is
required to add a minimum of 1.0 gal
(3.8 L) of diesel exhaust fluid to the
tank to exit the idle-only condition, but
your vehicle is still in the speed-limiting
mode until you refill the tank
completely.
Note: For either vehicle speed limiting or
idle-only condition, normal vehicle operation
resumes when you refill the diesel exhaust
fluid tank.
Note: When filling the diesel exhaust fluid
tank from empty, there may be a short delay
before detecting the increased level of fluid.
The increased level detection must occur
before your vehicle returns to full power.
Diesel Exhaust Fluid Guidelines
and Information
• Use only diesel exhaust fluid that
carries the American Petroleum
Institute (API) certified diesel exhaust
fluid trademark or ISO 22241.
• Do not put diesel exhaust fluid in the
diesel fuel tank.
• Do not overfill the diesel exhaust fluid
tank.
• Diesel exhaust fluid is corrosive.
• Do not re-use the diesel exhaust fluid
container once it is emptied. •
Avoid spilling diesel exhaust fluid on
painted surfaces, carpeting or plastic
components. Immediately wipe away
any diesel exhaust fluid that has spilled
with a damp cloth and water. If it has
already crystallized, use warm water
and a sponge.
• Store diesel exhaust fluid out of direct
sunlight and in temperatures between
23°F (-5°C)
and 68°F (20°C).
• Diesel exhaust fluid freezes below 12°F
(-11°C)
.
• Do not store the diesel exhaust fluid
bottle in your vehicle. If it leaks it could
cause damage to interior components
or release an ammonia odor inside your
vehicle.
• Diesel exhaust fluid is non-flammable,
non-toxic, colorless and water-soluble
liquid.
• The system has a diesel exhaust fluid
quality sensor. Dilution of diesel
exhaust fluid or use of any other liquid
in the SCR system leads to a diesel
exhaust fluid system fault, eventually
leading to the vehicle only operating in
idle-only mode.
• Do not dilute diesel exhaust fluid with
water or any other liquid.
• An ammonia odor may be smelled
when the cap is removed or during
refill. Refill diesel exhaust fluid in a well
ventilated area.
201
Super Duty (TFE) Canada/United States of America, enUSA, Edition date: 201709, Second Printing Engine Emission Control
Page 212 of 660

First (1)
•
Transmission operates in first (1) gear
only.
• Provides maximum engine braking.
• Allows upshifts by moving gearshift
lever.
• Does not downshift into first (1) gear
at high speeds; allows for first (1) gear
when vehicle reaches slower speeds.
Forced downshifts
• Allowed in drive (D) with the tow/haul
feature on or off.
• Press the accelerator to the floor.
• Allows transmission to select an
appropriate gear.
Tow/Haul Mode WARNING
Do not use tow/haul when the road
surface is slippery. Failure to follow
this instruction could result in the
loss of control of your vehicle. To activate tow/haul, press the
button on the gearshift lever
once. The TOW HAUL indicator
light illuminates in the instrument cluster. The tow/haul feature:
•
Delays upshifts to reduce the frequency
of transmission shifting.
• Provides engine braking in all forward
gears, which slows your vehicle and
assists you in controlling your vehicle
when descending a grade.
• Depending on driving conditions and
load conditions, may downshift the
transmission, slow your vehicle and
control your vehicle speed when
descending a hill, without pressing the
accelerator pedal. The amount of
downshift braking provided varies
based upon the amount you press the
brake pedal.
The tow/haul feature improves
transmission operation when towing a
trailer or a heavy load. All transmission
gear ranges are available when using
tow/haul.
Note: If your vehicle is equipped with the
Adaptive Steering System, enabling the
tow/haul feature adjusts the steering
response. In tow/haul mode the Adaptive
Steering system reduces vehicle sensitivity
to steering inputs at higher vehicle speeds
when maintaining the ease of parking and
maneuverability at low speeds. See
Steering (page 259).
To deactivate the tow/haul feature and
return to normal driving mode, press the
button on the gearshift lever when
tow/haul is active. The TOW HAUL light
deactivates. Tow/haul also deactivates
when you power down your vehicle.
209
Super Duty (TFE) Canada/United States of America, enUSA, Edition date: 201709, Second Printing TransmissionE161509
Page 213 of 660

Understanding your SelectShift
Automatic
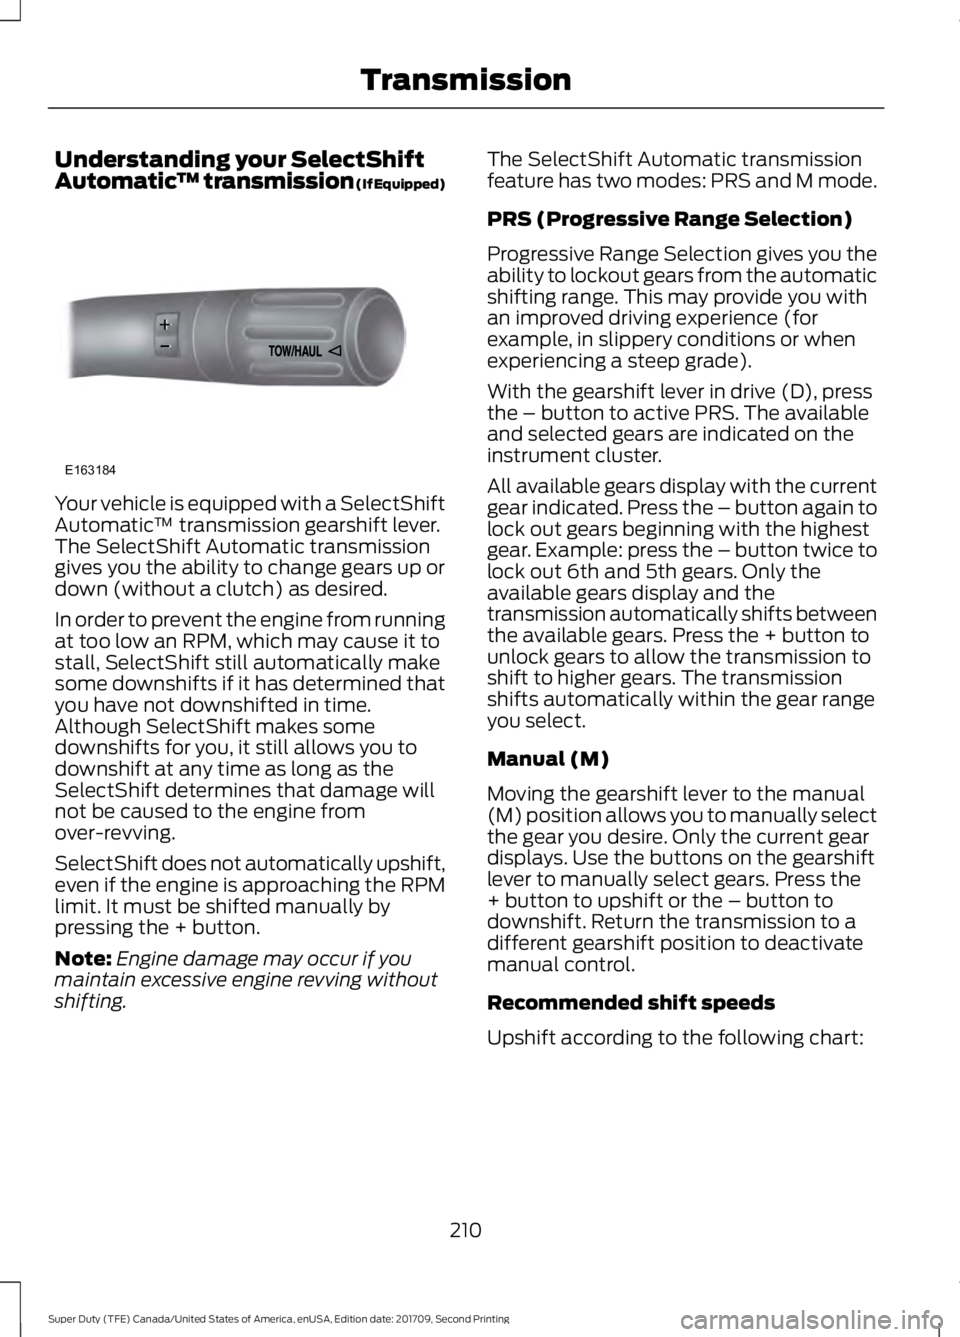
™ transmission (If Equipped)Your vehicle is equipped with a SelectShift
Automatic
™ transmission gearshift lever.
The SelectShift Automatic transmission
gives you the ability to change gears up or
down (without a clutch) as desired.
In order to prevent the engine from running
at too low an RPM, which may cause it to
stall, SelectShift still automatically make
some downshifts if it has determined that
you have not downshifted in time.
Although SelectShift makes some
downshifts for you, it still allows you to
downshift at any time as long as the
SelectShift determines that damage will
not be caused to the engine from
over-revving.
SelectShift does not automatically upshift,
even if the engine is approaching the RPM
limit. It must be shifted manually by
pressing the + button.
Note: Engine damage may occur if you
maintain excessive engine revving without
shifting. The SelectShift Automatic transmission
feature has two modes: PRS and M mode.
PRS (Progressive Range Selection)
Progressive Range Selection gives you the
ability to lockout gears from the automatic
shifting range. This may provide you with
an improved driving experience (for
example, in slippery conditions or when
experiencing a steep grade).
With the gearshift lever in drive (D), press
the – button to active PRS. The available
and selected gears are indicated on the
instrument cluster.
All available gears display with the current
gear indicated. Press the – button again to
lock out gears beginning with the highest
gear. Example: press the – button twice to
lock out 6th and 5th gears. Only the
available gears display and the
transmission automatically shifts between
the available gears. Press the + button to
unlock gears to allow the transmission to
shift to higher gears. The transmission
shifts automatically within the gear range
you select.
Manual (M)
Moving the gearshift lever to the manual
(M) position allows you to manually select
the gear you desire. Only the current gear
displays. Use the buttons on the gearshift
lever to manually select gears. Press the
+ button to upshift or the – button to
downshift. Return the transmission to a
different gearshift position to deactivate
manual control.
Recommended shift speeds
Upshift according to the following chart:
210
Super Duty (TFE) Canada/United States of America, enUSA, Edition date: 201709, Second Printing TransmissionE163184
Page 217 of 660

USING FOUR-WHEEL DRIVE
Note:
For important information regarding
the safe operation of this type of vehicle,
see General Information in the Wheels and
Tires chapter.
Note: Do not use 4H or 4L mode on dry,
hard surfaced roads. Doing so can produce
excessive noise, increase tire wear and may
damage drive components. 4X4 mode is
only intended for consistently slippery or
loose surfaces. Use of 4L mode on these
surfaces may produce some noise (such as
occasional clunks), but will not damage
drive components.
Note: If 4X4 low is selected while the
vehicle is moving above 3 mph (5 km/h),
the 4WD system will not perform a shift.
This is normal and should be no reason for
concern. Refer to Shifting to or from 4L (4X4
Low) for proper operation.
Note: You can switch on and switch off the
electronic locking differential by pulling the
4WD control (4WD vehicles) or turning the
electronic locking differential control (2WD
vehicles). See
Electronic Locking
Differential (page 223).
Manual Shift On Stop (MSOS)
4WD system
(If Equipped)
Note: The vehicle should not be driven in
4X4 High or 4X4 Low modes with the hub
locks set to FREE as this condition may
damage driveline system components. The 4WD system is engaged or disengaged
by rotating the control for both front wheel
hub locks from the FREE or LOCK position,
then manually engaging or disengaging the
transfer case with the floor-mounted
shifter. For increased fuel economy in 2WD,
rotate both hub locks to the FREE position.
Electronic Shift-On-the-Fly
(ESOF) 4WD system
(If Equipped)
Note: If 4X4 Low is selected while the
vehicle is moving above
3 mph (5 km/h),
the 4WD system will not perform a shift.
This is normal and should be no reason for
concern. Refer to Shifting to or from 4L (4X4
Low) for proper system operation.
Note: Auto-manual hub locks can be
manually overridden by rotating the hub lock
control from AUTO to LOCK. 214
Super Duty (TFE) Canada/United States of America, enUSA, Edition date: 201709, Second Printing Four-Wheel Drive
(If Equipped)LOC K
EERF
E163187 LOC K
OTUA
E163188
Page 218 of 660

For proper operation, make sure that each
hub is fully engaged and that both hub
locks are set to the same position (both
set to LOCK or both set to AUTO). To
engage LOCK, turn the hub locks
completely clockwise; to engage AUTO,
turn the hub locks completely
counterclockwise.
The ESOF 4WD system:
•
provides 4x4 High engagement and
disengagement while the vehicle is
moving.
• is operated by a rotary control located
on the instrument panel that allows
you select 4x2, 4x4 High or 4x4 Low
operation.
• uses auto-manual hub locks that can
be engaged and disengaged
automatically based on the 4x4 mode
selected.
• will increase fuel economy when used
in the hub lock's recommended AUTO
mode.
4WD Indicator Lights
Note: When a 4X4 system fault is present,
the system will typically remain in whichever
4X4 mode was selected prior to the fault
condition occurring. It will not default to 4X2
in all circumstances. When this warning is
displayed, have your vehicle serviced by an
authorized dealer.
4X2 Momentarily illuminates when
2H is selected.
4X4 HIGH Continuously illuminates when
4H is selected. 4X4 LOW Continuously illuminates when
4L is selected.
CHECK 4X4 Displays when a 4X4 fault is
present.
Using a Manual Shift On Stop
(MSOS) 4WD system (If Equipped)
Note: High shift efforts may be encountered
when attempting to shift into and out of 4x4
modes. It is recommended to allow the
vehicle to roll at a speed below
3 mph
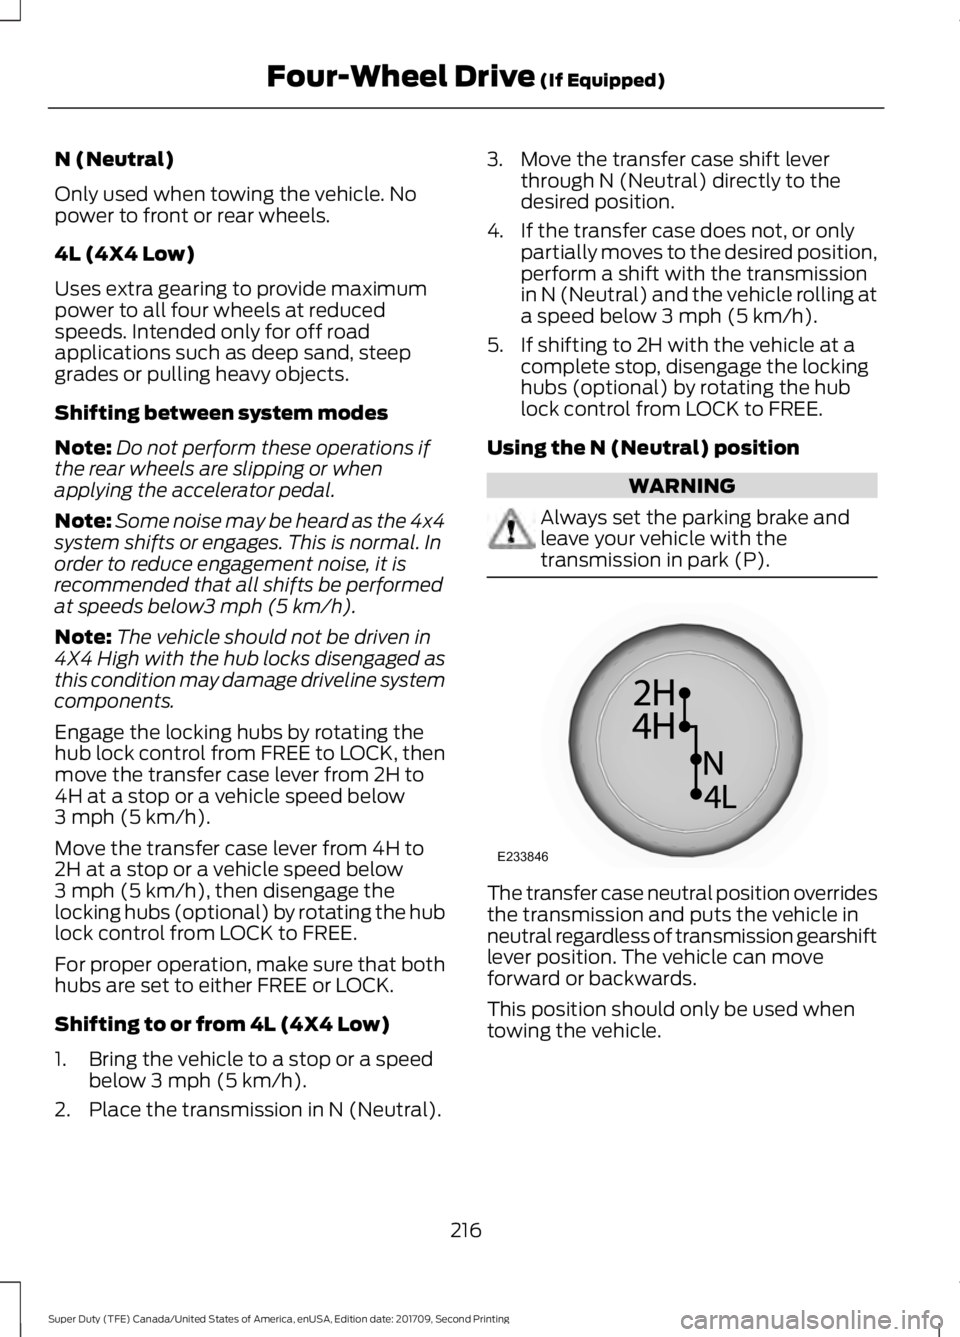
(5 km/h) when shifting between modes. 2H (4X2)
For general on-road driving. Sends power
to the rear wheels only and should be used
for street and highway driving. Provides
optimal smoothness and fuel economy at
high speeds
4H (4X4 High)
Used for extra traction such as in snow or
icy roads or in off road situations. This
mode is not intended for use on dry
pavement.
215
Super Duty (TFE) Canada/United States of America, enUSA, Edition date: 201709, Second Printing Four-Wheel Drive
(If Equipped)E163173 E181779 E181780 E233846
Page 219 of 660

N (Neutral)
Only used when towing the vehicle. No
power to front or rear wheels.
4L (4X4 Low)
Uses extra gearing to provide maximum
power to all four wheels at reduced
speeds. Intended only for off road
applications such as deep sand, steep
grades or pulling heavy objects.
Shifting between system modes
Note:
Do not perform these operations if
the rear wheels are slipping or when
applying the accelerator pedal.
Note: Some noise may be heard as the 4x4
system shifts or engages. This is normal. In
order to reduce engagement noise, it is
recommended that all shifts be performed
at speeds below3 mph (5 km/h).
Note: The vehicle should not be driven in
4X4 High with the hub locks disengaged as
this condition may damage driveline system
components.
Engage the locking hubs by rotating the
hub lock control from FREE to LOCK, then
move the transfer case lever from 2H to
4H at a stop or a vehicle speed below
3 mph (5 km/h)
.
Move the transfer case lever from 4H to
2H at a stop or a vehicle speed below
3 mph (5 km/h)
, then disengage the
locking hubs (optional) by rotating the hub
lock control from LOCK to FREE.
For proper operation, make sure that both
hubs are set to either FREE or LOCK.
Shifting to or from 4L (4X4 Low)
1. Bring the vehicle to a stop or a speed below
3 mph (5 km/h).
2. Place the transmission in N (Neutral). 3. Move the transfer case shift lever
through N (Neutral) directly to the
desired position.
4. If the transfer case does not, or only partially moves to the desired position,
perform a shift with the transmission
in N (Neutral) and the vehicle rolling at
a speed below
3 mph (5 km/h).
5. If shifting to 2H with the vehicle at a complete stop, disengage the locking
hubs (optional) by rotating the hub
lock control from LOCK to FREE.
Using the N (Neutral) position WARNING
Always set the parking brake and
leave your vehicle with the
transmission in park (P).
The transfer case neutral position overrides
the transmission and puts the vehicle in
neutral regardless of transmission gearshift
lever position. The vehicle can move
forward or backwards.
This position should only be used when
towing the vehicle.
216
Super Duty (TFE) Canada/United States of America, enUSA, Edition date: 201709, Second Printing Four-Wheel Drive
(If Equipped)E233846