2018 FORD EXPEDITION transmission
[x] Cancel search: transmissionPage 237 of 571

The system will provide an image of your
vehicle and the sensor zones. The zones
will highlight green, yellow and red when
the parking aid sensors detect an object in
the coverage area.
Manual Zoom
WARNING: When manual zoom
is on, the full area behind your vehicle
may not show. Be aware of your
surroundings when using the manual
zoom feature.
Note: Manual zoom is only available when
the transmission is in reverse (R).
Note: When you enable manual zoom, only
the centerline is shown.
Selectable settings for this feature are
Zoom in (+) and Zoom out (-). Press the
symbol in the camera screen to change the
view. The default setting is Zoom OFF.
This allows you to get a closer view of an
object behind your vehicle. The zoomed
image keeps the bumper in the image to
provide a reference. The zoom is only
active while the transmission is in reverse
(R).
Rear Camera Delay
Selectable settings for this feature are ON
and OFF.
The default setting for the rear camera
delay is OFF.
When shifting the transmission out of
reverse (R) and into any gear other than
park (P), the camera image remains in the
display until:
• Your vehicle speed reaches
approximately
6 mph (10 km/h).
• You shift your vehicle into park (P). 360 DEGREE CAMERA
(IF
EQUIPPED) WARNING:
The 360 degree
camera system still requires the driver
to use it in conjunction with looking out
of the windows, and checking the interior
and exterior mirrors for maximum
coverage. WARNING: Objects that are close
to either corner of the bumper or under
the bumper, might not be seen on the
screen due to the limited coverage of the
camera system. WARNING:
Use caution when
turning camera features on or off when
the transmission is not in park (P). Make
sure your vehicle is not moving.
Note: The 360 degree camera system turns
off when your vehicle is in motion at low
speed, except when in reverse (R).
The 360 degree camera system consists
of front, side and rear cameras. The
system:
• Allows you to see what is directly in
front or behind your vehicle.
• Provides cross traffic view in front and
behind your vehicle.
• Allows you to see a top-down view of
the area outside your vehicle, including
the blind spots.
• Provides visibility around your vehicle
to you in parking maneuvers such as:
•Centering in a parking space.
• Obstacles near vehicle.
• Parallel parking.
234
Expedition (TB8) Canada/United States of America, enUSA, Edition date: 201708, Third-Printing- Parking Aids
Page 239 of 571
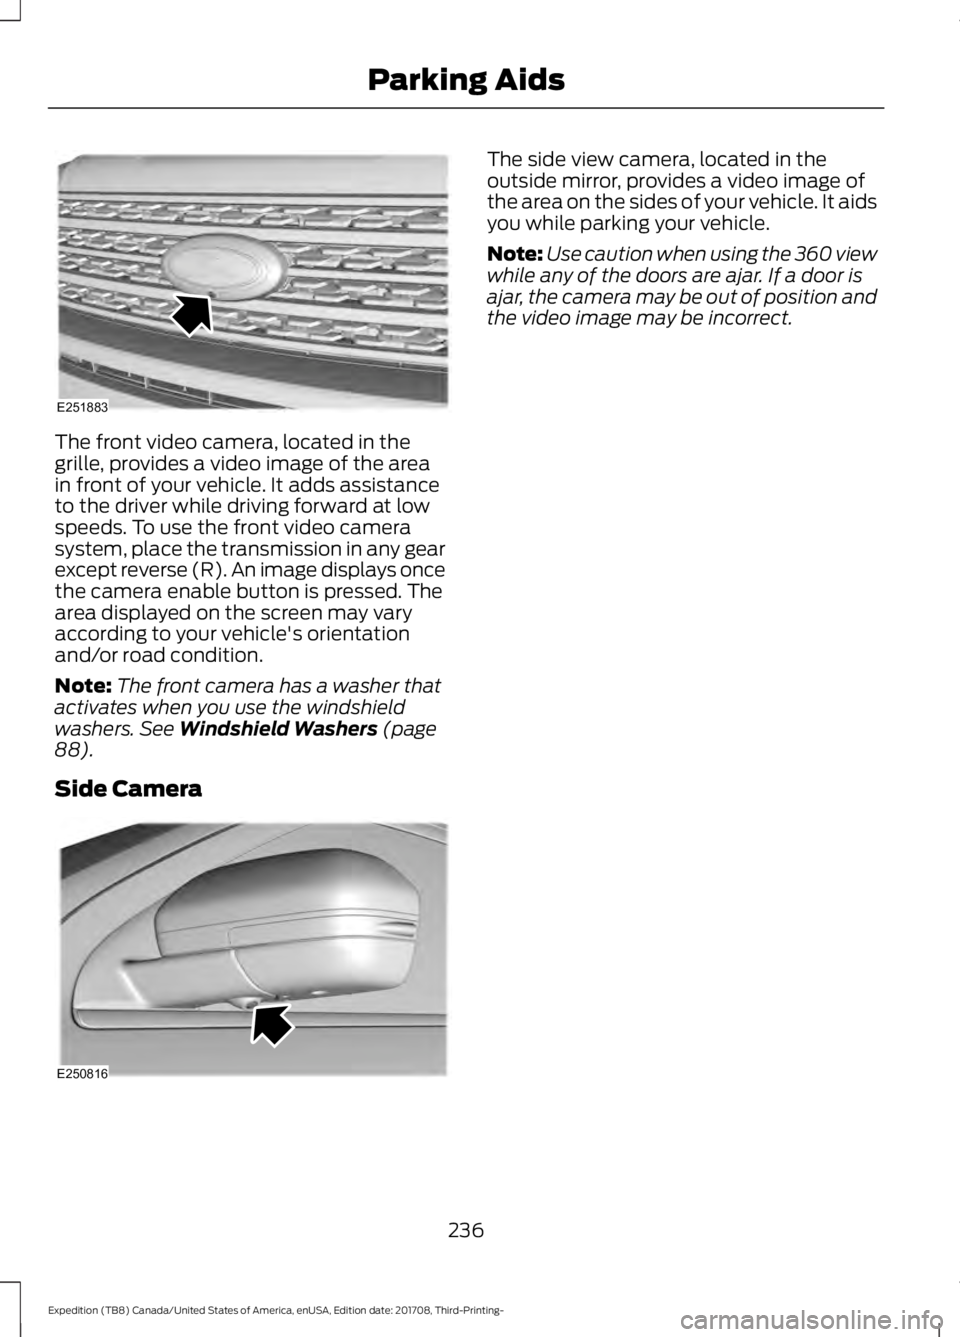
The front video camera, located in the
grille, provides a video image of the area
in front of your vehicle. It adds assistance
to the driver while driving forward at low
speeds. To use the front video camera
system, place the transmission in any gear
except reverse (R). An image displays once
the camera enable button is pressed. The
area displayed on the screen may vary
according to your vehicle's orientation
and/or road condition.
Note:
The front camera has a washer that
activates when you use the windshield
washers. See Windshield Washers (page
88).
Side Camera The side view camera, located in the
outside mirror, provides a video image of
the area on the sides of your vehicle. It aids
you while parking your vehicle.
Note:
Use caution when using the 360 view
while any of the doors are ajar. If a door is
ajar, the camera may be out of position and
the video image may be incorrect.
236
Expedition (TB8) Canada/United States of America, enUSA, Edition date: 201708, Third-Printing- Parking AidsE251883 E250816
Page 253 of 571
Why does the vehicle not come back toward the middle of the lane, as expected, in the
Aid or Aid + Alert mode?
High cross winds are present.
There is a large road crown.
Rough roads, grooves or shoulder drop-offs.
Heavy uneven loading of the vehicle or improper tire inflation pressure.
The tires have been changed, or the suspension has been modified.
BLIND SPOT INFORMATION
SYSTEM (IF EQUIPPED) WARNING:
Do not use the blind
spot information system as a
replacement for using the interior and
exterior mirrors or looking over your
shoulder before changing lanes. The
blind spot information system is not a
replacement for careful driving. WARNING:
The system may not
operate properly during severe weather
conditions, for example snow, ice, heavy
rain and spray. Always drive with due
care and attention. Failure to take care
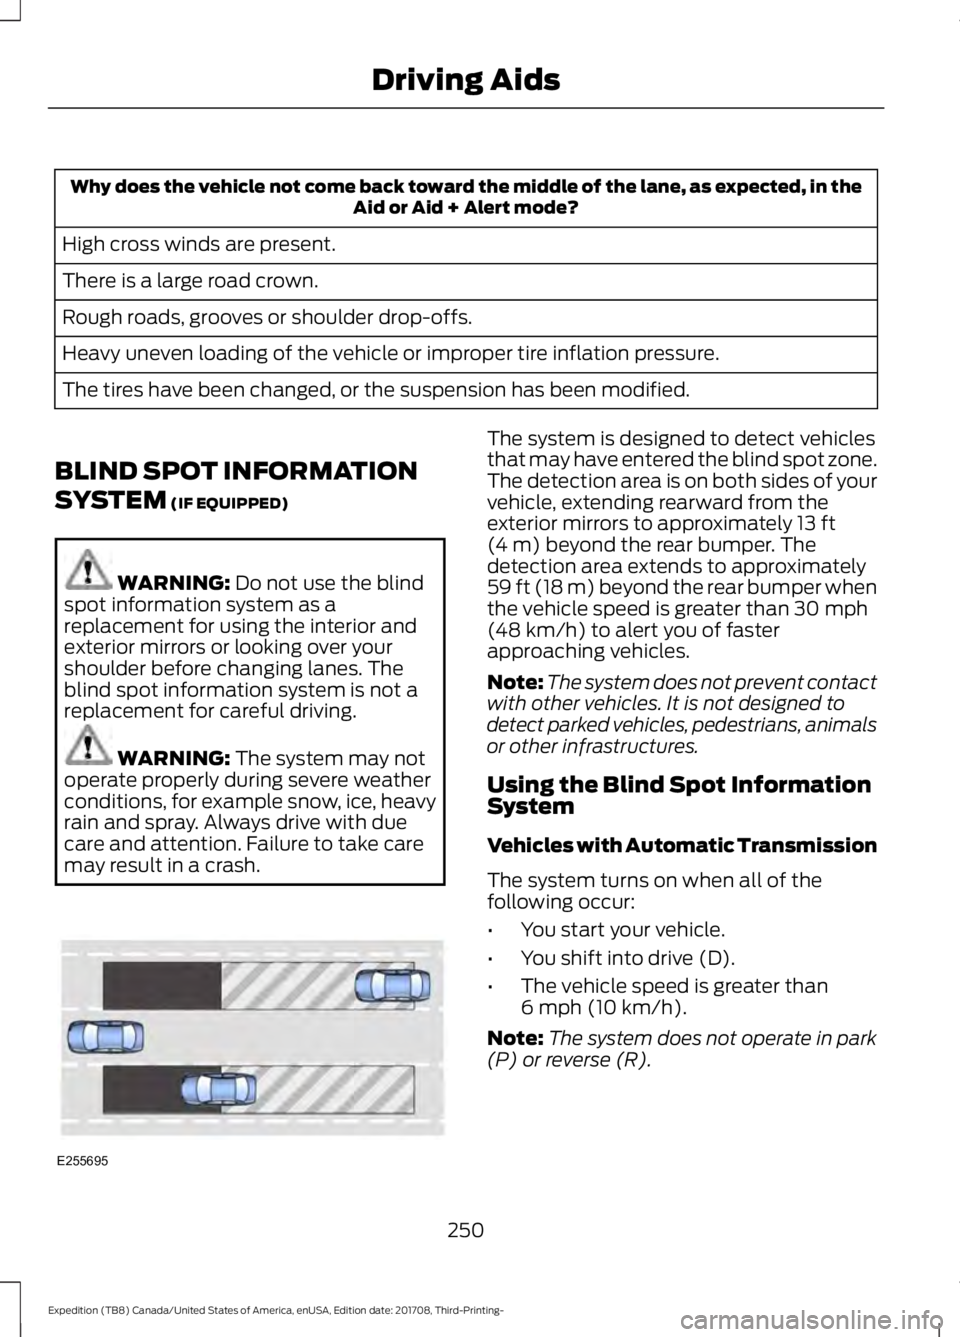
may result in a crash. The system is designed to detect vehicles
that may have entered the blind spot zone.
The detection area is on both sides of your
vehicle, extending rearward from the
exterior mirrors to approximately
13 ft
(4 m) beyond the rear bumper. The
detection area extends to approximately
59 ft (18 m)
beyond the rear bumper when
the vehicle speed is greater than 30 mph
(48 km/h) to alert you of faster
approaching vehicles.
Note: The system does not prevent contact
with other vehicles. It is not designed to
detect parked vehicles, pedestrians, animals
or other infrastructures.
Using the Blind Spot Information
System
Vehicles with Automatic Transmission
The system turns on when all of the
following occur:
• You start your vehicle.
• You shift into drive (D).
• The vehicle speed is greater than
6 mph (10 km/h)
.
Note: The system does not operate in park
(P) or reverse (R).
250
Expedition (TB8) Canada/United States of America, enUSA, Edition date: 201708, Third-Printing- Driving AidsE255695
Page 254 of 571

Vehicles with Manual Transmission
The system turns on when all of the
following occur:
•
You start your vehicle.
• The vehicle speed is greater than
6 mph (10 km/h).
Note: The system does not operate in
reverse (R).
System Lights and Messages When the system detects a vehicle, an
alert indicator illuminates in the exterior
mirror on the side the approaching vehicle
is coming from. If you turn the direction
indicator on for that side of your vehicle,
the alert indicator flashes.
Note:
The system may not alert you if a
vehicle quickly passes through the detection
zone.
Blocked Sensors The sensors are behind the rear bumper
on both sides of your vehicle.
Note:
Keep the sensors free from snow, ice
and large accumulations of dirt.
Note: Do not cover the sensors with bumper
stickers, repair compound or other objects.
Note: Blocked sensors could affect system
performance.
If the sensors become blocked, a message
may appear in the information display. See
Information Messages
(page 123). The
alert indicators remain illuminated but the
system does not alert you.
Blind Spot Information System
with Trailer Tow
(If Equipped) The system is designed to detect vehicles
that may have entered the blind spot zone
(A). The detection area is on both sides of
your vehicle and trailer, extending rearward
from the exterior mirrors to the end of your
trailer.
The system turns on when all of the
following occur:
•
You attach a trailer to your vehicle.
• You have set up the trailer to work with
the system through the information
display.
• You start your vehicle.
251
Expedition (TB8) Canada/United States of America, enUSA, Edition date: 201708, Third-Printing- Driving AidsE142442 E205199 E225007
Page 265 of 571
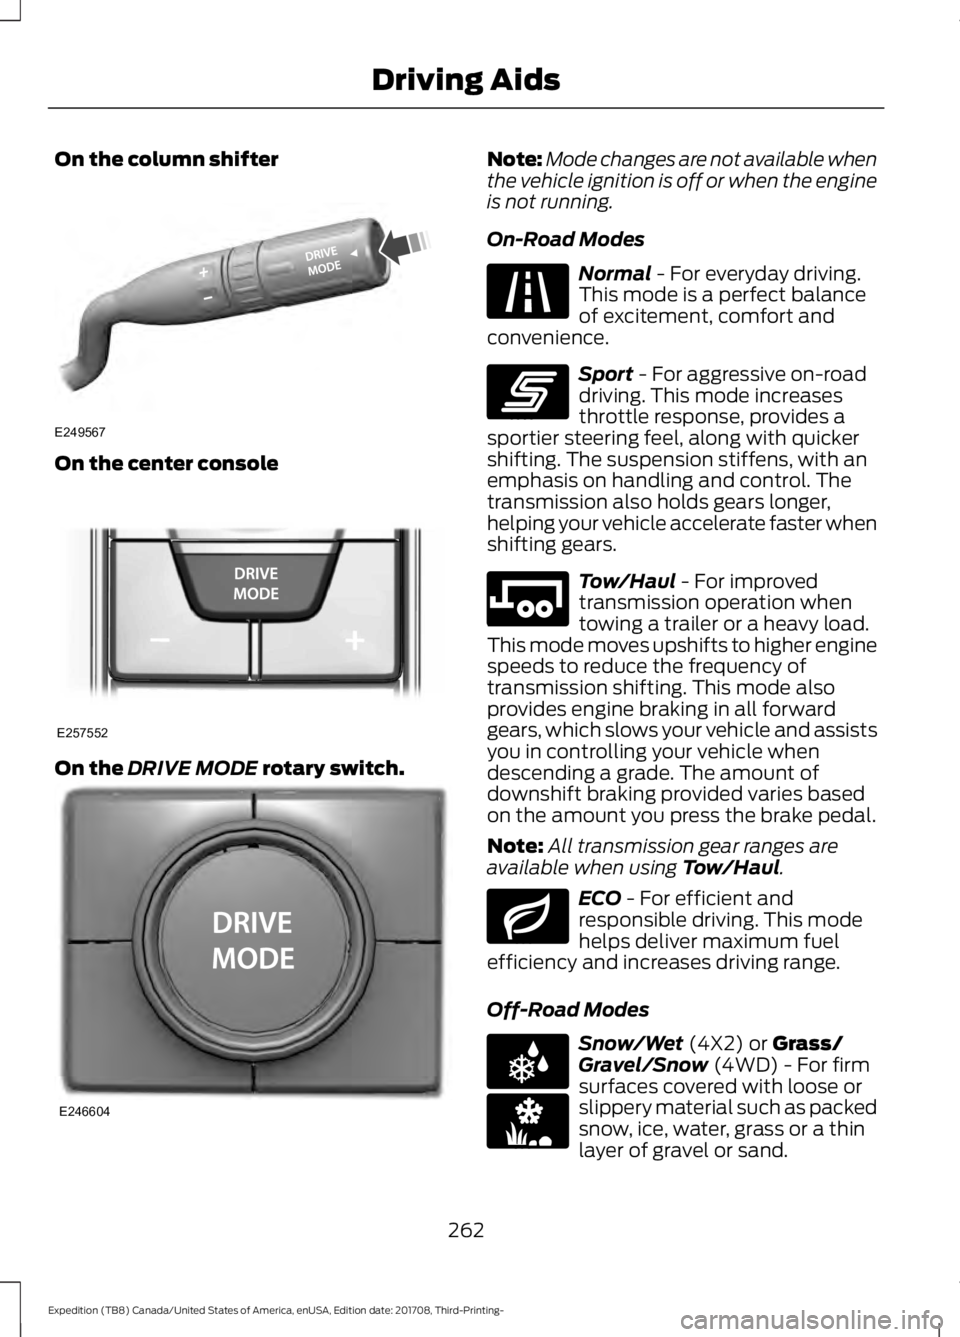
On the column shifter
On the center console
On the DRIVE MODE rotary switch. Note:
Mode changes are not available when
the vehicle ignition is off or when the engine
is not running.
On-Road Modes Normal
- For everyday driving.
This mode is a perfect balance
of excitement, comfort and
convenience. Sport
- For aggressive on-road
driving. This mode increases
throttle response, provides a
sportier steering feel, along with quicker
shifting. The suspension stiffens, with an
emphasis on handling and control. The
transmission also holds gears longer,
helping your vehicle accelerate faster when
shifting gears. Tow/Haul
- For improved
transmission operation when
towing a trailer or a heavy load.
This mode moves upshifts to higher engine
speeds to reduce the frequency of
transmission shifting. This mode also
provides engine braking in all forward
gears, which slows your vehicle and assists
you in controlling your vehicle when
descending a grade. The amount of
downshift braking provided varies based
on the amount you press the brake pedal.
Note: All transmission gear ranges are
available when using
Tow/Haul. ECO
- For efficient and
responsible driving. This mode
helps deliver maximum fuel
efficiency and increases driving range.
Off-Road Modes Snow/Wet
(4X2) or Grass/
Gravel/Snow (4WD) - For firm
surfaces covered with loose or
slippery material such as packed
snow, ice, water, grass or a thin
layer of gravel or sand.
262
Expedition (TB8) Canada/United States of America, enUSA, Edition date: 201708, Third-Printing- Driving AidsE249567 E257552 E246604 E225310 E246593 E246592 E246597 E225312 E246594
Page 277 of 571
TOWING A TRAILER
WARNING: Towing trailers
beyond the maximum
recommended gross trailer
weight exceeds the limit of your
vehicle and could result in engine
damage, transmission damage,
structural damage, loss of
vehicle control, vehicle rollover
and personal injury. WARNING:
Do not exceed
the GVWR or the GAWR
specified on the certification
label.
Your vehicle may have electrical
items, such as fuses or relays,
related to towing. See
Fuses
(page 314).
Some vehicles may have the
ability to modify trailer towing
features. See Towing (page 274).
Your vehicle's load capacity
designation is by weight, not by
volume, so you cannot necessarily
use all available space when
loading a vehicle or trailer.
Towing a trailer places an extra
load on your vehicle's engine,
transmission, axle, brakes, tires
and suspension. Inspect these
components periodically during,
and after, any towing operation. Load Placement
To help minimize how trailer
movement affects your vehicle
when driving:
•
Load the heaviest items closest
to the trailer floor.
• Load the heaviest items
centered between the left and
right side trailer tires.
• Load the heaviest items above
the trailer axles or just slightly
forward toward the trailer
tongue. Do not allow the final
trailer tongue weight to go
above or below 10-15% of the
loaded trailer weight.
• Select a ball mount with the
correct rise or drop and load
capacity. When both the
loaded vehicle and trailer are
connected, the trailer frame
should be level, or slightly
angled down toward your
vehicle, when viewed from the
side.
When driving with a trailer or
payload, a slight takeoff vibration
or shudder may be present due to
the increased payload weight.
Additional information regarding
proper trailer loading and setting
your vehicle up for towing is
located in another chapter of this
manual. See
Load Limit (page
268).
You can also find information in
the
RV & Trailer Towing Guide
available at your authorized
dealer, or online.
274
Expedition (TB8) Canada/United States of America, enUSA, Edition date: 201708, Third-Printing- Towing
Page 291 of 571
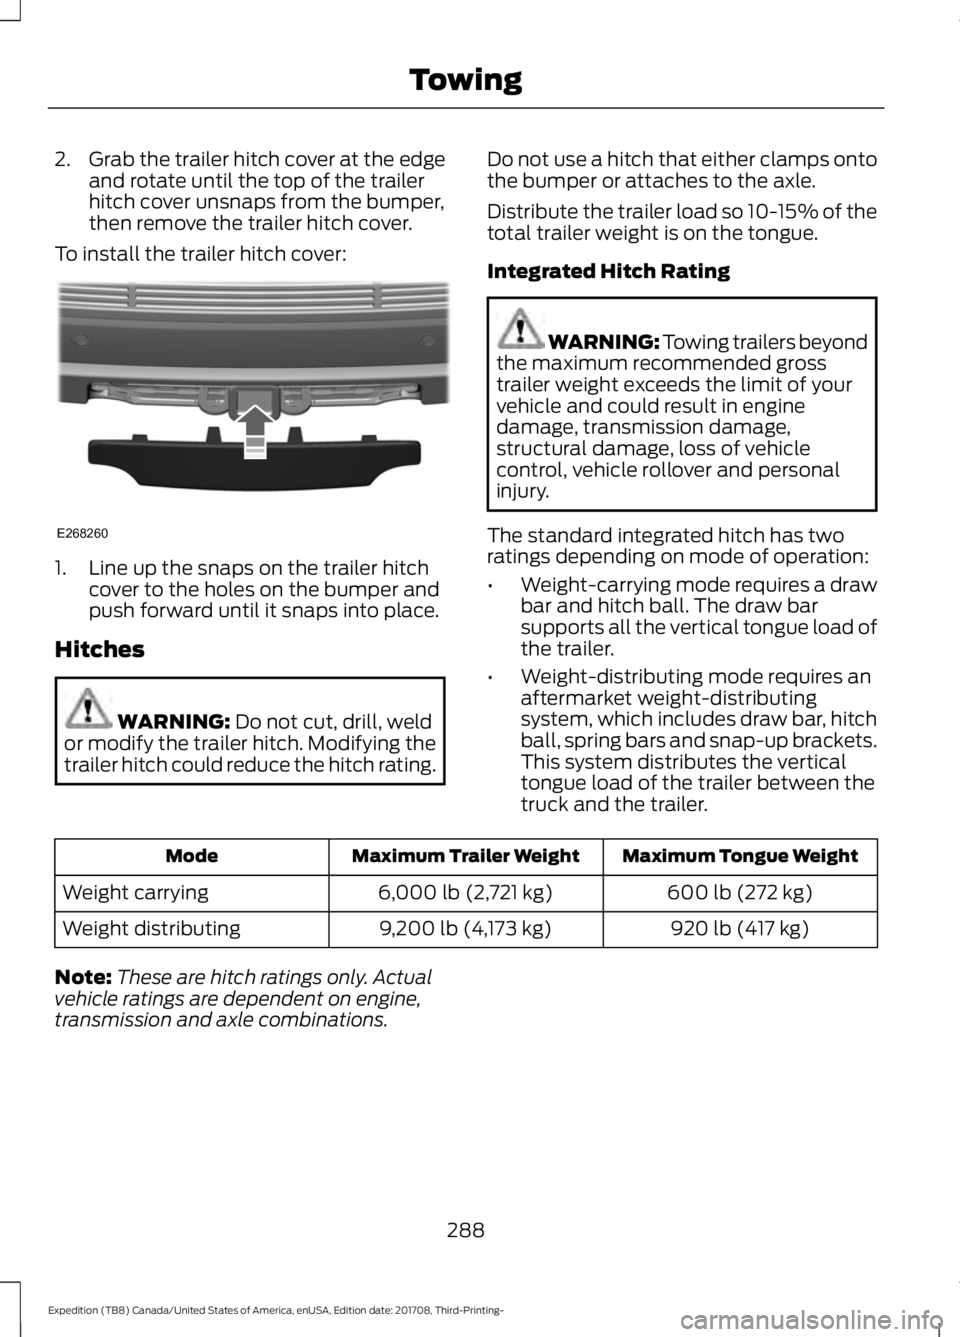
2.
Grab the trailer hitch cover at the edge
and rotate until the top of the trailer
hitch cover unsnaps from the bumper,
then remove the trailer hitch cover.
To install the trailer hitch cover: 1. Line up the snaps on the trailer hitch
cover to the holes on the bumper and
push forward until it snaps into place.
Hitches WARNING: Do not cut, drill, weld
or modify the trailer hitch. Modifying the
trailer hitch could reduce the hitch rating. Do not use a hitch that either clamps onto
the bumper or attaches to the axle.
Distribute the trailer load so 10-15% of the
total trailer weight is on the tongue.
Integrated Hitch Rating WARNING:
Towing trailers beyond
the maximum recommended gross
trailer weight exceeds the limit of your
vehicle and could result in engine
damage, transmission damage,
structural damage, loss of vehicle
control, vehicle rollover and personal
injury.
The standard integrated hitch has two
ratings depending on mode of operation:
• Weight-carrying mode requires a draw
bar and hitch ball. The draw bar
supports all the vertical tongue load of
the trailer.
• Weight-distributing mode requires an
aftermarket weight-distributing
system, which includes draw bar, hitch
ball, spring bars and snap-up brackets.
This system distributes the vertical
tongue load of the trailer between the
truck and the trailer. Maximum Tongue Weight
Maximum Trailer Weight
Mode
600 lb (272 kg)
6,000 lb (2,721 kg)
Weight carrying
920 lb (417 kg)
9,200 lb (4,173 kg)
Weight distributing
Note: These are hitch ratings only. Actual
vehicle ratings are dependent on engine,
transmission and axle combinations.
288
Expedition (TB8) Canada/United States of America, enUSA, Edition date: 201708, Third-Printing- TowingE268260
Page 296 of 571
Before Towing a Trailer
Practice turning, stopping and backing up
to get the feel of your vehicle-trailer
combination before starting on a trip.
When turning, make wider turns so the
trailer wheels clear curbs and other
obstacles.
When Towing a Trailer
•
Do not tow during the first 1,000 mi
(1,600 km).
• Do not make full-throttle starts.
• Check your hitch, electrical connections
and trailer wheel lug nuts thoroughly
after you have traveled 50 mi (80 km).
• When stopped in congested or heavy
traffic during hot weather, place the
transmission in park (P) to aid engine
and transmission cooling and to help
A/C performance.
• Turn off the speed control with heavy
loads or in hilly terrain. The speed
control may turn off automatically
when you are towing on long, steep
slopes.
• Shift to a lower gear when driving down
a long or steep hill. Do not apply the
brakes continuously, as they may
overheat and become less effective.
• If your transmission is equipped with a
Grade Assist or Tow/Haul feature, use
this feature when towing. This provides
engine braking and helps eliminate
excessive transmission shifting for
optimum fuel economy and
transmission cooling.
• If your vehicle is equipped with
AdvanceTrac with RSC, this system
may turn on during typical cornering
maneuvers with a heavily loaded trailer.
This is normal. Turning the corner at a
slower speed when towing may reduce
this tendency. •
If you are towing a trailer frequently in
hot weather, hilly conditions, at the
gross combined weight rating (or any
combination of these factors), consider
refilling your rear axle with synthetic
gear lubricant if the axle is not already
filled with it. See
Capacities and
Specifications (page 380).
• Allow more distance for stopping with
a trailer attached. Anticipate stops and
brake gradually.
• Avoid parking on a slope. However, if
you must park on a slope:
1. Turn the steering wheel to point your vehicle tires away from traffic flow.
2. Set your vehicle parking brake.
3. Place the transmission in park (P).
4. Place wheel chocks in front and back of the trailer wheels. Chocks are not
included with your vehicle.
Your vehicle may be equipped with a
temporary or conventional spare tire. A
temporary spare tire is different in size,
tread-type, or is from a different
manufacturer than the road tires on your
vehicle. Consult information on the tire
label or Safety Compliance label for
limitations when using these tires.
Launching or Retrieving a Boat or
Personal Watercraft (PWC)
Note: Disconnect the wiring to the trailer
before backing the trailer into the water.
Note: Reconnect the wiring to the trailer
after removing the trailer from the water.
When backing down a ramp during boat
launching or retrieval:
• Do not allow the static water level to
rise above the bottom edge of the rear
bumper.
• Do not allow waves to break higher
than
6 in (15 cm) above the bottom
edge of the rear bumper.
293
Expedition (TB8) Canada/United States of America, enUSA, Edition date: 201708, Third-Printing- Towing