2018 FORD EXPEDITION light
[x] Cancel search: lightPage 252 of 571
The system can be temporarily suppressed
at any time by the following:
•
Quick braking.
• Fast acceleration. •
Using the direction indicator.
• Evasive steering maneuver.
• Driving too close to the lane markings.
Troubleshooting Why is the feature not available (line markings are gray) when I can see the lane markings
on the road?
Your vehicle speed is outside the operational range of the feature.
The sun is shining directly into the camera lens.
A quick intentional lane change has occurred.
Your vehicle stays too close to the lane markings.
Driving at high speeds in curves.
The last alert warning or aid intervention occurred a short time ago.
Ambiguous lane markings, for example in construction zones.
Rapid transition from light to dark, or from dark to light.
Sudden offset in lane markings.
ABS or AdvanceTrac ™ is active.
There is a camera blockage due to dirt, grime, fog, frost or water on the windshield.
You are driving too close to the vehicle in front of you.
Transitioning between no lane markings to lane markings or vice versa.
There is standing water on the road.
Faint lane markings, for example partial yellow lane markings on concrete roads.
Lane width is too narrow or too wide.
The camera has not been calibrated after a windshield replacement.
Driving on tight roads or on uneven roads.
249
Expedition (TB8) Canada/United States of America, enUSA, Edition date: 201708, Third-Printing- Driving Aids
Page 254 of 571

Vehicles with Manual Transmission
The system turns on when all of the
following occur:
•
You start your vehicle.
• The vehicle speed is greater than
6 mph (10 km/h).
Note: The system does not operate in
reverse (R).
System Lights and Messages When the system detects a vehicle, an
alert indicator illuminates in the exterior
mirror on the side the approaching vehicle
is coming from. If you turn the direction
indicator on for that side of your vehicle,
the alert indicator flashes.
Note:
The system may not alert you if a
vehicle quickly passes through the detection
zone.
Blocked Sensors The sensors are behind the rear bumper
on both sides of your vehicle.
Note:
Keep the sensors free from snow, ice
and large accumulations of dirt.
Note: Do not cover the sensors with bumper
stickers, repair compound or other objects.
Note: Blocked sensors could affect system
performance.
If the sensors become blocked, a message
may appear in the information display. See
Information Messages
(page 123). The
alert indicators remain illuminated but the
system does not alert you.
Blind Spot Information System
with Trailer Tow
(If Equipped) The system is designed to detect vehicles
that may have entered the blind spot zone
(A). The detection area is on both sides of
your vehicle and trailer, extending rearward
from the exterior mirrors to the end of your
trailer.
The system turns on when all of the
following occur:
•
You attach a trailer to your vehicle.
• You have set up the trailer to work with
the system through the information
display.
• You start your vehicle.
251
Expedition (TB8) Canada/United States of America, enUSA, Edition date: 201708, Third-Printing- Driving AidsE142442 E205199 E225007
Page 256 of 571
Note:
If the trailer is actually a bike rack or
cargo rack with electrical lighting, enter a
length of 3 ft (1 m). Cross Traffic Alert
remains on for trailers with a length of 3 ft
(1 m) or less.
Note: Proper measurement and
measurement entry is required for the
system to function as designed.
System Operation
When you connect a trailer to your vehicle,
the trailer set up menu appears in the
information display. This menu allows you
to set up a new trailer or choose from a
previously set up trailer. A warning
message appears and the system turns off
if you do not choose or add a new trailer.
Note: The warning message may not
appear until your vehicle speed reaches
22 mph (35 km/h)
.
If you select a trailer in the information
display before connecting a trailer to your
vehicle, the system loads the configuration
for the selected trailer. When a trailer is
connected, a warning message appears.
Note: A second warning message may
appear stating that the Cross Traffic Alert
system has turned off. The Blind Spot
Information System with Trailer Tow
continues to function normally in this
situation.
Note: The system remembers the last
selected trailer set up when you start your
vehicle.
Trailer Considerations
The system is designed to work with a
trailer with a front width of
8.5 ft (2.6 m)
or less, and a total length from the trailer
hitch ball to the rear of the trailer of
33 ft
(10.1 m) or less. Some trailers may cause a slight change
in system performance:
•
Large box trailers may cause false
alerts to occur when driving next to
infrastructures or near parked cars. A
false alert may also occur while making
a 90-degree turn.
• Trailers that have a width greater than
8.5 ft (2.6 m)
at the front and have a
total length greater than 20 ft (6 m)
may cause delayed alerts when a
vehicle is passing at high speed.
• Box trailers that have a width greater
than
8.5 ft (2.6 m) at the front may
cause early alerts when you pass a
vehicle.
• Clam shell or V-Nose box trailers with
a width greater than
8.5 ft (2.6 m) at
the front may cause delayed alerts
when a vehicle traveling the same
speed as your vehicle merges lanes.
System Errors
If the system detects a fault, a warning
lamp illuminates and a message displays.
See
Information Messages (page 123).
Switching the System On and Off
You can switch the system off using the
information display.
See General
Information (page 111). When you switch
the system off, a warning lamp illuminates
and a message displays. When you switch
the system on or off, the alert indicators
flash twice.
Note: The system remembers the last
setting when you start your vehicle.
Note: The system may not correctly operate
when towing a trailer. For vehicles with a
trailer tow module and tow bar approved
by us, the system turns off when you attach
a trailer. For vehicles with an aftermarket
trailer tow module or tow bar, we
recommend that you switch the system off
when you attach a trailer.
253
Expedition (TB8) Canada/United States of America, enUSA, Edition date: 201708, Third-Printing- Driving Aids
Page 258 of 571

Zone coverage also decreases when
parking at narrow angles. The sensor on
the left-hand side is mostly obstructed and
zone coverage on that side is severely
reduced.
System Lights, Messages and
Audible Alerts
When the system detects a vehicle, an
indicator illuminates in the exterior mirror
on the side the approaching vehicle is
coming from. A tone sounds and a
message appears in the information
display. Note:
In exceptional conditions, the system
could alert you even when there is nothing
in the detection zone, for example a vehicle
passing in the distance.
Blocked Sensors The sensors are behind the rear bumper
on both sides of your vehicle.
Note:
Keep the sensors free from snow, ice
and large accumulations of dirt.
Note: Do not cover the sensors with bumper
stickers, repair compound or other objects.
Note: Blocked sensors could affect system
performance.
255
Expedition (TB8) Canada/United States of America, enUSA, Edition date: 201708, Third-Printing- Driving AidsE142441 E142442 E205199
Page 260 of 571
Extreme continuous steering may increase
the effort required for you to steer your
vehicle. This increased effort prevents
overheating and permanent damage to
the steering system. You do not lose the
ability to steer your vehicle manually.
Typical steering and driving maneuvers
allow the system to cool and return to
normal operation.
Steering Tips
If the steering wanders or pulls, check for:
•
Correct tire pressures.
• Uneven tire wear.
• Loose or worn suspension
components.
• Loose or worn steering components.
• Improper vehicle alignment.
Note: A high crown in the road or high
crosswinds may also make the steering
seem to wander or pull.
Adaptive Learning
The electronic power steering system
adaptive learning helps correct road
irregularities and improves overall handling
and steering feel. It communicates with
the brake system to help operate
advanced stability control and accident
avoidance systems. Additionally, whenever
the battery is disconnected or a new
battery installed, you must drive your
vehicle a short distance before the system
relearns the strategy and reactivates all
systems. PRE-COLLISION ASSIST (IF
EQUIPPED) WARNING:
You are responsible
for controlling your vehicle at all times.
The system is designed to be an aid and
does not relieve you of your responsibility
to drive with due care and attention.
Failure to follow this instruction could
result in the loss of control of your
vehicle, personal injury or death. WARNING:
The system does not
detect vehicles that are driving in a
different direction, cyclists or animals.
Failure to take care may result in the loss
of control of your vehicle, serious
personal injury or death. WARNING:
The system does not
operate during hard acceleration or
steering. Failure to take care may lead
to a crash or personal injury. WARNING:
The system may fail
or operate with reduced function during
cold and severe weather conditions.
Snow, ice, rain, spray and fog can
adversely affect the system. Keep the
front camera and radar free of snow and
ice. Failure to take care may result in the
loss of control of your vehicle, serious
personal injury or death. WARNING: In situations where the
vehicle camera has limited detection
capability, this may reduce system
performance. These situations include
but are not limited to direct or low
sunlight, vehicles at night without tail
lights, unconventional vehicle types,
pedestrians with complex backgrounds,
257
Expedition (TB8) Canada/United States of America, enUSA, Edition date: 201708, Third-Printing- Driving Aids
Page 261 of 571
running pedestrians, partly obscured
pedestrians, or pedestrians that the
system cannot distinguish from a group.
Failure to take care may result in the loss
of control of your vehicle, serious
personal injury or death.
WARNING: The system cannot
help prevent all crashes. Do not rely on
this system to replace driver judgment
and the need to maintain a safe distance
and speed.
Using the Pre-Collision Assist
System
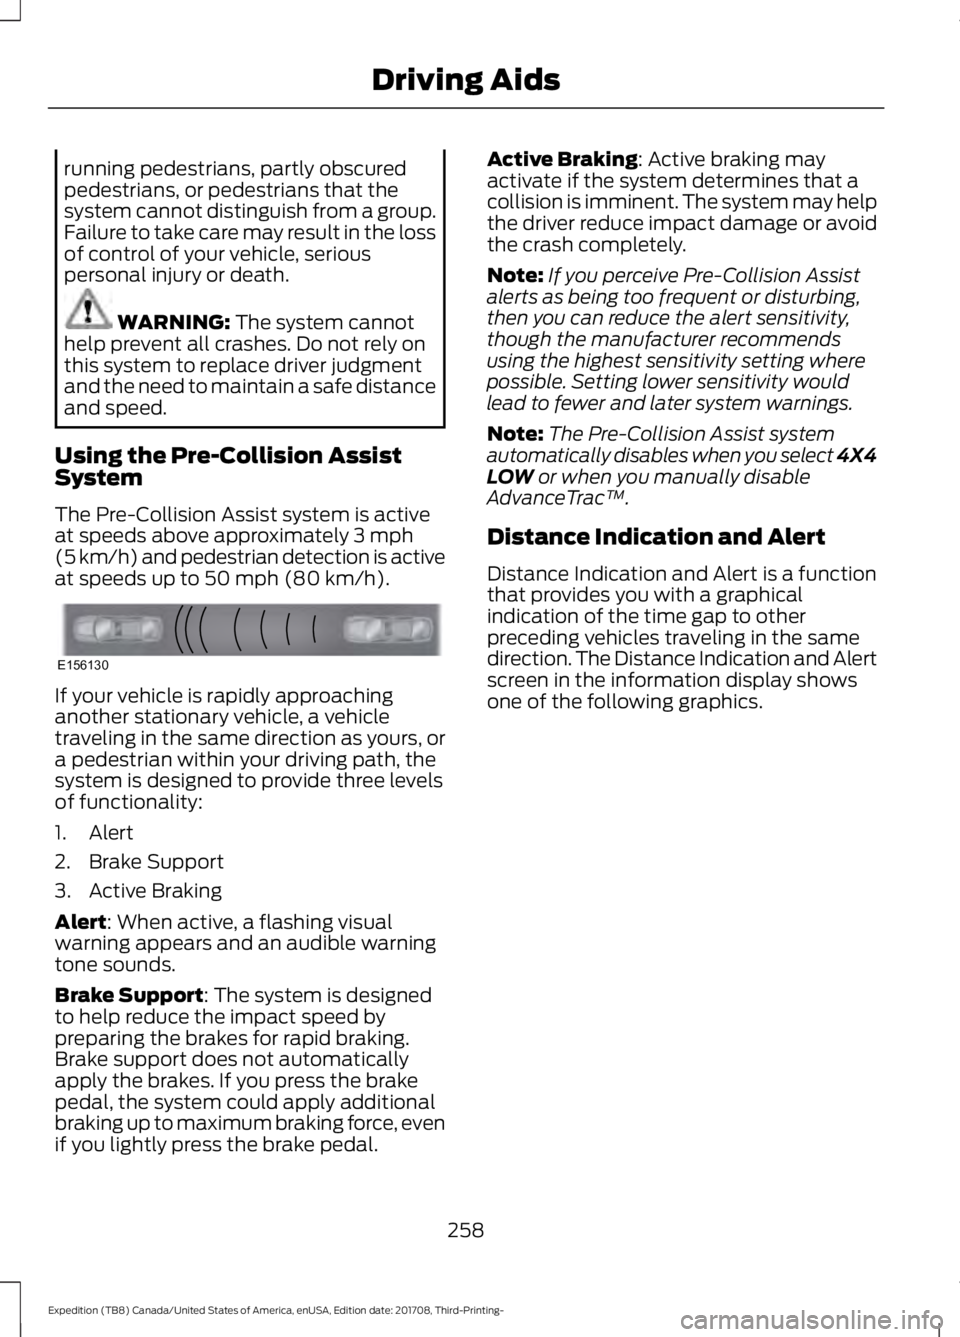
The Pre-Collision Assist system is active
at speeds above approximately
3 mph
(5 km/h) and pedestrian detection is active
at speeds up to
50 mph (80 km/h). If your vehicle is rapidly approaching
another stationary vehicle, a vehicle
traveling in the same direction as yours, or
a pedestrian within your driving path, the
system is designed to provide three levels
of functionality:
1. Alert
2. Brake Support
3. Active Braking
Alert
: When active, a flashing visual
warning appears and an audible warning
tone sounds.
Brake Support
: The system is designed
to help reduce the impact speed by
preparing the brakes for rapid braking.
Brake support does not automatically
apply the brakes. If you press the brake
pedal, the system could apply additional
braking up to maximum braking force, even
if you lightly press the brake pedal. Active Braking
: Active braking may
activate if the system determines that a
collision is imminent. The system may help
the driver reduce impact damage or avoid
the crash completely.
Note: If you perceive Pre-Collision Assist
alerts as being too frequent or disturbing,
then you can reduce the alert sensitivity,
though the manufacturer recommends
using the highest sensitivity setting where
possible. Setting lower sensitivity would
lead to fewer and later system warnings.
Note: The Pre-Collision Assist system
automatically disables when you select 4X4
LOW
or when you manually disable
AdvanceTrac ™.
Distance Indication and Alert
Distance Indication and Alert is a function
that provides you with a graphical
indication of the time gap to other
preceding vehicles traveling in the same
direction. The Distance Indication and Alert
screen in the information display shows
one of the following graphics.
258
Expedition (TB8) Canada/United States of America, enUSA, Edition date: 201708, Third-Printing- Driving AidsE156130
Page 269 of 571
For the short wheel base system, it is
necessary for the second panel located
toward the front of the vehicle to be raised
up when the seats are folded down.
For the long wheel base system, it is
necessary for the second panel located
toward the front of the vehicle to be raised
up.
Note:
Before moving the board into the
shelf position, you may need to flip down
the hooks.
Note: Do not put more than 50 lb (22 kg)
on shelf.
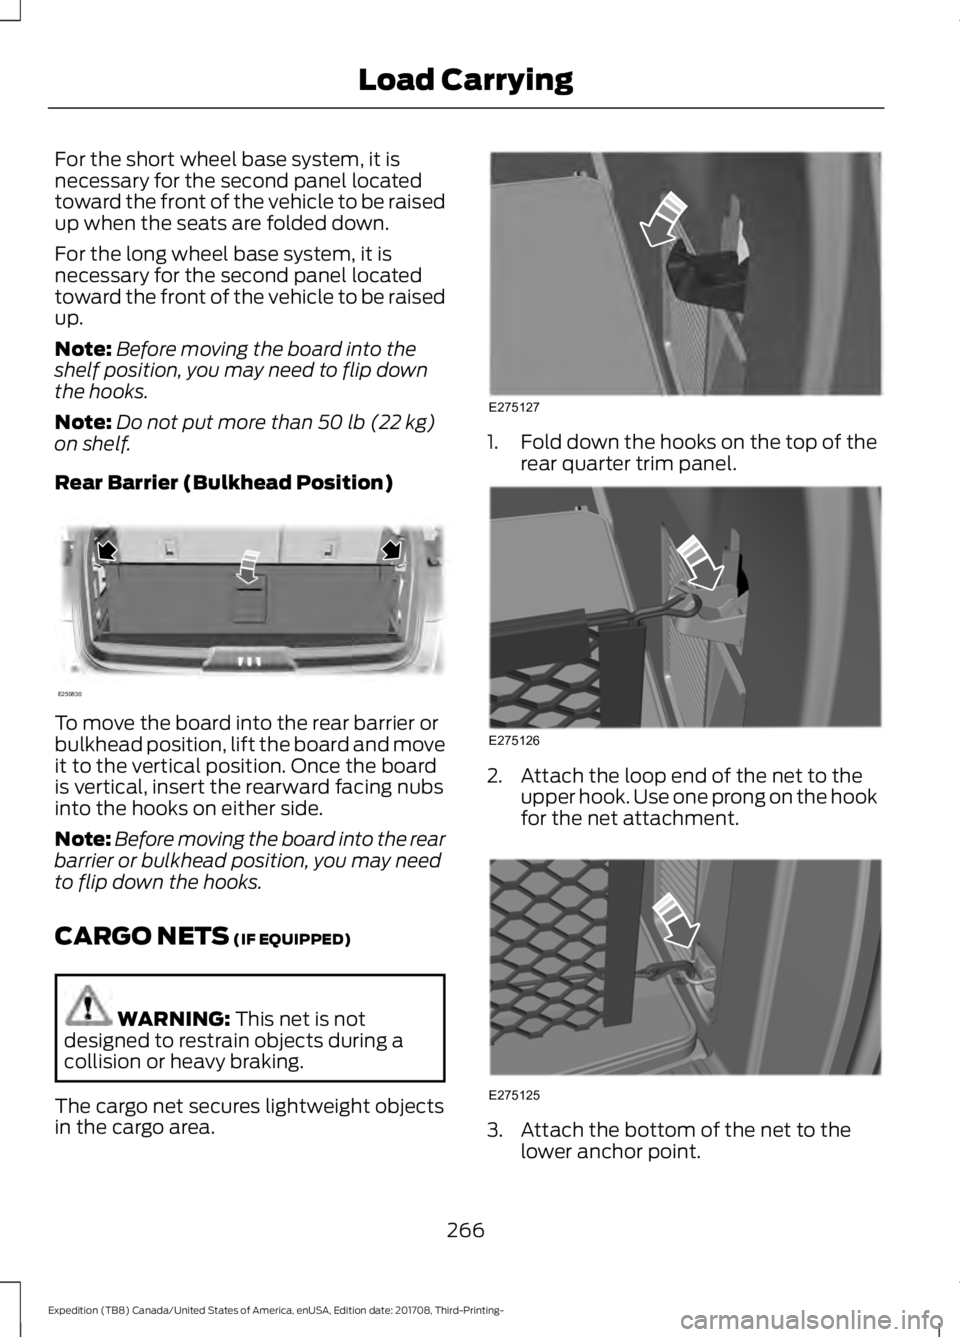
Rear Barrier (Bulkhead Position) To move the board into the rear barrier or
bulkhead position, lift the board and move
it to the vertical position. Once the board
is vertical, insert the rearward facing nubs
into the hooks on either side.
Note:
Before moving the board into the rear
barrier or bulkhead position, you may need
to flip down the hooks.
CARGO NETS
(IF EQUIPPED) WARNING:
This net is not
designed to restrain objects during a
collision or heavy braking.
The cargo net secures lightweight objects
in the cargo area. 1.
Fold down the hooks on the top of the
rear quarter trim panel. 2. Attach the loop end of the net to the
upper hook. Use one prong on the hook
for the net attachment. 3. Attach the bottom of the net to the
lower anchor point.
266
Expedition (TB8) Canada/United States of America, enUSA, Edition date: 201708, Third-Printing- Load CarryingE250830 E275127 E275126 E275125
Page 277 of 571
TOWING A TRAILER
WARNING: Towing trailers
beyond the maximum
recommended gross trailer
weight exceeds the limit of your
vehicle and could result in engine
damage, transmission damage,
structural damage, loss of
vehicle control, vehicle rollover
and personal injury. WARNING:
Do not exceed
the GVWR or the GAWR
specified on the certification
label.
Your vehicle may have electrical
items, such as fuses or relays,
related to towing. See
Fuses
(page 314).
Some vehicles may have the
ability to modify trailer towing
features. See Towing (page 274).
Your vehicle's load capacity
designation is by weight, not by
volume, so you cannot necessarily
use all available space when
loading a vehicle or trailer.
Towing a trailer places an extra
load on your vehicle's engine,
transmission, axle, brakes, tires
and suspension. Inspect these
components periodically during,
and after, any towing operation. Load Placement
To help minimize how trailer
movement affects your vehicle
when driving:
•
Load the heaviest items closest
to the trailer floor.
• Load the heaviest items
centered between the left and
right side trailer tires.
• Load the heaviest items above
the trailer axles or just slightly
forward toward the trailer
tongue. Do not allow the final
trailer tongue weight to go
above or below 10-15% of the
loaded trailer weight.
• Select a ball mount with the
correct rise or drop and load
capacity. When both the
loaded vehicle and trailer are
connected, the trailer frame
should be level, or slightly
angled down toward your
vehicle, when viewed from the
side.
When driving with a trailer or
payload, a slight takeoff vibration
or shudder may be present due to
the increased payload weight.
Additional information regarding
proper trailer loading and setting
your vehicle up for towing is
located in another chapter of this
manual. See
Load Limit (page
268).
You can also find information in
the
RV & Trailer Towing Guide
available at your authorized
dealer, or online.
274
Expedition (TB8) Canada/United States of America, enUSA, Edition date: 201708, Third-Printing- Towing