Page 460 of 553
Setting NameSelectable Options
Balance/Fade Arrow Buttons “C” icon
NOTE:
The “Balance/Fade” feature allows you to adjust the Balance and Fade settings. Press and drag the speaker icon or
use the arrows to adjust, tap the “C” icon to readjust to the center. Speed Adjusted Vol- ume Off
12 3
NOTE:
The “Speed Adjusted Volume” feature increases or decreases volume relative to vehicle speed. To change the Speed
Adjusted Volume press the “Speed Adjusted Volume” button on the touchscreen and select from “Off,” “1,” “2” or
“3” buttons on the touchscreen. Surround Sound — If Equipped On
Off
NOTE:
The “Surround Sound” feature provides simulated surround sound mode. To make your selection, press the “Sur-
round Sound” button on the touchscreen, and select “On” or “Off.”
458 MULTIMEDIA
Page 461 of 553
Setting NameSelectable Options
AUX Volume Offset — If Equipped +–
NOTE:
The “AUX Volume Offset” feature provides the ability to tune the audio level for portable devices connected through
the AUX input. To make your selection, press the “AUX Volume Offset” button on the touchscreen, select “+” and
“–”. Auto Play — IfEquipped On
Off
NOTE: The Auto Play feature allows a media device to begin playing when the media device is plugged in. To make
your selection, press the On or Off buttons to activate or deactivate Auto Play.
Phone/Bluetooth
After pressing the “Phone/Bluetooth” button on the touch-
screen, the following settings will be available:
Setting Name Selectable Options
Do Not Disturb List of Settings
NOTE: Press “Do Not Disturb” to access the available settings. The following settings are: Auto Reply (both, text,
call), Auto Reply Message (custom, default) and Custom Auto Reply Message (create message).
10
MULTIMEDIA 459
Page 467 of 553

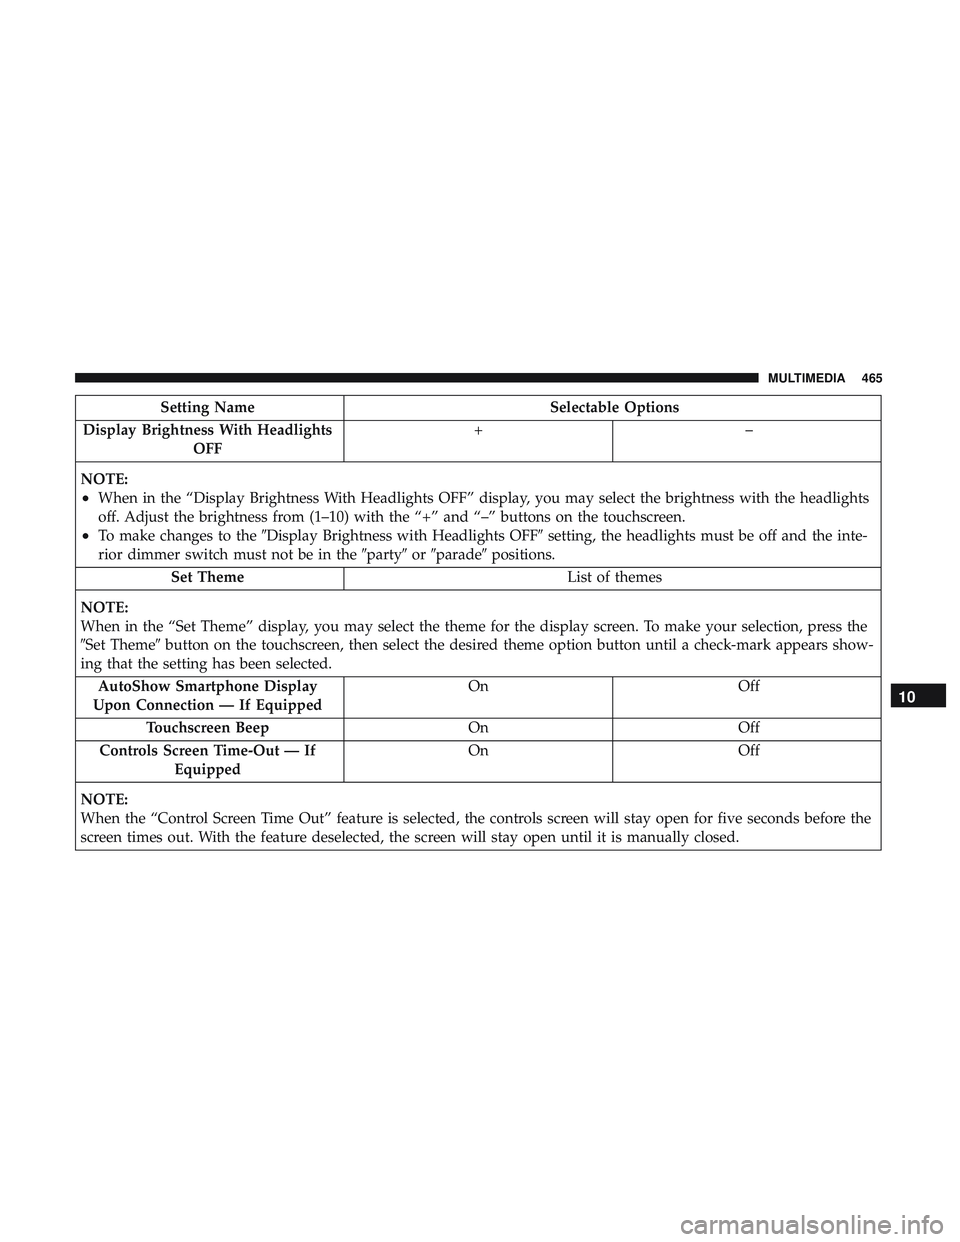
Setting NameSelectable Options
Display Brightness With Headlights OFF +–
NOTE:
•When in the “Display Brightness With Headlights OFF” display, you may select the brightness with the headlights
off. Adjust the brightness from (1–10) with the “+” and “–” buttons on the touchscreen.
•To make changes to the �Display Brightness with Headlights OFF� setting, the headlights must be off and the inte-
rior dimmer switch must not be in the �party�or�parade� positions.
Set Theme List of themes
NOTE:
When in the “Set Theme” display, you may select the theme for the display screen. To make your selection, press the
�Set Theme� button on the touchscreen, then select the desired theme option button until a check-mark appears show-
ing that the setting has been selected.
AutoShow Smartphone Display
Upon Connection — If Equipped On
Off
Touchscreen Beep OnOff
Controls Screen Time-Out — If Equipped On
Off
NOTE:
When the “Control Screen Time Out” feature is selected, the controls screen will stay open for five seconds before the
screen times out. With the feature deselected, the screen will stay open until it is manually closed.
10
MULTIMEDIA 465
Page 479 of 553

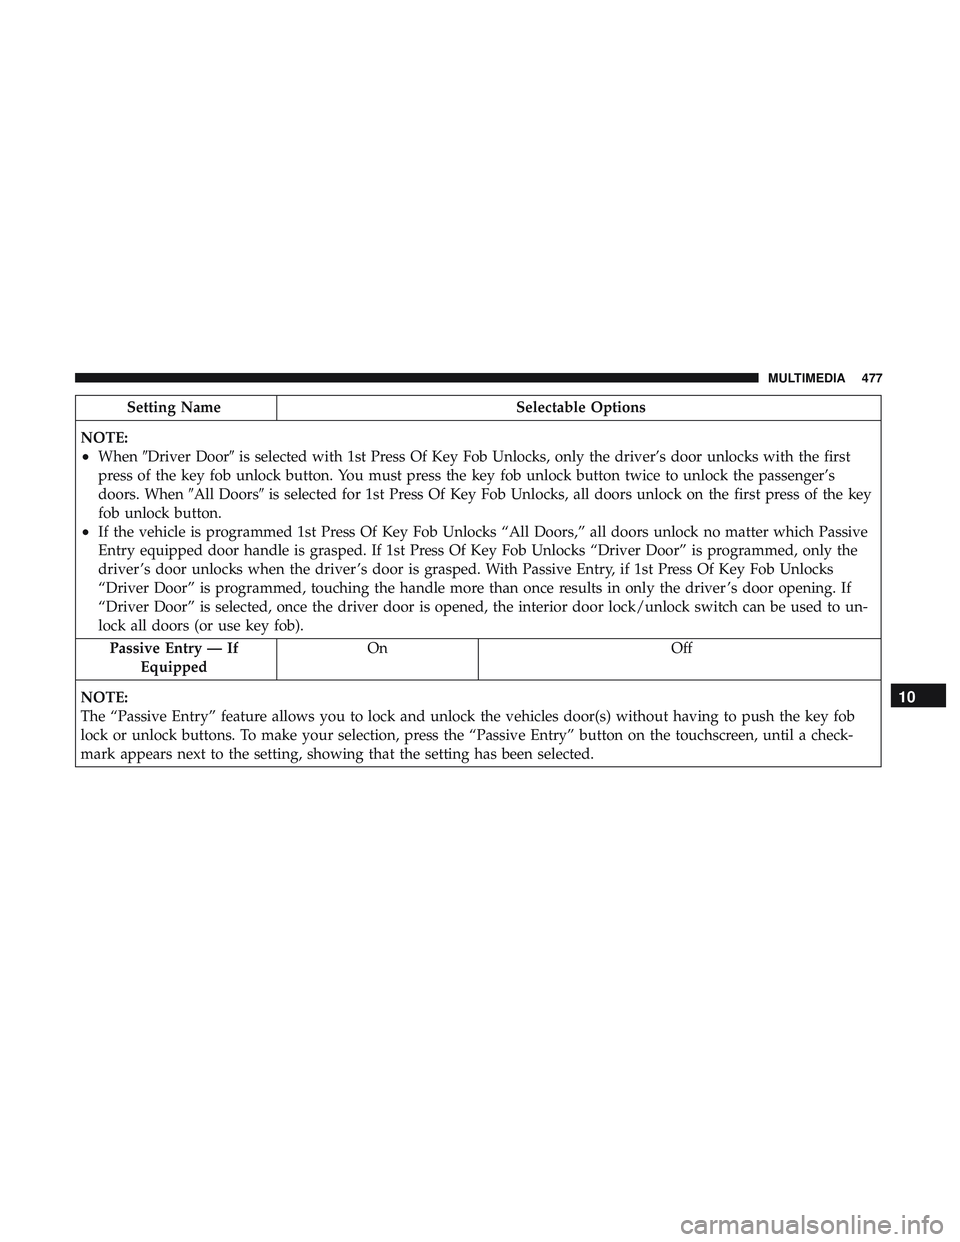
Setting NameSelectable Options
NOTE:
•When �Driver Door� is selected with 1st Press Of Key Fob Unlocks, only the driver’s door unlocks with the first
press of the key fob unlock button. You must press the key fob unlock button twice to unlock the passenger’s
doors. When �All Doors�is selected for 1st Press Of Key Fob Unlocks, all doors unlock on the first press of the key
fob unlock button.
•If the vehicle is programmed 1st Press Of Key Fob Unlocks “All Doors,” all doors unlock no matter which Passive
Entry equipped door handle is grasped. If 1st Press Of Key Fob Unlocks “Driver Door” is programmed, only the
driver ’s door unlocks when the driver ’s door is grasped. With Passive Entry, if 1st Press Of Key Fob Unlocks
“Driver Door” is programmed, touching the handle more than once results in only the driver ’s door opening. If
“Driver Door” is selected, once the driver door is opened, the interior door lock/unlock switch can be used to un-
lock all doors (or use key fob).
Passive Entry — If Equipped On Off
NOTE:
The “Passive Entry” feature allows you to lock and unlock the vehicles door(s) without having to push the key fob
lock or unlock buttons. To make your selection, press the “Passive Entry” button on the touchscreen, until a check-
mark appears next to the setting, showing that the setting has been selected.
10
MULTIMEDIA 477
Page 482 of 553
Setting NameSelectable Options
Headlight Off Delay 0 sec30 sec
60 sec 90 sec
NOTE:
When the “Headlight Off Delay” feature is selected, the driver can choose to have the headlights remain on for 0, 30,
60, or 90 seconds when exiting the vehicle. To change the Headlight Off Delay status press the “+” or “–” button on
the touchscreen to select your desired time interval.
Audio
After pressing the “Audio” button on the touchscreen, the
following settings will be available:
Setting Name Selectable Options
Balance/Fade “Speaker” Icon Arrow Buttons
NOTE:
The “Balance/Fade” feature allows you to adjust the Balance and Fade settings. Press and drag the speaker icon, use
the arrows to adjust, or tap the “Speaker” icon to readjust to the center. Equalizer +–
480 MULTIMEDIA
Page 483 of 553
Setting NameSelectable Options
NOTE:
•The “Equalizer” feature allows you to adjust the Bass, Mid and Treble settings. Adjust the settings with the “+”
and “–” setting buttons on the touchscreen or by selecting any point on the scale between the “+” and “–” buttons
on the touchscreen.
•Bass/Mid/Treble allow you to simply slide your finger up or down to change the setting as well as press directly
on the desired setting.
Speed Adjusted Vol- ume Off 1 2 3
NOTE:
The “Speed Adjusted Volume” feature increases or decreases volume relative to vehicle speed. To change the Speed
Adjusted Volume press the “Off,” “1,” “2” or “3” button on the touchscreen. Surround Sound — If Equipped On Off
NOTE:
The “Surround Sound” feature provides simulated surround sound mode. To make your selection, press the “Sur-
round Sound” button on the touchscreen, select “On” or “Off.”
10
MULTIMEDIA 481
Page 484 of 553
Setting NameSelectable Options
AUX Volume Offset — If Equipped -3
+3
NOTE:
The “AUX Volume Offset” feature provides the ability to tune the audio level for portable devices connected through
the AUX input. To make your selection, press the AUX Volume Match button on the touchscreen, choose a level from
–3 to +3. Auto Play On Off
NOTE:
The Auto Play feature allows a media device to begin playing when the media device is plugged in. To make your
selection, press the On or Off buttons to activate or deactivate Auto Play.
Phone/Bluetooth Settings
After pressing the “Phone/Bluetooth Settings” button on
the touchscreen, the following settings will be available:
Setting Name Selectable Options
Do Not Disturb List of Settings
NOTE:
Press “Do Not Disturb” to access the available settings. The following settings are: Auto Reply (both, text, call), Auto
Reply Message (custom, default) and Custom Auto Reply Message (create message).
482 MULTIMEDIA
Page 497 of 553

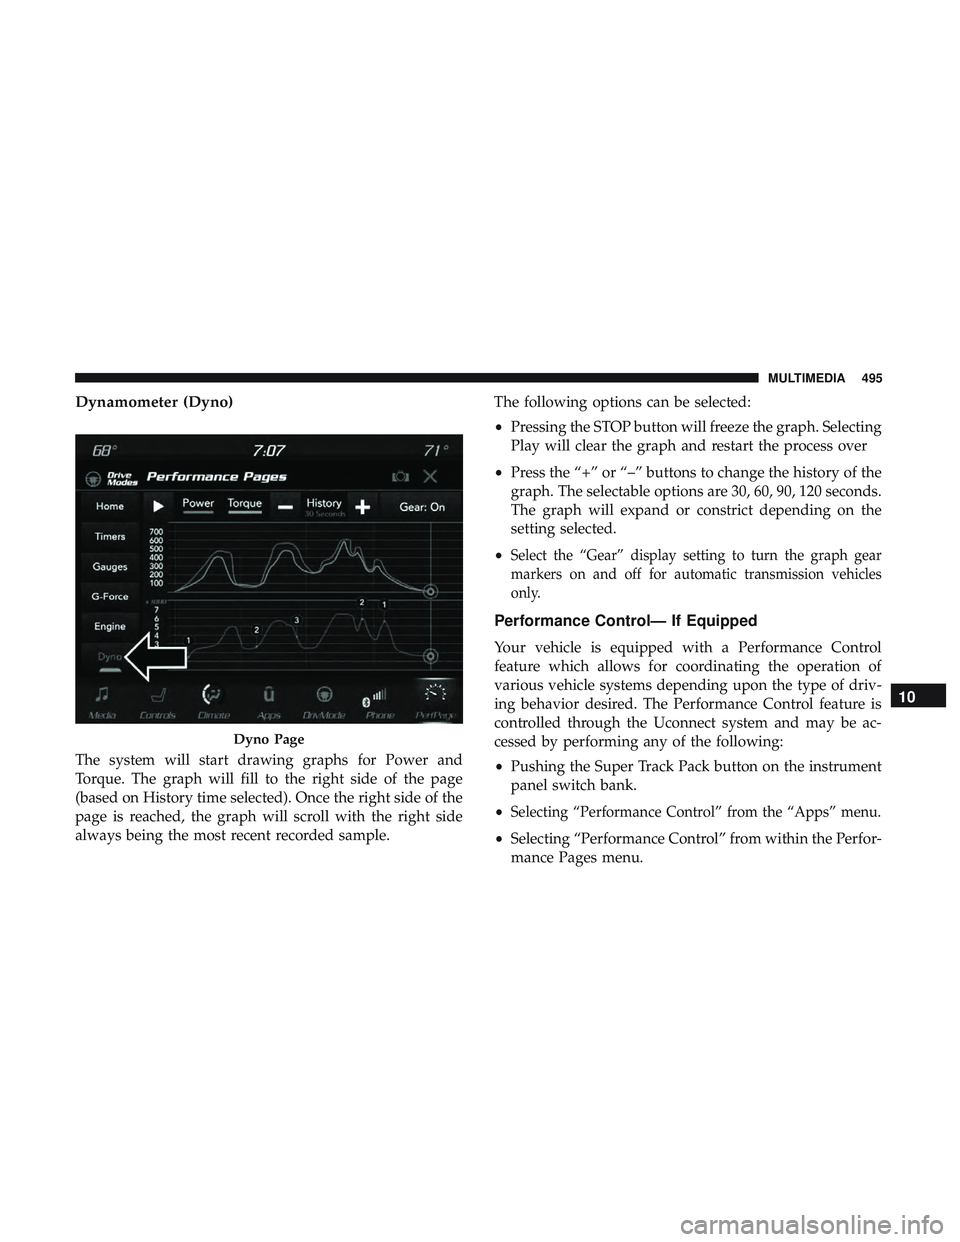
Dynamometer (Dyno)
The system will start drawing graphs for Power and
Torque. The graph will fill to the right side of the page
(based on History time selected). Once the right side of the
page is reached, the graph will scroll with the right side
always being the most recent recorded sample.The following options can be selected:
•
Pressing the STOP button will freeze the graph. Selecting
Play will clear the graph and restart the process over
• Press the “+” or “–” buttons to change the history of the
graph. The selectable options are 30, 60, 90, 120 seconds.
The graph will expand or constrict depending on the
setting selected.
•
Select the “Gear” display setting to turn the graph gear
markers on and off for automatic transmission vehicles
only.
Performance Control— If Equipped
Your vehicle is equipped with a Performance Control
feature which allows for coordinating the operation of
various vehicle systems depending upon the type of driv-
ing behavior desired. The Performance Control feature is
controlled through the Uconnect system and may be ac-
cessed by performing any of the following:
• Pushing the Super Track Pack button on the instrument
panel switch bank.
•
Selecting “Performance Control” from the “Apps” menu.
• Selecting “Performance Control” from within the Perfor-
mance Pages menu.
Dyno Page
10
MULTIMEDIA 495