Page 54 of 553

WARNING!(Continued)
•Do not place anything on the seat or seatback that
insulates against heat, such as a blanket or cushion.
This may cause the seat heater to overheat. Sitting in
a seat that has been overheated could cause serious
burns due to the increased surface temperature of the
seat.
Rear Heated Seats
On some models, the two outboard seats are equipped
with heated seats. The heated seat switches for these seats
are located on the rear of the center console. There are two
heated seat switches
that allow the rear passengers to
operate the seats independently.
You can choose from HI, LO, or off heat settings. The
indicator lights in each switch indicate the level of heat in
use. Two indicator lights will illuminate for HI, one for LO,
and none for off.
• Push the heated seat button
once to select HI-level
heating.
• Push the heated seat buttona second time to select
LO-level heating.
• Push the heated seat buttona third time to turn the
heating elements off.
NOTE:
• Once a heat setting is selected, heat will be felt within
two to five minutes.
• The engine must be running for the heated seats to
operate.
If the HI-level setting is selected, the system will automati-
cally switch to LO-level after approximately 60 minutes of
continuous operation. At that time, the number of illumi-
nated LEDs changes from two to one, indicating the
change. The LO-level setting will turn off automatically
after approximately 45 minutes.
Front Ventilated Seats — If Equipped
Located in the seat cushion and seat back are fans that
draw the air from the passenger compartment and move
air through fine perforations in the seat cover to help keep
the driver and front passenger cooler in higher ambient
temperatures. The fans operate at two speeds, HI and LO.
52 GETTING TO KNOW YOUR VEHICLE
Page 73 of 553
To turn the lights off, push the switch a second time. The
lights also turn on when a door is opened. The lights will
also turn on when the unlock button on the key fob is
pushed.Ambient Light — If Equipped
The overhead console is equipped with an ambient light
feature. This light casts illumination for improved visibility
of the floor and center console area.
Front Map/Reading Light SwitchesAmbient Light
3
GETTING TO KNOW YOUR VEHICLE 71
Page 104 of 553

GARAGE DOOR OPENER — IF EQUIPPED
HomeLink replaces up to three hand-held transmitters that
operate devices such as garage door openers, motorized
gates, lighting or home security systems. The HomeLink
unit is powered by your vehicle’s battery.
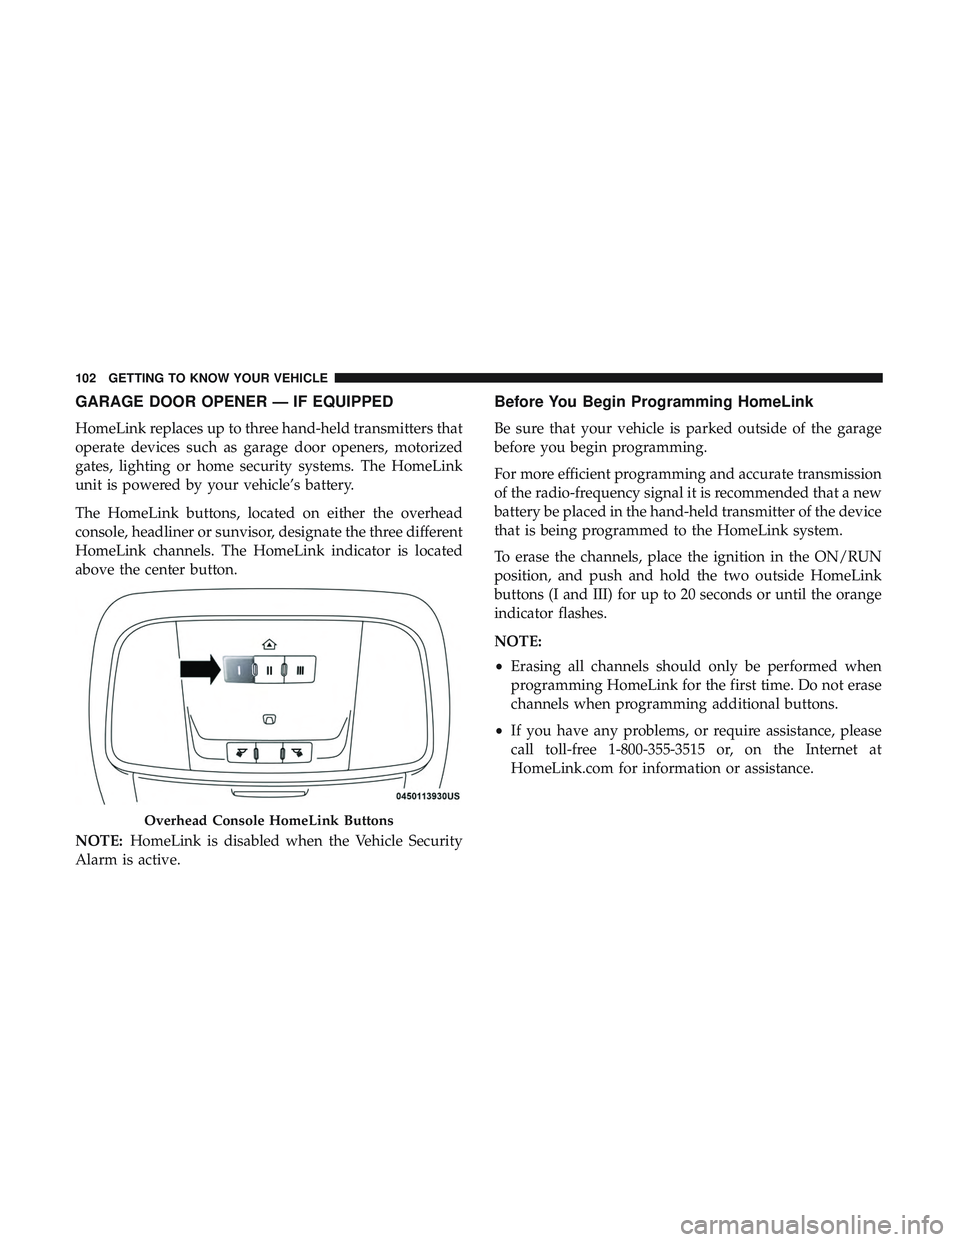
The HomeLink buttons, located on either the overhead
console, headliner or sunvisor, designate the three different
HomeLink channels. The HomeLink indicator is located
above the center button.
NOTE:HomeLink is disabled when the Vehicle Security
Alarm is active.
Before You Begin Programming HomeLink
Be sure that your vehicle is parked outside of the garage
before you begin programming.
For more efficient programming and accurate transmission
of the radio-frequency signal it is recommended that a new
battery be placed in the hand-held transmitter of the device
that is being programmed to the HomeLink system.
To erase the channels, place the ignition in the ON/RUN
position, and push and hold the two outside HomeLink
buttons (I and III) for up to 20 seconds or until the orange
indicator flashes.
NOTE:
• Erasing all channels should only be performed when
programming HomeLink for the first time. Do not erase
channels when programming additional buttons.
• If you have any problems, or require assistance, please
call toll-free 1-800-355-3515 or, on the Internet at
HomeLink.com for information or assistance.
Overhead Console HomeLink Buttons
102 GETTING TO KNOW YOUR VEHICLE
Page 111 of 553
INTERNAL EQUIPMENT
Storage
Glove Compartment
The glove compartment is located on the passenger side of
the instrument panel.
To open the glove compartment, pull the release handle.
Console Features
There is an open cubby bin located forward of the gear
selector.Two separate storage compartments are also located un-
derneath the center console armrest.
Inside the center console armrest, there is a removable
upper storage tray that can be slid forward/rearward on
rails for access to the lower storage area. This tray has an
integrated coin holder, along with additional area for small
items and handheld devices. Below the upper tray, the
lower storage compartment is made for larger items, like
tissue boxes. In addition, the 12 volt power outlet, USB and
Aux jack are located here.
Glove Compartment
Center Console
3
GETTING TO KNOW YOUR VEHICLE 109
Page 113 of 553
Cupholders
The cupholders are located in the forward edge of the
center console.
Retractable Cover
Front Cupholders
3
GETTING TO KNOW YOUR VEHICLE 111
Page 114 of 553

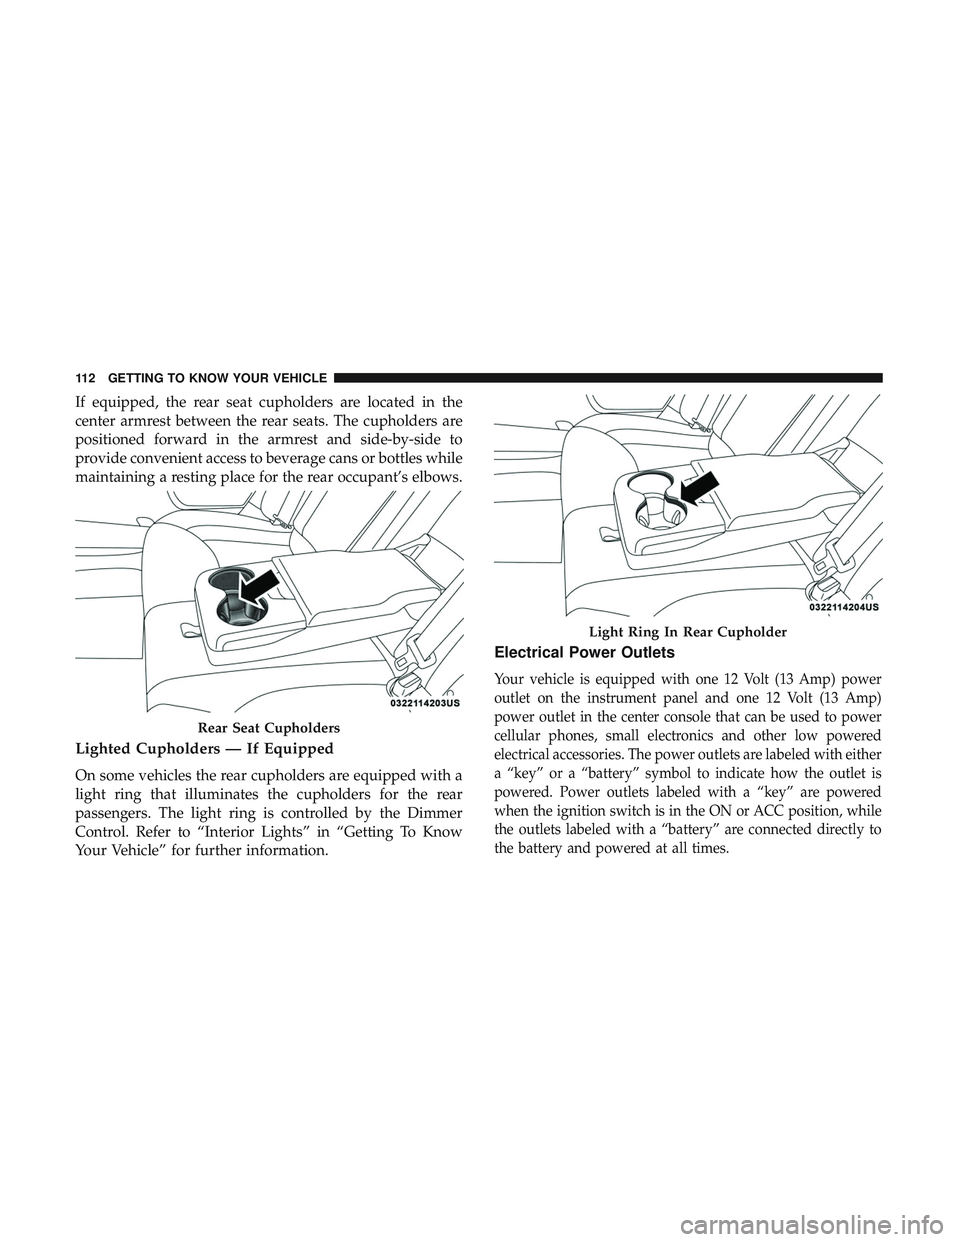
If equipped, the rear seat cupholders are located in the
center armrest between the rear seats. The cupholders are
positioned forward in the armrest and side-by-side to
provide convenient access to beverage cans or bottles while
maintaining a resting place for the rear occupant’s elbows.
Lighted Cupholders — If Equipped
On some vehicles the rear cupholders are equipped with a
light ring that illuminates the cupholders for the rear
passengers. The light ring is controlled by the Dimmer
Control. Refer to “Interior Lights” in “Getting To Know
Your Vehicle” for further information.
Electrical Power Outlets
Your vehicle is equipped with one 12 Volt (13 Amp) power
outlet on the instrument panel and one 12 Volt (13 Amp)
power outlet in the center console that can be used to power
cellular phones, small electronics and other low powered
electrical accessories. The power outlets are labeled with either
a “key” or a “battery” symbol to indicate how the outlet is
powered. Power outlets labeled with a “key” are powered
when the ignition switch is in the ON or ACC position, while
the outlets labeled with a “battery” are connected directly to
the battery and powered at all times.
Rear Seat Cupholders
Light Ring In Rear Cupholder
112 GETTING TO KNOW YOUR VEHICLE
Page 115 of 553
NOTE:
•All accessories connected to the “battery” powered
outlets should be removed or turned off when the
vehicle is not in use to protect the battery against
discharge.
The front power outlet is located inside the storage area on
the center stack of the instrument panel.WARNING!
Do not place ashes inside the cubby bin located on the
center console on vehicles not equipped with the ash
receiver tray. A fire leading to bodily injury could
result.
In addition to the front power outlet, there is also a power
outlet located in the storage area of the center console.
Front Power Outlet
Center Console Power Outlet
3
GETTING TO KNOW YOUR VEHICLE 113
Page 116 of 553

NOTE:If the Media Hub is in use, do not exceed the
maximum power of 100 Watts (8 Amps) for the center
console power outlet. When the Media Hub is not in use,
the outlet can deliver up to 160 Watts (13 Amps). If the
power rating is exceeded, the fuse protecting the system
needs to be replaced. NOTE:
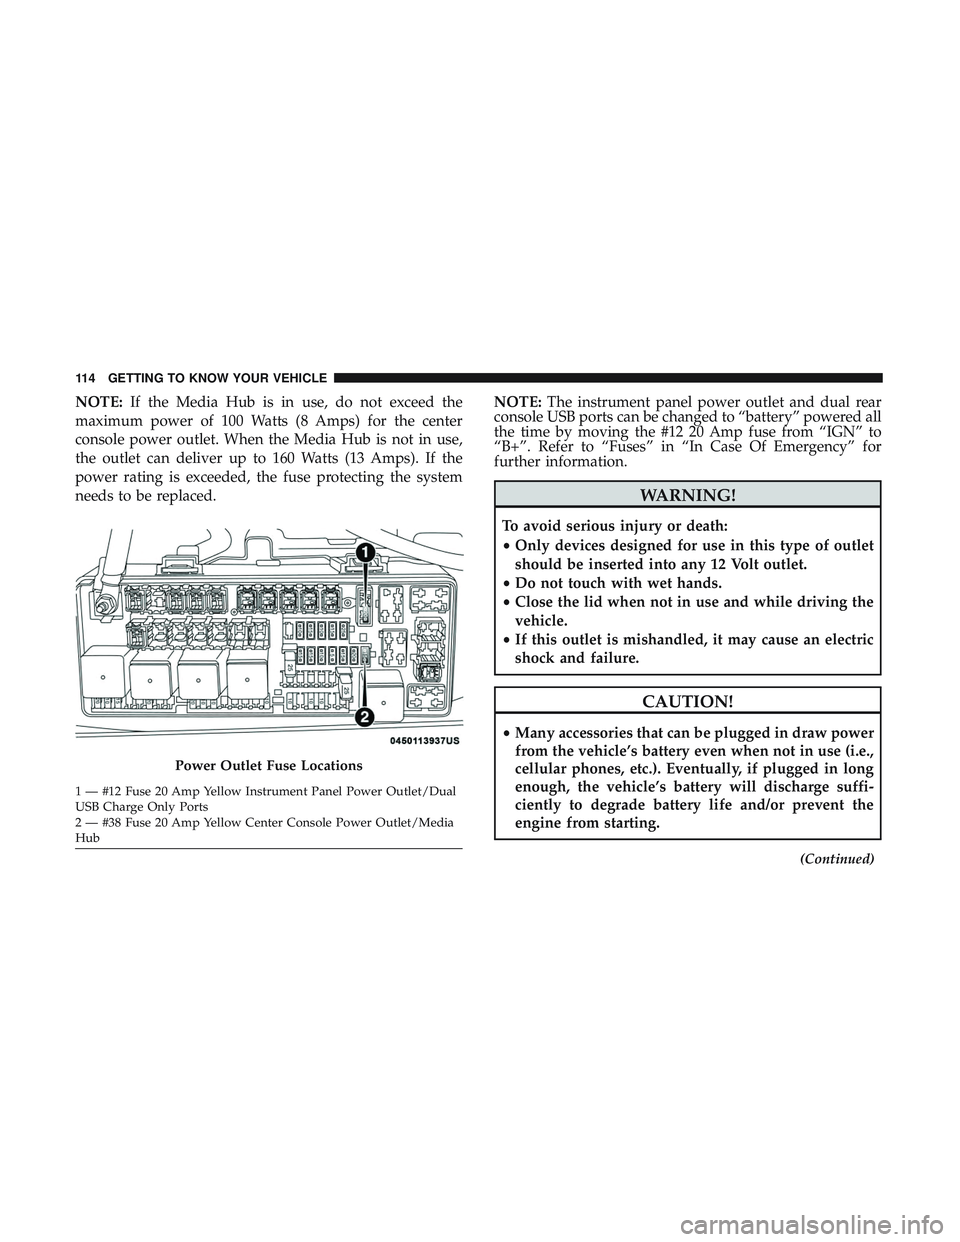
The instrument panel power outlet and dual rear
console USB ports can be changed to “battery” powered all
the time by moving the #12 20 Amp fuse from “IGN” to
“B+”. Refer to “Fuses” in “In Case Of Emergency” for
further information.
WARNING!
To avoid serious injury or death:
• Only devices designed for use in this type of outlet
should be inserted into any 12 Volt outlet.
• Do not touch with wet hands.
• Close the lid when not in use and while driving the
vehicle.
• If this outlet is mishandled, it may cause an electric
shock and failure.
CAUTION!
•Many accessories that can be plugged in draw power
from the vehicle’s battery even when not in use (i.e.,
cellular phones, etc.). Eventually, if plugged in long
enough, the vehicle’s battery will discharge suffi-
ciently to degrade battery life and/or prevent the
engine from starting.
(Continued)
Power Outlet Fuse Locations
1 — #12 Fuse 20 Amp Yellow Instrument Panel Power Outlet/Dual
USB Charge Only Ports
2 — #38 Fuse 20 Amp Yellow Center Console Power Outlet/Media
Hub 114 GETTING TO KNOW YOUR VEHICLE