Page 70 of 553

NOTE:The “Headlights On With Wipers” feature can be
turned on or off using the Uconnect System. Refer to
“Uconnect Settings” in “Multimedia” for further informa-
tion.
Headlight Time Delay
This feature provides the safety of headlight illumination
for up to 90 seconds when leaving your vehicle in an unlit
area with the headlight switch in the O (off) position.
To activate the delay feature, turn OFF the ignition switch
while the headlights are still on. Then, turn off the head-
lights within 45 seconds. The delay interval begins when
the headlight switch is turned off.
NOTE: The lights must be turned off within 45 seconds of
turning the ignition OFF to activate this feature.
If you turn the headlights, park lights or ignition switch
ON again, the system will cancel the delay.
If you turn the headlights off before the ignition, they will
turn off in the normal manner.
NOTE: The Headlight Time Delay is programmable using
the Uconnect System, refer to “Uconnect Settings” in
“Multimedia” for further information.
Lights-On Reminder
If the headlights or parking lights are on after the ignition
is placed in the OFF position, a chime will sound to alert
the driver when the driver’s door is opened.
Fog Lights — If Equipped
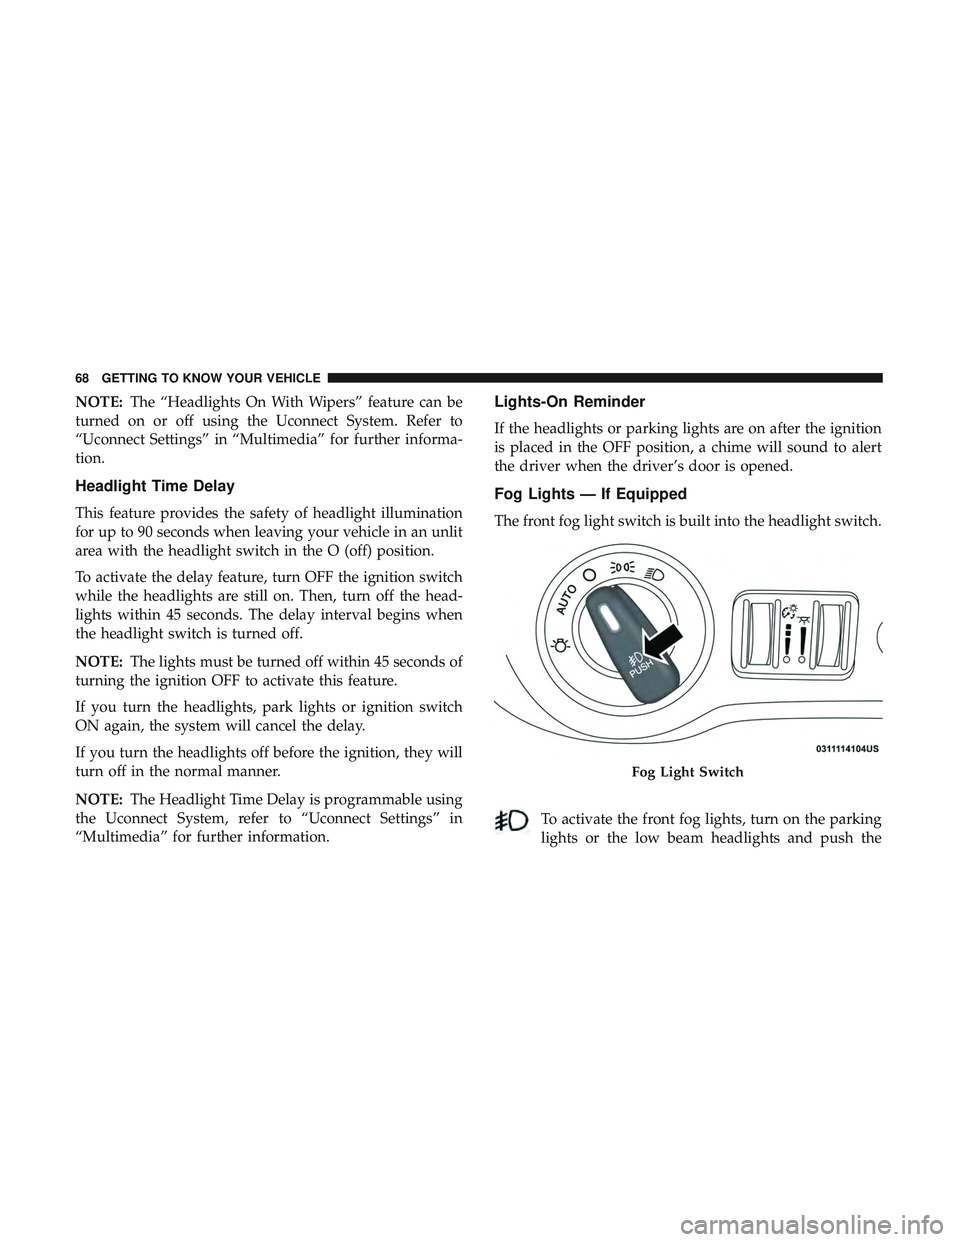
The front fog light switch is built into the headlight switch.
To activate the front fog lights, turn on the parking
lights or the low beam headlights and push the
Fog Light Switch
68 GETTING TO KNOW YOUR VEHICLE
Page 71 of 553

headlight switch. To turn off the front fog lights, either
push the headlight switch a second time or turn off the
headlight switch.
An indicator light in the instrument cluster display illumi-
nates when the fog lights are turned on.
NOTE:The fog lights will operate with the low beam
headlights or parking lights on. However, selecting the
high beam headlights will turn off the fog lights.
Turn Signals
Move the multifunction lever up or down and the arrows
on each side of the instrument cluster display flash to show
proper operation of the front and rear turn signal lights.
NOTE:
• If either light remains on and does not flash, or there is
a very fast flash rate, check for a defective outside light
bulb. If an indicator fails to light when the lever is
moved, it would suggest that the indicator bulb is
defective.
• A “Turn Signal On” message will appear in the instru-
ment cluster display and a continuous chime will sound
if the vehicle is driven more than 1 mile (1.6 km) with
either turn signal on.
Lane Change Assist — If Equipped
Tap the multifunction lever up or down once, without
moving beyond the detent, and the turn signal (right or
left) will flash three times then automatically turn off.
INTERIOR LIGHTS
The interior lights come on when a door is opened.
To protect the battery, the interior lights will turn off
automatically ten minutes after the ignition is moved to the
OFF position. This will occur if the interior lights were
switched on manually or are on because a door is open.
The Battery Protection also includes the glove compart-
ment light and the trunk light. To restore interior light
operation after automatic battery protection is enabled
(lights off), either place the ignition in the ON/RUN
position or cycle the light switch.
3
GETTING TO KNOW YOUR VEHICLE 69
Page 72 of 553
Courtesy Lights
The courtesy lights can be turned on by pushing the top
corner of the lens. To turn the lights off, push the lens a
second time.
Front Map/Reading Lights — If Equipped
Lights are mounted in the overhead console. Each light can
be turned on by pushing the switch on either side of the
console. These buttons are backlit for night time visibility.
Courtesy LightsFront Map/Reading Lights
70 GETTING TO KNOW YOUR VEHICLE
Page 73 of 553
To turn the lights off, push the switch a second time. The
lights also turn on when a door is opened. The lights will
also turn on when the unlock button on the key fob is
pushed.Ambient Light — If Equipped
The overhead console is equipped with an ambient light
feature. This light casts illumination for improved visibility
of the floor and center console area.
Front Map/Reading Light SwitchesAmbient Light
3
GETTING TO KNOW YOUR VEHICLE 71
Page 74 of 553
Dimmer Controls
The dimmer control is part of the headlight switch and is
located on the left side of the instrument panel.
With the parking lights or headlights on, rotating the left
dimmer control upward will increase the brightness of the
instrument panel lights and lighted cupholders (if
equipped).Dome Light Position
Rotate the dimmer control completely upward to the
second detent to turn on the interior lights. The interior
lights will remain on when the dimmer control is in this
position.
Interior Light Defeat (Off)
Rotate the instrument panel dimmer control to the extreme
bottom (O) off position. The interior lights will remain off
when the doors are open.
Dimmer Controls
Instrument Panel Dimmer
72 GETTING TO KNOW YOUR VEHICLE
Page 75 of 553

Parade Mode (Daytime Brightness Feature)
Rotate the instrument panel dimmer control upward to the
first detent. This feature brightens all text displays such as
the odometer, instrument cluster display, and radio when
the position lights or headlights are on.
WINDSHIELD WIPERS AND WASHERS
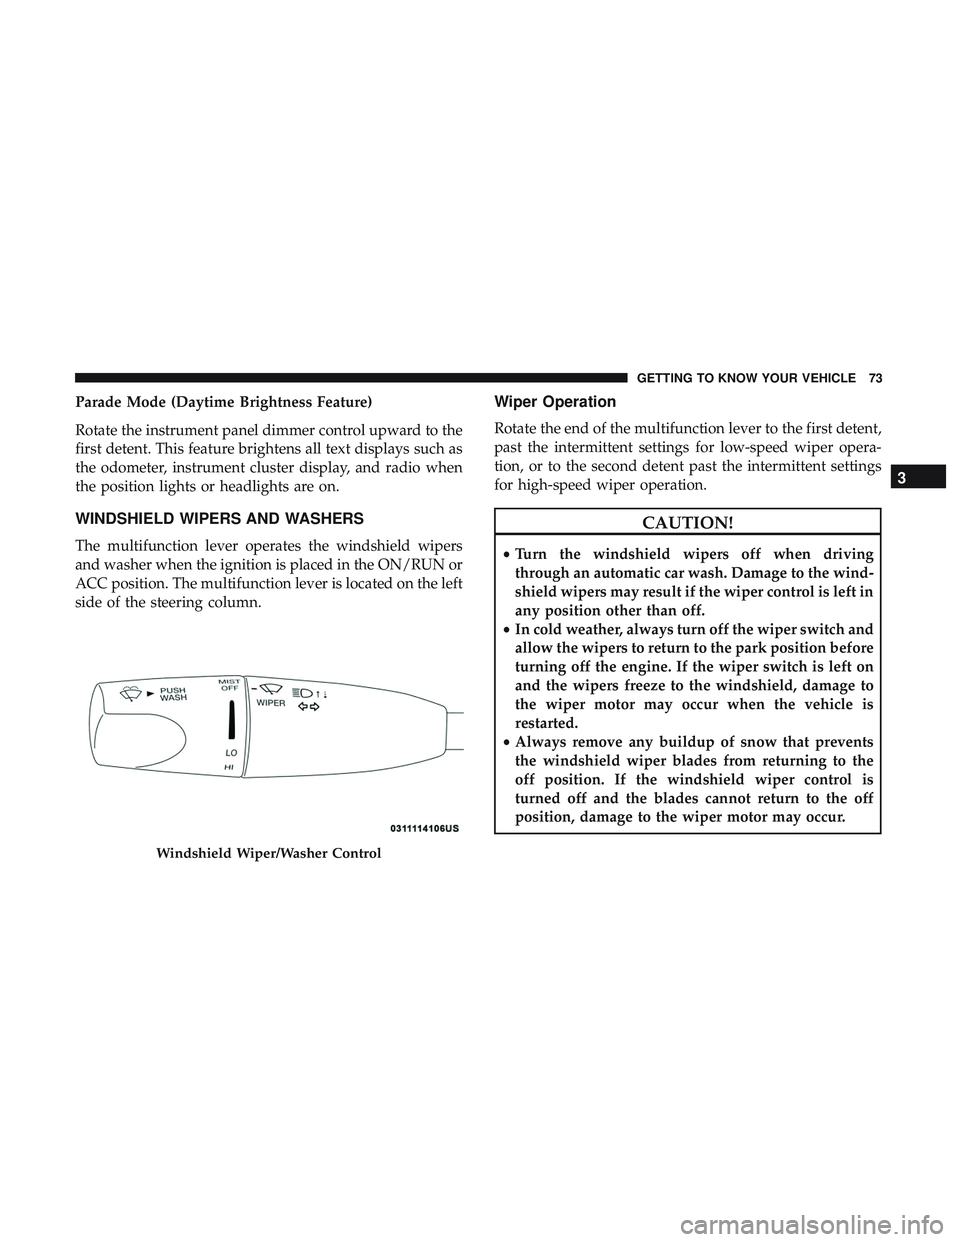
The multifunction lever operates the windshield wipers
and washer when the ignition is placed in the ON/RUN or
ACC position. The multifunction lever is located on the left
side of the steering column.
Wiper Operation
Rotate the end of the multifunction lever to the first detent,
past the intermittent settings for low-speed wiper opera-
tion, or to the second detent past the intermittent settings
for high-speed wiper operation.
CAUTION!
•Turn the windshield wipers off when driving
through an automatic car wash. Damage to the wind-
shield wipers may result if the wiper control is left in
any position other than off.
• In cold weather, always turn off the wiper switch and
allow the wipers to return to the park position before
turning off the engine. If the wiper switch is left on
and the wipers freeze to the windshield, damage to
the wiper motor may occur when the vehicle is
restarted.
• Always remove any buildup of snow that prevents
the windshield wiper blades from returning to the
off position. If the windshield wiper control is
turned off and the blades cannot return to the off
position, damage to the wiper motor may occur.
Windshield Wiper/Washer Control
3
GETTING TO KNOW YOUR VEHICLE 73
Page 114 of 553

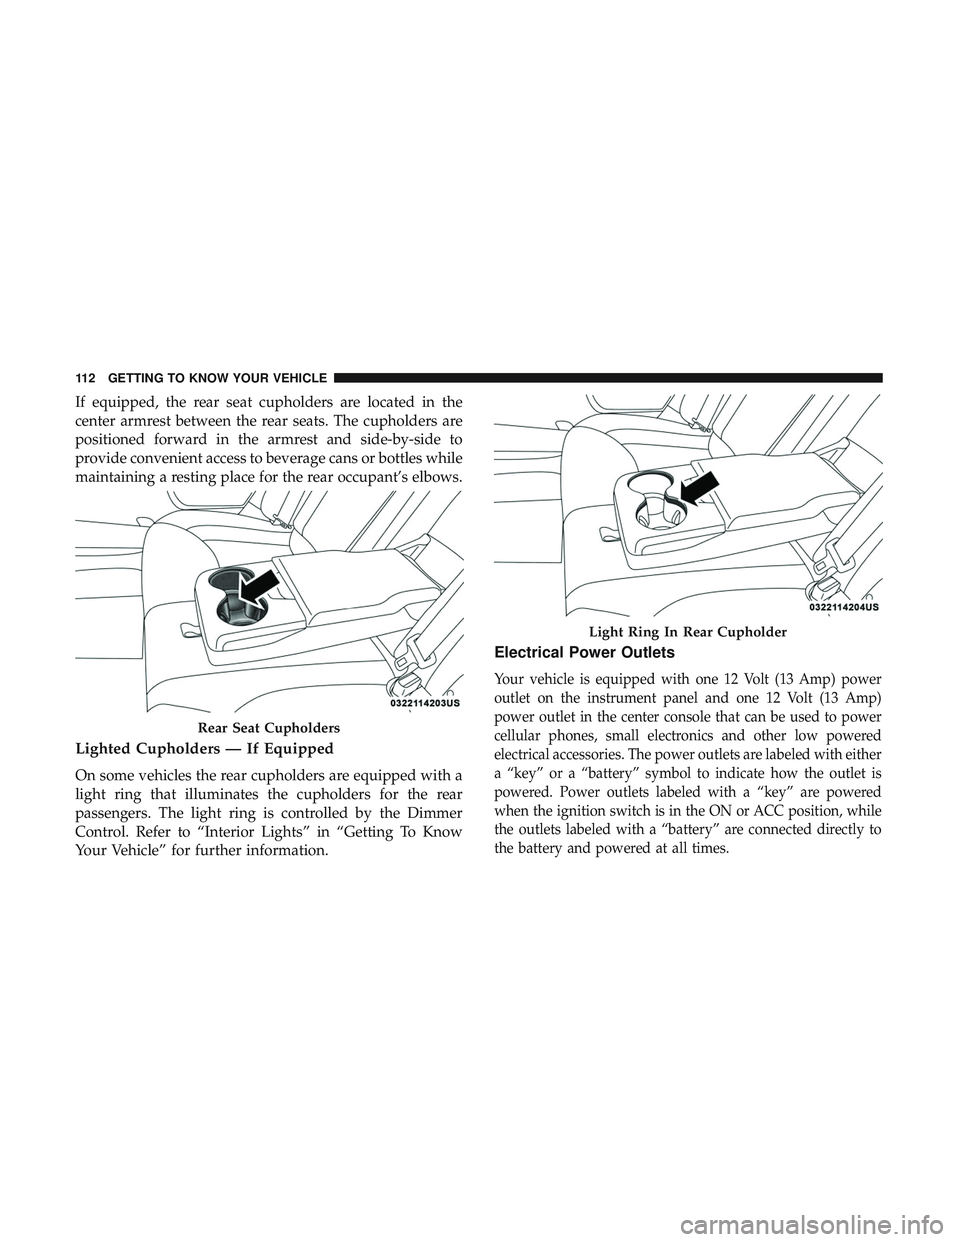
If equipped, the rear seat cupholders are located in the
center armrest between the rear seats. The cupholders are
positioned forward in the armrest and side-by-side to
provide convenient access to beverage cans or bottles while
maintaining a resting place for the rear occupant’s elbows.
Lighted Cupholders — If Equipped
On some vehicles the rear cupholders are equipped with a
light ring that illuminates the cupholders for the rear
passengers. The light ring is controlled by the Dimmer
Control. Refer to “Interior Lights” in “Getting To Know
Your Vehicle” for further information.
Electrical Power Outlets
Your vehicle is equipped with one 12 Volt (13 Amp) power
outlet on the instrument panel and one 12 Volt (13 Amp)
power outlet in the center console that can be used to power
cellular phones, small electronics and other low powered
electrical accessories. The power outlets are labeled with either
a “key” or a “battery” symbol to indicate how the outlet is
powered. Power outlets labeled with a “key” are powered
when the ignition switch is in the ON or ACC position, while
the outlets labeled with a “battery” are connected directly to
the battery and powered at all times.
Rear Seat Cupholders
Light Ring In Rear Cupholder
112 GETTING TO KNOW YOUR VEHICLE
Page 117 of 553
CAUTION!(Continued)
•Accessories that draw higher power (i.e., coolers,
vacuum cleaners, lights, etc.) will degrade the battery
even more quickly. Only use these intermittently and
with greater caution.
• After the use of high power draw accessories or long
periods of the vehicle not being started (with acces-
sories still plugged in), the vehicle must be driven a
sufficient length of time to allow the alternator to
recharge the vehicle’s battery.
• Power outlets are designed for accessory plugs only.
Do not hang any type of accessory or accessory
bracket from the plug. Improper use of the power
outlet can cause damage.
Sunglasses Bin Door
At the front of the console a compartment is provided for
the storage of a pair of sunglasses. The storage compart-
ment access is a “push/push” design. Push the chrome pad
on the door to open. Push the chrome pad on the door to
close.
Sunglasses Bin Door
3
GETTING TO KNOW YOUR VEHICLE 115