Page 259 of 516

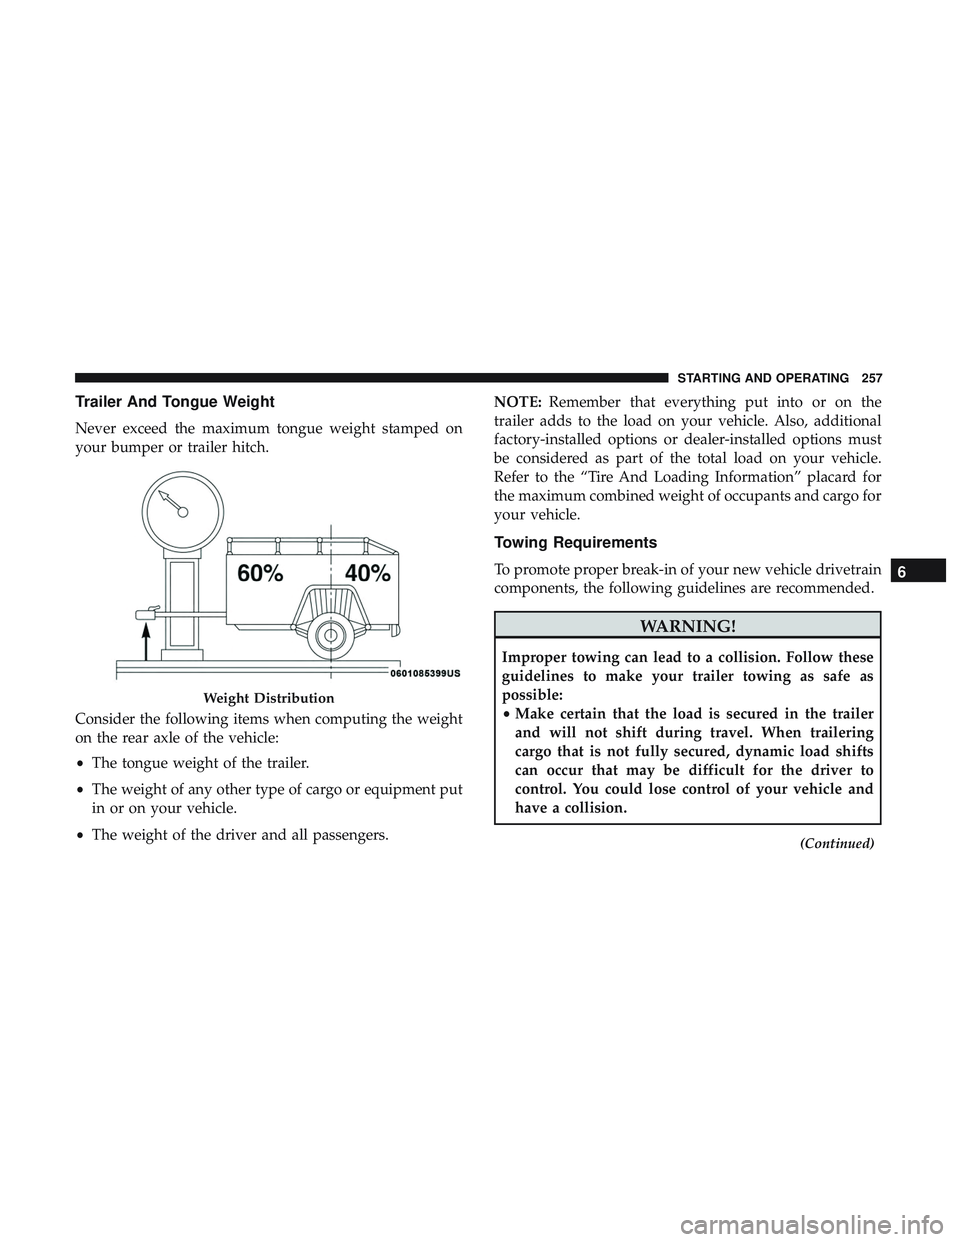
Trailer And Tongue Weight
Never exceed the maximum tongue weight stamped on
your bumper or trailer hitch.
Consider the following items when computing the weight
on the rear axle of the vehicle:
•The tongue weight of the trailer.
• The weight of any other type of cargo or equipment put
in or on your vehicle.
• The weight of the driver and all passengers. NOTE:
Remember that everything put into or on the
trailer adds to the load on your vehicle. Also, additional
factory-installed options or dealer-installed options must
be considered as part of the total load on your vehicle.
Refer to the “Tire And Loading Information” placard for
the maximum combined weight of occupants and cargo for
your vehicle.
Towing Requirements
To promote proper break-in of your new vehicle drivetrain
components, the following guidelines are recommended.
WARNING!
Improper towing can lead to a collision. Follow these
guidelines to make your trailer towing as safe as
possible:
• Make certain that the load is secured in the trailer
and will not shift during travel. When trailering
cargo that is not fully secured, dynamic load shifts
can occur that may be difficult for the driver to
control. You could lose control of your vehicle and
have a collision.
(Continued)
Weight Distribution
6
STARTING AND OPERATING 257
Page 293 of 516
Jack Location/Spare Tire Stowage
The jack and spare tire are both stowed under an access
cover in the trunk. Follow these steps to access the jack and
spare tire.
NOTE:The spare tire must be removed in order to access
the jack.
1. Open the trunk.
2. Lift the access cover using the pull strap. 3. Rotate the fastener securing the spare tire counterclock-
wise to remove it.
4. Remove the spare tire.
Opening The Access Panel
Spare Tire Fastener
7
IN CASE OF EMERGENCY 291
Page 294 of 516

5. Rotate the fastener securing the jack counterclockwise toremove it.
6. Remove the jack and lug wrench assembly from under the spare tire. Turn the jack screw to the left to loosen the
lug wrench, and remove the wrench from the jack
assembly.
WARNING!
A loose tire or jack thrown forward in a collision or
hard stop could endanger the occupants of the vehicle.
(Continued)
WARNING! (Continued)
Always stow the jack parts and the spare tire in the
places provided. Have the deflated (flat) tire repaired
or replaced immediately.
Preparations For Jacking
1. Park the vehicle on a firm, level surface as far from the
edge of the roadway as possible. Avoid icy or slippery
areas.
WARNING!
Do not attempt to change a tire on the side of the
vehicle close to moving traffic, pull far enough off the
road to avoid being hit when operating the jack or
changing the wheel.
2. Turn on the Hazard Warning flasher.
3. Apply the parking brake.
4. Place the gear selector into PARK (automatic transmis- sion) or FIRST GEAR (manual transmission).
5. Turn the ignition OFF.
Jack Fastener
292 IN CASE OF EMERGENCY
Page 311 of 516

to the radiator and aids in removing heat from the
engine cooling system.
WARNING!
You or others can be badly burned by hot engine
coolant (antifreeze) or steam from your radiator. If you
see or hear steam coming from under the hood, do not
open the hood until the radiator has had time to cool.
Never try to open a cooling system pressure cap when
the radiator or coolant bottle is hot.
CAUTION!
Driving with a hot cooling system could damage your
vehicle. If the temperature gauge reads HOT (H), pull
over and stop the vehicle. Idle the vehicle with the air
conditioner turned off until the pointer drops back
into the normal range. If the pointer remains on HOT
(H), and you hear continuous chimes, turn the engine
off immediately and call for service.
MANUAL PARK RELEASE — 8 SPEED
TRANSMISSION
WARNING!
Always secure your vehicle by fully applying the
parking brake before activating the Manual Park Re-
lease. In addition, you should be seated in the driver’s
seat with your foot firmly on the brake pedal when
activating the Manual Park Release. Activating the
Manual Park Release will allow your vehicle to roll
away if it is not secured by the parking brake, or by
proper connection to a tow vehicle. Activating the
Manual Park Release on an unsecured vehicle could
lead to serious injury or death for those in or around
the vehicle.
In order to move the vehicle in cases where the transmis-
sion will not shift out of PARK (such as a dead battery), a
Manual Park Release is available.
7
IN CASE OF EMERGENCY 309
Page 312 of 516
Follow these steps to use the Manual Park Release:
1. Firmly apply the parking brake.
2. Remove the console storage bin to access the ManualPark Release lever.
3. Using a small screwdriver or similar tool, fish the tether strap up through the opening in the console base.
4. Press and maintain firm pressure on the brake pedal. 5. Insert the screwdriver into the slot in the center of the
lever, and disengage the lever locking tab by pushing it
to the right.
6. While holding the locking tab in the disengaged posi- tion, pull the tether strap to rotate the lever up and
rearward until it locks in place in the vertical position.
The vehicle is now out of PARK and can be moved.
Release the parking brake only when the vehicle is
securely connected to a tow vehicle.
Console Storage Bin
Locking Tab
310 IN CASE OF EMERGENCY
Page 313 of 516

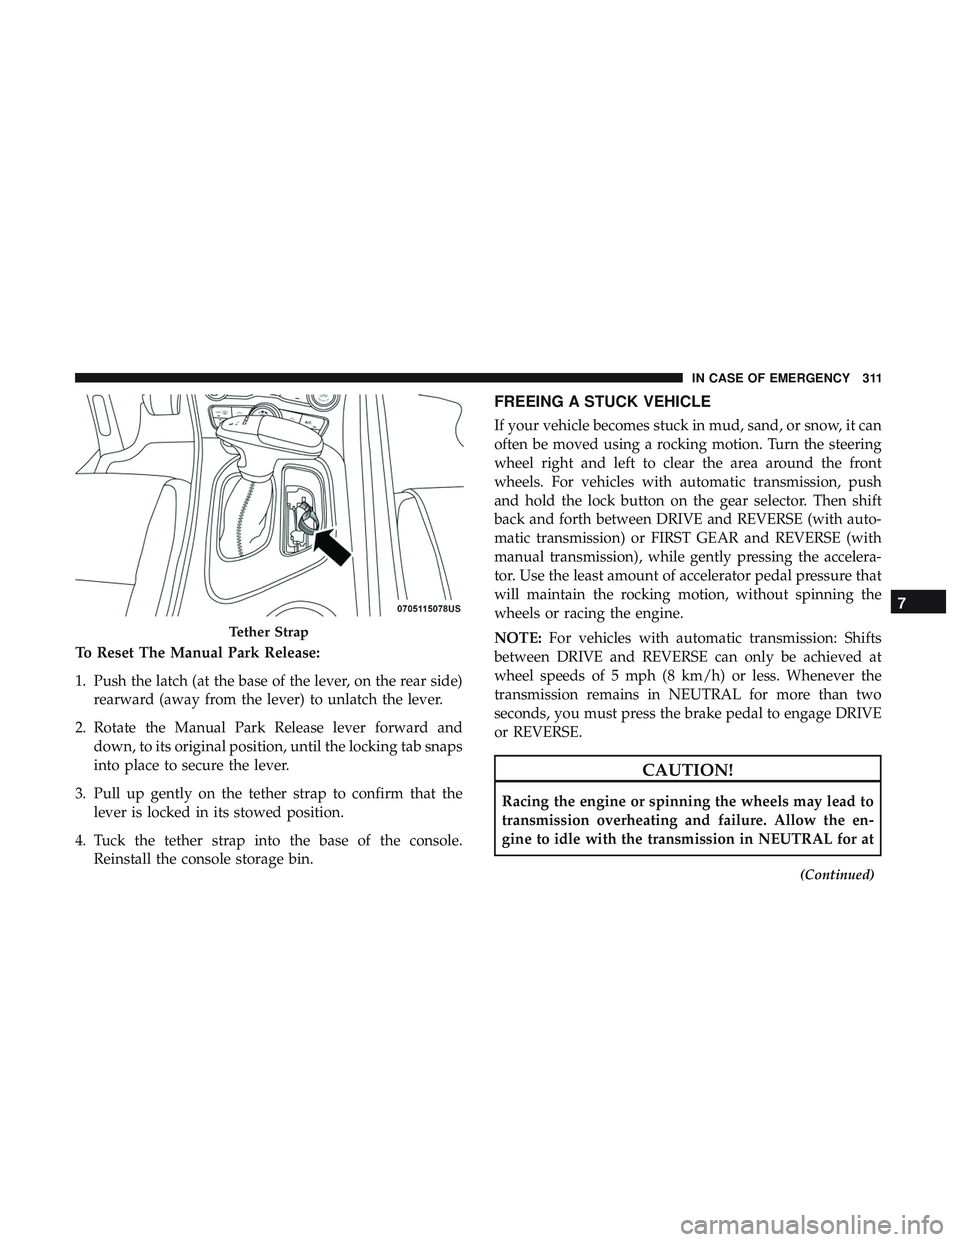
To Reset The Manual Park Release:
1. Push the latch (at the base of the lever, on the rear side)rearward (away from the lever) to unlatch the lever.
2. Rotate the Manual Park Release lever forward and down, to its original position, until the locking tab snaps
into place to secure the lever.
3. Pull up gently on the tether strap to confirm that the lever is locked in its stowed position.
4. Tuck the tether strap into the base of the console. Reinstall the console storage bin.
FREEING A STUCK VEHICLE
If your vehicle becomes stuck in mud, sand, or snow, it can
often be moved using a rocking motion. Turn the steering
wheel right and left to clear the area around the front
wheels. For vehicles with automatic transmission, push
and hold the lock button on the gear selector. Then shift
back and forth between DRIVE and REVERSE (with auto-
matic transmission) or FIRST GEAR and REVERSE (with
manual transmission), while gently pressing the accelera-
tor. Use the least amount of accelerator pedal pressure that
will maintain the rocking motion, without spinning the
wheels or racing the engine.
NOTE: For vehicles with automatic transmission: Shifts
between DRIVE and REVERSE can only be achieved at
wheel speeds of 5 mph (8 km/h) or less. Whenever the
transmission remains in NEUTRAL for more than two
seconds, you must press the brake pedal to engage DRIVE
or REVERSE.
CAUTION!
Racing the engine or spinning the wheels may lead to
transmission overheating and failure. Allow the en-
gine to idle with the transmission in NEUTRAL for at
(Continued)
Tether Strap
7
IN CASE OF EMERGENCY 311
Page 316 of 516

Proper towing or lifting equipment is required to prevent
damage to your vehicle. Use only tow bars and other
equipment designed for this purpose, following equipment
manufacturer ’s instructions. Use of safety chains is man-
datory. Attach a tow bar or other towing device to main
structural members of the vehicle, not to bumpers or
associated brackets. State and local laws regarding vehicles
under tow must be observed.
If you must use the accessories (wipers, defrosters, etc.)
while being towed, the ignition must be in the ON/RUN
mode, not the ACC mode.
If the key fob is unavailable, or the vehicle’s battery is
discharged, refer to�Manual Park Release� in this section
for instructions on shifting the transmission out of PARK
for towing.
CAUTION!
• Do not use sling type equipment when towing.
Vehicle damage may occur.
• When securing the vehicle to a flat bed truck, do not
attach to front or rear suspension components. Dam-
age to your vehicle may result from improper towing.
• The manufacturer does not recommend towing this
vehicle using a tow dolly. Vehicle damage may occur.
All Wheel Drive (AWD) Models
The manufacturer recommends towing your vehicle with
all four wheels OFF the ground using a flatbed.
If the transmission and driveline are operable, AWD mod-
els can also be towed with the ignition in the ON/RUN
mode, the transmission in NEUTRAL (not in PARK!), and
the rear wheels OFF the ground with no limitation on
speed or distance. Since the ignition MUST be in the
ON/RUN mode to tow in this manner, AWD vehicles must
be towed with ALL FOUR wheels OFF the ground (e.g. on
a flatbed truck) if the key fob is unavailable.
CAUTION!
• Towing this vehicle using any other method can
cause severe transmission and/or transfer
case damage.
• Damage from improper towing is not covered under
the New Vehicle Limited Warranty.
314 IN CASE OF EMERGENCY
Page 356 of 516

Clean the top of the master cylinder area before removing
the cap. Add fluid to bring the level up to the top of the
“FULL” mark on the side of the master cylinder reservoir.
Overfilling of fluid is not recommended because it may
cause leaking in the system.
Add enough fluid to bring the level up to the requirements
described on the brake fluid reservoir. With disc brakes,
fluid level can be expected to fall as the brake pads wear.
However, low fluid level may be caused by a leak and a
checkup may be needed.
Use only brake fluid that has been recommended by the
manufacturer, and has been kept in a tightly closed con-
tainer to avoid contamination from foreign matter or
moisture.
Refer to “Fluids And Lubricants” in “Technical Specifica-
tions” for further information.
WARNING!
•Use only manufacturer’s recommended brake fluid.
Refer to “Fluids And Lubricants” in “Technical
Specifications” for further information. Using the
(Continued)
WARNING! (Continued)
wrong type of brake fluid can severely damage your
brake system and/or impair its performance. The
proper type of brake fluid for your vehicle is also
identified on the original factory installed hydraulic
master cylinder reservoir.
• To avoid contamination from foreign matter or mois-
ture, use only new brake fluid or fluid that has been
in a tightly closed container. Keep the master cylin-
der reservoir cap secured at all times. Brake fluid in
a open container absorbs moisture from the air
resulting in a lower boiling point. This may cause it
to boil unexpectedly during hard or prolonged brak-
ing, resulting in sudden brake failure. This could
result in a collision.
• Overfilling the brake fluid reservoir can result in
spilling brake fluid on hot engine parts, causing the
brake fluid to catch fire. Brake fluid can also damage
painted and vinyl surfaces, care should be taken to
avoid its contact with these surfaces.
• Do not allow petroleum based fluid to contaminate
the brake fluid. Brake seal components could be
damaged, causing partial or complete brake failure.
This could result in a collision.
354 SERVICING AND MAINTENANCE