Page 597 of 696
Display
After pressing the “Display” button on the touchscreen, the
following settings will be available:
Setting NameSelectable Options
Display Mode Manual Auto
Display Brightness With Headlights ON +-
NOTE:
To make changes to the �Display Brightness with Headlights ON� setting, the headlights must be on and the interior
dimmer switch must not be in the �party�or�parade� positions.
Display Brightness With Headlights OFF +-
NOTE:
To make changes to the �Display Brightness with Headlights OFF� setting, the headlights must be off and the interior
dimmer switch must not be in the �party�or�parade� positions.
Set Theme OnOff
NOTE:
When the “Set Theme” feature is selected, you may select the theme for the display screen. To make your selection,
press the �Set Theme� button on the touchscreen, then select the desired theme option button until a check-mark ap-
pears showing that the setting has been selected.
10
MULTIMEDIA 595
Page 605 of 696

Setting NameSelectable Options
Blind Spot Alert — If Equipped Off
LightsLights and Chime
NOTE:
When the “Blind Spot Alert” feature is selected, the Blind Spot Monitor (BSM) system is activated and will show a
visual alert in the outside mirrors, or it will show a visual alert in the outside mirrors as well as play an audible alert
when the turn signal is on. When “Off” is selected, the Blind Spot Monitor (BSM) system is deactivated.
If your vehicle has experienced any damage in the area where the sensor is located, even if the fascia is not damaged,
the sensor may have become misaligned. Take your vehicle to an authorized dealer to verify sensor alignment. A sen-
sor that is misaligned will result in the BSM not operating to specification. Hill Start Assist — If Equipped On
Off
Mirrors & Wipers
After pressing the “Mirror and Wipers” button on the
touchscreen, the following settings will be available:
Setting Name Selectable Options
Rain Sensing Auto Wipers OnOff
Tilt Side Mirrors in Reverse OnOff
Headlights with Wipers OnOff
10
MULTIMEDIA 603
Page 606 of 696
Brakes
After pressing the “Brakes” button on the touchscreen, the
following settings will be available:
Setting NameSelectable Options
Auto Park Brake OnOff
Brake Service Ye sN o
NOTE:
Selecting the “Brake Service” feature will display a pop-up asking whether or you would like to retract the park
brakes to all break system service.
Lights
After pressing the “Lights” button on the touchscreen, the
following settings will be available:
Setting Name Selectable Options
Headlight Off Delay 0 sec30 sec
60 sec 90 sec
NOTE:
When the “Headlight Off Delay” feature is selected, it allows the adjustment of the amount of time the headlights
remain on after the vehicle is shut off.
604 MULTIMEDIA
Page 607 of 696
Setting NameSelectable Options
Headlight Illumination On Ap- proach 0 sec
30 sec
60 sec 90 sec
NOTE:
When the “Headlight Illumination On Approach” feature is selected, it allows the adjustment of the amount of time
the headlights remain on after the doors are unlocked with the key fob. Headlights With Wipers — If Equipped On
Off
Auto Dim High Beams— If Equipped On
Off
NOTE:
When the “Auto Dim High Beams” feature is selected, the high beam headlights will activate/deactivate automati-
cally under certain conditions. Daytime Running Lights OnOff
Flash Lights With Lock OnOff
Flash Lights With Sliding Door OnOff
10
MULTIMEDIA 605
Page 611 of 696

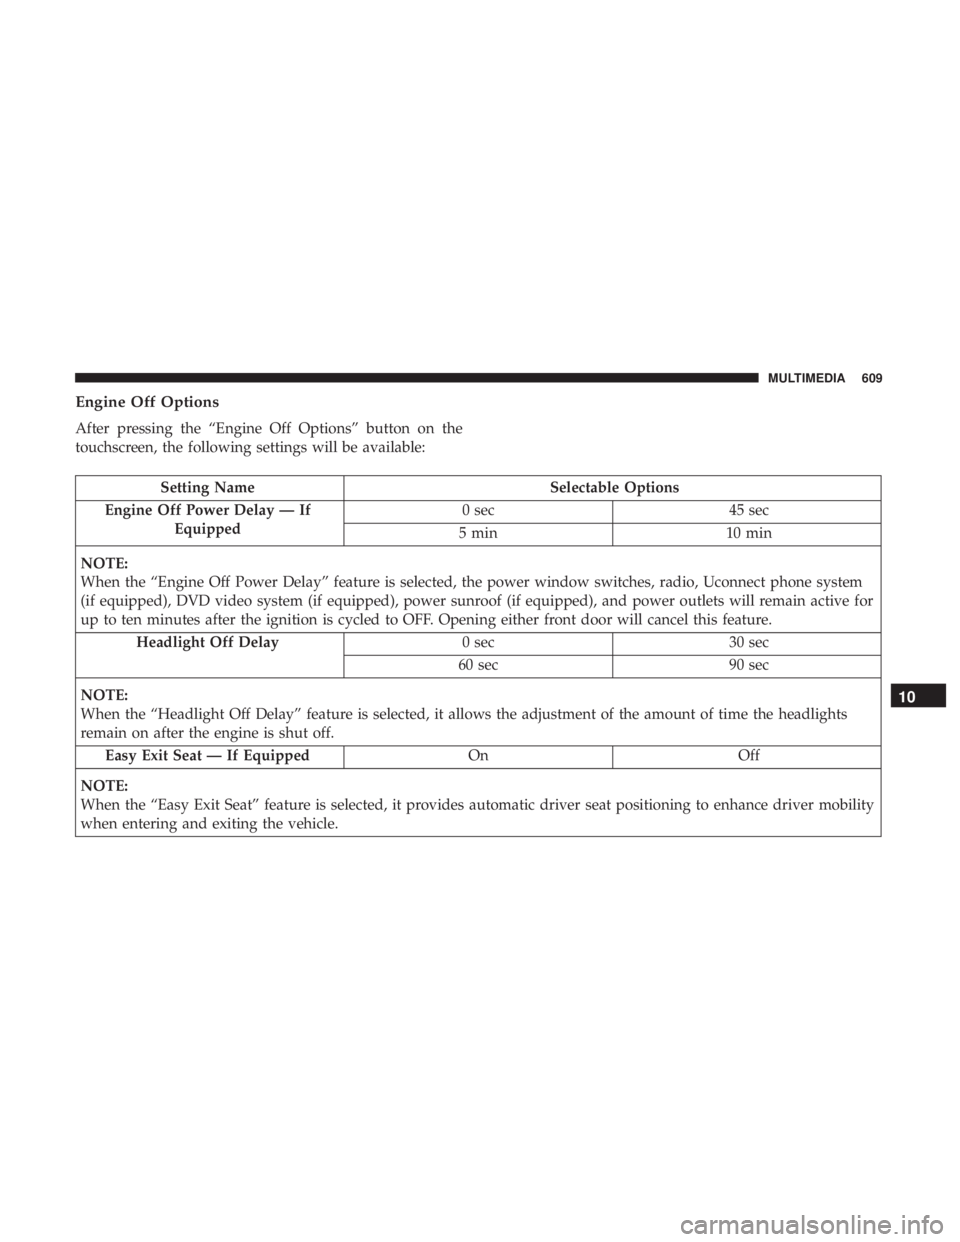
Engine Off Options
After pressing the “Engine Off Options” button on the
touchscreen, the following settings will be available:
Setting NameSelectable Options
Engine Off Power Delay — If Equipped 0 sec
45 sec
5 min 10 min
NOTE:
When the “Engine Off Power Delay” feature is selected, the power window switches, radio, Uconnect phone system
(if equipped), DVD video system (if equipped), power sunroof (if equipped), and power outlets will remain active for
up to ten minutes after the ignition is cycled to OFF. Opening either front door will cancel this feature. Headlight Off Delay 0 sec30 sec
60 sec 90 sec
NOTE:
When the “Headlight Off Delay” feature is selected, it allows the adjustment of the amount of time the headlights
remain on after the engine is shut off. Easy Exit Seat — If Equipped OnOff
NOTE:
When the “Easy Exit Seat” feature is selected, it provides automatic driver seat positioning to enhance driver mobility
when entering and exiting the vehicle.
10
MULTIMEDIA 609
Page 619 of 696
NOTE:The USB “Charge Only” ports will recharge battery
operated USB devices when connected.
UCONNECT THEATER — IF EQUIPPED
Uconnect Theater Overview
Your Uconnect Theater is designed to give your family
years of enjoyment.
There are multiple ways to interact with your Uconnect
Theater system.
• Play your favorite CDs, DVDs or Blu-ray Discs •
Plug and play a variety of standard video games or
devices into the HDMI port
• Listen to audio over the wireless headphones
• Plug and play a variety of devices into the Video USB
port
• Plug in standard headphones to listen to audio
• Project your mobile phone, or tablet screen onto the rear
Uconnect Theater touchscreens — If Equipped
Please review this Owner’s Manual to become familiar
with its features and operation.
3rd Row USB Charging Port
10
MULTIMEDIA 617
Page 620 of 696
Getting Started
There are three different ways to operate the features of the
Uconnect Theater:
•The Remote Control
• The Uconnect System
• The Individual Uconnect Theater Touchscreens
Accessing The System From The Uconnect System
You can access your Uconnect Theater system from the
radio touchscreen following the steps below:
Option 1
1. Press the “Media” button.
2. Press the “Uconnect Theater” button icon.
Uconnect Theater Screen1 — Uconnect Theater Touchscreen (Rear Touchscreens)
2 — Uconnect System (Front Touchscreen)
3 — Uconnect Theater Media Hub (Headphone Jack, HDMI Input,
USB Charge Only Port)Uconnect Theater Button
618 MULTIMEDIA
Page 626 of 696

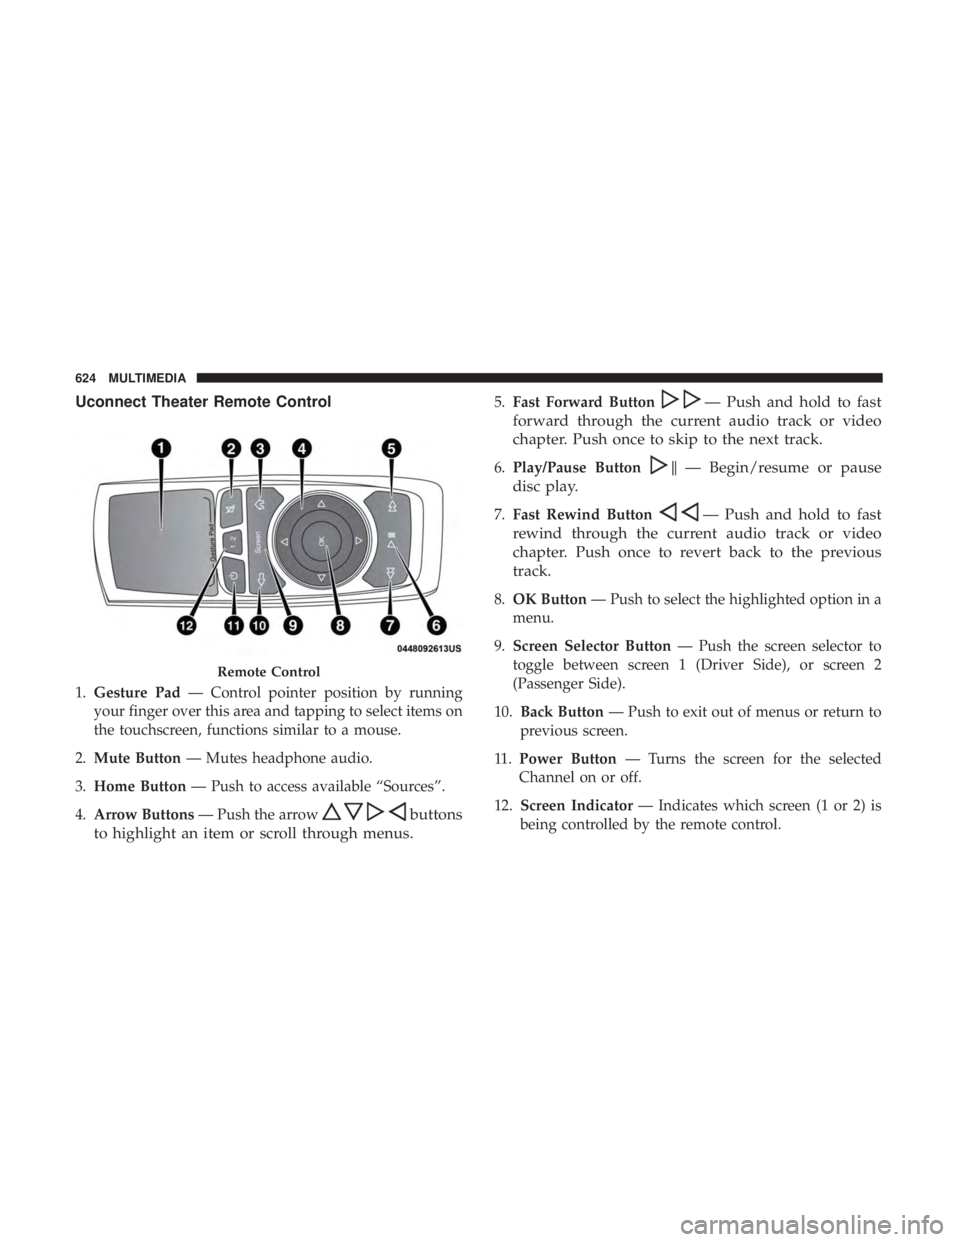
Uconnect Theater Remote Control
1.Gesture Pad — Control pointer position by running
your finger over this area and tapping to select items on
the touchscreen, functions similar to a mouse.
2. Mute Button — Mutes headphone audio.
3. Home Button — Push to access available “Sources”.
4. Arrow Buttons — Push the arrow
buttons
to highlight an item or scroll through menus.
5. Fast Forward Button— Push and hold to fast
forward through the current audio track or video
chapter. Push once to skip to the next track.
6. Play/Pause Button�— Begin/resume or pause
disc play.
7. Fast Rewind Button— Push and hold to fast
rewind through the current audio track or video
chapter. Push once to revert back to the previous
track.
8. OK Button — Push to select the highlighted option in a
menu.
9. Screen Selector Button — Push the screen selector to
toggle between screen 1 (Driver Side), or screen 2
(Passenger Side).
10. Back Button — Push to exit out of menus or return to
previous screen.
11 . Power Button — Turns the screen for the selected
Channel on or off.
12. Screen Indicator — Indicates which screen (1 or 2) is
being controlled by the remote control.
Remote Control
624 MULTIMEDIA