2018 CHRYSLER PACIFICA HYBRID ECO mode
[x] Cancel search: ECO modePage 127 of 614
Closing Sunroof
Express Mode
Push the switch forward and release it within one second
and the sunroof will close automatically from any position.
The sunroof will close fully and stop automatically. This is
called “Express Close.” During Express Close operation,
any other actuation of the switch will stop the sunroof.
Manual Mode
To close the sunroof, push and hold the switch in the
forward position. Any release of the switch will stop the
movement and the sunroof will remain in a partially closed
condition until the sunroof switch is pushed again.
Wind Buffeting
Wind buffeting can be described as the perception of
pressure on the ears or a helicopter-type sound in the ears.
Your vehicle may exhibit wind buffeting with the windows
down, or the sunroof (if equipped) in certain open or
partially open positions. This is a normal occurrence and
can be minimized. If the buffeting occurs with the rear
windows open, open the front and rear windows together
to minimize the buffeting. If the buffeting occurs with the
sunroof open, adjust the sunroof opening to minimize the
buffeting or open any window.
Power Sun Shade — If Equipped
Opening Power Shade — Express Mode
Push the shade switch rearward and release it within one
second and the shade will open automatically from any
position. The shade will open and stop automatically at the
half-open position. Push the shade switch rearward again
and release it within one second and the shade will open
automatically to the full-open position. This is called
“Express Open”. During Express Open operation, any
other actuation of the shade switch will stop the shade.
Opening Power Shade — Manual Mode
To open the shade, push and hold the switch rearward. The
shade will open and stop automatically at the half-open
position. Push and hold the shade switch rearward again
and the shade will open automatically to the full-open
position. Any release of the switch will stop the movement
and the shade will remain in a partially opened condition
until the switch is pushed again.
Closing Power Shade — Express Mode
Push the switch forward and release it within one second
and the shade will close automatically from any position. If
the sunroof is completely closed the shade will close fully
3
GETTING TO KNOW YOUR VEHICLE 125
Page 132 of 614
Closing
To Close The Liftgate
Grasp the liftgate closing handle and initiate lowering the
liftgate. Release the handle when the liftgate takes over the
closing effort.
To Lock The Vehicle
With a valid Passive Entry key fob within 5 ft (1.5 m) of the
liftgate, pushing the passive entry lock button located to
the right of the outside handle will lock the vehicle.
WARNING!
•Driving with the liftgate open can allow poisonous
exhaust gases into your vehicle. You and your pas-
sengers could be injured by these fumes. Keep the
liftgate closed when you are operating the vehicle.
• If you are required to drive with the liftgate open,
make sure that all windows are closed, and the
climate control blower switch is set at high speed. Do
not use the recirculation mode.
Power Liftgate — If Equipped
The power liftgate may be opened or closed in several
ways:
• Overhead console liftgate button
• Key fob
• Outside handle (opens liftgate only)
• Button just inside the liftgate on the upper left trim
(when liftgate is open)
• Hands-Free Liftgate (opens liftgate only) — If Equipped
Using the above ways:
• When the liftgate is fully closed, the liftgate will open
• When the liftgate is fully open, the liftgate will close
• When the liftgate is moving, the liftgate will reverse
Push the Power Liftgate button on the Overhead Console
to open or close the liftgate.
Push the liftgate button on the key fob twice within five
seconds to open or close the liftgate.
130 GETTING TO KNOW YOUR VEHICLE
Page 138 of 614
1. Place the ignition in the ON/RUN position.
2. Place the hand-held transmitter 1 to 3 inches (3 to 8 cm)away from the HomeLink button you wish to program
while keeping the HomeLink indicator light in view.
3. Push and hold the HomeLink button you want to program while you push and hold the hand-held trans-
mitter button. 4. Continue to hold both buttons and observe the indicator
light. The HomeLink indicator will flash slowly and
then rapidly after HomeLink has received the frequency
signal from the hand-held transmitter. Release both
buttons after the indicator light changes from slow to
rapid.
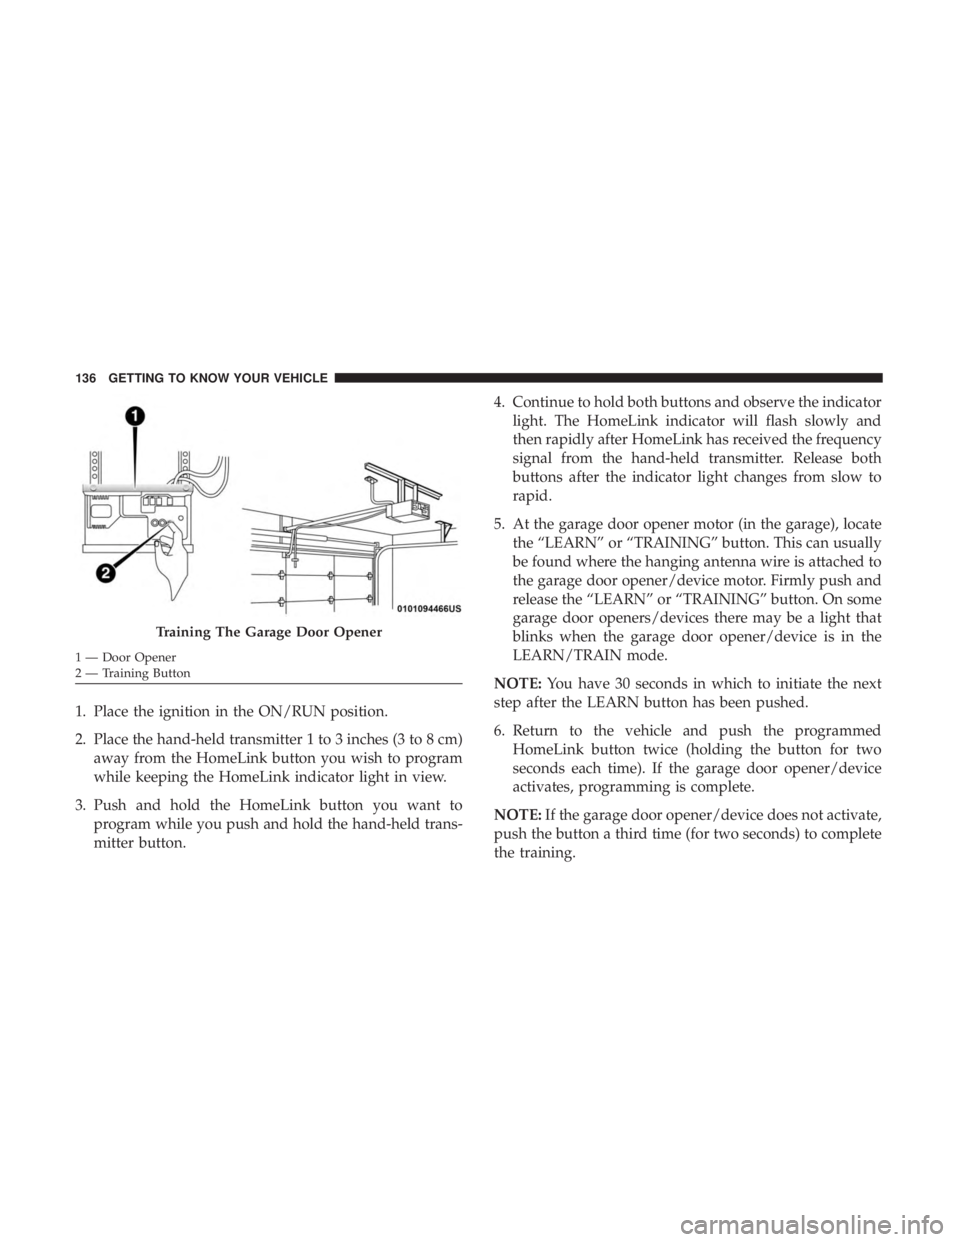
5. At the garage door opener motor (in the garage), locate the “LEARN” or “TRAINING” button. This can usually
be found where the hanging antenna wire is attached to
the garage door opener/device motor. Firmly push and
release the “LEARN” or “TRAINING” button. On some
garage door openers/devices there may be a light that
blinks when the garage door opener/device is in the
LEARN/TRAIN mode.
NOTE: You have 30 seconds in which to initiate the next
step after the LEARN button has been pushed.
6. Return to the vehicle and push the programmed HomeLink button twice (holding the button for two
seconds each time). If the garage door opener/device
activates, programming is complete.
NOTE: If the garage door opener/device does not activate,
push the button a third time (for two seconds) to complete
the training.
Training The Garage Door Opener
1 — Door Opener
2 — Training Button 136 GETTING TO KNOW YOUR VEHICLE
Page 150 of 614
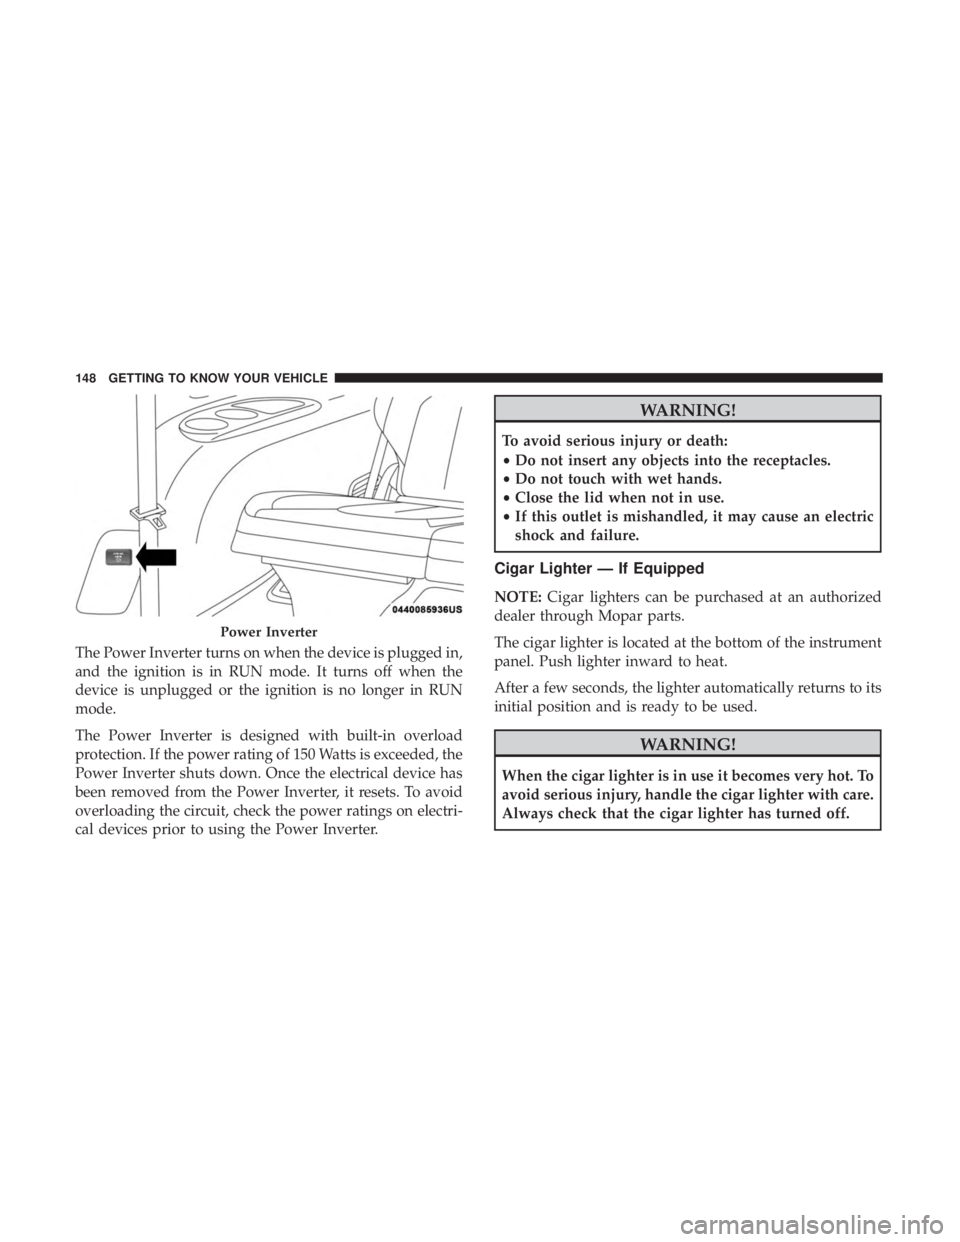
The Power Inverter turns on when the device is plugged in,
and the ignition is in RUN mode. It turns off when the
device is unplugged or the ignition is no longer in RUN
mode.
The Power Inverter is designed with built-in overload
protection. If the power rating of 150 Watts is exceeded, the
Power Inverter shuts down. Once the electrical device has
been removed from the Power Inverter, it resets. To avoid
overloading the circuit, check the power ratings on electri-
cal devices prior to using the Power Inverter.
WARNING!
To avoid serious injury or death:
•Do not insert any objects into the receptacles.
• Do not touch with wet hands.
• Close the lid when not in use.
• If this outlet is mishandled, it may cause an electric
shock and failure.
Cigar Lighter — If Equipped
NOTE: Cigar lighters can be purchased at an authorized
dealer through Mopar parts.
The cigar lighter is located at the bottom of the instrument
panel. Push lighter inward to heat.
After a few seconds, the lighter automatically returns to its
initial position and is ready to be used.
WARNING!
When the cigar lighter is in use it becomes very hot. To
avoid serious injury, handle the cigar lighter with care.
Always check that the cigar lighter has turned off.
Power Inverter
148 GETTING TO KNOW YOUR VEHICLE
Page 162 of 614

through HV battery use. The outer ring represents
current energy economy. The white inner ring repre-
sents average energy economy.
• NONE
INSTRUMENT CLUSTER DISPLAY
Your vehicle is equipped with an instrument cluster dis-
play, which offers useful information to the driver. With the
ignition in the STOP/OFF mode, opening/closing of a
door will activate the display for viewing, and display the
total miles or kilometers in the odometer. Your instrument
cluster display is designed to display important informa-
tion about your vehicle’s systems and features. Using a
driver interactive display located on the instrument panel,
your instrument cluster display can show you how sys-
tems are working and give you warnings when they are
not. The steering wheel mounted controls allow you to
scroll through and enter the main menus and submenus.
You can access the specific information you want and make
selections and adjustments.
Instrument Cluster Display Location And Controls
The Instrument Cluster Display is located in the center of
the instrument cluster.
The Main Menu items consists of the following:
• Speedometer
• Vehicle Info
• Driver Assist
• Hybrid Info
• Trip (Trip A/Trip B)
• Audio
• Messages
• Screen Setup
• Speed Warning — If Equipped
160 GETTING TO KNOW YOUR INSTRUMENT PANEL
Page 164 of 614

•Unless reset, this message will continue to display each
time the ignition is cycled to the ON/RUN position.
• To reset the oil change indicator after performing the
scheduled maintenance, refer to the following proce-
dure.
Without pressing the brake pedal, push the ENGINE
START/STOP button and place the ignition in the ON/
RUN position (do not start the vehicle.)
1. Push the OKbutton to enter the instrument cluster
display menu screen.
2. Push and release the downarrow button to access the
”Oil Life” menu screen.
3. Push the leftarrow button or right arrow button to
access the “Vehicle Info” submenu.
4. Hold the OKbutton to reset the “Oil Life” to 100%.
5. Push the uparrow button to exit the instrument cluster
display menu screen.
NOTE: If the indicator message illuminates when you
start the vehicle, the oil change indicator system did not
reset. If necessary, repeat this procedure.Fuel And Oil Refresh Mode
Since it is possible to operate this vehicle for extended
periods of time without running the gas engine, the fuel
within the vehicle’s fuel tank can become stale. To prevent
engine and/or fuel system damage due to stale fuel, as
well as, maintaining internal engine lubrication, this ve-
hicle is equipped with a “Fuel and Oil Refresh Mode”.
The vehicle will automatically enter into the Fuel and Oil
Refresh Mode to minimize potential for stale fuel, and to
ensure lubrication of internal engine components. When
operating in this mode, the gas engine will run to provide
vehicle propulsion (electric only operation is inhibited). A
message will be displayed in the instrument cluster when-
ever Fuel and Oil Refresh Mode is active.
The vehicle will automatically exit the Fuel and Oil Refresh
Mode when conditions have been satisfied. If the vehicle
enters Fuel and Oil Refresh Mode, due to fuel which has
been in the fuel tank for a long period of time (becoming
stale fuel), the engine will run whenever the vehicle is
operational (no electric only operation) until the low fuel
level warning is activated. It is possible to exit the Fuel and
Oil Refresh Mode sooner by adding new fuel to the
vehicle’s fuel tank.
162 GETTING TO KNOW YOUR INSTRUMENT PANEL
Page 172 of 614

Speed Warning — If Equipped
Push and release theupordown arrow button until Speed
Warning is highlighted in the instrument cluster display.
Push and release the OKbutton to enter speed warning.
Use the upordown arrow button to turn the speed
warning ON or OFF, then push and release the OKbutton
to confirm the selection. If the ON status is selected, use the
up ordown arrow button to set the desired speed, then
push the OKbutton to set the speed for the speed warning.
A speed warning telltale will illuminate in the instrument
cluster, with a number matching the set speed, with a pop
up message to inform the driver that the speed warning
has been set to the desired speed. Each time the set speed
is exceeded, a single chime will sound and a pop up
warning message will display. If the set speed is exceeded
more than 2 mph (3 km/h), a continuous chime will sound
for up to 10 seconds, or until the speed is no longer
exceeded. The telltale in the instrument cluster will also
change from white to yellow, and a pop up warning
message will pop up on the instrument cluster display.
NOTE: Speed Warning is unavailable while KeySense is in
use.
Battery Saver On/Battery Saver Mode Message —
Electrical Load Reduction Actions — If Equipped
The vehicle is equipped with an Intelligent Battery Sensor
(IBS) to perform additional monitoring of the 12 volt
electrical system and status of the 12 volt vehicle battery.
In cases when the IBS detects charging system failure, or
the 12 volt vehicle battery conditions are deteriorating,
electrical load reduction actions will take place to extend
the driving time and distance of the vehicle. This is done by
reducing power to or turning off non-essential 12 volt
electrical loads. Load reduction will be functional when the
vehicle propulsion system is active.
The vehicle may not be running depending on the HV
battery SOC or temperature. It will display a message if
there is a risk of battery depletion to the point where the
vehicle may stall due to lack of electrical supply, or will not
restart after the current drive cycle.
When 12 volt load reduction is activated, the message
“Battery Saver On” or “Battery Saver Mode” will appear in
the Instrument Cluster Display.
These messages indicate the 12 volt vehicle battery has a
low state of charge and continues to lose electrical charge at
a rate that the charging system cannot sustain.
170 GETTING TO KNOW YOUR INSTRUMENT PANEL
Page 179 of 614
— Plug Status Fault Warning Light
This indicator will illuminate when a plug status fault is
detected (when vehicle not in motion). It will be accompa-
nied by a cluster message indicating the type of fault. You
may receive one of the following messages if a fault is
detected:
•“Service Charging System” – If you see this message, it
is recommended to unplug and plug in again, or try a
different charging station. If an issue continues, contact
your authorized dealer to service your high voltage
charging system.
• “Issue Detected Check External Charging Station” – If
you see this message, the charging station maybe pow-
ered off, having internal fault or being scheduled to
charge later. It is recommended to try a different charg-
ing station. If an issue continues, then contact your
authorized dealer.
NOTE: Older or non-compliant J1772 EVSE models may
not support charging of this vehicle. If this vehicle does not
charge, it may be connected to a non-compliant Level 2
EVSE, and will flash indicators. Please identify this failure
to the site operator and/or EVSE provider. NOTE:
Before driving the vehicle make sure the charging
cord has been removed from the charging inlet.
— Torque Limited Warning Light
This telltale illuminates when vehicle acceleration is lim-
ited due to a reduction in engine or electric motor perfor-
mance. Contact your authorized dealer for service if illu-
mination persists.
Yellow Warning Lights
— Anti-Lock Brake (ABS) Warning Light
This light monitors the Anti-Lock Brake System (ABS). The
light will turn on when the ignition is placed in the
ON/RUN or ACC/ON/RUN position and may stay on for
as long as four seconds.
If the ABS light remains on or turns on while driving, then
the Anti-Lock portion of the brake system is not function-
ing and service is required as soon as possible. However,
the conventional brake system will continue to operate
normally, assuming the Brake Warning Light is not also on.
If the ABS light does not turn on when the ignition is
placed in the ON/RUN or ACC/ON/RUN position, have
the brake system inspected by an authorized dealer.
4
GETTING TO KNOW YOUR INSTRUMENT PANEL 177