2018 CHEVROLET MALIBU tow
[x] Cancel search: towPage 17 of 413
Chevrolet Malibu Owner Manual (GMNA-Localizing-U.S./Canada/Mexico-
11348460) - 2018 - crc - 5/3/17
16 In Brief
Exterior Lighting
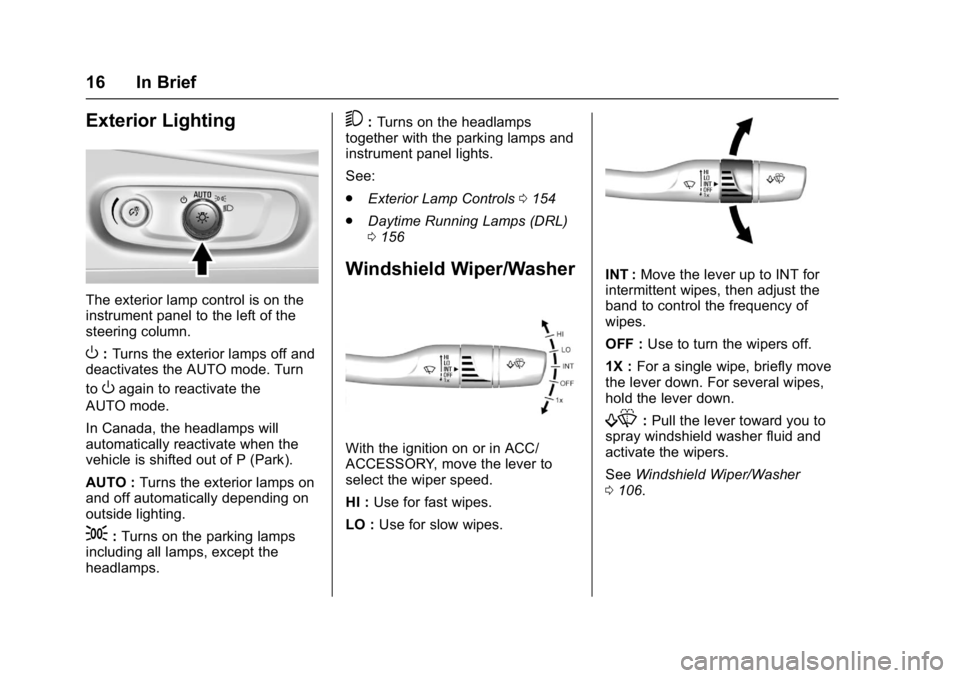
The exterior lamp control is on the
instrument panel to the left of the
steering column.
O:Turns the exterior lamps off and
deactivates the AUTO mode. Turn
to
Oagain to reactivate the
AUTO mode.
In Canada, the headlamps will
automatically reactivate when the
vehicle is shifted out of P (Park).
AUTO : Turns the exterior lamps on
and off automatically depending on
outside lighting.
;: Turns on the parking lamps
including all lamps, except the
headlamps.
5: Turns on the headlamps
together with the parking lamps and
instrument panel lights.
See:
. Exterior Lamp Controls 0154
. Daytime Running Lamps (DRL)
0156
Windshield Wiper/Washer
With the ignition on or in ACC/
ACCESSORY, move the lever to
select the wiper speed.
HI : Use for fast wipes.
LO : Use for slow wipes.
INT : Move the lever up to INT for
intermittent wipes, then adjust the
band to control the frequency of
wipes.
OFF : Use to turn the wipers off.
1X : For a single wipe, briefly move
the lever down. For several wipes,
hold the lever down.
f: Pull the lever toward you to
spray windshield washer fluid and
activate the wipers.
See Windshield Wiper/Washer
0 106.
Page 19 of 413
Chevrolet Malibu Owner Manual (GMNA-Localizing-U.S./Canada/Mexico-
11348460) - 2018 - crc - 5/3/17
18 In Brief
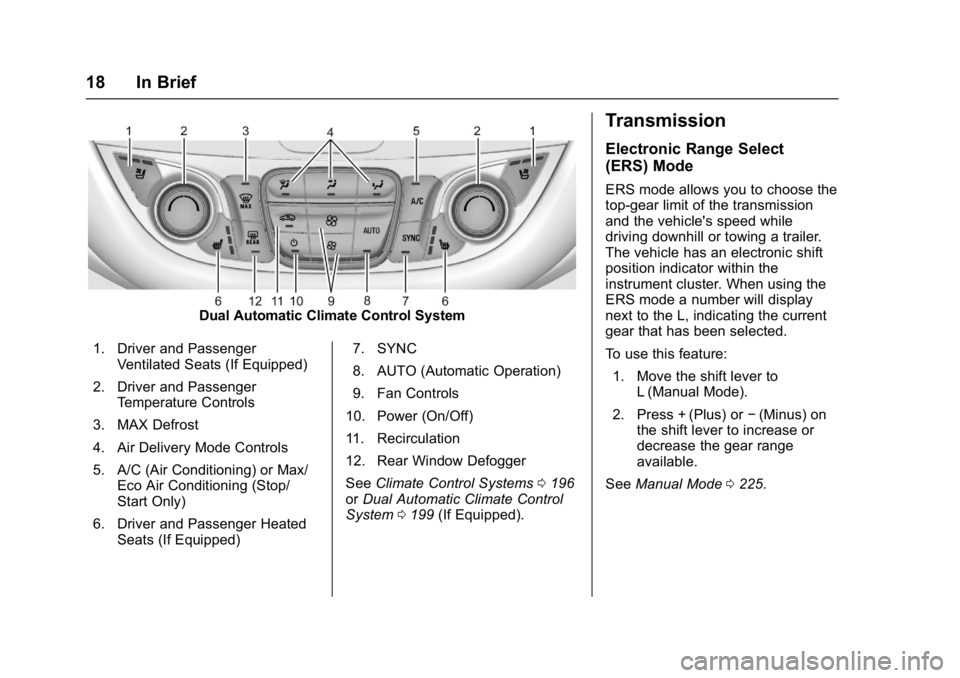
Dual Automatic Climate Control System
1. Driver and Passenger Ventilated Seats (If Equipped)
2. Driver and Passenger Temperature Controls
3. MAX Defrost
4. Air Delivery Mode Controls
5. A/C (Air Conditioning) or Max/ Eco Air Conditioning (Stop/
Start Only)
6. Driver and Passenger Heated Seats (If Equipped) 7. SYNC
8. AUTO (Automatic Operation)
9. Fan Controls
10. Power (On/Off)
11. Recirculation
12. Rear Window Defogger
See Climate Control Systems 0196
or Dual Automatic Climate Control
System 0199 (If Equipped).
Transmission
Electronic Range Select
(ERS) Mode
ERS mode allows you to choose the
top-gear limit of the transmission
and the vehicle's speed while
driving downhill or towing a trailer.
The vehicle has an electronic shift
position indicator within the
instrument cluster. When using the
ERS mode a number will display
next to the L, indicating the current
gear that has been selected.
To use this feature:
1. Move the shift lever to L (Manual Mode).
2. Press + (Plus) or −(Minus) on
the shift lever to increase or
decrease the gear range
available.
See Manual Mode 0225.
Page 38 of 413
Chevrolet Malibu Owner Manual (GMNA-Localizing-U.S./Canada/Mexico-
11348460) - 2018 - crc - 5/3/17
Keys, Doors, and Windows 37
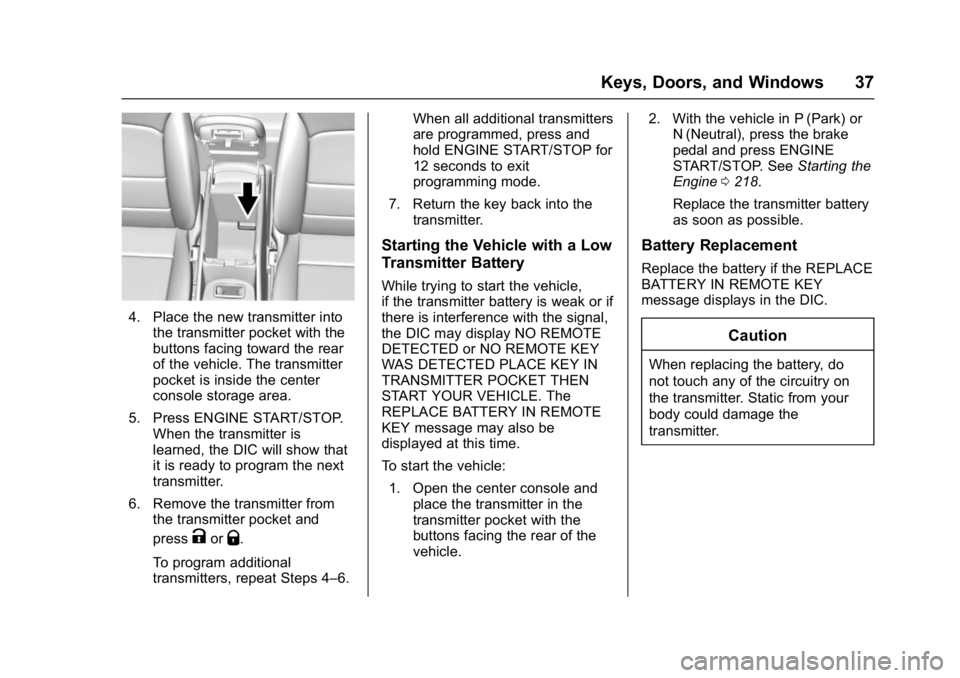
4. Place the new transmitter intothe transmitter pocket with the
buttons facing toward the rear
of the vehicle. The transmitter
pocket is inside the center
console storage area.
5. Press ENGINE START/STOP. When the transmitter is
learned, the DIC will show that
it is ready to program the next
transmitter.
6. Remove the transmitter from the transmitter pocket and
press
KorQ.
To program additional
transmitters, repeat Steps 4–6. When all additional transmitters
are programmed, press and
hold ENGINE START/STOP for
12 seconds to exit
programming mode.
7. Return the key back into the transmitter.
Starting the Vehicle with a Low
Transmitter Battery
While trying to start the vehicle,
if the transmitter battery is weak or if
there is interference with the signal,
the DIC may display NO REMOTE
DETECTED or NO REMOTE KEY
WAS DETECTED PLACE KEY IN
TRANSMITTER POCKET THEN
START YOUR VEHICLE. The
REPLACE BATTERY IN REMOTE
KEY message may also be
displayed at this time.
To start the vehicle:
1. Open the center console and place the transmitter in the
transmitter pocket with the
buttons facing the rear of the
vehicle. 2. With the vehicle in P (Park) or
N (Neutral), press the brake
pedal and press ENGINE
START/STOP. See Starting the
Engine 0218.
Replace the transmitter battery
as soon as possible.
Battery Replacement
Replace the battery if the REPLACE
BATTERY IN REMOTE KEY
message displays in the DIC.
Caution
When replacing the battery, do
not touch any of the circuitry on
the transmitter. Static from your
body could damage the
transmitter.
Page 39 of 413
Chevrolet Malibu Owner Manual (GMNA-Localizing-U.S./Canada/Mexico-
11348460) - 2018 - crc - 5/3/17
38 Keys, Doors, and Windows
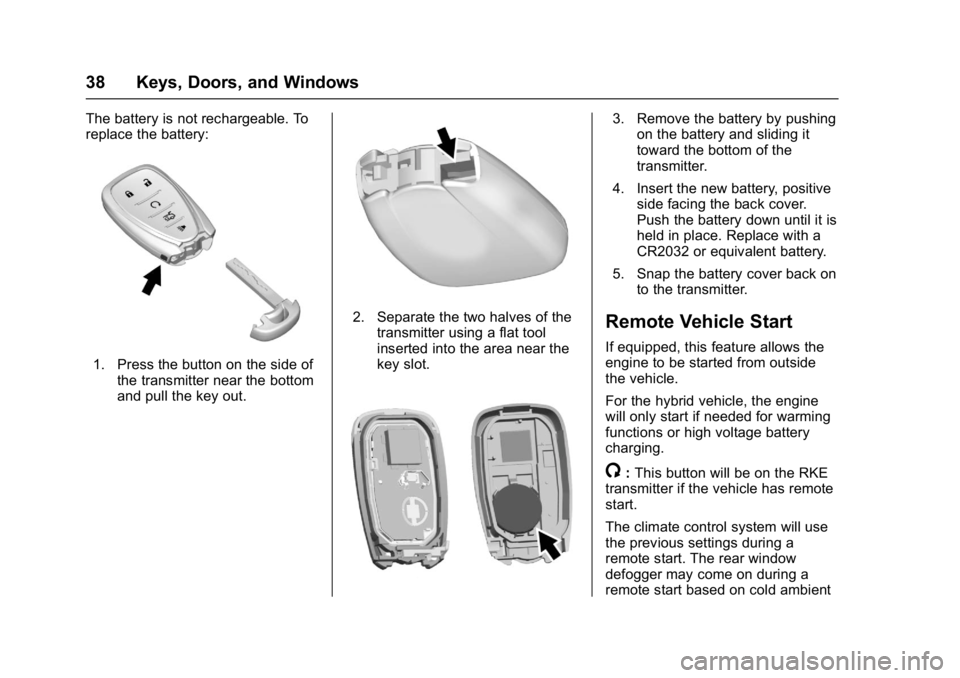
The battery is not rechargeable. To
replace the battery:
1. Press the button on the side ofthe transmitter near the bottom
and pull the key out.
2. Separate the two halves of the
transmitter using a flat tool
inserted into the area near the
key slot.
3. Remove the battery by pushingon the battery and sliding it
toward the bottom of the
transmitter.
4. Insert the new battery, positive side facing the back cover.
Push the battery down until it is
held in place. Replace with a
CR2032 or equivalent battery.
5. Snap the battery cover back on to the transmitter.
Remote Vehicle Start
If equipped, this feature allows the
engine to be started from outside
the vehicle.
For the hybrid vehicle, the engine
will only start if needed for warming
functions or high voltage battery
charging.
/:This button will be on the RKE
transmitter if the vehicle has remote
start.
The climate control system will use
the previous settings during a
remote start. The rear window
defogger may come on during a
remote start based on cold ambient
Page 50 of 413
Chevrolet Malibu Owner Manual (GMNA-Localizing-U.S./Canada/Mexico-
11348460) - 2018 - crc - 5/3/17
Keys, Doors, and Windows 49
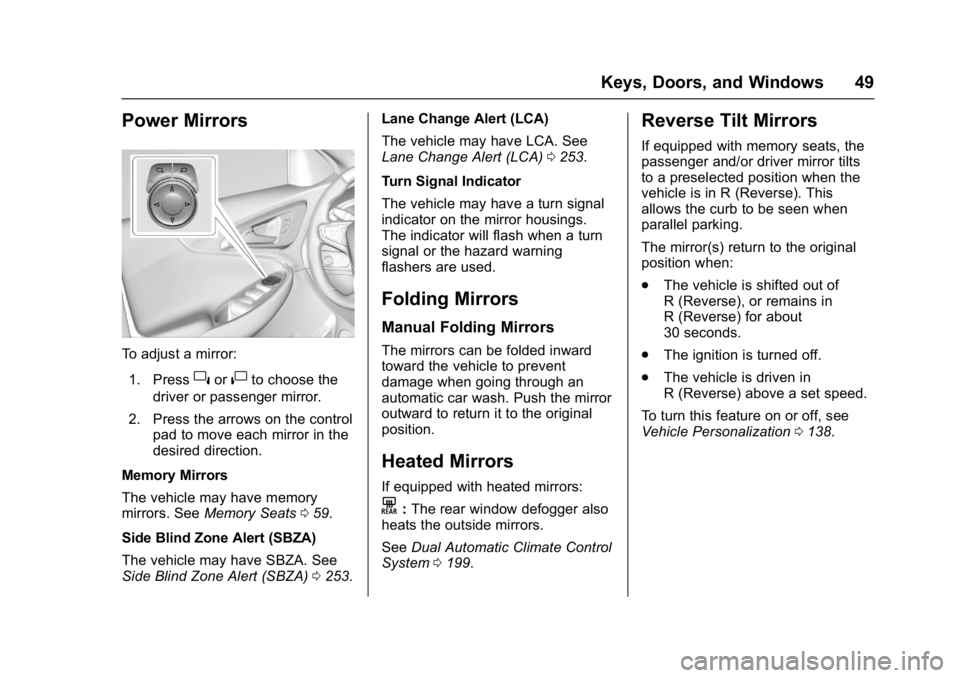
Power Mirrors
To adjust a mirror:1. Press
}or|to choose the
driver or passenger mirror.
2. Press the arrows on the control pad to move each mirror in the
desired direction.
Memory Mirrors
The vehicle may have memory
mirrors. See Memory Seats 059.
Side Blind Zone Alert (SBZA)
The vehicle may have SBZA. See
Side Blind Zone Alert (SBZA) 0253. Lane Change Alert (LCA)
The vehicle may have LCA. See
Lane Change Alert (LCA)
0253.
Turn Signal Indicator
The vehicle may have a turn signal
indicator on the mirror housings.
The indicator will flash when a turn
signal or the hazard warning
flashers are used.
Folding Mirrors
Manual Folding Mirrors
The mirrors can be folded inward
toward the vehicle to prevent
damage when going through an
automatic car wash. Push the mirror
outward to return it to the original
position.
Heated Mirrors
If equipped with heated mirrors:
K: The rear window defogger also
heats the outside mirrors.
See Dual Automatic Climate Control
System 0199.
Reverse Tilt Mirrors
If equipped with memory seats, the
passenger and/or driver mirror tilts
to a preselected position when the
vehicle is in R (Reverse). This
allows the curb to be seen when
parallel parking.
The mirror(s) return to the original
position when:
.
The vehicle is shifted out of
R (Reverse), or remains in
R (Reverse) for about
30 seconds.
. The ignition is turned off.
. The vehicle is driven in
R (Reverse) above a set speed.
To turn this feature on or off, see
Vehicle Personalization 0138.
Page 51 of 413
Chevrolet Malibu Owner Manual (GMNA-Localizing-U.S./Canada/Mexico-
11348460) - 2018 - crc - 5/3/17
50 Keys, Doors, and Windows
Interior Mirrors
Interior Rearview Mirrors
Adjust the rearview mirror for a clear
view of the area behind the vehicle.
Do not spray glass cleaner directly
on the mirror. Use a soft towel
dampened with water.
Manual Rearview Mirror
If equipped, push the tab forward for
daytime use and pull it rearward for
nighttime use to avoid glare of the
headlamps from behind.
Automatic Dimming
Rearview Mirror
If equipped, automatic dimming
reduces the glare of headlamps
from behind. The dimming feature
comes on when the vehicle is
started.
Windows
{Warning
Never leave a child, a helpless
adult, or a pet alone in a vehicle,
especially with the windows
closed in warm or hot weather.
They can be overcome by the
extreme heat and suffer
permanent injuries or even death
from heat stroke.
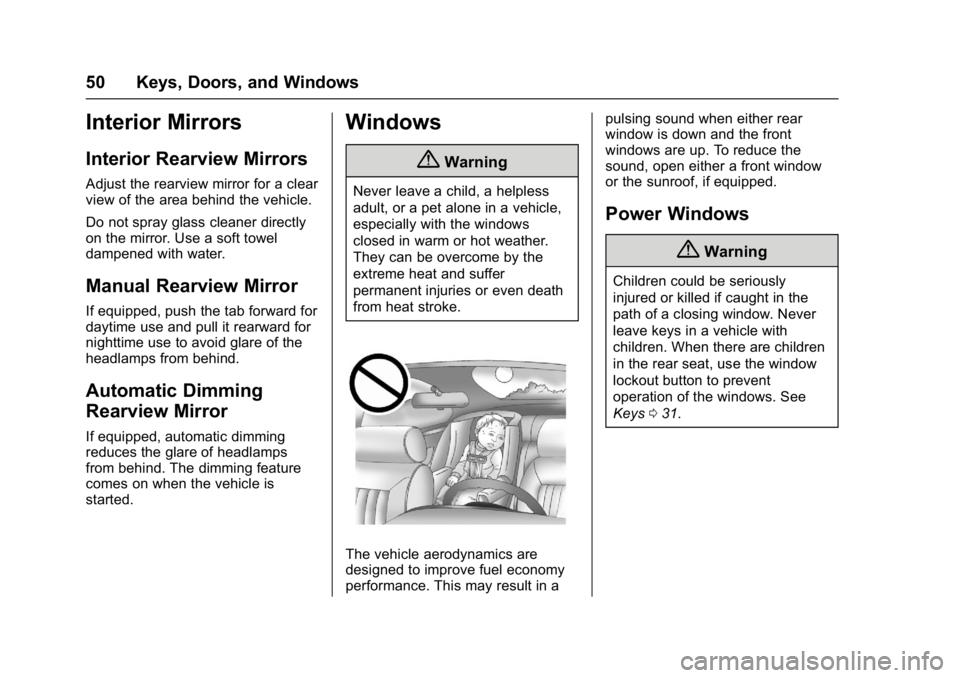
The vehicle aerodynamics are
designed to improve fuel economy
performance. This may result in apulsing sound when either rear
window is down and the front
windows are up. To reduce the
sound, open either a front window
or the sunroof, if equipped.
Power Windows
{Warning
Children could be seriously
injured or killed if caught in the
path of a closing window. Never
leave keys in a vehicle with
children. When there are children
in the rear seat, use the window
lockout button to prevent
operation of the windows. See
Keys
031.
Page 64 of 413
Chevrolet Malibu Owner Manual (GMNA-Localizing-U.S./Canada/Mexico-
11348460) - 2018 - crc - 5/3/17
Seats and Restraints 63
Rear Seats
Rear Seat Reminder
If equipped, the message REAR
SEAT REMINDER LOOK IN REAR
SEAT displays under certain
conditions indicating there may be
an item or passenger in the rear
seat. Check before exiting the
vehicle.
This feature will activate when a
second row door is opened while
the vehicle is on or up to 10 minutes
before the vehicle is turned on.
There will be an alert when the
vehicle is turned off. The alert does
not directly detect objects in the rear
seat; instead, under certain
conditions, it detects when a rear
door is opened and closed,
indicating that there may be
something in the rear seat.
The feature is active only once each
time the vehicle is turned on and off,
and will require reactivation by
opening and closing the second row
doors. There may be an alert even
when there is nothing in the rear
seat; for example, if a child enteredthe vehicle through the rear door
and left the vehicle without the
vehicle being shut off.
The feature can be turned on or off.
See
Vehicle Personalization 0138.
Folding the Seatback
Either side of the seatback can be
folded down for more cargo space.
Fold a seatback only when the
vehicle is not moving.
Caution
Folding a rear seat with the seat
belts still fastened may cause
damage to the seat or the seat
belts. Always unbuckle the seat
belts and return them to their
normal stowed position before
folding a rear seat.
The release levers for folding the
rear seatbacks are located in the
trunk. To fold the seatback down: 1. Lower the rear seat head restraints completely. See
Head Restraints 055. 2. Lift the rear seat armrest and
place it in the folded position,
if necessary. See Rear Seat
Armrest 065.
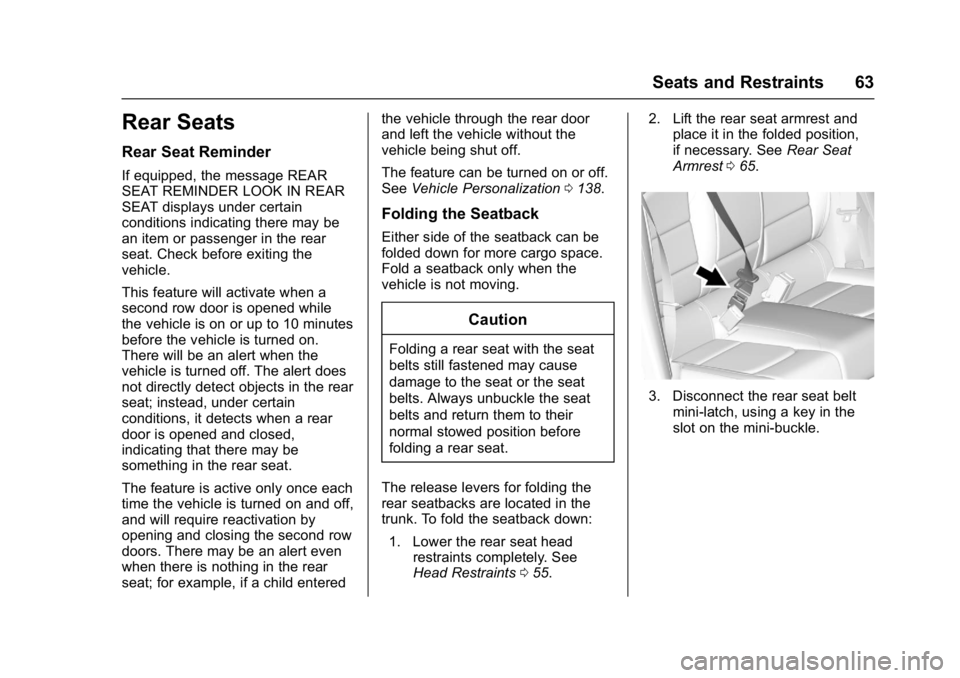
3. Disconnect the rear seat belt
mini-latch, using a key in the
slot on the mini-buckle.
Page 70 of 413
Chevrolet Malibu Owner Manual (GMNA-Localizing-U.S./Canada/Mexico-
11348460) - 2018 - crc - 5/3/17
Seats and Restraints 69
Engaging the child restraint
locking feature in the front
outboard seating position may
affect the passenger sensing
system. SeePassenger
Sensing System 078.
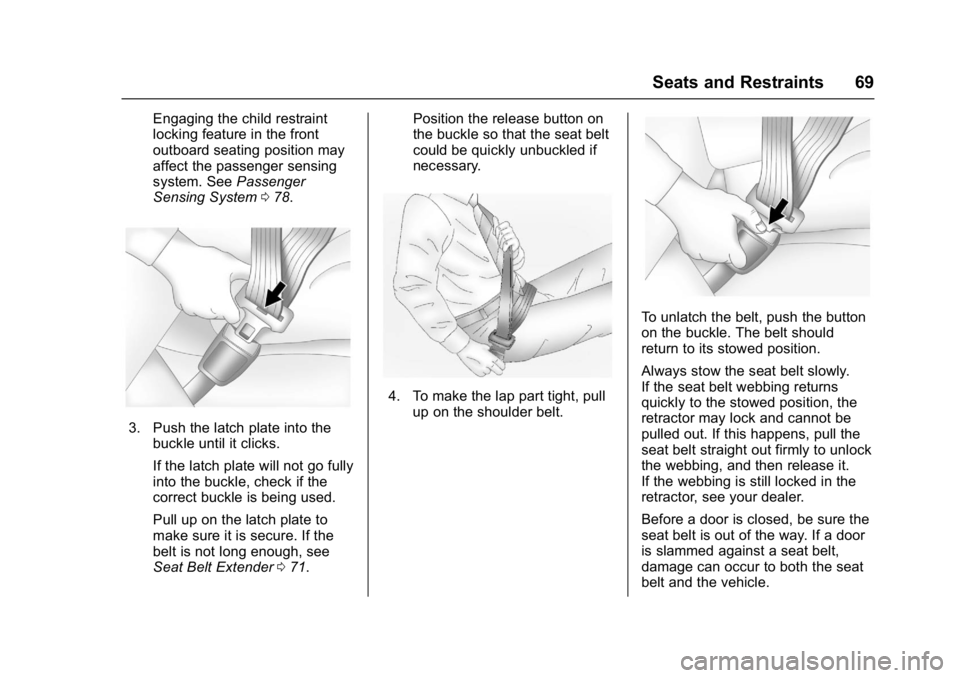
3. Push the latch plate into the
buckle until it clicks.
If the latch plate will not go fully
into the buckle, check if the
correct buckle is being used.
Pull up on the latch plate to
make sure it is secure. If the
belt is not long enough, see
Seat Belt Extender 071. Position the release button on
the buckle so that the seat belt
could be quickly unbuckled if
necessary.
4. To make the lap part tight, pull
up on the shoulder belt.
To unlatch the belt, push the button
on the buckle. The belt should
return to its stowed position.
Always stow the seat belt slowly.
If the seat belt webbing returns
quickly to the stowed position, the
retractor may lock and cannot be
pulled out. If this happens, pull the
seat belt straight out firmly to unlock
the webbing, and then release it.
If the webbing is still locked in the
retractor, see your dealer.
Before a door is closed, be sure the
seat belt is out of the way. If a door
is slammed against a seat belt,
damage can occur to both the seat
belt and the vehicle.