2018 CHEVROLET MALIBU four wheel drive
[x] Cancel search: four wheel drivePage 143 of 413
Chevrolet Malibu Owner Manual (GMNA-Localizing-U.S./Canada/Mexico-
11348460) - 2018 - crc - 5/3/17
142 Instruments and Controls
Remote Door Unlock
Select to set which doors will unlock
when pressing
Kon the RKE
transmitter. See Remote Keyless
Entry (RKE) System Operation 032.
Select Driver Door or All Doors.
Remote Start Auto Cool Seats
If equipped and turned on, this
feature will turn the ventilated seats
on when using remote start on
warm days.
Select Off, On-Driver and
Passenger, or On-Driver.
Remote Start Auto Heat Seats
Select to enable or disable which
seat will come on when remote start
is used. See Heated and Ventilated
Front Seats 061.
Select Off, On-Driver and
Passenger, or On-Driver.
Passive Door Unlock
Select to set which doors will unlock
when the RKE transmitter is within
range and the button on the outside
driver door handle is being used to unlock the vehicle. See
Remote
Keyless Entry (RKE) System
Operation 032.
Select Driver Door Only or All
Doors.
Passive Door Lock
This allows passive locking to be
turned on or off and selects
feedback. See Remote Keyless
Entry (RKE) System Operation 032.
Select Off, On, or On With Horn
Chirp.
Remote Left in Vehicle Reminder
This feature sounds an alert when
the RKE transmitter is left in the
vehicle. This menu also enables the
Remote No Longer Left in Vehicle
alert.
Select Off or On.
Return to Factory Settings
Select to return all vehicle
personalizations to the default
settings.
Select Yes or No.
Software Information
Select to view the radio software
information.
Valet Mode (If Equipped)
This will lock the infotainment
system and steering wheel controls.
It may also limit access to vehicle
storage locations, if equipped.
To enable valet mode: 1. Enter a four-digit code on the keypad.
2. Select Enter to go to the confirmation screen.
3. Re-enter the four-digit code.
Select Lock or Unlock to lock or
unlock the system. Select BACK to
go back to the previous menu.
Personalization Menu (Radio
with Touchscreen)
Settings can be made with the
ignition on and the vehicle not
moving.
Page 144 of 413
Chevrolet Malibu Owner Manual (GMNA-Localizing-U.S./Canada/Mexico-
11348460) - 2018 - crc - 5/3/17
Instruments and Controls 143
The following are all possible
personalization features. Depending
on the vehicle, some may not be
available.
{:Press to access the Home
Page Menu.
QorR: Touch to scroll through the
menus or setup items.
0: Touch to exit or return to the
previous screen or menu.
To access the menu:
1. Press
{.
2. Touch Settings.
Touch the menu item to select it.
Each of the menus is detailed in the
following information.
Settings menus and functions may
vary depending on vehicle options.
The following list of menu items may
be available:
. Time and Date
. Rear Seat Reminder
. Language
. Valet Mode .
Teen Driver
. Radio
. Vehicle
. Bluetooth
. Apple CarPlay
. Android Auto
. USB Auto Launch
. Voice
. Display
. Rear Camera
. Return to Factory Settings
. Software Information
. Wi-Fi
Time and Date
Select Time and Date to adjust the
clock. See Clock0107.
Rear Seat Reminder
This allows for a chime and a
message when the rear door has
been opened before or during
operation of the vehicle.
Select Off or On.
Language
Select, then select from the
available language(s).
Valet Mode
This will lock the infotainment
system and steering wheel controls.
It may also limit access to vehicle
storage locations, if equipped.
To enable valet mode:
1. Enter a four-digit code on the keypad.
2. Touch Enter to go to the confirmation screen.
3. Re-enter the four-digit code.
Touch Lock or Unlock to lock or
unlock the system. Touch Back to
go back to the previous menu.
Teen Driver
See “Teen Driver” under“Settings”
in the infotainment manual.
Radio
Select and the following may
display:
. Manage Favorites
Page 322 of 413
Chevrolet Malibu Owner Manual (GMNA-Localizing-U.S./Canada/Mexico-
11348460) - 2018 - crc - 5/3/17
Vehicle Care 321
could prevent the TPMS from
functioning properly. SeeBuying
New Tires 0324.
. Operating electronic devices or
being near facilities using radio
wave frequencies similar to the
TPMS could cause the TPMS
sensors to malfunction.
If the TPMS is not functioning
properly it cannot detect or signal a
low tire pressure condition. See
your dealer for service if the TPMS
malfunction light and DIC message
comes on and stays on.
TPMS Sensor Matching
Process
Each TPMS sensor has a unique
identification code. The identification
code needs to be matched to a new
tire/wheel position after rotating the
vehicle’s tires or replacing one or
more of the TPMS sensors. The
TPMS sensor matching process
should also be performed after
replacing a spare tire with a road
tire containing the TPMS sensor.
The malfunction light and the DIC
message should go off at the next
ignition cycle. The sensors are matched to the tire/wheel positions,
using a TPMS relearn tool, in the
following order: driver side front tire,
passenger side front tire, passenger
side rear tire, and driver side rear.
See your dealer for service or to
purchase a relearn tool. A TPMS
relearn tool can also be purchased.
See Tire Pressure Monitor Sensor
Activation Tool at
www.gmtoolsandequipment.com or
call 1-800-GM TOOLS
(1-800-468-6657).
There are two minutes to match the
first tire/wheel position, and
five minutes overall to match all four
tire/wheel positions. If it takes
longer, the matching process stops
and must be restarted.
The TPMS sensor matching
process is:
1. Set the parking brake.
2. Place the vehicle in Service Mode. See Ignition Positions
0 216.
3. Make sure the Tire Pressure info page option is turned on.
The info pages on the DIC can be turned on and off through
the Options menu.
See
Driver Information Center
(DIC) (Uplevel) 0134 orDriver
Information Center (DIC) (Base
Level) 0131.
4. Use the DIC controls on the right side of the steering wheel
to scroll to the Tire Pressure
screen under the DIC
info page.
5. Press and hold
Vin the center
of the DIC controls.
The horn sounds twice to
signal the receiver is in relearn
mode and the TIRE
LEARNING ACTIVE message
displays on the DIC screen.
6. Start with the driver side front tire.
7. Place the relearn tool against the tire sidewall, near the valve
stem. Then press the button to
activate the TPMS sensor.
A horn chirp confirms that the
sensor identification code has
been matched to this tire and
wheel position.
Page 323 of 413
Chevrolet Malibu Owner Manual (GMNA-Localizing-U.S./Canada/Mexico-
11348460) - 2018 - crc - 5/3/17
322 Vehicle Care
8. Proceed to the passenger sidefront tire, and repeat the
procedure in Step 7.
9. Proceed to the passenger side rear tire, and repeat the
procedure in Step 7.
10. Proceed to the driver side rear tire, and repeat the procedure
in Step 7. The horn sounds two
times to indicate the sensor
identification code has been
matched to the driver side rear
tire, and the TPMS sensor
matching process is no longer
active. The TIRE LEARNING
ACTIVE message on the DIC
display screen goes off.
11. Turn the vehicle off.
12. Set all four tires to the recommended air pressure
level as indicated on the Tire
and Loading Information label.Tire Inspection
We recommend that the tires,
including the spare tire, if the
vehicle has one, be inspected
for signs of wear or damage at
least once a month.
Replace the tire if:
.The indicators at three or
more places around the tire
can be seen.
.There is cord or fabric
showing through the tire's
rubber.
.The tread or sidewall is
cracked, cut, or snagged
deep enough to show cord or
fabric.
.The tire has a bump, bulge,
or split.
.The tire has a puncture, cut,
or other damage that cannot
be repaired well because of
the size or location of the
damage.
Tire Rotation
Tires should be rotated every
12 000 km (7,500 mi). See
Maintenance Schedule 0360.
Tires are rotated to achieve a
more uniform wear for all tires.
The first rotation is the most
important.
Anytime unusual wear is
noticed, rotate the tires as soon
as possible, check for proper tire
inflation pressure, and check for
damaged tires or wheels. If the
unusual wear continues after the
rotation, check the wheel
alignment.
See When It Is Time for New
Tires 0323 andWheel
Replacement 0328.
Page 349 of 413
Chevrolet Malibu Owner Manual (GMNA-Localizing-U.S./Canada/Mexico-
11348460) - 2018 - crc - 5/3/17
348 Vehicle Care
To dinghy tow the vehicle from the
front with all four wheels on the
ground:1. Position the vehicle to tow and then secure it to the towing
vehicle.
2. Start the engine and place the vehicle in N (Neutral).
3. Press ENGINE START/STOP once to turn the engine off. See
Ignition Positions 0216.
4. To prevent the battery from draining while the vehicle is
being towed, remove fuses
F10 and F41 from the
instrument panel fuse block.
See Instrument Panel Fuse
Block 0306.
Remember to reinstall the fuses
once the destination has been
reached.Caution
If 105 km/h (65 mph) is exceeded
while towing the vehicle, it could
be damaged. Never exceed
105 km/h (65 mph) while towing
the vehicle.
Caution
Use of a shield mounted in front
of the vehicle grille could restrict
airflow and cause damage to the
transmission. The repairs would
not be covered by the vehicle
warranty. If using a shield, only
use one that attaches to the
towing vehicle.
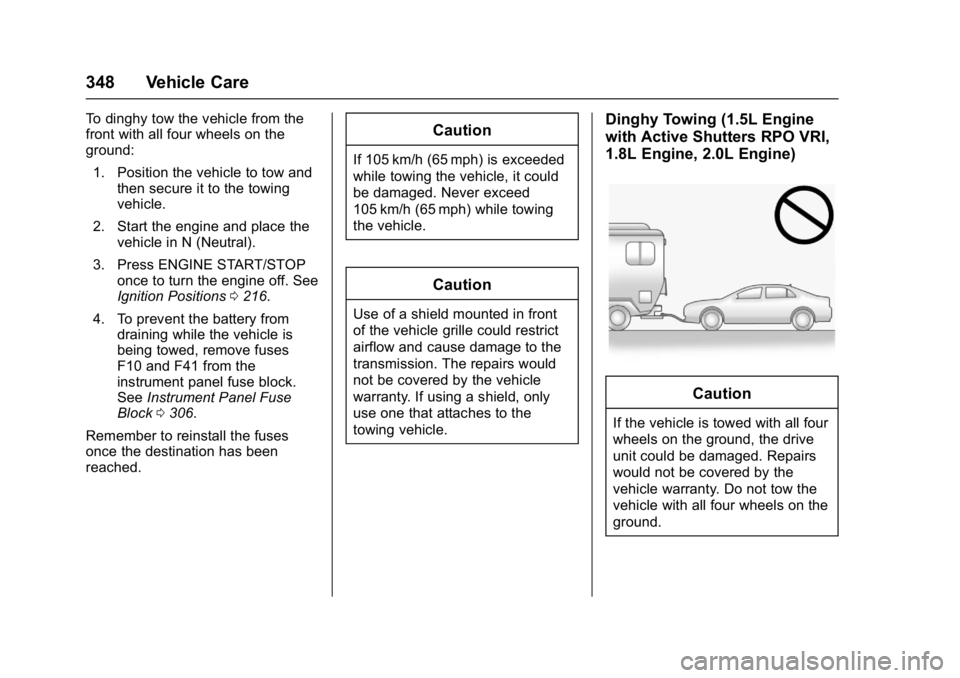
Dinghy Towing (1.5L Engine
with Active Shutters RPO VRI,
1.8L Engine, 2.0L Engine)
Caution
If the vehicle is towed with all four
wheels on the ground, the drive
unit could be damaged. Repairs
would not be covered by the
vehicle warranty. Do not tow the
vehicle with all four wheels on the
ground.