2018 CHEVROLET MALIBU 216
[x] Cancel search: 216Page 8 of 413

Chevrolet Malibu Owner Manual (GMNA-Localizing-U.S./Canada/Mexico-
11348460) - 2018 - crc - 5/3/17
In Brief 7
1.Air Vents 0203.
2. Turn Signal Lever. See Turn
and Lane-Change Signals
0 158.
IntelliBeam System Button
(If Equipped). See Exterior
Lamp Controls 0154.
3. Instrument Cluster (Base
Level) 0112 orInstrument
Cluster (Uplevel) 0114.
Driver Information Center (DIC)
(Uplevel) 0134 orDriver
Information Center (DIC) (Base
Level) 0131.
4. Windshield Wiper/Washer
0106.
5. Light Sensor. See Automatic
Headlamp System 0157.
6. Infotainment 0162.
7. Climate Control Systems
0196.
Dual Automatic Climate Control
System 0199 (If Equipped).
8. Hazard Warning Flashers
0157.
9. Power Outlets 0109. 10.
Traction Control/Electronic
Stability Control 0231.
Assistance Systems for
Parking or Backing 0243
(If Equipped).
11. Shift Lever. See Automatic
Transmission 0224.
12. Electric Parking Brake 0228.
13. USB Port 0176.
14. ENGINE START/STOP Button. SeeIgnition Positions 0216.
15. Steering Wheel Controls 0105.
Driver Information Center
Buttons.
See Driver Information Center
(DIC) (Uplevel) 0134 orDriver
Information Center (DIC) (Base
Level) 0131.
16. Horn 0106.
17. Steering Wheel Adjustment
0105.
18. Cruise Control 0233.
Adaptive Cruise Control 0235
(If Equipped). Heated Steering Wheel
0106
(If Equipped).
Forward Collision Alert (FCA)
System 0247 (If Equipped).
Lane Keep Assist (LKA) 0255
(If Equipped).
19. Hood Release. See Hood
0 271.
20. Data Link Connector (Out of View). See Malfunction
Indicator Lamp (Check Engine
Light) 0122.
21. Exterior Lamp Controls 0154.
22. Instrument Panel Illumination
Control 0158.
Page 26 of 413
Chevrolet Malibu Owner Manual (GMNA-Localizing-U.S./Canada/Mexico-
11348460) - 2018 - crc - 5/3/17
In Brief 25
Universal Remote System
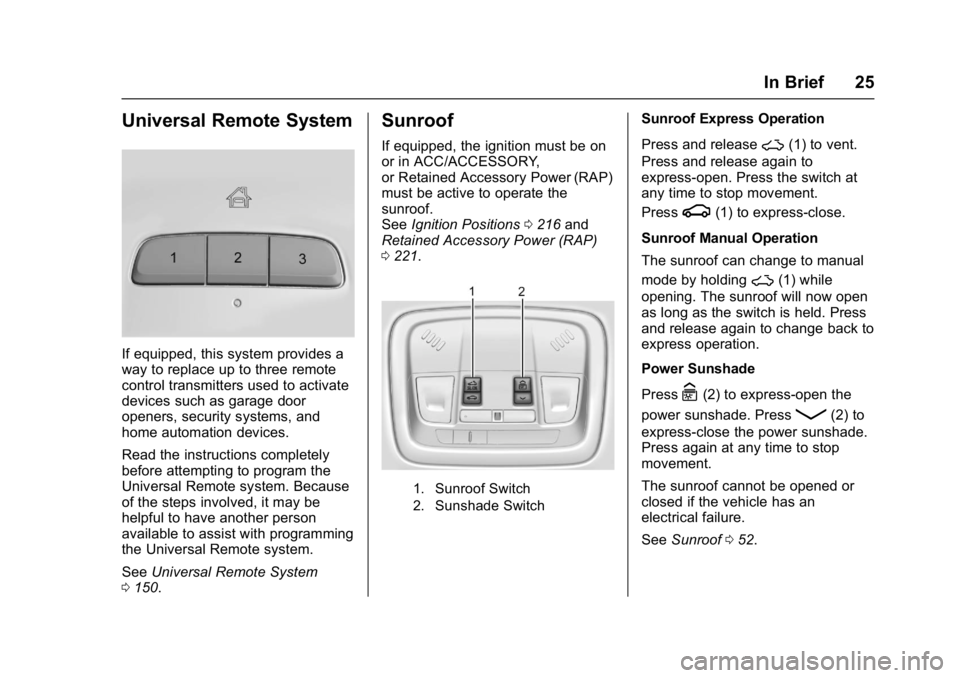
If equipped, this system provides a
way to replace up to three remote
control transmitters used to activate
devices such as garage door
openers, security systems, and
home automation devices.
Read the instructions completely
before attempting to program the
Universal Remote system. Because
of the steps involved, it may be
helpful to have another person
available to assist with programming
the Universal Remote system.
SeeUniversal Remote System
0 150.
Sunroof
If equipped, the ignition must be on
or in ACC/ACCESSORY,
or Retained Accessory Power (RAP)
must be active to operate the
sunroof.
See Ignition Positions 0216 and
Retained Accessory Power (RAP)
0 221.
1. Sunroof Switch
2. Sunshade Switch
Sunroof Express Operation
Press and release
~(1) to vent.
Press and release again to
express-open. Press the switch at
any time to stop movement.
Press
g(1) to express-close.
Sunroof Manual Operation
The sunroof can change to manual
mode by holding
~(1) while
opening. The sunroof will now open
as long as the switch is held. Press
and release again to change back to
express operation.
Power Sunshade
Press
C(2) to express-open the
power sunshade. Press
Q(2) to
express-close the power sunshade.
Press again at any time to stop
movement.
The sunroof cannot be opened or
closed if the vehicle has an
electrical failure.
See Sunroof 052.
Page 53 of 413
Chevrolet Malibu Owner Manual (GMNA-Localizing-U.S./Canada/Mexico-
11348460) - 2018 - crc - 5/3/17
52 Keys, Doors, and Windows
Warning (Continued)
override, make sure that all
people and obstructions are clear
of the window path.
When the engine is on, override the
automatic reversal system by pulling
and holding the window switch if
conditions prevent it from closing.
Programming the Power
Windows
Programming may be necessary if
the vehicle's battery has been
disconnected or discharged. If the
window is unable to express-up,
program each express-close
window: 1. Close all doors.
2. Turn the ignition on or to ACC/ ACCESSORY.
3. Partially open the window to be programmed. Then close it and
continue to pull the switch
briefly after the window has
fully closed. 4. Open the window and continue
to press the switch briefly after
the window has fully opened.
Sun Visors
Pull the sun visor down to block
glare. Detach the sun visor from the
center mount to pivot to the side
window, or to extend along the rod,
if available.
The vehicle may have mirror lamps.
The lamps turn on and off when the
cover is opened and closed.
Roof
Sunroof
If equipped, the ignition must be on
or in ACC/ACCESSORY, or when
Retained Accessory Power (RAP) is
active to operate the sunroof.
See Ignition Positions 0216 and
Retained Accessory Power (RAP)
0 221.
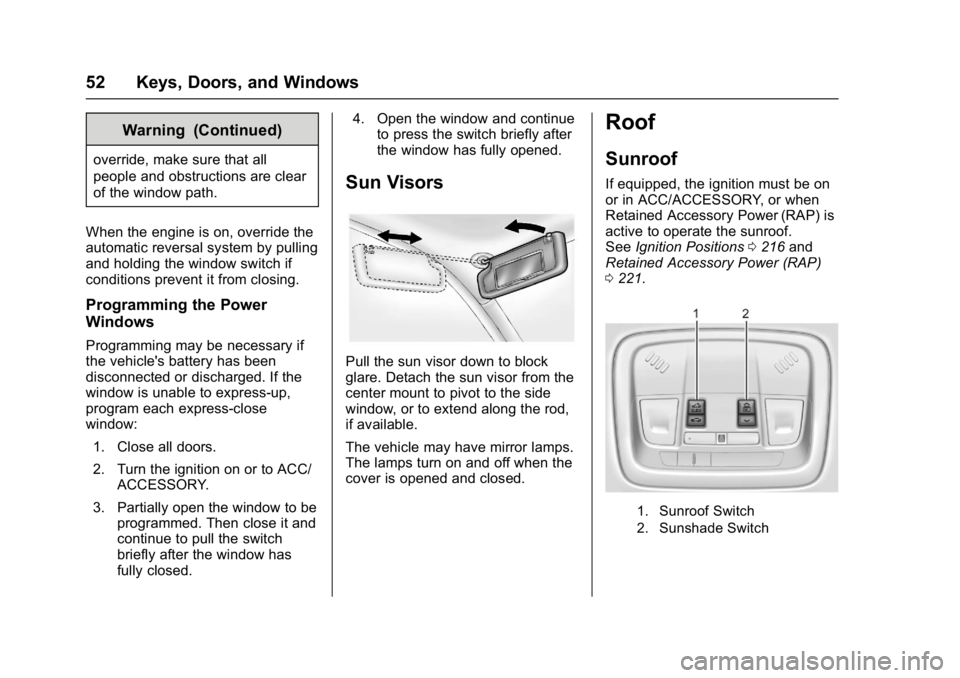
1. Sunroof Switch
2. Sunshade Switch
Page 123 of 413
Chevrolet Malibu Owner Manual (GMNA-Localizing-U.S./Canada/Mexico-
11348460) - 2018 - crc - 5/3/17
122 Instruments and Controls
Charging System Light
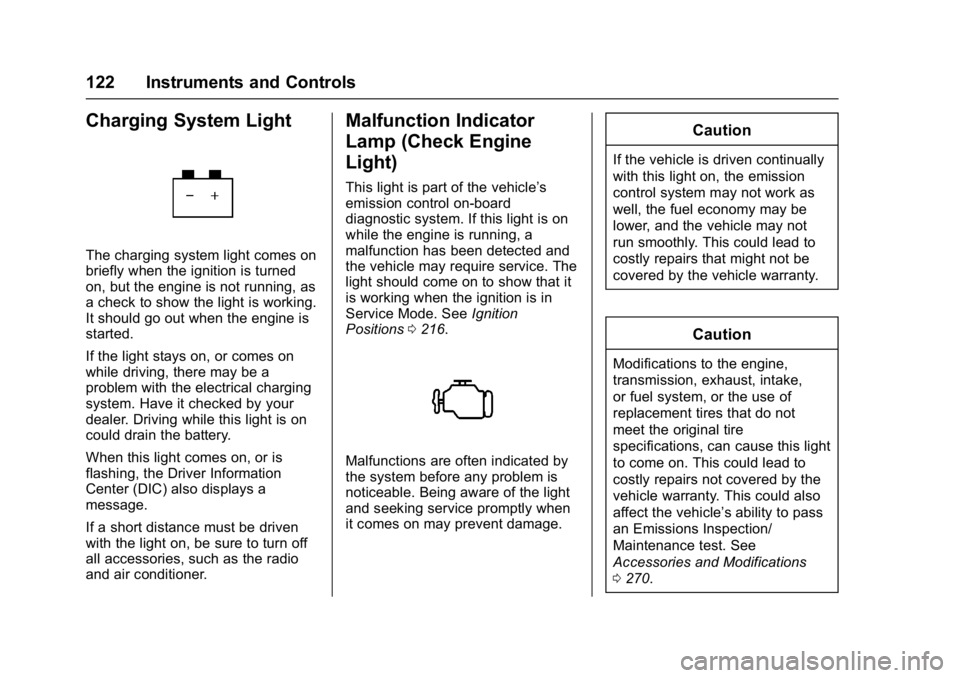
The charging system light comes on
briefly when the ignition is turned
on, but the engine is not running, as
a check to show the light is working.
It should go out when the engine is
started.
If the light stays on, or comes on
while driving, there may be a
problem with the electrical charging
system. Have it checked by your
dealer. Driving while this light is on
could drain the battery.
When this light comes on, or is
flashing, the Driver Information
Center (DIC) also displays a
message.
If a short distance must be driven
with the light on, be sure to turn off
all accessories, such as the radio
and air conditioner.
Malfunction Indicator
Lamp (Check Engine
Light)
This light is part of the vehicle’s
emission control on-board
diagnostic system. If this light is on
while the engine is running, a
malfunction has been detected and
the vehicle may require service. The
light should come on to show that it
is working when the ignition is in
Service Mode. SeeIgnition
Positions 0216.
Malfunctions are often indicated by
the system before any problem is
noticeable. Being aware of the light
and seeking service promptly when
it comes on may prevent damage.
Caution
If the vehicle is driven continually
with this light on, the emission
control system may not work as
well, the fuel economy may be
lower, and the vehicle may not
run smoothly. This could lead to
costly repairs that might not be
covered by the vehicle warranty.
Caution
Modifications to the engine,
transmission, exhaust, intake,
or fuel system, or the use of
replacement tires that do not
meet the original tire
specifications, can cause this light
to come on. This could lead to
costly repairs not covered by the
vehicle warranty. This could also
affect the vehicle’s ability to pass
an Emissions Inspection/
Maintenance test. See
Accessories and Modifications
0270.
Page 177 of 413
Chevrolet Malibu Owner Manual (GMNA-Localizing-U.S./Canada/Mexico-
11348460) - 2018 - crc - 5/3/17
176 Infotainment System
Audio Players
Avoiding Untrusted Media
Devices
When using media devices such as
CDs, DVDs, Blu-ray Discs, SD
cards, USB devices, and mobile
devices, consider the source.
Untrusted media devices could
contain files that affect system
operation or performance. Avoid use
if the content or origin cannot be
trusted.
USB Port
Using the USB Port
The infotainment system can play
music by connecting an auxiliary
device to the USB port.
USB Support
The USB port is in the center stack
and use the USB 2.0 standard.
If equipped, there is a USB charge
port in the rear of the center
console.USB Supported Devices
.
USB Flash Drives
. iPods/iPhones
. Portable USB Hard Drives
Not all iPods and USB drives are
compatible with the USB port.
Make sure the iPod has the latest
firmware from Apple for proper
operation. iPod firmware can be
updated using the latest iTunes
application. See www.apple.com/
itunes.
For help with identifying your iPod,
go to www.apple.com/support.
The USB port can play both lower
and upper case .mp3, .wma, .ogg,
and .wav files stored on a USB
storage device.
Supported Apple Devices
To view supported devices in the
U.S., see www.my.chevrolet.com/
learn.
To view supported devices in
Canada, see
www.chevroletowner.ca. To view supported devices in
Mexico, see your dealer.
USB Supported File and Folder
Structure
The infotainment system supports:
.
FAT16
. FAT32
. exFAT
Connecting a USB Storage
Device or iPod/iPhone
To connect a USB storage device,
connect the device to the USB port.
To connect an iPod/iPhone, connect
one end of the device’ s cable to the
iPod/iPhone and the other end to
the USB port.
The iPod/iPhone charges while it is
connected to the vehicle if the
vehicle is on or in ACC/
ACCESSORY. See Ignition
Positions 0216. When the vehicle is
turned off, the iPod/iPhone
automatically powers off and will not
charge or draw power from the
vehicle's battery.
Page 206 of 413
Chevrolet Malibu Owner Manual (GMNA-Localizing-U.S./Canada/Mexico-
11348460) - 2018 - crc - 5/3/17
Driving and Operating 205
Driving and
Operating
Driving Information
Distracted Driving . . . . . . . . . . . . 206
Defensive Driving . . . . . . . . . . . . . 207
Drunk Driving . . . . . . . . . . . . . . . . . 207
Control of a Vehicle . . . . . . . . . . . 207
Braking . . . . . . . . . . . . . . . . . . . . . . . 207
Steering . . . . . . . . . . . . . . . . . . . . . . 208
Off-Road Recovery . . . . . . . . . . . 208
Loss of Control . . . . . . . . . . . . . . . 209
Driving on Wet Roads . . . . . . . . 209
Hill and Mountain Roads . . . . . 210
Winter Driving . . . . . . . . . . . . . . . . 211
If the Vehicle Is Stuck . . . . . . . . 212
Vehicle Load Limits . . . . . . . . . . . 212
Starting and Operating
New Vehicle Break-In . . . . . . . . . 216
Ignition Positions . . . . . . . . . . . . . 216
Starting the Engine . . . . . . . . . . . 218
Engine Heater . . . . . . . . . . . . . . . . 220
Retained AccessoryPower (RAP) . . . . . . . . . . . . . . . . 221
Shifting Into Park . . . . . . . . . . . . . 221
Shifting out of Park . . . . . . . . . . . 222
Parking over Things That Burn . . . . . . . . . . . . . . . . . . . 222 Extended Parking . . . . . . . . . . . . 222
Engine Exhaust
Engine Exhaust . . . . . . . . . . . . . . 223
Running the Vehicle While
Parked . . . . . . . . . . . . . . . . . . . . . . 223
Automatic Transmission
Automatic Transmission . . . . . . 224
Manual Mode . . . . . . . . . . . . . . . . . 225
Brakes
Antilock BrakeSystem (ABS) . . . . . . . . . . . . . . . 227
Parking Brake . . . . . . . . . . . . . . . . 227
Electric Parking Brake . . . . . . . . 228
Brake Assist . . . . . . . . . . . . . . . . . . 229
Hill Start Assist (HSA) . . . . . . . . 230
Regenerative Braking (Hybrid Only) . . . . . . . . . . . . . . . . 230
Ride Control Systems
Traction Control/ElectronicStability Control . . . . . . . . . . . . . 231
Cruise Control
Cruise Control . . . . . . . . . . . . . . . . 233
Adaptive Cruise Control . . . . . . 235
Driver Assistance Systems
Driver Assistance Systems . . . 242
Assistance Systems forParking or Backing . . . . . . . . . . 243 Assistance Systems for
Driving . . . . . . . . . . . . . . . . . . . . . . 247
Forward Collision Alert (FCA) System . . . . . . . . . . . . . . . . . . . . . . 247
Forward Automatic
Braking (FAB) . . . . . . . . . . . . . . . 249
Front Pedestrian Braking (FPB) System . . . . . . . . . . . . . . . 251
Side Blind Zone Alert (SBZA) . . . . . . . . . . . . . . . . 253
Lane Change Alert (LCA) . . . . . 253
Lane Departure Warning (LDW) . . . . . . . . . . . . . 255
Lane Keep Assist (LKA) . . . . . . 255
Fuel
Fuel . . . . . . . . . . . . . . . . . . . . . . . . . . 257
California Fuel Requirements . . . . . . . . . . . . . . . 258
Fuels in Foreign Countries . . . 259
Fuel Additives . . . . . . . . . . . . . . . . 259
Filling the Tank . . . . . . . . . . . . . . . 259
Filling a Portable Fuel Container . . . . . . . . . . . . . . . . . . . 261
Trailer Towing
General TowingInformation . . . . . . . . . . . . . . . . . . 261
Driving Characteristics and
Towing Tips . . . . . . . . . . . . . . . . . 262
Trailer Towing . . . . . . . . . . . . . . . . 265
Page 217 of 413
Chevrolet Malibu Owner Manual (GMNA-Localizing-U.S./Canada/Mexico-
11348460) - 2018 - crc - 5/3/17
216 Driving and Operating
Starting and
Operating
New Vehicle Break-In
Caution
The vehicle does not need an
elaborate break-in. But it will
perform better in the long run if
you follow these guidelines:. Do not drive at any one
constant speed, fast or slow,
for the first 805 km (500 mi).
Do not make full-throttle
starts. Avoid downshifting to
brake or slow the vehicle.
. Avoid making hard stops for
the first 322 km (200 mi) or
so. During this time the new
brake linings are not yet
broken in. Hard stops with
new linings can mean
premature wear and earlier
replacement. Follow this
(Continued)
Caution (Continued)
breaking-in guideline every
time you get new brake
linings.
Following break-in, engine speed
and load can be gradually
increased.
Ignition Positions
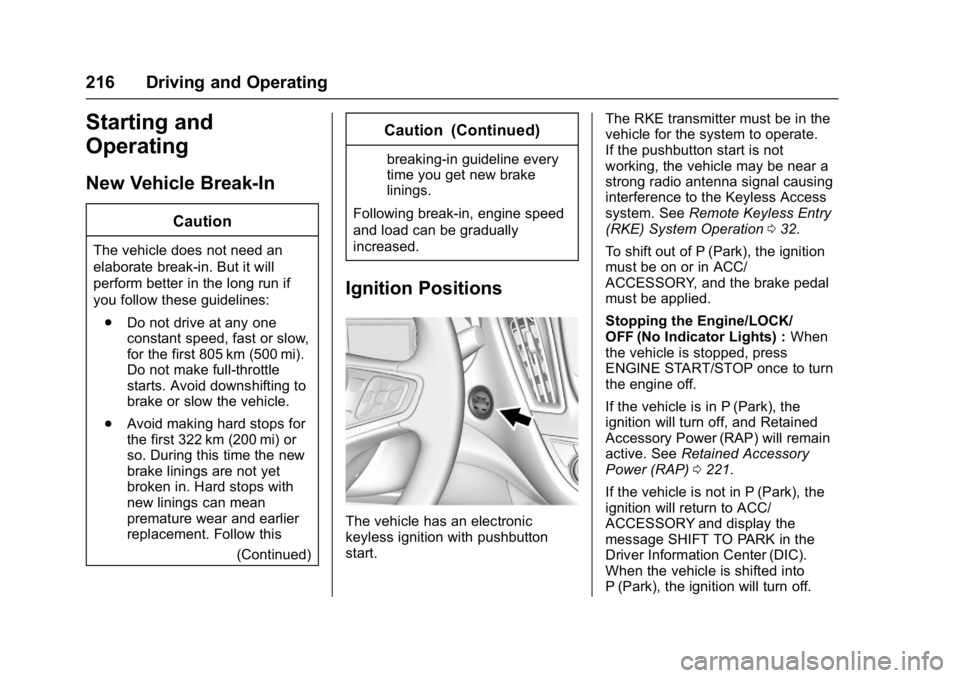
The vehicle has an electronic
keyless ignition with pushbutton
start. The RKE transmitter must be in the
vehicle for the system to operate.
If the pushbutton start is not
working, the vehicle may be near a
strong radio antenna signal causing
interference to the Keyless Access
system. See
Remote Keyless Entry
(RKE) System Operation 032.
To shift out of P (Park), the ignition
must be on or in ACC/
ACCESSORY, and the brake pedal
must be applied.
Stopping the Engine/LOCK/
OFF (No Indicator Lights) : When
the vehicle is stopped, press
ENGINE START/STOP once to turn
the engine off.
If the vehicle is in P (Park), the
ignition will turn off, and Retained
Accessory Power (RAP) will remain
active. See Retained Accessory
Power (RAP) 0221.
If the vehicle is not in P (Park), the
ignition will return to ACC/
ACCESSORY and display the
message SHIFT TO PARK in the
Driver Information Center (DIC).
When the vehicle is shifted into
P (Park), the ignition will turn off.
Page 322 of 413
Chevrolet Malibu Owner Manual (GMNA-Localizing-U.S./Canada/Mexico-
11348460) - 2018 - crc - 5/3/17
Vehicle Care 321
could prevent the TPMS from
functioning properly. SeeBuying
New Tires 0324.
. Operating electronic devices or
being near facilities using radio
wave frequencies similar to the
TPMS could cause the TPMS
sensors to malfunction.
If the TPMS is not functioning
properly it cannot detect or signal a
low tire pressure condition. See
your dealer for service if the TPMS
malfunction light and DIC message
comes on and stays on.
TPMS Sensor Matching
Process
Each TPMS sensor has a unique
identification code. The identification
code needs to be matched to a new
tire/wheel position after rotating the
vehicle’s tires or replacing one or
more of the TPMS sensors. The
TPMS sensor matching process
should also be performed after
replacing a spare tire with a road
tire containing the TPMS sensor.
The malfunction light and the DIC
message should go off at the next
ignition cycle. The sensors are matched to the tire/wheel positions,
using a TPMS relearn tool, in the
following order: driver side front tire,
passenger side front tire, passenger
side rear tire, and driver side rear.
See your dealer for service or to
purchase a relearn tool. A TPMS
relearn tool can also be purchased.
See Tire Pressure Monitor Sensor
Activation Tool at
www.gmtoolsandequipment.com or
call 1-800-GM TOOLS
(1-800-468-6657).
There are two minutes to match the
first tire/wheel position, and
five minutes overall to match all four
tire/wheel positions. If it takes
longer, the matching process stops
and must be restarted.
The TPMS sensor matching
process is:
1. Set the parking brake.
2. Place the vehicle in Service Mode. See Ignition Positions
0 216.
3. Make sure the Tire Pressure info page option is turned on.
The info pages on the DIC can be turned on and off through
the Options menu.
See
Driver Information Center
(DIC) (Uplevel) 0134 orDriver
Information Center (DIC) (Base
Level) 0131.
4. Use the DIC controls on the right side of the steering wheel
to scroll to the Tire Pressure
screen under the DIC
info page.
5. Press and hold
Vin the center
of the DIC controls.
The horn sounds twice to
signal the receiver is in relearn
mode and the TIRE
LEARNING ACTIVE message
displays on the DIC screen.
6. Start with the driver side front tire.
7. Place the relearn tool against the tire sidewall, near the valve
stem. Then press the button to
activate the TPMS sensor.
A horn chirp confirms that the
sensor identification code has
been matched to this tire and
wheel position.