2018 CHEVROLET MALIBU brake light
[x] Cancel search: brake lightPage 248 of 413
Chevrolet Malibu Owner Manual (GMNA-Localizing-U.S./Canada/Mexico-
11348460) - 2018 - crc - 5/3/17
Driving and Operating 247
If the vehicle is in R (Reverse), but
does not steer into the expected
space, this may be because the
system is maneuvering the vehicle
into a previously detected space.
The APA system does not need
service.
If the vehicle exceeds 10 km/h
(6 mph), APA is automatically
disengaged and automatic steering
will turn off. A DIC progress arrow
displays the status of the parking
maneuver. Depending on the space
size, additional maneuvers may be
required, and there will be additional
instructions. When changing gears,
allow the automatic steering to
complete before continuing the
parking maneuver. Upon successful
completion of a maneuver, APA will
beep and display a PARKING
COMPLETE message. Place the
vehicle in P (Park).
APA may automatically disengage if:
.The steering wheel is used by
the driver.
. The maximum allowed speed is
exceeded. .
There is a failure with the APA
system.
. Electronic stability control or
antilock brakes are activated.
. A high priority vehicle message
is displayed in the DIC.
To cancel APA, press
Oagain.
When the System Does Not Seem
to Work Properly
The APA system may require a
short period of driving along curves
to calibrate.
Assistance Systems for
Driving
If equipped, when driving the
vehicle in a forward gear, Forward
Collision Alert (FCA), Lane
Departure Warning (LDW), Lane
Keep Assist (LKA), Side Blind Zone
Alert (SBZA), Lane Change Alert
(LCA), Forward Automatic Braking
(FAB), and/or the Front Pedestrian
Braking (FPB) System can help to
avoid a crash or reduce crash
damage.
Forward Collision Alert
(FCA) System
If equipped, the FCA system may
help to avoid or reduce the harm
caused by front-end crashes. When
approaching a vehicle ahead too
quickly, FCA provides a flashing red
alert on the windshield and rapidly
beeps. FCA also lights an amber
visual alert if following another
vehicle much too closely.
FCA detects vehicles within a
distance of approximately 60 m
(197 ft) and operates at speeds
above 8 km/h (5 mph). If the vehicle
has Adaptive Cruise Control (ACC),
it can detect vehicles to distances of
approximately 110 m (360 ft) and
operates at all speeds. See
Adaptive Cruise Control 0235.
{Warning
FCA is a warning system and
does not apply the brakes. When
approaching a slower-moving or
stopped vehicle ahead too rapidly,
(Continued)
Page 254 of 413
Chevrolet Malibu Owner Manual (GMNA-Localizing-U.S./Canada/Mexico-
11348460) - 2018 - crc - 5/3/17
Driving and Operating 253
{Warning
FPB may alert or automatically
brake the vehicle suddenly in
situations where it is unexpected
and undesired. It could falsely
alert or brake for objects similar in
shape or size to pedestrians,
including shadows. This is normal
operation and the vehicle does
not need service. To override
Automatic Braking, firmly press
the accelerator pedal, if it is safe
to do so.
Automatic Braking can be disabled
through vehicle personalization. See
“Front Pedestrian Detection” in
“Collision/Detection Systems” under
Vehicle Personalization 0138.
{Warning
Using the Front Pedestrian
Braking system while towing a
trailer could cause you to lose
(Continued)
Warning (Continued)
control of the vehicle and crash.
Turn the system to Alert or Off
when towing a trailer.
Cleaning the System
If FPB does not seem to operate
properly, cleaning the outside of the
windshield in front of the rearview
mirror may correct the issue.
Side Blind Zone
Alert (SBZA)
If equipped, the SBZA system is a
lane-changing aid that assists
drivers with avoiding crashes that
occur with moving vehicles in the
side blind zone (or spot) areas.
When the vehicle is in a forward
gear, the left or right side mirror
display will light up if a moving
vehicle is detected in that blind
zone. If the turn signal is activated
and a vehicle is also detected on
the same side, the display will flash
as an extra warning not to change
lanes. Since this system is part of the Lane Change Alert (LCA)
system, read the entire LCA section
before using this feature.
Lane Change Alert (LCA)
If equipped, the LCA system is a
lane-changing aid that assists
drivers with avoiding lane change
crashes that occur with moving
vehicles in the side blind zone (or
spot) areas or with vehicles rapidly
approaching these areas from
behind. The LCA warning display
will light up in the corresponding
outside side mirror and will flash if
the turn signal is on.
{Warning
LCA does not alert the driver to
vehicles outside of the system
detection zones, pedestrians,
bicyclists, or animals. It may not
provide alerts when changing
lanes under all driving conditions.
Failure to use proper care when
changing lanes may result in
injury, death, or vehicle damage.
(Continued)
Page 269 of 413
Chevrolet Malibu Owner Manual (GMNA-Localizing-U.S./Canada/Mexico-
11348460) - 2018 - crc - 5/3/17
268 Vehicle Care
Vehicle Care
General Information
General Information . . . . . . . . . . 269
California Proposition65 Warning . . . . . . . . . . . . . . . . . 269
California Perchlorate Materials Requirements . . . . . 270
Accessories and Modifications . . . . . . . . . . . . . . . . 270
Vehicle Checks
Doing Your OwnService Work . . . . . . . . . . . . . . . 270
Hood . . . . . . . . . . . . . . . . . . . . . . . . . 271
Engine Compartment Overview . . . . . . . . . . . . . . . . . . . . 273
Engine Oil . . . . . . . . . . . . . . . . . . . . 278
Engine Oil Life System . . . . . . . 281
Automatic Transmission Fluid . . . . . . . . . . . . . . . . . . . . . . . . 282
Engine Air Cleaner/Filter . . . . . . 282
Cooling System (Engine) . . . . . 283
Cooling System (Power Electronics) . . . . . . . . . . . . . . . . . 287
Engine Overheating . . . . . . . . . . 288
Washer Fluid . . . . . . . . . . . . . . . . . 289
Brakes . . . . . . . . . . . . . . . . . . . . . . . 289
Brake Fluid . . . . . . . . . . . . . . . . . . . 290
Battery - North America . . . . . . 291 Starter Switch Check . . . . . . . . . 293
Automatic Transmission Shift
Lock Control Function
Check . . . . . . . . . . . . . . . . . . . . . . . 293
Park Brake and P (Park)
Mechanism Check . . . . . . . . . . 294
Wiper Blade Replacement . . . . 294
Gas Strut(s) . . . . . . . . . . . . . . . . . . 295
Headlamp Aiming
Headlamp Aiming . . . . . . . . . . . . 296
Bulb Replacement
Bulb Replacement . . . . . . . . . . . . 296
Halogen Bulbs . . . . . . . . . . . . . . . . 296
LED Lighting . . . . . . . . . . . . . . . . . 296
Headlamps, Front Turn Signal, Sidemarker, and Parking
Lamps . . . . . . . . . . . . . . . . . . . . . . 297
Taillamps, Turn Signal, Stoplamps, and Back-Up
Lamps (LS and LT) . . . . . . . . . . 298
Taillamps, Turn Signal, Stoplamps, and Back-Up
Lamps (LTZ) . . . . . . . . . . . . . . . . 299
License Plate Lamp . . . . . . . . . . 300
Electrical System
High Voltage Devices and Wiring . . . . . . . . . . . . . . . . . . . . . . . 300
Electrical System Overload . . . 301
Fuses and Circuit Breakers . . . 301 Engine Compartment Fuse
Block . . . . . . . . . . . . . . . . . . . . . . . . 302
Instrument Panel Fuse Block . . . . . . . . . . . . . . . . . . . . . . . . 306
Wheels and Tires
Tires . . . . . . . . . . . . . . . . . . . . . . . . . . 308
All-Season Tires . . . . . . . . . . . . . . 309
Winter Tires . . . . . . . . . . . . . . . . . . 310
Low-Profile Tires . . . . . . . . . . . . . 310
Summer Tires . . . . . . . . . . . . . . . . 310
Tire Sidewall Labeling . . . . . . . . 311
Tire Designations . . . . . . . . . . . . . 313
Tire Terminology andDefinitions . . . . . . . . . . . . . . . . . . 314
Tire Pressure . . . . . . . . . . . . . . . . . 316
Tire Pressure for High-Speed Operation . . . . . . . . . . . . . . . . . . . 317
Tire Pressure Monitor System . . . . . . . . . . . . . . . . . . . . . . 318
Tire Pressure Monitor Operation . . . . . . . . . . . . . . . . . . . 319
Tire Inspection . . . . . . . . . . . . . . . . 322
Tire Rotation . . . . . . . . . . . . . . . . . 322
When It Is Time for New Tires . . . . . . . . . . . . . . . . . . . . . . . . 323
Buying New Tires . . . . . . . . . . . . . 324
Different Size Tires and Wheels . . . . . . . . . . . . . . . . . . . . . . 325
Uniform Tire Quality Grading . . . . . . . . . . . . . . . . . . . . . 326
Page 291 of 413
Chevrolet Malibu Owner Manual (GMNA-Localizing-U.S./Canada/Mexico-
11348460) - 2018 - crc - 5/3/17
290 Vehicle Care
{Warning
The brake wear warning sound
means that soon the brakes will
not work well. That could lead to
a crash. When the brake wear
warning sound is heard, have the
vehicle serviced.
Caution
Continuing to drive with worn-out
brake pads could result in costly
brake repair.
Some driving conditions or climates
can cause a brake squeal when the
brakes are first applied or lightly
applied. This does not mean
something is wrong with the brakes.
Properly torqued wheel nuts are
necessary to help prevent brake
pulsation. When tires are rotated,
inspect brake pads for wear and
evenly tighten wheel nuts in the proper sequence to torque
specifications. See
Capacities and
Specifications 0373.
Brake pads should be replaced as
complete sets.
Brake Pedal Travel
See your dealer if the brake pedal
does not return to normal height,
or if there is a rapid increase in
pedal travel. This could be a sign
that brake service may be required.
Replacing Brake System Parts
Always replace brake system parts
with new, approved replacement
parts. If this is not done, the brakes
may not work properly. The braking
performance expected can change
in many other ways if the wrong
replacement brake parts are
installed or if parts are improperly
installed.
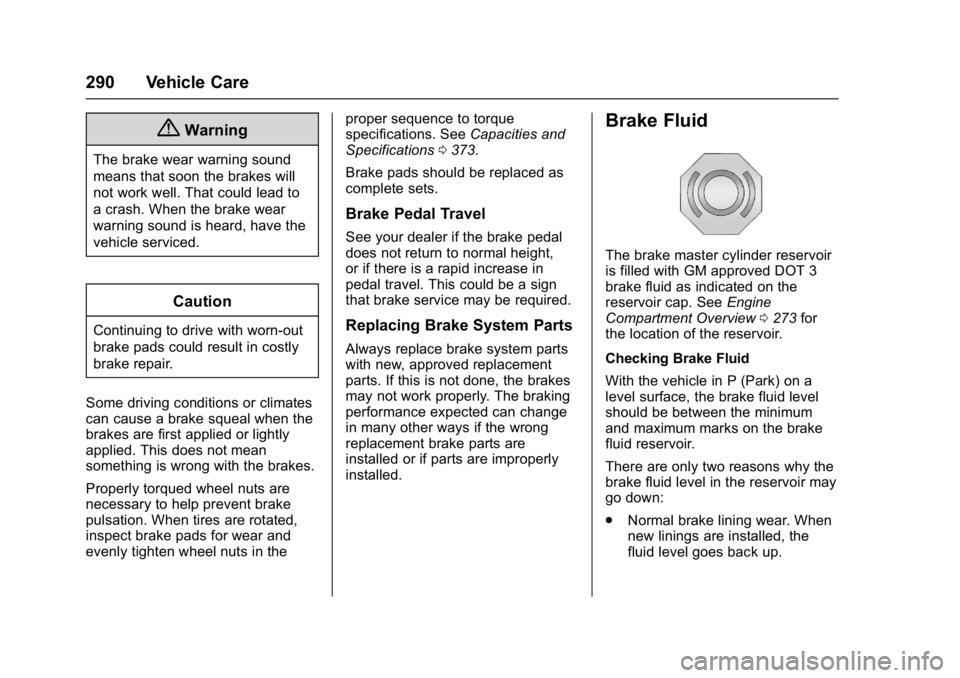
Brake Fluid
The brake master cylinder reservoir
is filled with GM approved DOT 3
brake fluid as indicated on the
reservoir cap. See Engine
Compartment Overview 0273 for
the location of the reservoir.
Checking Brake Fluid
With the vehicle in P (Park) on a
level surface, the brake fluid level
should be between the minimum
and maximum marks on the brake
fluid reservoir.
There are only two reasons why the
brake fluid level in the reservoir may
go down:
. Normal brake lining wear. When
new linings are installed, the
fluid level goes back up.
Page 292 of 413
Chevrolet Malibu Owner Manual (GMNA-Localizing-U.S./Canada/Mexico-
11348460) - 2018 - crc - 5/3/17
Vehicle Care 291
.A fluid leak in the brake
hydraulic system. Have the
brake hydraulic system fixed.
With a leak, the brakes will not
work well.
Always clean the brake fluid
reservoir cap and the area around
the cap before removing it.
Do not top off the brake fluid.
Adding fluid does not correct a leak.
If fluid is added when the linings are
worn, there will be too much fluid
when new brake linings are
installed. Add or remove fluid, as
necessary, only when work is done
on the brake hydraulic system.
{Warning
If too much brake fluid is added, it
can spill on the engine and burn,
if the engine is hot enough. You
or others could be burned, and
the vehicle could be damaged.
Add brake fluid only when work is
done on the brake hydraulic
system. When the brake fluid falls to a low
level, the brake warning light comes
on. See
Brake System Warning
Light 0124.
Brake fluid absorbs water over time
which degrades the effectiveness of
the brake fluid. Replace brake fluid
at the specified intervals to prevent
increased stopping distance. See
Maintenance Schedule 0360.
What to Add
Use only GM approved DOT 3
brake fluid from a clean, sealed
container. See Recommended
Fluids and Lubricants 0369.
{Warning
The wrong or contaminated brake
fluid could result in damage to the
brake system. This could result in
the loss of braking leading to a
possible injury. Always use the
proper GM approved brake fluid.
Caution
If brake fluid is spilled on the
vehicle's painted surfaces, the
paint finish can be damaged.
Immediately wash off any painted
surface.
Battery - North America
The original equipment battery is
maintenance free. Do not remove
the cap and do not add fluid.
The non-hybrid vehicle has a
standard 12-volt battery under the
hood. See Engine Compartment
Overview 0273.
Refer to the replacement number
shown on the original battery label
when a new 12-volt battery is
needed.
Hybrid Vehicle
The hybrid vehicle 12-volt battery is
in the trunk on the driver side.
Hybrid vehicles also have a high
voltage battery. Only a trained
service technician with the proper
knowledge and tools should inspect,
Page 322 of 413
Chevrolet Malibu Owner Manual (GMNA-Localizing-U.S./Canada/Mexico-
11348460) - 2018 - crc - 5/3/17
Vehicle Care 321
could prevent the TPMS from
functioning properly. SeeBuying
New Tires 0324.
. Operating electronic devices or
being near facilities using radio
wave frequencies similar to the
TPMS could cause the TPMS
sensors to malfunction.
If the TPMS is not functioning
properly it cannot detect or signal a
low tire pressure condition. See
your dealer for service if the TPMS
malfunction light and DIC message
comes on and stays on.
TPMS Sensor Matching
Process
Each TPMS sensor has a unique
identification code. The identification
code needs to be matched to a new
tire/wheel position after rotating the
vehicle’s tires or replacing one or
more of the TPMS sensors. The
TPMS sensor matching process
should also be performed after
replacing a spare tire with a road
tire containing the TPMS sensor.
The malfunction light and the DIC
message should go off at the next
ignition cycle. The sensors are matched to the tire/wheel positions,
using a TPMS relearn tool, in the
following order: driver side front tire,
passenger side front tire, passenger
side rear tire, and driver side rear.
See your dealer for service or to
purchase a relearn tool. A TPMS
relearn tool can also be purchased.
See Tire Pressure Monitor Sensor
Activation Tool at
www.gmtoolsandequipment.com or
call 1-800-GM TOOLS
(1-800-468-6657).
There are two minutes to match the
first tire/wheel position, and
five minutes overall to match all four
tire/wheel positions. If it takes
longer, the matching process stops
and must be restarted.
The TPMS sensor matching
process is:
1. Set the parking brake.
2. Place the vehicle in Service Mode. See Ignition Positions
0 216.
3. Make sure the Tire Pressure info page option is turned on.
The info pages on the DIC can be turned on and off through
the Options menu.
See
Driver Information Center
(DIC) (Uplevel) 0134 orDriver
Information Center (DIC) (Base
Level) 0131.
4. Use the DIC controls on the right side of the steering wheel
to scroll to the Tire Pressure
screen under the DIC
info page.
5. Press and hold
Vin the center
of the DIC controls.
The horn sounds twice to
signal the receiver is in relearn
mode and the TIRE
LEARNING ACTIVE message
displays on the DIC screen.
6. Start with the driver side front tire.
7. Place the relearn tool against the tire sidewall, near the valve
stem. Then press the button to
activate the TPMS sensor.
A horn chirp confirms that the
sensor identification code has
been matched to this tire and
wheel position.
Page 325 of 413
Chevrolet Malibu Owner Manual (GMNA-Localizing-U.S./Canada/Mexico-
11348460) - 2018 - crc - 5/3/17
324 Vehicle Care
The rubber in tires ages over time.
This also applies to the spare tire,
if the vehicle has one, even if it is
never used. Multiple factors
including temperatures, loading
conditions, and inflation pressure
maintenance affect how fast aging
takes place. GM recommends that
tires, including the spare if
equipped, be replaced after six
years, regardless of tread wear. The
tire manufacture date is the last four
digits of the DOT Tire Identification
Number (TIN) which is molded into
one side of the tire sidewall. The
first two digits represent the week
(01–52) and the last two digits, the
year. For example, the third week of
the year 2010 would have a
four-digit DOT date of 0310.
Vehicle Storage
Tires age when stored normally
mounted on a parked vehicle. Park
a vehicle that will be stored for at
least a month in a cool, dry, clean
area away from direct sunlight to
slow aging. This area should be freeof grease, gasoline, or other
substances that can deteriorate
rubber.
Parking for an extended period can
cause flat spots on the tires that
may result in vibrations while
driving. When storing a vehicle for
at least a month, remove the tires or
raise the vehicle to reduce the
weight from the tires.
Buying New Tires
GM has developed and matched
specific tires for the vehicle. The
original equipment tires installed
were designed to meet General
Motors Tire Performance Criteria
Specification (TPC Spec)
system rating. When
replacement tires are needed,
GM strongly recommends
buying tires with the same TPC
Spec rating.
GM's exclusive TPC Spec
system considers over a dozen
critical specifications that impact
the overall performance of the
vehicle, including brake system
performance, ride and handling,
traction control, and tire
pressure monitoring
performance. GM's TPC Spec
number is molded onto the tire's
sidewall near the tire size. If the
tires have an all-season tread
design, the TPC Spec number
will be followed by MS for mud
and snow. See
Tire Sidewall
Labeling 0311.
GM recommends replacing worn
tires in complete sets of four.
Uniform tread depth on all tires
will help to maintain the
performance of the vehicle.
Braking and handling
performance may be adversely
affected if all the tires are not
replaced at the same time.
If proper rotation and
maintenance have been done,
all four tires should wear out at
about the same time. See Tire
Rotation 0322. However, if it is
Page 346 of 413
Chevrolet Malibu Owner Manual (GMNA-Localizing-U.S./Canada/Mexico-
11348460) - 2018 - crc - 5/3/17
Vehicle Care 345
manual transmission in Neutral
before setting the parking
brake.
Caution
If any accessories are left on or
plugged in during the jump
starting procedure, they could be
damaged. The repairs would not
be covered by the vehicle
warranty. Whenever possible, turn
off or unplug all accessories on
either vehicle when jump starting.
4. Turn the ignition off and switch off all lights and accessories in
both vehicles, except the
hazard warning flashers if
needed.
{Warning
An electric fan can start up even
when the engine is not running
and can injure you. Keep hands,
clothing, and tools away from any
underhood electric fan.
{Warning
Using a match near a battery can
cause battery gas to explode.
People have been hurt doing this,
and some have been blinded.
Use a flashlight if you need more
light.
Battery fluid contains acid that
can burn you. Do not get it on
you. If you accidentally get it in
your eyes or on your skin, flush
the place with water and get
medical help immediately.
{Warning
Fans or other moving engine
parts can injure you badly. Keep
your hands away from moving
parts once the engine is running.
6. Connect the red positive (+) cable to the positive (+) or
remote positive (+) terminal of
the discharged battery. 7. Connect the other end of the
positive (+) cable to the
positive (+) terminal of the
good battery. Use a remote
positive (+) terminal if the
vehicle has one.
8. Connect one end of the black negative (−) cable to the
negative (−) terminal of the
good battery.
9. Connect the other end of the negative (−) cable to the
negative (–) ground terminal for
the discharged battery.
10. Start the vehicle with the good battery and run the engine at
idle speed for at least
four minutes.
11. Try to start the vehicle that had the dead battery. If it will not
start after a few tries, it
probably needs service.
For hybrid vehicles, the engine will
only start if needed after pressing
ENGINE START/STOP. The vehicle
ready light will come on when the
propulsion system is on and ready.