2018 CHEVROLET CRUZE tow
[x] Cancel search: towPage 328 of 404

Chevrolet Cruze Owner Manual (GMNA-Localizing-U.S./Canada/Mexico-
11348462) - 2018 - crc - 5/15/17
Vehicle Care 327
Vehicles with a Liftgate
1. Jack
2. Wrench
3. Tow Hook
4. Strap
1. Open the trunk or liftgate.See Trunk 048 orLiftgate
0 50.
2. Lift the load floor.
3. Turn the retainer nut counterclockwise and remove
the spare tire. Place the spare
tire next to the tire being
changed. 4. The jack and tools are stored
under the spare tire. Remove
them from their container and
place them near the tire being
changed.
Removing the Flat Tire and
Installing the Spare Tire
1. Do a safety check before
proceeding. See If a Tire Goes
Flat 0318.
2. Turn the wheel wrench
counterclockwise to loosen all
the wheel nuts, but do not
remove them yet.
3. Place the jack near the flat tire. 4. Place the jack under the
vehicle.
5. Put the compact spare tire near you.
{Warning
Getting under a vehicle when it is
lifted on a jack is dangerous.
If the vehicle slips off the jack,
you could be badly injured or
killed. Never get under a vehicle
when it is supported only by
a jack.
{Warning
Raising the vehicle with the jack
improperly positioned can
damage the vehicle and even
make the vehicle fall. To help
avoid personal injury and vehicle
damage, be sure to fit the jack lift
head into the proper location
before raising the vehicle.
Page 330 of 404
Chevrolet Cruze Owner Manual (GMNA-Localizing-U.S./Canada/Mexico-
11348462) - 2018 - crc - 5/15/17
Vehicle Care 329
room for the road tire to clear
the ground. Do not raise the
jack any further.
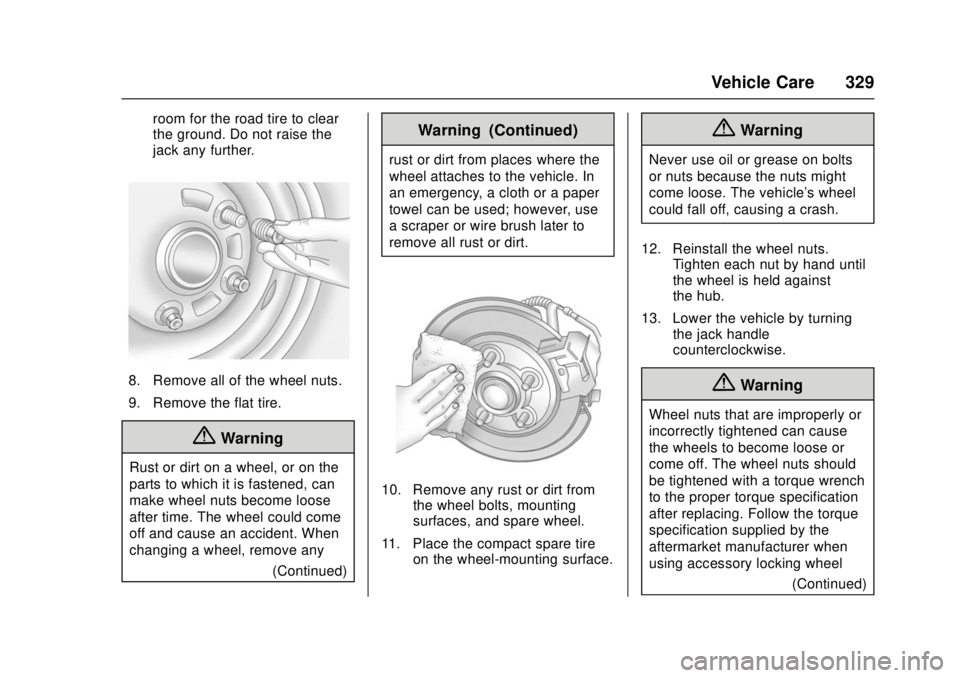
8. Remove all of the wheel nuts.
9. Remove the flat tire.
{Warning
Rust or dirt on a wheel, or on the
parts to which it is fastened, can
make wheel nuts become loose
after time. The wheel could come
off and cause an accident. When
changing a wheel, remove any(Continued)
Warning (Continued)
rust or dirt from places where the
wheel attaches to the vehicle. In
an emergency, a cloth or a paper
towel can be used; however, use
a scraper or wire brush later to
remove all rust or dirt.
10. Remove any rust or dirt fromthe wheel bolts, mounting
surfaces, and spare wheel.
11. Place the compact spare tire on the wheel-mounting surface.
{Warning
Never use oil or grease on bolts
or nuts because the nuts might
come loose. The vehicle's wheel
could fall off, causing a crash.
12. Reinstall the wheel nuts. Tighten each nut by hand until
the wheel is held against
the hub.
13. Lower the vehicle by turning the jack handle
counterclockwise.
{Warning
Wheel nuts that are improperly or
incorrectly tightened can cause
the wheels to become loose or
come off. The wheel nuts should
be tightened with a torque wrench
to the proper torque specification
after replacing. Follow the torque
specification supplied by the
aftermarket manufacturer when
using accessory locking wheel
(Continued)
Page 335 of 404

Chevrolet Cruze Owner Manual (GMNA-Localizing-U.S./Canada/Mexico-
11348462) - 2018 - crc - 5/15/17
334 Vehicle Care
2. Discharged BatteryNegative Grounding
Terminal
3. Good Battery Negative Terminal
4. Good Battery Positive Terminal
The jump start remote negative
grounding terminal (2) for the
discharged battery is on the driver
side shock tower.
The jump start positive terminal on
the discharged battery (1) is located
in the engine compartment on the
driver side of the vehicle.
The jump start positive terminal (4)
and negative terminal (3) are on the
battery of the vehicle providing the
jump start.
The positive jump start connection
for the discharged battery is under a
trim cover. Open the cover to
expose the terminal.
1. Check the other vehicle. It must have a 12-volt battery
with a negative ground system.
Caution
If the other vehicle does not have
a 12-volt system with a negative
ground, both vehicles can be
damaged. Only use a vehicle that
has a 12-volt system with a
negative ground for jump starting.
2. Position the two vehicles so that they are not touching.
3. Set the parking brake firmly and put the shift lever in
P (Park) with an automatic
transmission, or Neutral with a
manual transmission. See
Shifting Into Park (Automatic
Transmission) 0215 with an
automatic transmission,
or Parking (Manual
Transmission) 0216 with a
manual transmission.
Caution
If any accessories are left on or
plugged in during the jump
starting procedure, they could be
damaged. The repairs would not
be covered by the vehicle
warranty. Whenever possible, turn
off or unplug all accessories on
either vehicle when jump starting.
4. Turn the ignition off. Turn off all lights and accessories in both
vehicles, except the hazard
warning flashers if needed.
{Warning
An electric fan can start up even
when the engine is not running
and can injure you. Keep hands,
clothing, and tools away from any
underhood electric fan.
Page 337 of 404
Chevrolet Cruze Owner Manual (GMNA-Localizing-U.S./Canada/Mexico-
11348462) - 2018 - crc - 5/15/17
336 Vehicle Care
Towing the Vehicle
Caution
Incorrectly towing a disabled
vehicle may cause damage. The
damage would not be covered by
the vehicle warranty.
Do not lash or hook to
suspension components. Use the
proper straps around the tires to
secure the vehicle.
Use only a flatbed tow truck for
towing a disabled vehicle. Never
use a sling type lift or damage will
occur. Use ramps to help reduce
approach angles if necessary.
A towed vehicle should have its
drive wheels off the ground.
Consult a professional towing
service if the disabled vehicle must
be towed.
Caution
Improper use of the tow eye can
cause vehicle damage. Use
caution and low speeds to
prevent damage to the vehicle.
If the vehicle is equipped with tow
eye, only use the tow eye to pull the
vehicle onto a flatbed car carrier
from a flat road surface. Do not use
the tow eye to pull the vehicle from
snow, mud or sand.
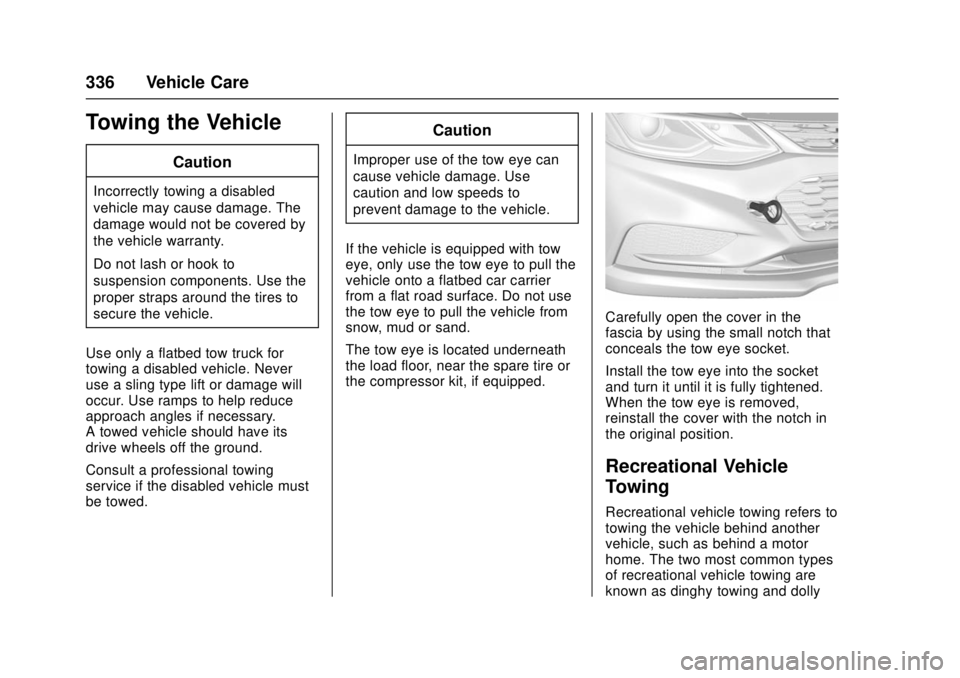
The tow eye is located underneath
the load floor, near the spare tire or
the compressor kit, if equipped.
Carefully open the cover in the
fascia by using the small notch that
conceals the tow eye socket.
Install the tow eye into the socket
and turn it until it is fully tightened.
When the tow eye is removed,
reinstall the cover with the notch in
the original position.
Recreational Vehicle
Towing
Recreational vehicle towing refers to
towing the vehicle behind another
vehicle, such as behind a motor
home. The two most common types
of recreational vehicle towing are
known as dinghy towing and dolly
Page 338 of 404

Chevrolet Cruze Owner Manual (GMNA-Localizing-U.S./Canada/Mexico-
11348462) - 2018 - crc - 5/15/17
Vehicle Care 337
towing. Dinghy towing is towing the
vehicle with all four wheels on the
ground. Dolly towing is towing the
vehicle with two wheels on the
ground and two wheels up on a
device known as a dolly.
Here are some important things to
consider before recreational vehicle
towing:
.The towing capacity of the
towing vehicle. Be sure to read
the tow vehicle manufacturer's
recommendations.
. How far the vehicle will be
towed. Some vehicles have
restrictions on how far and how
long they can tow.
. The proper towing equipment.
See your dealer or trailering
professional for additional advice
and equipment
recommendations.
. Whether the vehicle is ready to
be towed. Just as preparing the
vehicle for a long trip, make sure
the vehicle is prepared to be
towed.Caution
Use of a shield mounted in front
of the vehicle grille could restrict
airflow and cause damage to the
transmission. The repairs would
not be covered by the vehicle
warranty. If using a shield, only
use one that attaches to the
towing vehicle.
Dinghy Towing (with Automatic
Transmission)
Caution
If the vehicle is towed with all four
wheels on the ground, the
drivetrain components could be
damaged. The repairs would not
be covered by the vehicle
warranty. Do not tow the vehicle
with all four wheels on the
ground.
Vehicles with an automatic
transmission should not be towed
with all four wheels on the ground.
If the vehicle must be towed, a dolly
should be used. See "Dolly Towing"
later in this section.
Page 339 of 404
Chevrolet Cruze Owner Manual (GMNA-Localizing-U.S./Canada/Mexico-
11348462) - 2018 - crc - 5/15/17
338 Vehicle Care
Dinghy Towing (with Manual
Transmission)
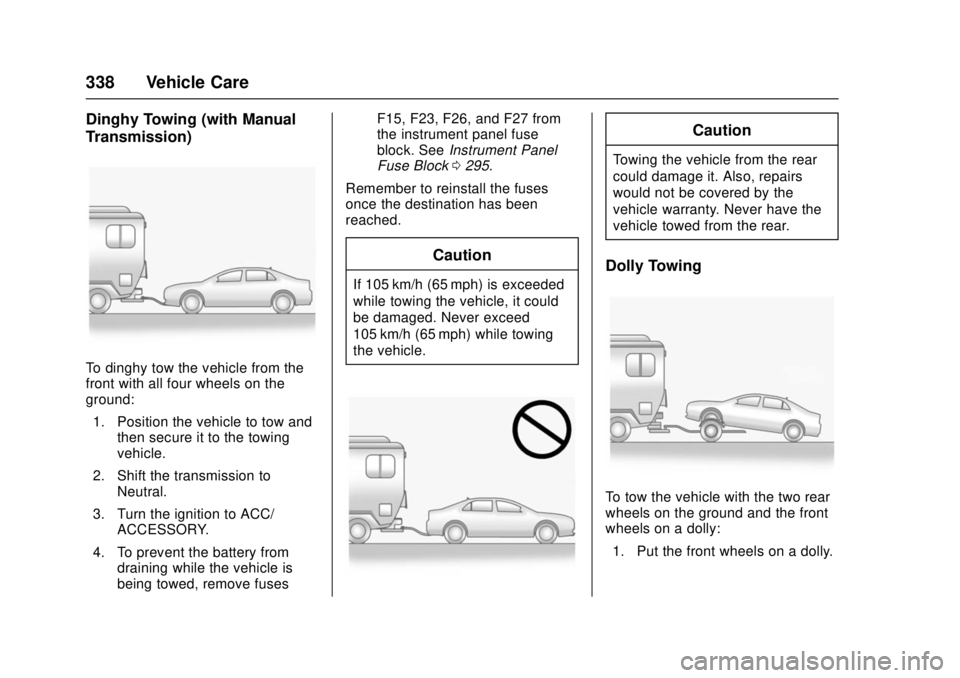
To dinghy tow the vehicle from the
front with all four wheels on the
ground:1. Position the vehicle to tow and then secure it to the towing
vehicle.
2. Shift the transmission to Neutral.
3. Turn the ignition to ACC/ ACCESSORY.
4. To prevent the battery from draining while the vehicle is
being towed, remove fuses F15, F23, F26, and F27 from
the instrument panel fuse
block. See
Instrument Panel
Fuse Block 0295.
Remember to reinstall the fuses
once the destination has been
reached.
Caution
If 105 km/h (65 mph) is exceeded
while towing the vehicle, it could
be damaged. Never exceed
105 km/h (65 mph) while towing
the vehicle.
Caution
Towing the vehicle from the rear
could damage it. Also, repairs
would not be covered by the
vehicle warranty. Never have the
vehicle towed from the rear.
Dolly Towing
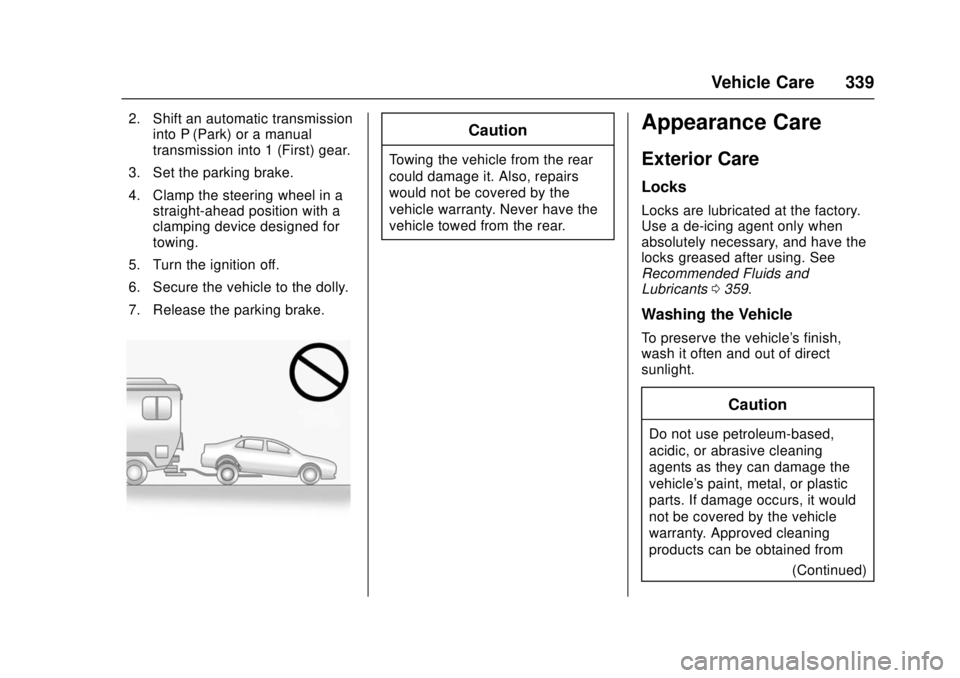
To tow the vehicle with the two rear
wheels on the ground and the front
wheels on a dolly: 1. Put the front wheels on a dolly.
Page 340 of 404
Chevrolet Cruze Owner Manual (GMNA-Localizing-U.S./Canada/Mexico-
11348462) - 2018 - crc - 5/15/17
Vehicle Care 339
2. Shift an automatic transmissioninto P (Park) or a manual
transmission into 1 (First) gear.
3. Set the parking brake.
4. Clamp the steering wheel in a straight-ahead position with a
clamping device designed for
towing.
5. Turn the ignition off.
6. Secure the vehicle to the dolly.
7. Release the parking brake.Caution
Towing the vehicle from the rear
could damage it. Also, repairs
would not be covered by the
vehicle warranty. Never have the
vehicle towed from the rear.
Appearance Care
Exterior Care
Locks
Locks are lubricated at the factory.
Use a de-icing agent only when
absolutely necessary, and have the
locks greased after using. See
Recommended Fluids and
Lubricants 0359.
Washing the Vehicle
To preserve the vehicle's finish,
wash it often and out of direct
sunlight.
Caution
Do not use petroleum-based,
acidic, or abrasive cleaning
agents as they can damage the
vehicle's paint, metal, or plastic
parts. If damage occurs, it would
not be covered by the vehicle
warranty. Approved cleaning
products can be obtained from
(Continued)
Page 341 of 404
Chevrolet Cruze Owner Manual (GMNA-Localizing-U.S./Canada/Mexico-
11348462) - 2018 - crc - 5/15/17
340 Vehicle Care
Caution (Continued)
your dealer. Follow all
manufacturer directions regarding
correct product usage, necessary
safety precautions, and
appropriate disposal of any
vehicle care product.
Caution
Avoid using high-pressure
washes closer than 30 cm (12 in)
to the surface of the vehicle. Use
of power washers exceeding
8,274 kPa (1,200 psi) can result
in damage or removal of paint
and decals.
Caution
Do not power wash any
component under the hood that
has this
esymbol.(Continued)
Caution (Continued)
This could cause damage that
would not be covered by the
vehicle warranty.
If using an automatic car wash,
follow the car wash instructions. The
windshield wiper and rear window
wiper, if equipped, must be off.
Remove any accessories that may
be damaged or interfere with the car
wash equipment.
Rinse the vehicle well, before
washing and after, to remove all
cleaning agents completely. If they
are allowed to dry on the surface,
they could stain.
Dry the finish with a soft, clean
chamois or an all-cotton towel to
avoid surface scratches and water
spotting.
Finish Care
Application of aftermarket clearcoat
sealant/wax materials is not
recommended. If painted surfaces
are damaged, see your dealer to have the damage assessed and
repaired. Foreign materials such as
calcium chloride and other salts, ice
melting agents, road oil and tar, tree
sap, bird droppings, chemicals from
industrial chimneys, etc., can
damage the vehicle's finish if they
remain on painted surfaces. Wash
the vehicle as soon as possible.
If necessary, use non-abrasive
cleaners that are marked safe for
painted surfaces to remove foreign
matter.
Occasional hand waxing or mild
polishing should be done to remove
residue from the paint finish. See
your dealer for approved cleaning
products.
Do not apply waxes or polishes to
uncoated plastic, vinyl, rubber,
decals, simulated wood, or flat paint
as damage can occur.
Caution
Machine compounding or
aggressive polishing on a
basecoat/clearcoat paint finish
(Continued)