2018 CHEVROLET CRUZE trunk
[x] Cancel search: trunkPage 49 of 404
Chevrolet Cruze Owner Manual (GMNA-Localizing-U.S./Canada/Mexico-
11348462) - 2018 - crc - 5/15/17
48 Keys, Doors, and Windows
Manual Safety Locks
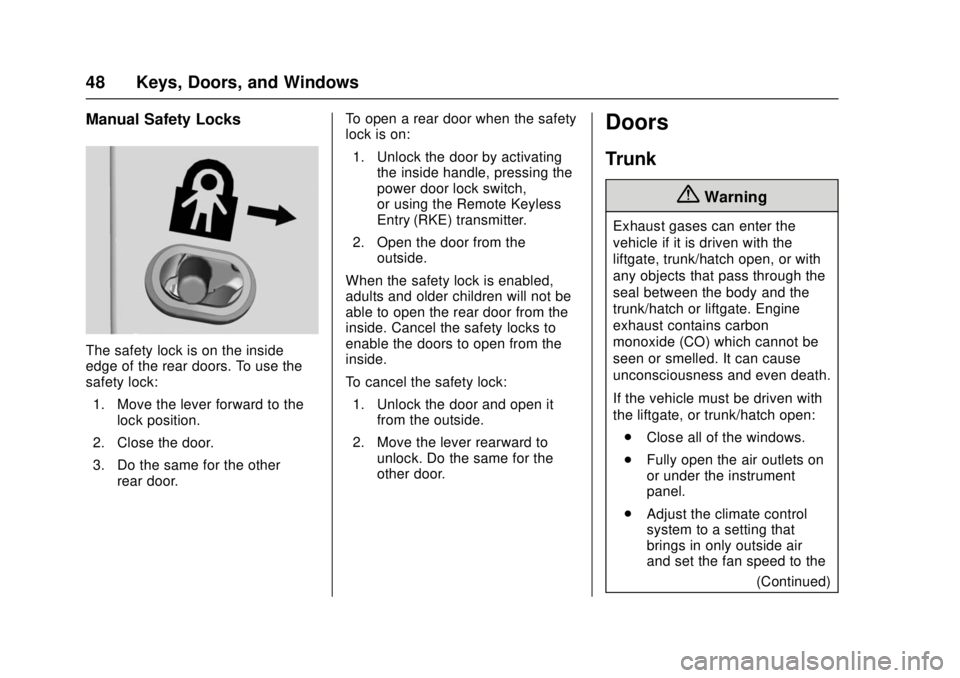
The safety lock is on the inside
edge of the rear doors. To use the
safety lock:1. Move the lever forward to the lock position.
2. Close the door.
3. Do the same for the other rear door. To open a rear door when the safety
lock is on:
1. Unlock the door by activating the inside handle, pressing the
power door lock switch,
or using the Remote Keyless
Entry (RKE) transmitter.
2. Open the door from the outside.
When the safety lock is enabled,
adults and older children will not be
able to open the rear door from the
inside. Cancel the safety locks to
enable the doors to open from the
inside.
To cancel the safety lock: 1. Unlock the door and open it from the outside.
2. Move the lever rearward to unlock. Do the same for the
other door.
Doors
Trunk
{Warning
Exhaust gases can enter the
vehicle if it is driven with the
liftgate, trunk/hatch open, or with
any objects that pass through the
seal between the body and the
trunk/hatch or liftgate. Engine
exhaust contains carbon
monoxide (CO) which cannot be
seen or smelled. It can cause
unconsciousness and even death.
If the vehicle must be driven with
the liftgate, or trunk/hatch open:
. Close all of the windows.
. Fully open the air outlets on
or under the instrument
panel.
. Adjust the climate control
system to a setting that
brings in only outside air
and set the fan speed to the
(Continued)
Page 50 of 404
Chevrolet Cruze Owner Manual (GMNA-Localizing-U.S./Canada/Mexico-
11348462) - 2018 - crc - 5/15/17
Keys, Doors, and Windows 49
Warning (Continued)
highest setting. See
“Climate Control Systems”
in the Index.
. If the vehicle has a power
liftgate, disable the power
liftgate function.
For more information about
carbon monoxide, see Engine
Exhaust 0217.
To open the trunk, the vehicle must
be off or stopped with the parking
brake applied for manual
transmissions, or with the shift lever
in P (Park) for automatic
transmissions.
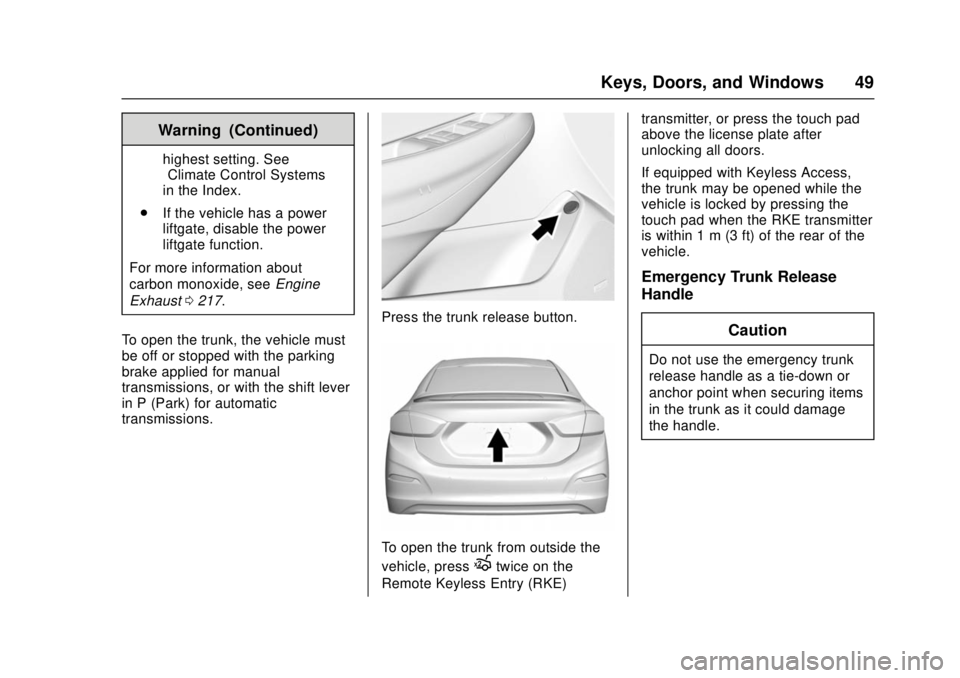
Press the trunk release button.
To open the trunk from outside the
vehicle, press
Xtwice on the
Remote Keyless Entry (RKE) transmitter, or press the touch pad
above the license plate after
unlocking all doors.
If equipped with Keyless Access,
the trunk may be opened while the
vehicle is locked by pressing the
touch pad when the RKE transmitter
is within 1 m (3 ft) of the rear of the
vehicle.
Emergency Trunk Release
Handle
Caution
Do not use the emergency trunk
release handle as a tie-down or
anchor point when securing items
in the trunk as it could damage
the handle.
Page 51 of 404
Chevrolet Cruze Owner Manual (GMNA-Localizing-U.S./Canada/Mexico-
11348462) - 2018 - crc - 5/15/17
50 Keys, Doors, and Windows
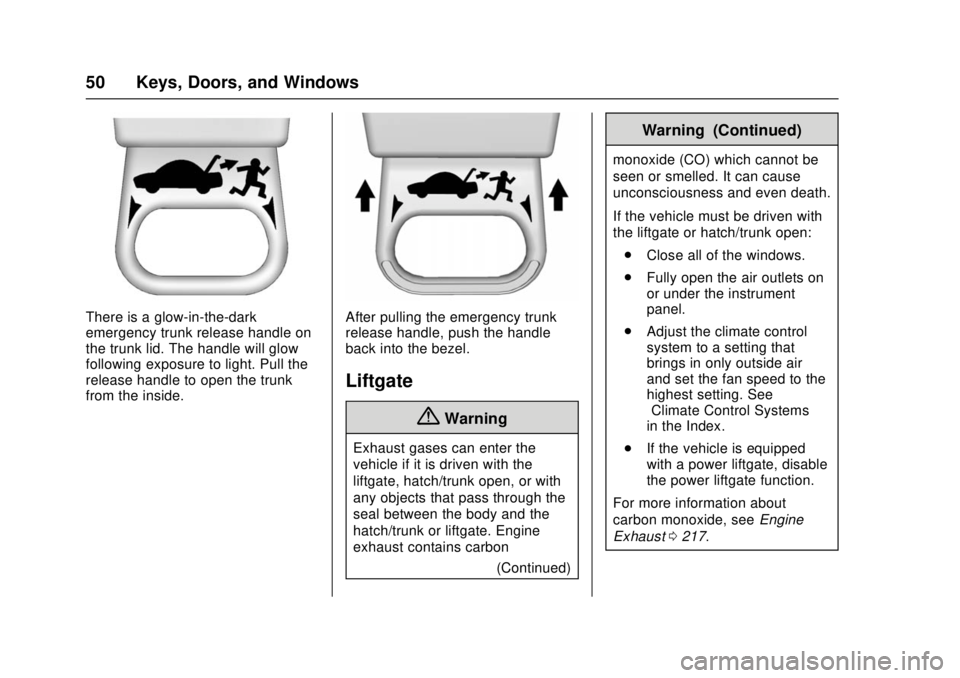
There is a glow-in-the-dark
emergency trunk release handle on
the trunk lid. The handle will glow
following exposure to light. Pull the
release handle to open the trunk
from the inside.After pulling the emergency trunk
release handle, push the handle
back into the bezel.
Liftgate
{Warning
Exhaust gases can enter the
vehicle if it is driven with the
liftgate, hatch/trunk open, or with
any objects that pass through the
seal between the body and the
hatch/trunk or liftgate. Engine
exhaust contains carbon(Continued)
Warning (Continued)
monoxide (CO) which cannot be
seen or smelled. It can cause
unconsciousness and even death.
If the vehicle must be driven with
the liftgate or hatch/trunk open:
. Close all of the windows.
. Fully open the air outlets on
or under the instrument
panel.
. Adjust the climate control
system to a setting that
brings in only outside air
and set the fan speed to the
highest setting. See
“Climate Control Systems”
in the Index.
. If the vehicle is equipped
with a power liftgate, disable
the power liftgate function.
For more information about
carbon monoxide, see Engine
Exhaust 0217.
Page 53 of 404
Chevrolet Cruze Owner Manual (GMNA-Localizing-U.S./Canada/Mexico-
11348462) - 2018 - crc - 5/15/17
52 Keys, Doors, and Windows
On Solid :Vehicle is secured
during the delay to arm the system.
Fast Flash : Vehicle is unsecured.
A door, the hood, or the trunk
is open.
Slow Flash : Alarm system is
armed.
Arming the Alarm System
1. Close the trunk and the hood. Turn off the vehicle.
2. Lock the vehicle in one of three ways:
.Use the RKE transmitter.
. Use the Keyless Access
system, if equipped.
. With a door open, press the
interior
Q.
3. After 30 seconds the alarm system will arm, and the
indicator light will begin to
slowly flash indicating the
alarm system is operating.
Pressing
Qon the RKE
transmitter a second time will bypass the 30-second delay
and immediately arm the alarm
system.
The vehicle alarm system will not
arm if the doors are locked with
the key.
If the driver door is opened without
first unlocking with the RKE
transmitter, the horn will chirp and
the lights will flash to indicate
pre-alarm. If the vehicle is not
started, or the door is not unlocked
by pressing
Kon the RKE
transmitter during the 10-second
pre-alarm, the alarm will be
activated.
If a door, the hood, or the trunk is
opened without first disarming the
system, the turn signals will flash
and the horn will sound for about
30 seconds. The alarm system will
then re-arm to monitor for the next
unauthorized event.
Disarming the Alarm System
Do one of the following to disarm
the alarm system or turn off the
alarm if it has been activated: .
Press
Kon the RKE transmitter.
. Unlock the vehicle using the
Keyless Access system,
if equipped.
. Start the vehicle.
To avoid setting off the alarm by
accident:
. Lock the vehicle after all
occupants have left the vehicle
and all doors are closed.
. Always unlock a door with the
RKE transmitter or use the
Keyless Access system,
if equipped.
Unlocking the driver door with the
key will not disarm the system or
turn off the alarm.
How to Detect a Tamper
Condition
IfKis pressed on the RKE
transmitter and the horn chirps and
the lamps flash three times, an
alarm occurred previously while the
alarm system was armed.
If the alarm has been activated, a
message will appear on the DIC.
Page 101 of 404

Chevrolet Cruze Owner Manual (GMNA-Localizing-U.S./Canada/Mexico-
11348462) - 2018 - crc - 5/15/17
100 Seats and Restraints
If you are using a dual
tether in the center
seating position, or the
rear outboard head
restraint has been
removed, route the dual
tether over the seatback.
3. Before placing a child in the child restraint, make sure it is
securely held in place. To
check, grasp the child restraint
at the LATCH path and attempt
to move it side to side and
back and forth. There should
be no more than 2.5 cm (1 in) of
movement, for proper
installation.
Head Restraint Removal and
Reinstallation
The rear outboard head restraints
can be removed if they interfere with
the proper installation of the child
restraint.
To remove the head restraint:
1. Partially fold the seatback forward. See Rear Seats066
for additional information.
2. Press both buttons on the head restraint posts at the same
time, and pull up on the head
restraint. 3. Store the head restraint in the
trunk of the vehicle or in a
secure place.
4. When the child restraint is removed, reinstall the head
restraint before the seating
position is used.
{Warning
With head restraints that are not
installed and adjusted properly,
there is a greater chance that
occupants will suffer a neck/
spinal injury in a crash. Do not
drive until the head restraints for
all occupants are installed and
adjusted properly.
Page 257 of 404
Chevrolet Cruze Owner Manual (GMNA-Localizing-U.S./Canada/Mexico-
11348462) - 2018 - crc - 5/15/17
256 Driving and Operating
Caution
If a new fuel cap is needed, be
sure to get the right type of cap
from your dealer. The wrong type
of fuel cap may not fit properly,
may cause the malfunction
indicator lamp to light, and could
damage the fuel tank and
emissions system. See
Malfunction Indicator Lamp
(Check Engine Light)0130.
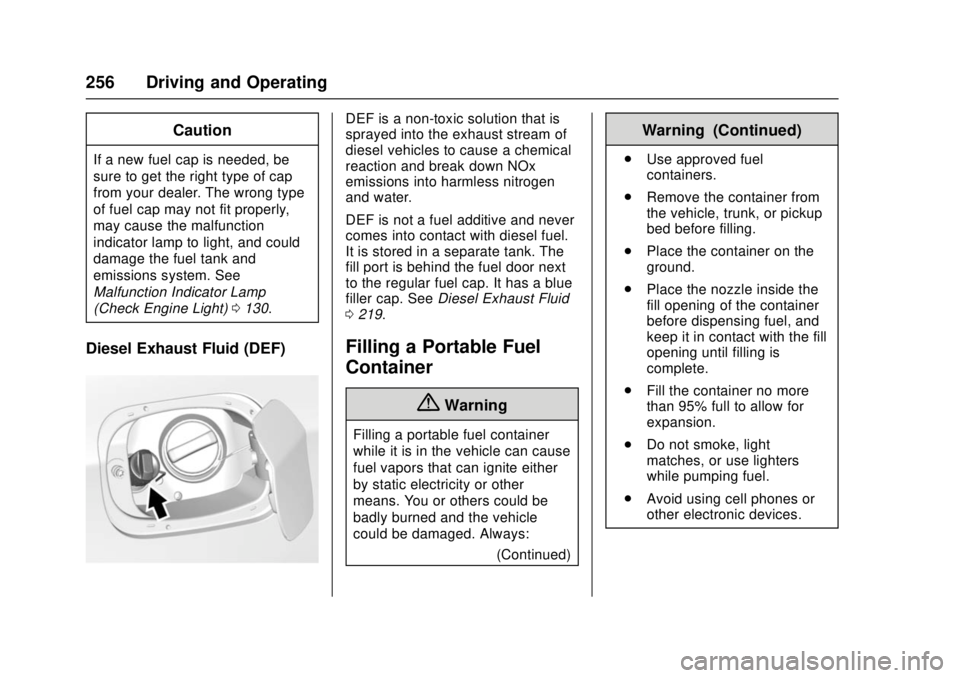
Diesel Exhaust Fluid (DEF)
DEF is a non-toxic solution that is
sprayed into the exhaust stream of
diesel vehicles to cause a chemical
reaction and break down NOx
emissions into harmless nitrogen
and water.
DEF is not a fuel additive and never
comes into contact with diesel fuel.
It is stored in a separate tank. The
fill port is behind the fuel door next
to the regular fuel cap. It has a blue
filler cap. See Diesel Exhaust Fluid
0 219.
Filling a Portable Fuel
Container
{Warning
Filling a portable fuel container
while it is in the vehicle can cause
fuel vapors that can ignite either
by static electricity or other
means. You or others could be
badly burned and the vehicle
could be damaged. Always:
(Continued)
Warning (Continued)
.Use approved fuel
containers.
. Remove the container from
the vehicle, trunk, or pickup
bed before filling.
. Place the container on the
ground.
. Place the nozzle inside the
fill opening of the container
before dispensing fuel, and
keep it in contact with the fill
opening until filling is
complete.
. Fill the container no more
than 95% full to allow for
expansion.
. Do not smoke, light
matches, or use lighters
while pumping fuel.
. Avoid using cell phones or
other electronic devices.
Page 284 of 404
Chevrolet Cruze Owner Manual (GMNA-Localizing-U.S./Canada/Mexico-
11348462) - 2018 - crc - 5/15/17
Vehicle Care 283
3. Remove the wiper blade fromthe blade assembly.
It may require extra effort to
remove the old blade.
4. Reverse Steps 1–3 to install the new blade.
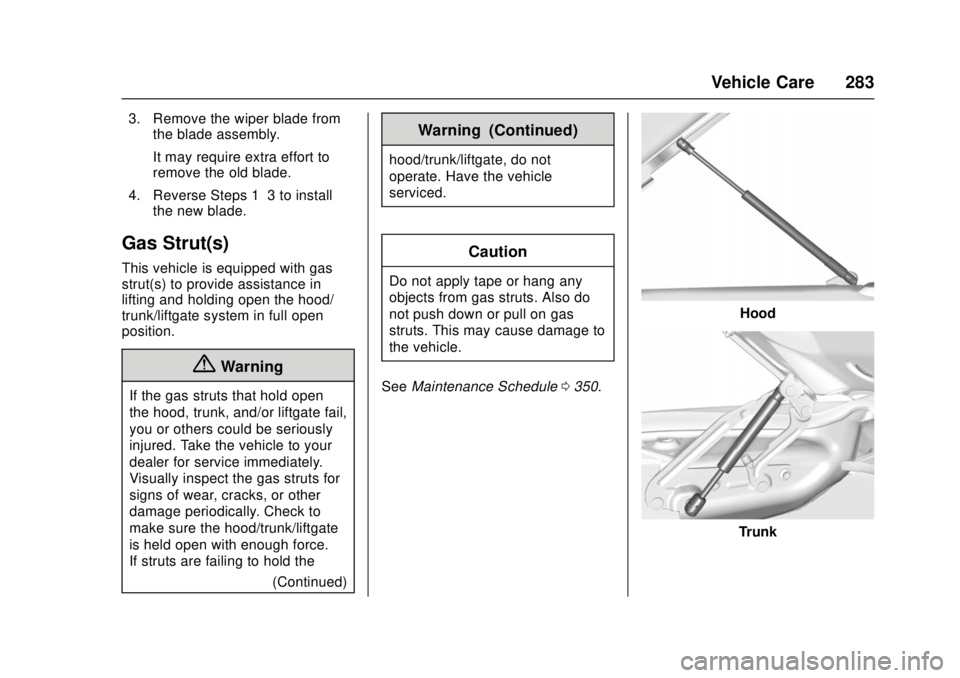
Gas Strut(s)
This vehicle is equipped with gas
strut(s) to provide assistance in
lifting and holding open the hood/
trunk/liftgate system in full open
position.
{Warning
If the gas struts that hold open
the hood, trunk, and/or liftgate fail,
you or others could be seriously
injured. Take the vehicle to your
dealer for service immediately.
Visually inspect the gas struts for
signs of wear, cracks, or other
damage periodically. Check to
make sure the hood/trunk/liftgate
is held open with enough force.
If struts are failing to hold the
(Continued)
Warning (Continued)
hood/trunk/liftgate, do not
operate. Have the vehicle
serviced.
Caution
Do not apply tape or hang any
objects from gas struts. Also do
not push down or pull on gas
struts. This may cause damage to
the vehicle.
See Maintenance Schedule 0350.
Hood
Trunk
Page 287 of 404
Chevrolet Cruze Owner Manual (GMNA-Localizing-U.S./Canada/Mexico-
11348462) - 2018 - crc - 5/15/17
286 Vehicle Care
3. For the passenger side,disengage the air cleaner, and
push it aside to allow easier
access to the bulb cover.
4. Remove the bulb cover by turning counterclockwise.
5. Remove the bulb socket from the headlamp assembly by
turning counterclockwise.
6. Remove the bulb socket from the plug connector.
7. Attach the new bulb socket to the plug connector.
8. Install the bulb socket from the headlamp assembly by turning
clockwise.
9. Install the bulb cover by turning clockwise.
10. For the driver side, reinstall the windshield washer bottle filler
neck by firmly pushing it
straight into the bottle and
reattaching it to the tie bar.
11. For the passenger side, reattach the air cleaner.Turn Signal Lamp
1. Open the hood. See Hood
0 261.
2. For the driver side bulb, remove the windshield washer
bottle filler neck by unclipping it
from the tie bar and firmly
pulling it straight up and out of
the bottle.
3. Remove the bulb socket by turning counterclockwise.
4. Remove the bulb from the socket by pulling it straight out.
5. Install the new bulb by pushing it into the bulb socket.
6. Install the bulb socket to the headlamp assembly by turning
clockwise.
7. For the driver side, reinstall the windshield washer bottle filler
neck by firmly pushing it
straight into the bottle and
reattaching it to the tie bar.
Taillamps and Back-Up
Lamps
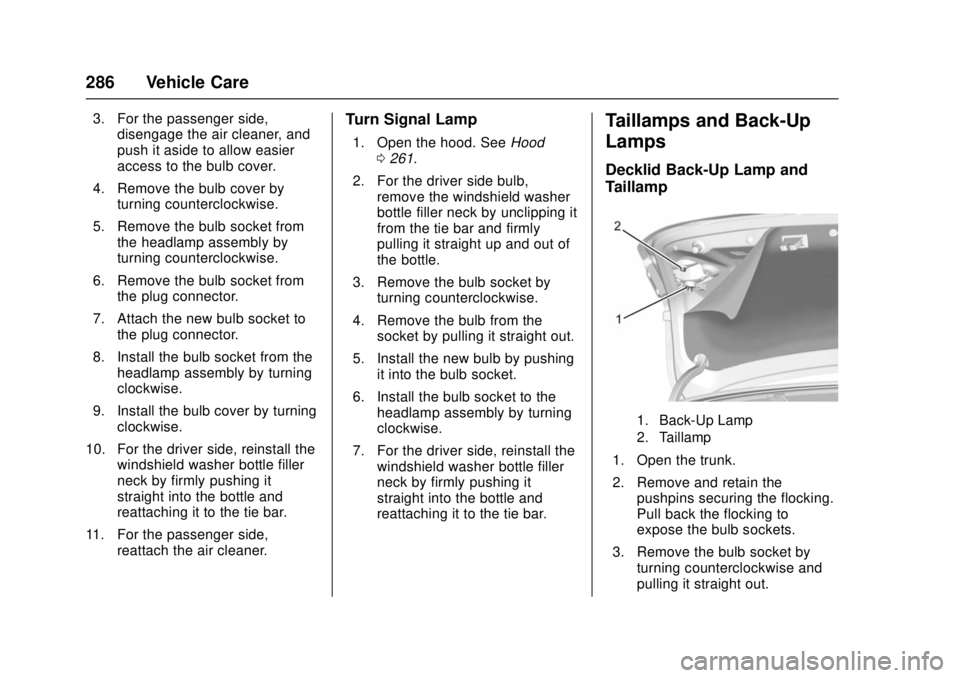
Decklid Back-Up Lamp and
Taillamp
1. Back-Up Lamp
2. Taillamp
1. Open the trunk.
2. Remove and retain thepushpins securing the flocking.
Pull back the flocking to
expose the bulb sockets.
3. Remove the bulb socket by turning counterclockwise and
pulling it straight out.