2018 Alfa Romeo Stelvio change time
[x] Cancel search: change timePage 8 of 276

HOW TO USE THIS MANUAL
Operating Instructions
Each time an instruction is given that concerns direction (left/right or forward/backward), it is written to be read from the
perspective of an occupant in the driver's seat. If a direction is written from a different perspective, it will be specified as such in the
text as appropriate.
The figures in the manual are only examples: this might imply that some details of the image do not correspond to the actual
arrangement of your vehicle.
To identify the chapter with the information necessary, you can consult the index at the end of this manual.
Chapters can be rapidly identified with dedicated graphic tabs, located at the side of each odd page. There is also a key for getting to
know the chapter order and the relevant symbols in the tabs. Additionally, there is a textual indication of each current chapter at the
side of each even page.
Warnings And Cautions
While reading this Owner’s Manual you will find a series ofWARNINGSthat must be carefully followed to prevent incorrect use of the
components of the vehicle, which could cause accidents or injuries.
There are also CAUTIONSto prevent procedures that could damage your vehicle.
Therefore all WARNINGSandCAUTIONS must always be carefully followed.
WARNINGS andCAUTIONS are recalled in the text with the following symbols:
Personal Safety:
Vehicle Safety:
Note: This Owner’s Manual describes all vehicle models. Optional equipment meant for specific markets or particular models
are not identified as such in the text: you need to consider only the information related to the model you own. Any content
introduced throughout the production of the model, outside the specific request of options at the time of purchase, will be
identified by the indicator: — if equipped.
The data contained in this publication is intended to help you use your vehicle in the best possible way. FCA US LLC aims for
constant improvement of the vehicles produced. For this reason, it reserves the right to make changes to the model described
for technical and/or commercial reasons.
For further information, contact your authorized dealer.
Page 29 of 276

System Activation/Deactivation
The Passive Entry system can be
activated or deactivated using the
Information and Entertainment System.
General Information
The following regulatory statement
applies to all radio frequency (RF)
devices equipped in this vehicle:
This device complies with Part 15 of the
FCC Rules and with Industry Canada
license-exempt RSS standard(s).
Operation is subject to the following two
conditions:
1. This device may not cause harmful
interference, and
2. This device must accept any
interference received, including
interference that may cause undesired
operation.
Note:Changes or modifications not
expressly approved by the party
responsible for compliance could void the
user’s authority to operate the
equipment.
Power Lock
The power lock is a safety device that
prevents the operation of the interior
door handles and the door lock and
unlock buttons. The power lock also
prevent opening of the doors from inside
the passenger compartment.
It is recommended to lock the vehicle
doors each time the vehicle is parked.
Activating The Power Lock
The power lock is enabled on all the doors
by quickly pushing the lock button on the
key fob twice.
The turn signals will flash to let you know
that the power lock is active.
If one or more of the doors are not closed
correctly, the power lock will not activate,
preventing a person from getting stuck
inside the passenger compartment by
entering the vehicle, and then closing, the
open door.
Deactivating The Power Lock
The power lock disengages
automatically:
When the doors are unlocked, pushing
the unlock button on the key fob.
When the keyless ignition is placed in
the ON position.
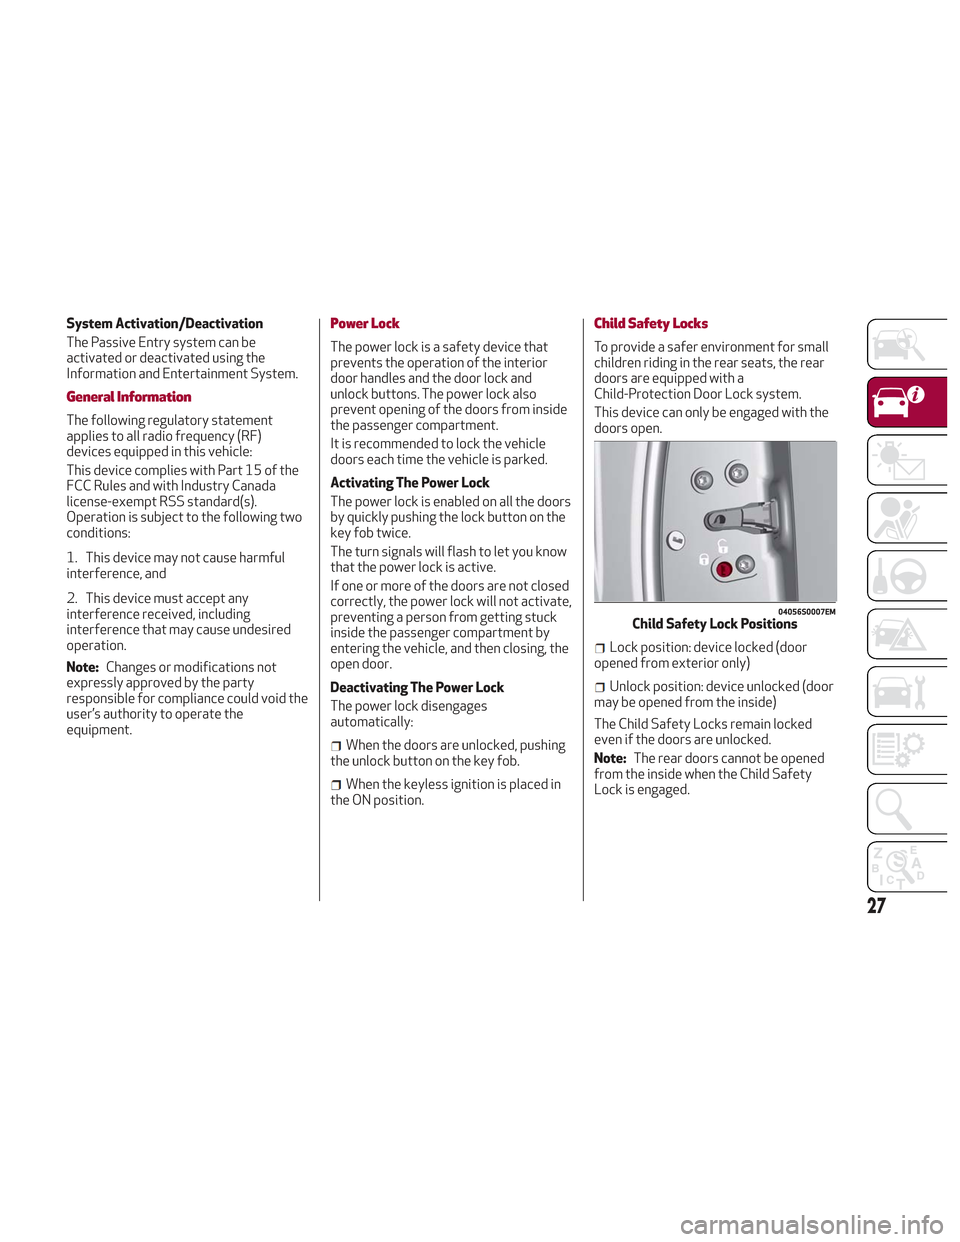
Child Safety Locks
To provide a safer environment for small
children riding in the rear seats, the rear
doors are equipped with a
Child-Protection Door Lock system.
This device can only be engaged with the
doors open.
Lock position: device locked (door
opened from exterior only)
Unlock position: device unlocked (door
may be opened from the inside)
The Child Safety Locks remain locked
even if the doors are unlocked.
Note: The rear doors cannot be opened
from the inside when the Child Safety
Lock is engaged.
04056S0007EMChild Safety Lock Positions
27
Page 43 of 276

Automatic High Beam Headlights — If
Equipped
The Automatic High Beam Headlights
system provides increased forward
lighting at night by automating high beam
control through the use of a digital
camera mounted on the windshield. This
camera detects vehicle specific light and
automatically turns from high beams to
low beams until the approaching vehicle
is out of view.
This function is enabled with the
Information and Entertainment System,
and can only be activated with the light
switch turned to the
(auto) position.
If the high beam headlights are on, the
blue icon/warning light
will illuminate
in the instrument panel.
When the speed is higher than 37 mph
(60 km/h) and the function is active, the
lights will turn off if the multifunction
lever is pushed again.
When the speed is lower than 15 mph
(25 km/h) and the function is active, the
function turns the high beam headlights
off.
If the high beam headlights are operated
again (pushing the multifunction lever
towards the instrument panel), the
warning light/icon
will illuminate in the
instrument panel, and the main beam
headlights only will be on until the speed
exceeds 37 mph (60 km/h).
When the speed of 37 mph (60 km/h) is
exceeded again, the automatic
functioning is reactivated. If the multifunction lever is pushed again
with the Automatic High Beam
Headlights activated, the function
deactivates.
This feature can also be deactivated by
rotating the headlight switch to the
position.
Note: If the system recognizes heavy
traffic areas, the automatic functions
remain disabled independently of the
vehicle’s speed.
Turn Signals
To activate the turn signals, move the
multifunction lever, located on the left
side of the steering wheel, up or down
until it reaches the detent. Moving the
lever upward flashes the right turn signal
and moving the lever downward will flash
the left turn signal.
The
orturn signal will blink on the
instrument panel.
The turn signals turn off automatically
when the vehicle is brought back onto a
straight course.
“Lane Change” Function
Tap the lever up or down once, without
moving beyond the detent, and the turn
signal (right or left) will flash five times.
Then, the turn signal (right or left) will
automatically turn off.
To turn off the flashing before the end of
the cycle, move the lever in the opposite
direction until the first click (about half
way).
INTERIOR LIGHTS
Front Map Reading Lights
The front map/reading and overhead
lights are mounted in the overhead
console. Each light can be turned on by
pushing the corresponding switch on the
console. These switches are backlit for
night time visibility. To turn the lights off,
push the switch a second time.
04136S0001EMOverhead Console
1 — Driver’s Reading/Map Light Switch
2 — Rear Overhead Lights Switch
3 — Overhead Lights Switch
4 — Overhead Lights On/Off When
Doors Open
5 — Passenger’s Reading/Map Light
Switch
6 — Passenger’s Reading/Map Light
7 — Center Reading/Map Light
8 — Driver’s Reading/Map Light
41
Page 51 of 276

Description
The Automatic Dual Zone Climate
Control System adjusts the temperature
and air distribution independently
between the driver and passenger.
The system maintains the set
temperature inside the passenger
compartment and compensates for
outside temperature change.
Note:The reference temperature is 72
°F (22 °C) for optimal comfort
management.
The automatic setting will adjust the
following to maintain comfort within the
passenger compartment:
Air temperature from the driver/front
passenger side vents
Air distribution from the driver/front
passenger side vents
Fan speed (continuous variation of the
air flow)
Compressor variations (for
cooling/dehumidifying the air)
Air recirculation
The Climate Control System can also be
operated manually by using the buttons
and knobs on the faceplate. Manual selections will override the
automatic settings, which are stored until
the AUTO button is pushed. If the system
intervenes for safety reasons, the
automatic setting will take control of the
system.
The below operations will not deactivate
the automatic (AUTO) function:
Air Recirculation activation/
deactivation
A/C activation/deactivation
SYNC function activation
Rear Window Defrost activation/
deactivation
When in AUTO mode, the vehicle’s
internal temperature is controlled
according to the set temperature.
The following can be manually set or
adjusted:
Driver/passenger air temperature
Blower speed (continuous variation)
Air distribution (seven positions for
driver and passenger)
A/C activation
Front Defroster
Air recirculation
Rear Defroster
System deactivation
Operating Mode
The Climate Control system can be
activated in different ways. It is
recommended to use the automatic
function. Push the AUTO button and set
the desired temperatures.
The automatic system adjusts the
temperature, quantity, and distribution
of air introduced into the passenger
compartment. It also controls air
recirculation and the activation of the air
conditioner.
At any time during automatic operation,
you can change the temperature, activate
or deactivate the Rear Defroster,
activate SYNC, activate or deactivate
the air conditioner, and activate or
deactivate air recirculation. The system
will automatically adjust to the new
settings.
49
Page 52 of 276

Climate Control Display Settings
The Climate Control settings are visible
on the Information and Entertainment
System radio screen.
The display on the Information and
Entertainment System is a pop up
window (1), which is activated by pushing
the buttons or turning the knobs on the
Climate Control system. The indicator
lights located on the buttons and knobs
indicate that the selected feature is
on/off. If no operation is performed for a
predetermined time, the pop-up will close
on the display.
Air Temperature Adjustment
Rotate the driver or passenger
Temperature Adjustment Knob clockwise
for warmer temperatures or
counterclockwise for cooler
temperatures. The set temperatures are
shown on the Information and
Entertainment System.
Push the SYNC button to sync the driver
and passenger air temperatures.
Rotate the passenger Temperature
Adjustment Knob to cancel the SYNC
function. This will set a new passenger
side temperature.
Rotate the Temperature Adjustment
Knob fully clockwise to engage the HI
(maximum heating) setting or fully
counterclockwise to engage the LO
(maximum cooling) setting. To deactivate
these functions, rotate the Temperature
Adjustment Knob to the desired
temperature.
Rear passengers’ temperature is linked
to driver side selection.
Air Distribution Selection
Push the Air Distribution Selection
button on the faceplate to change the
mode of air distribution. The follow
selectable option are explained below:
Air flow to the windshield and
demister window vents to
demist/defrost them.
Air flow at the central and side
dashboard vents to ventilate the
chest and the face.
Air flow to the front and rear floor
vents. This setting heats the
passenger compartment the
quickest.
Air flow distributed between the
floor vents (hotter air) and the
central and side dashboard vents
(cooler air). This air distribution
setting is useful on sunny days
during spring and autumn.
Air flow distributed between the
floor vents, windshield, and front
side window defrosting/demisting
vents. This distribution setting
warms the passenger compartment
while preventing the windows from
fogging up.0521128655USClimate Control Display Settings
1 — Climate Control Pop-up Display
50
GETTING TO KNOW YOUR VEHICLE
Page 54 of 276

In automatic operation, air recirculation
will be controlled by the system
according to outside environmental
conditions.
Note:
With the AQS function active and
after the internal air recirculation
system has been functioning for a set
amount of time, the Climate Control
System enables air intake to cycle the
air in the passenger compartment for a
set time. The AQS function is disabled
during the air changes.
The engagement of the recirculation
system makes it possible to reach the
required heating or cooling conditions
faster. It is, however, inadvisable to use
it on rainy/cold days as it can increase
the possibility of the windows fogging.
When the outside temperature is low,
recirculation is forced off to prevent the
windows from fogging up.
A/C Compressor
Push the A/C button or theicon to
activate or deactivate the A/C
compressor (indicator illuminated when
activated). The A/C compressor will
remain off even after the engine has
stopped. When the A/C compressor is turned off,
the system deactivates air recirculation
to prevent the windows from fogging up.
If the climate control system can
maintain the temperature, with the A/C
turned off, the AUTO feature will remain
on and the AUTO button indicator light
will not switch off.
To restore automatic control of the A/C
compressor, push the A/C button or the
icon or the AUTO button. With the A/C
compressor off, the air speed can be set
manually using the Air Speed Adjustment
Knob.
When the A/C compressor is on, and the
engine is running, air speed cannot be
lower than the minimum speed (only one
indicator light is lit).
Note: When the A/C is off, the Climate
Control system can not produce air that
is colder than the current outside
temperature. Under certain
environmental conditions, windows could
fog up rapidly since the air is not
dehumidified.
Front Defroster And MAX-DEF
Function
Push the Front Defroster button(indicator illuminated) to defrost the
windshield and side windows.
While in MAX-DEF function, the air
conditioner will:
Activate the air conditioner
compressor when the weather allows
Turn air recirculation off
Set the maximum air temperature (HI)
on both the driver and passenger side
Activate a blower speed based on the
temperature of the engine coolant
Adjust the air flow towards the
windshield and front side windows
Activate the Rear Window Defroster
Display the fan speed (indicators
illuminated) and current air distribution
setting
Note: The MAX-DEF function remains
active for approximately three minutes
once the engine coolant reaches the
proper temperature.
When the function is on, AUTO mode will
deactivate. The only manual operations
possible are adjusting blower speed and
turning off the Rear Window Defroster.
Pushing the
button switches off the
MAX-DEF function.
Rear Defroster
Push the Rear Defrosterbutton to
activate (indicators illuminated) the Rear
Defroster.
The Rear Defroster will turn off after
20 minutes or once the engine is turned
off. To reactive the Rear Defroster, push
the Rear Defroster
button.
Note: To avoid damage, do not apply
stickers over the interior heating
filaments of the Rear Defroster.
52
GETTING TO KNOW YOUR VEHICLE
Page 78 of 276

in the door jamb stating what the mileage
was before the repair or service. It is a
good idea for you to make a record of the
odometer reading before the
repair/service, so that you can be sure
that it is properly reset, or that the door
jamb sticker is accurate if the odometer
must be reset at zero.
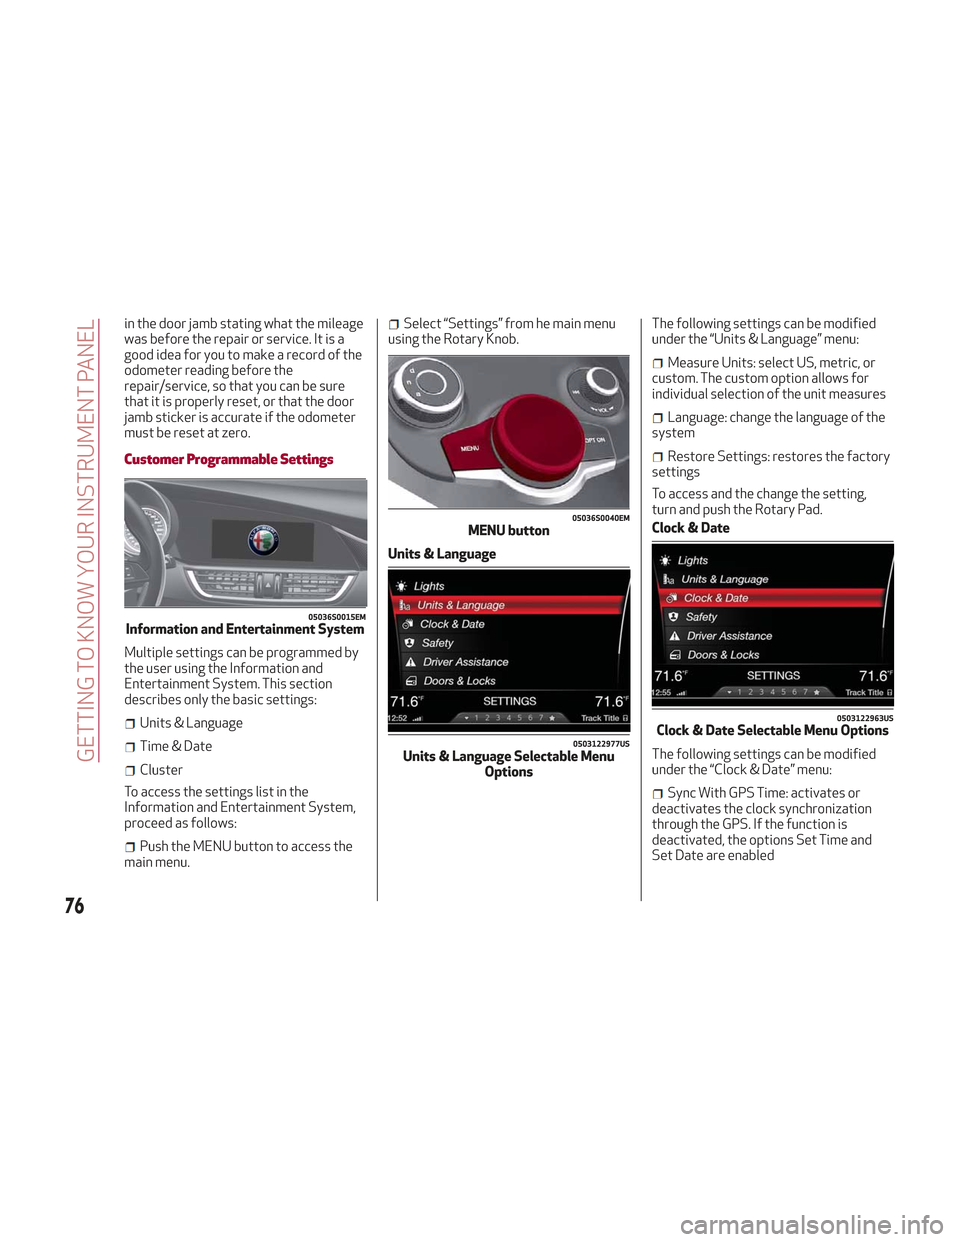
Customer Programmable Settings
Multiple settings can be programmed by
the user using the Information and
Entertainment System. This section
describes only the basic settings:
Units & Language
Time & Date
Cluster
To access the settings list in the
Information and Entertainment System,
proceed as follows:
Push the MENU button to access the
main menu.
Select “Settings” from he main menu
using the Rotary Knob.
Units & Language The following settings can be modified
under the “Units & Language” menu:
Measure Units: select US, metric, or
custom. The custom option allows for
individual selection of the unit measures
Language: change the language of the
system
Restore Settings: restores the factory
settings
To access and the change the setting,
turn and push the Rotary Pad.
Clock & Date
The following settings can be modified
under the “Clock & Date” menu:
Sync With GPS Time: activates or
deactivates the clock synchronization
through the GPS. If the function is
deactivated, the options Set Time and
Set Date are enabled
05036S0015EMInformation and Entertainment System
05036S0040EMMENU button
0503122977USUnits & Language Selectable Menu Options
0503122963USClock & Date Selectable Menu Options
76
GETTING TO KNOW YOUR INSTRUMENT PANEL
Page 79 of 276

Set Time: set the time manually
Time Format: set the time format to
either a 12-hour and a 24-hour clock)
Set Date: set the date manually
Restore Settings: restores the factory
settings
To access and the change the setting,
turn and push the Rotary Pad.
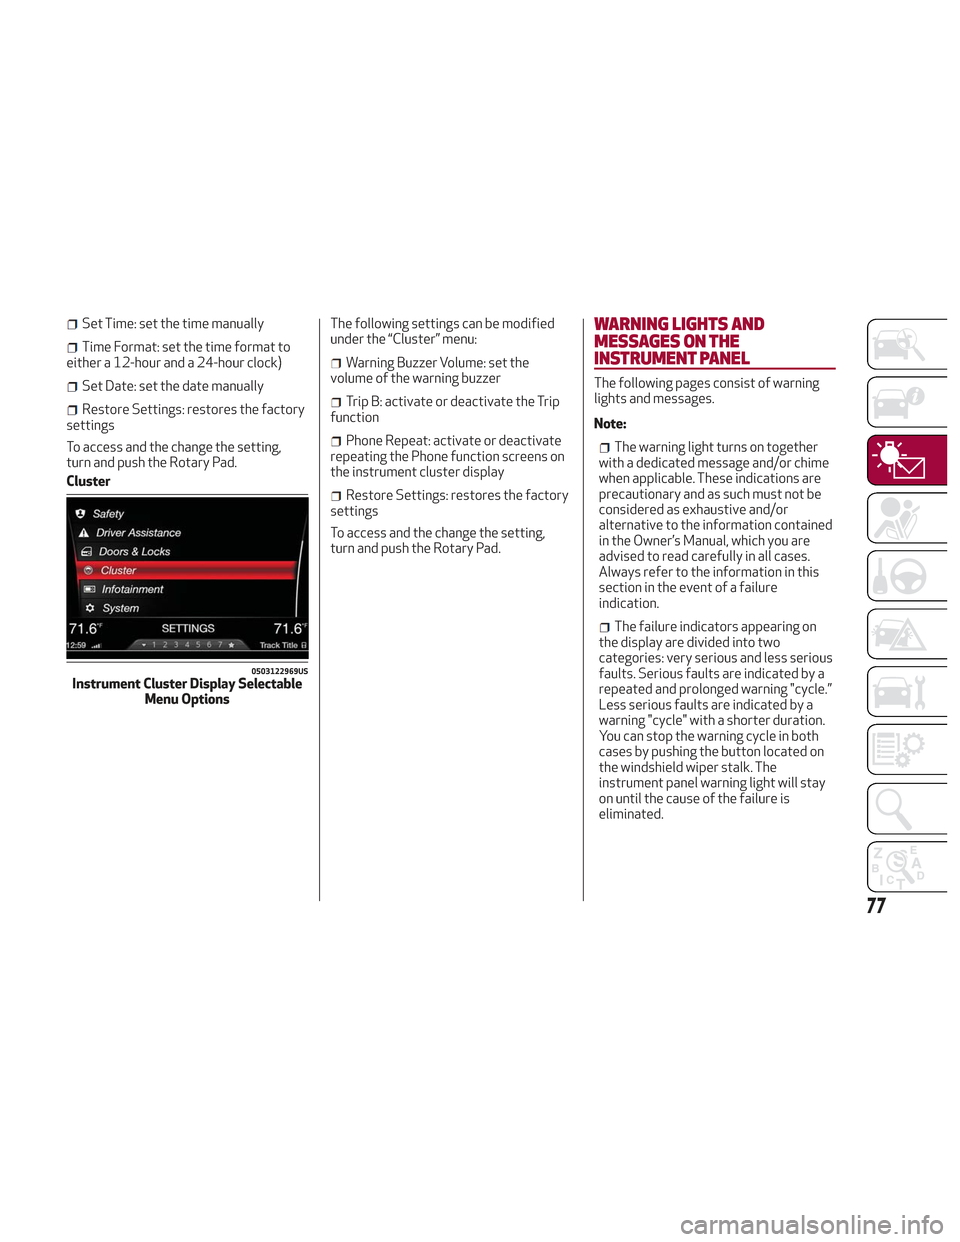
Cluster The following settings can be modified
under the “Cluster” menu:
Warning Buzzer Volume: set the
volume of the warning buzzer
Trip B: activate or deactivate the Trip
function
Phone Repeat: activate or deactivate
repeating the Phone function screens on
the instrument cluster display
Restore Settings: restores the factory
settings
To access and the change the setting,
turn and push the Rotary Pad.
WARNING LIGHTS AND
MESSAGES ON THE
INSTRUMENT PANEL
The following pages consist of warning
lights and messages.
Note:
The warning light turns on together
with a dedicated message and/or chime
when applicable. These indications are
precautionary and as such must not be
considered as exhaustive and/or
alternative to the information contained
in the Owner’s Manual, which you are
advised to read carefully in all cases.
Always refer to the information in this
section in the event of a failure
indication.
The failure indicators appearing on
the display are divided into two
categories: very serious and less serious
faults. Serious faults are indicated by a
repeated and prolonged warning "cycle.”
Less serious faults are indicated by a
warning "cycle" with a shorter duration.
You can stop the warning cycle in both
cases by pushing the button located on
the windshield wiper stalk. The
instrument panel warning light will stay
on until the cause of the failure is
eliminated.
0503122969USInstrument Cluster Display Selectable Menu Options
77