Page 47 of 273

Seats, restraints45Airbag system
The airbag system consists of a
number of individual systems
depending on the scope of
equipment.
When triggered, the airbags inflate
within milliseconds. They also deflate
so quickly that it is often unnoticeable during the collision. When triggered
the high voltage system of the vehicle
is also deactivated.9 Warning
The airbag system deploys in an
explosive manner, repairs must be performed by skilled personnel
only.
9 Warning
Adding accessories that change
the vehicle's frame, bumper
system, height, front end or side
sheet metal, may keep the airbag
system from working properly. The operation of the airbag system can
also be affected by changing any
parts of the front seats, seat belts, airbag sensing and diagnostic
module, steering wheel,
instrument panel, inner door seals including the speakers, any of the
airbag modules, ceiling or pillar
trim, front sensors, side impact
sensors or airbag wiring.
Note
The airbag sensing and diagnostic module is located in the centre
console area. Do not put any
magnetic objects in this area.
Do not affix any objects onto the
airbag covers and do not cover them with other materials. Have damagedcovers replaced by a workshop.
Each airbag is triggered only once.
Have deployed airbags replaced by
a workshop. Furthermore, it may be
necessary to have the steering
wheel, the instrument panel, parts of
the panelling, the door seals,
handles and the seats replaced.
Do not make any modifications to
the airbag system as this will
invalidate the vehicle operating
permit.
Control indicator v for airbag systems
3 78.
Child restraint systems on front
passenger seat with airbag
systems
Warning according to ECE R94.02:
EN: NEVER use a rearward-facing
child restraint on a seat protected by
an ACTIVE AIRBAG in front of it;
DEATH or SERIOUS INJURY to the
CHILD can occur.
Page 53 of 273

Seats, restraints51Child restraints
Child restraint systems9 Danger
If using a rear-facing child restraint
system on the front passenger
seat, the airbag system for the
front passenger seat must be
deactivated. This also applies to certain forward-facing child
restraint systems as indicated in
the tables 3 53.
Airbag deactivation 3 49.
Airbag label 3 45.
We recommend a child restraint system which is tailored specifically to the vehicle. For further information,
contact your workshop.
When a child restraint system is being
used, pay attention to the following
usage and installation instructions
and also those supplied with the child
restraint system.
Always comply with local or national
regulations. In some countries, the
use of child restraint systems is
forbidden on certain seats.
Child restraint systems can be
fastened with:
● Three-point seat belt
● ISOFIX brackets
● Top-tether
Three-point seat belt
Child restraint systems can be
fastened by using a three-point seat
belt. Depending on the size of the
used child restraint systems, up to
three child restraint systems can be
attached to the rear seats. After
fastening the child restraint system
the seat belt has to be tightened
3 53.ISOFIX brackets
Fasten vehicle-approved ISOFIX
child restraint systems to the ISOFIX
mounting brackets. Specific vehicle
ISOFIX child restraint system
positions are marked in the ISOFIX
table 3 53.
ISOFIX mounting brackets are
indicated by a label on the backrest.
Either a Top-tether strap or a support leg must be used in addition to the
ISOFIX mounting brackets.
Top-tether anchors Top-tether anchors are marked with
the symbol : for a child seat.
Page 54 of 273

52Seats, restraints
In addition to the ISOFIX mounting
brackets, fasten the Top-tether strap
to the Top-tether anchors.
Remove the load compartment cover before mounting a child restraint
system, if required 3 60.
ISOFIX child restraint systems of
universal category positions are
marked in the table by IUF 3 53.
Selecting the right system The rear seats are the most
convenient location to fasten a child
restraint system.
Children should travel facing
rearwards in the vehicle as long as
possible. This makes sure that the child's backbone, which is still very
weak, is under less strain in the event
of an accident.
Suitable are restraint systems that
comply with valid UN ECE
regulations. Check local laws and
regulations for mandatory use of child restraint systems.
The following child restraints are
recommended for the following
weight classes:
● Group 0, Group 0+
Maxi Cosi Cabriofix with or
without ISOFIX base, for children
up to 13 kg.
● Group I
Duo Plus with ISOFIX and Top-
tether, for children from 9 kg to
18 kg.
● Group II, Group III
Kidfix XP with or without ISOFIX,
for children from 15 kg to 25 kg.
Graco Junior, for children
from 22 kg to 36 kg.Ensure that the child restraint system to be installed is compatible with the
vehicle type.
Ensure that the mounting location of
the child restraint system within the
vehicle is correct, see following
tables.
Allow children to enter and exit the
vehicle only on the side facing away
from the traffic.
When the child restraint system is not in use, secure the seat with a seat beltor remove it from the vehicle.
Note
Do not affix anything on the child
restraint systems and do not cover
them with any other materials.
A child restraint system which has
been subjected to stress in an
accident must be replaced.
Page 64 of 273

62StorageRoof rack systemRoof rackFor safety reasons and to avoid
damage to the roof, the vehicle
approved roof rack system is
recommended. For further
information contact your workshop.
Follow the installation instructions
and remove the roof rack when not in
use.
To fasten the roof rack, insert the
mounting bolts in the holes indicated
in the figure.
Loading information
● Heavy objects in the load compartment should be placed
against the seat backrests. Make
sure that the backrests are
securely engaged, i.e. no longer
showing the red markings near the release lever. If objects can
be stacked, heavier objects
should be placed at the bottom.
● Secure objects with lashing straps attached to lashing eyes3 61.
● Secure loose objects in the load
compartment to prevent themfrom sliding.
● When transporting objects in the load compartment, the backrestsof the rear seats must not be
angled forward.
● Do not allow the load to protrude above the upper edge of the
backrests.
● Do not place any objects on the load compartment cover or theinstrument panel, and do not
cover the sensor on top of the instrument panel.
● The load must not obstruct the operation of the pedals, parking
brake and selector lever, or
hinder the freedom of movement
of the driver. Do not place any
unsecured objects in the interior.
● Do not drive with an open load compartment.
Page 68 of 273

66Instruments and controlsThe recommended grip areas of the
steering wheel are heated quicker
and to a higher temperature than the
other areas.
Heating is operational after the
vehicle has been started.
Auto heated steering wheel
The heated steering wheel will turn on
automatically in remote start along
with the heated seats when it is cold
outside. The heated steering wheel
indicator light may not come on.
The heated steering wheel will not
switch on during a remote start unless the heated seat feature is enabled in
the vehicle settings.
Vehicle personalisation 3 91.Horn
Press j.
Pedestrian safety alert Pedestrian safety signal enables thedriver to alert people who may not
hear the vehicle approaching.
The automatic sound is generated to
indicate the vehicle presence to
pedestrians. The sound changes if the vehicle is speeding up or slowing
down. It is activated when the vehicle
is shifted into a forward gear or R, up
to 23 km/h.
This feature can be deactivated in the vehicle settings.
Vehicle personalisation 3 91.
Windscreen wiper and washerHI:fastLO:slowAUTO:automatic wiping with rain
sensorOFF:off
Page 71 of 273

Instruments and controls699Warning
The road surface may already be
icy even though the display
indicates a few degrees above
0 °C.
Clock
Date and time are shown in the
Info Display.
Info Display 3 85.
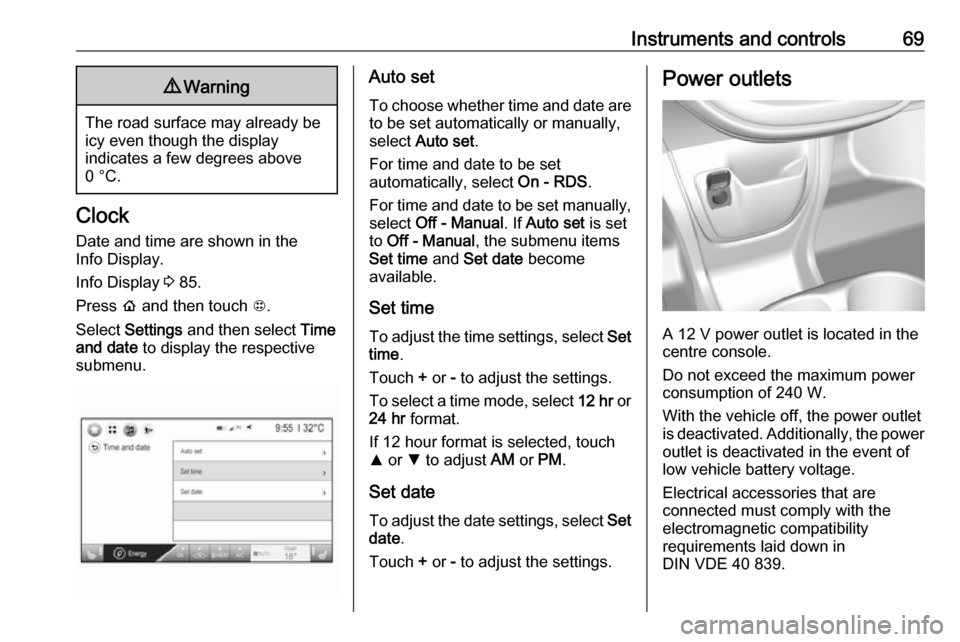
Press p and then touch 1.
Select Settings and then select Time
and date to display the respective
submenu.
Auto set
To choose whether time and date are to be set automatically or manually,
select Auto set .
For time and date to be set
automatically, select On - RDS.
For time and date to be set manually, select Off - Manual . If Auto set is set
to Off - Manual , the submenu items
Set time and Set date become
available.
Set time To adjust the time settings, select Set
time .
Touch + or - to adjust the settings.
To select a time mode, select 12 hr or
24 hr format.
If 12 hour format is selected, touch
R or S to adjust AM or PM .
Set date To adjust the date settings, select Set
date .
Touch + or - to adjust the settings.Power outlets
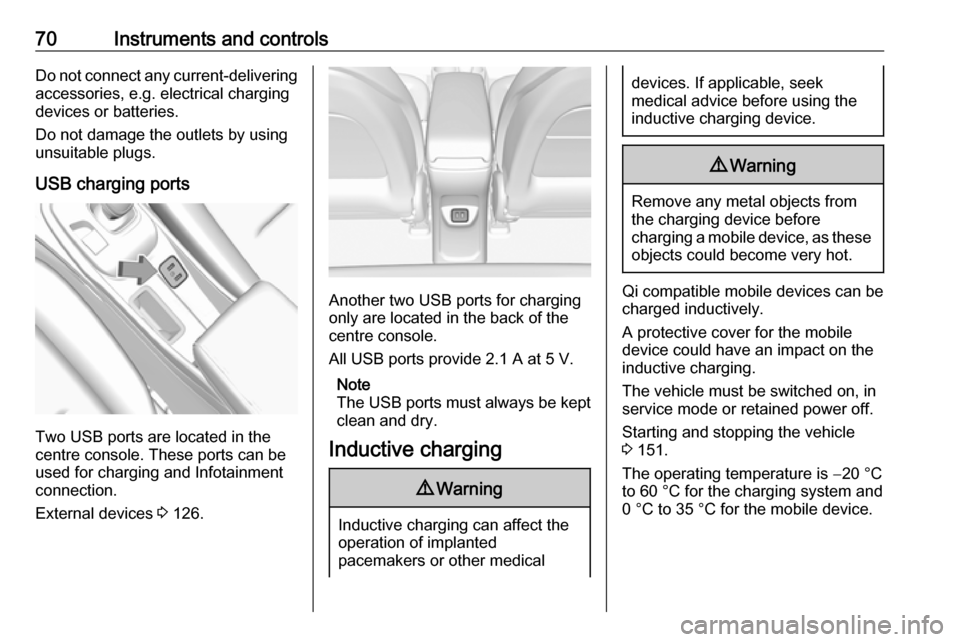
A 12 V power outlet is located in the
centre console.
Do not exceed the maximum power
consumption of 240 W.
With the vehicle off, the power outlet
is deactivated. Additionally, the power
outlet is deactivated in the event of
low vehicle battery voltage.
Electrical accessories that are
connected must comply with the
electromagnetic compatibility
requirements laid down in
DIN VDE 40 839.
Page 72 of 273

70Instruments and controlsDo not connect any current-delivering
accessories, e.g. electrical charging
devices or batteries.
Do not damage the outlets by using
unsuitable plugs.
USB charging ports
Two USB ports are located in the
centre console. These ports can be
used for charging and Infotainment
connection.
External devices 3 126.
Another two USB ports for charging
only are located in the back of the
centre console.
All USB ports provide 2.1 A at 5 V.
Note
The USB ports must always be kept clean and dry.
Inductive charging
9 Warning
Inductive charging can affect the
operation of implanted
pacemakers or other medical
devices. If applicable, seek
medical advice before using the
inductive charging device.9 Warning
Remove any metal objects from
the charging device before
charging a mobile device, as these objects could become very hot.
Qi compatible mobile devices can be
charged inductively.
A protective cover for the mobile
device could have an impact on the
inductive charging.
The vehicle must be switched on, in
service mode or retained power off.
Starting and stopping the vehicle
3 151.
The operating temperature is −20 °C
to 60 °C for the charging system and
0 °C to 35 °C for the mobile device.
Page 73 of 273
Instruments and controls71
To charge a mobile device:1. Remove all objects from the charging slot. The system may not
charge if there are any objects in
the charging slot.
2. With the mobile device screen facing the driver, slowly insert the
device into the charging slot until
0 is shown on the Info Display.
This indicates that the mobile
device is properly positioned and
could be charged.
If a device is inserted into the slot and
0 is not displayed, remove the mobile
device from the pocket, turn it 180°,
and wait 3 seconds before inserting the device into the slot again.