Page 57 of 116
For your safety – pre-operation checks
5-2
5
Control cables • Make sure that operation is smooth.
• Lubricate if necessary. 7-25
Wheels an d tires •Check for damage.
• Check tire condition and tread depth.
• Check air pressure.
• Correct if necessary. 7-19,
7-21
Brake levers • Make sure that operation is smooth.
• Lubricate lever pivoting points if necessary.
7-26
Centerstan d, si de-
stan d • Make sure that operation is smooth.
• Lubricate pivots if necessary.
7-27
Chassis fasteners • Make sure that all nuts, bolts and screws are properly
tightened.
• Tighten if necessary. —
Instruments, li ghts,
si gnals an d switches • Check operation.
• Correct if necessary.
—
Si destan d switch • Check operation of ignition circuit cut-off system.
• If system is not working correctly, have Yamaha dealer
check vehicle. 4-26
ITEM
CHECKSPAGE
UB74E0E0.book Page 2 Tuesday, May 2, 2017 1:04 PM
Page 58 of 116
Operation and important rid ing points
6-1
6
EAU15952
Read the Owner’s Manual carefully to
become familiar with all controls. If
there is a control or function you do not
understand, ask your Yamaha dealer.
WARNING
EWA10272
Failure to familiarize yourself with
the controls can lead to loss of con-
trol, which coul d cause an acci dent
or injury.
EAU78221
TIP
This model is equipped with a lean an-
gle sensor to stop the engine in case of
a turnover. In this case, the engine
trouble warning light will come on but
this is not a malfunction. Before re-
starting the engine, turn the main
switch off and then back on to reset the
engine trouble warning light. Failing to
do so will prevent the engine from
starting even though the engine will
crank when pushing the start switch.
UB74E0E0.book Page 1 Tuesday, May 2, 2017 1:04 PM
Page 59 of 116

Operation and important ri din g points
6-2
6
EAU78231
Startin g the eng ine
NOTICE
ECA10251
See pag e 6-5 for en gine break-in in-
structions prior to operatin g the ve-
hicle for the first time.
In order for the ignition circuit cut-off
system to enable starting, the side-
stand must be up. (See page 4-27.) 1. Turn the main switch on and make sure that the stop/run/start switch
is set to “ ”.
The following warning lights and
indicator lights should come on for
a few seconds, then go off.�z Engine trouble warning light
�z Traction control system indi-
cator light
�z Smart key system indicator
light
TIP
The ABS warning light should come on
and stay on until the vehicle reaches a
traveling speed of 10 km/h (6 mi/h) or
higher.
NOTICE
ECA22510
If a warnin g or in dicator li ght does
not work as d escribed a bove, see
pa ge 4-1 for the correspon din g
warnin g an d in dicator li ght circuit
check.
2. Close the throttle.
3. While applying the front or rear brake, push the “ ” side of the
stop/run/start switch. Release it
when the engine starts.
TIP
If the engine does not start, release the
start switch after 5 seconds. Before
pressing the start switch again, wait 10
seconds to allow battery voltage to re-
store.
NOTICE
ECA11043
For maximum en gine life, never ac-
celerate har d when the en gine is
col d!
UB74E0E0.book Page 2 Tuesday, May 2, 2017 1:04 PM
Page 60 of 116
Operation and important rid ing points
6-3
6
EAU45093
Startin g off
1. While pulling the rear brake lever
with your left hand and holding the
grab bar with your right hand,
push the scooter off the center-
stand.
2. Sit astride the seat, and then ad- just the rear view mirrors.
3. Switch the turn signals on.
4. Check for oncoming traffic, and then slowly turn the throttle grip
(on the right) in order to take off.
5. Switch the turn signals off.
EAU16782
Acceleration an d d eceleration
The speed can be adjusted by opening
and closing the throttle. To increase
the speed, turn the throttle grip in di-
rection (a). To reduce the speed, turn
the throttle grip in direction (b).
1. Grab bar
1
(b)
(a)
ZAUM0199
UB74E0E0.book Page 3 Tuesday, May 2, 2017 1:04 PM
Page 61 of 116
, otherwise the scooter
may ski d or")
Operation and important ri din g points
6-4
6
EAU16794
Brakin g
WARNING
EWA10301
�zAvoi d b rakin g har d or su ddenly
(especially when leanin g over to
one si de), otherwise the scooter
may ski d or overturn.
�z Railroa d crossin gs, streetcar
rails, iron plates on roa d con-
struction sites, an d manhole
covers become extremely slip-
pery when wet. Therefore, slow
d own when approachin g such
areas an d cross them with cau-
tion.
�z Keep in min d that b raking on a
wet roa d is much more difficult.
�z Ride slowly d own a hill, as brak-
in g d ownhill can be very d iffi-
cult.
1. Close the throttle completely.
2. Apply both front and rear brakes simultaneously while gradually in-
creasing the pressure.
EAU16821
Tips for re ducin g fuel con-
sumption
Fuel consumption depends largely on
your riding style. Consider the follow-
ing tips to reduce fuel consumption:
�z Avoid high engine speeds during
acceleration.
�z Avoid high engine speeds with no
load on the engine.
�z Turn the engine off instead of let-
ting it idle for an extended length
of time (e.g., in traffic jams, at traf-
fic lights or at railroad crossings).
UB74E0E0.book Page 4 Tuesday, May 2, 2017 1:04 PM
Page 62 of 116
. For
this reas")
Operation and important rid ing points
6-5
6
EAU16842
En gine break-in
There is never a more important period
in the life of your engine than the period
between 0 and 1600 km (1000 mi). For
this reason, you should read the fol-
lowing material carefully.
Since the engine is brand new, do not
put an excessive load on it for the first
1600 km (1000 mi). The various parts in
the engine wear and polish themselves
to the correct operating clearances.
During this period, prolonged full-throt-
tle operation or any condition that
might result in engine overheating
must be avoided.
EAU34323
0–1000 km (0–600 mi)
Avoid prolonged operation above 4500
r/min. NOTICE: After 1000 km (600
mi) of operation, be sure to replace
the en gine oil, final transmission oil
an d the oil filter element.
[ECA12932]
1000–1600 km (600–1000 mi)
Avoid prolonged operation above 5400
r/min.
1600 km (1000 mi) an d b eyon d
The vehicle can now be operated nor-
mally.
NOTICE
ECA10311
�z Keep the en gine spee d out of
the tachometer red zone.
�z If any en gine trou ble shoul d oc-
cur during the en gine break-in
period , imme diately have a
Yamaha dealer check the vehi-
cle.
EAUN1421
Parkin g
When parking, turn the vehicle power
off, and then turn the smart key off.
TIP
Even when the vehicle is parked in a lo-
cation partitioned by a fence or the
glass window of a shop, if the smart
key is within operating range, other
people will be able to start the engine
and operate the vehicle. Please turn
the smart key off when leaving the ve-
hicle. (See page 3-5.)
If the sidestand is lowered when the
engine is running, the engine will stop
and the beeper will sound for approxi-
mately 1 minute. To stop the beeper,
turn the vehicle power off or raise the
sidestand.
TIP
�zBefore leaving the vehicle, be sure
to turn the main switch to “OFF”
or “ ”. Otherwise, the battery may
discharge.
�z The sidestand alarm beeper can
be set to not activate. Please con-
tact your Yamaha dealer.
WARNING
EWA10312
�zSince the en gine an d exhaust
system can become very hot,
park in a place where ped estri-
ans or chil dren are not likely to
touch them and b e burne d.
�z Do not park on a slope or on soft
groun d, otherwise the vehicle
may overturn, increasin g the
risk of a fuel leak an d fire.
UB74E0E0.book Page 5 Tuesday, May 2, 2017 1:04 PM
Page 63 of 116
Operation and important ri din g points
6-6
6
�z
Do not park near g rass or other
flammab le materials which
mi ght catch fire.
UB74E0E0.book Page 6 Tuesday, May 2, 2017 1:04 PM
Page 64 of 116

Periodic maintenance an d a djustment
7-1
7
EAU17246
Periodic inspection, adjustment, and
lubrication will keep your vehicle in the
safest and most efficient condition
possible. Safety is an obligation of the
vehicle owner/operator. The most im-
portant points of vehicle inspection,
adjustment, and lubrication are ex-
plained on the following pages.
The intervals given in the periodic
maintenance charts should be simply
considered as a general guide under
normal riding conditions. However, de-
pending on the weather, terrain, geo-
graphical location, and individual use,
the maintenance intervals may need to
be shortened.
WARNING
EWA10322
Failure to properly maintain the vehi-
cle or performin g maintenance ac-
tivities incorrectly may increase
your risk of injury or d eath durin g
service or while usin g the vehicle. If
you are not familiar with vehicle ser-
vice, have a Yamaha d ealer perform
service.
WARNING
EWA15123
Turn off the en gine when performin g
maintenance unless otherwise
specified .
�z A runnin g en gine has movin g
parts that can catch on body
parts or clothin g an d electrical
parts that can cause shocks or
fires.
�z Runnin g the en gine while ser-
vicing can lead to eye injury,
b urns, fire, or car bon monoxi de
poisonin g – possi bly lea din g to d
eath. See pag e 1-2 for more in-
formation a bout car bon monox-
i d e.
WARNING
EWA15461
Brake discs, calipers, drums, an d
linin gs can b ecome very hot during
use. To avoi d possi ble burns, let
b rake components cool before
touchin g them.
UB74E0E0.book Page 1 Tuesday, May 2, 2017 1:04 PM
 1
1 2
2 3
3 4
4 5
5 6
6 7
7 8
8 9
9 10
10 11
11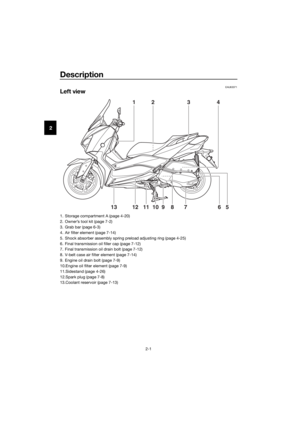 12
12 13
13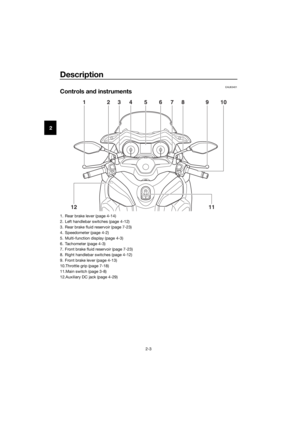 14
14 15
15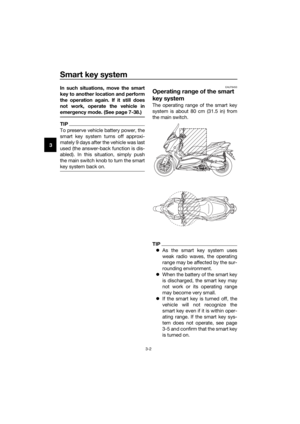 16
16 17
17 18
18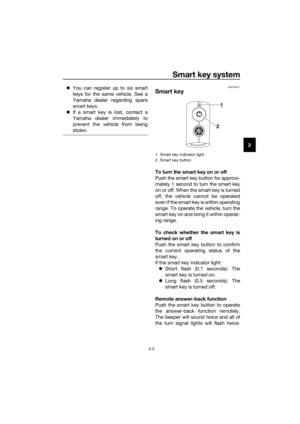 19
19 20
20 21
21 22
22 23
23 24
24 25
25 26
26 27
27 28
28 29
29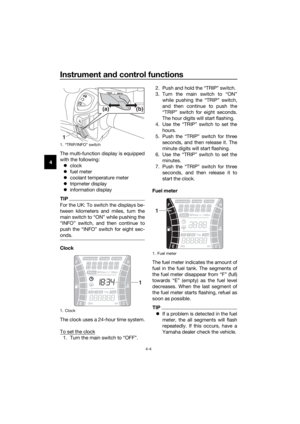 30
30 31
31 32
32 33
33 34
34 35
35 36
36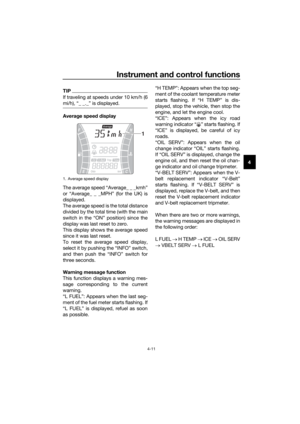 37
37 38
38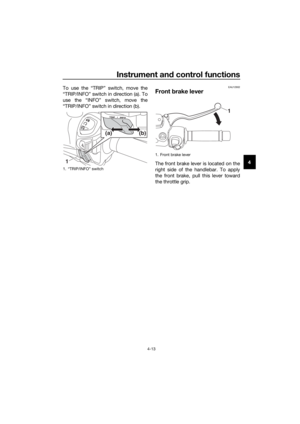 39
39 40
40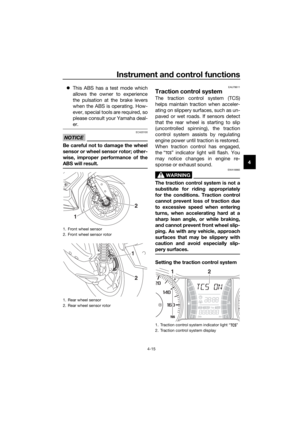 41
41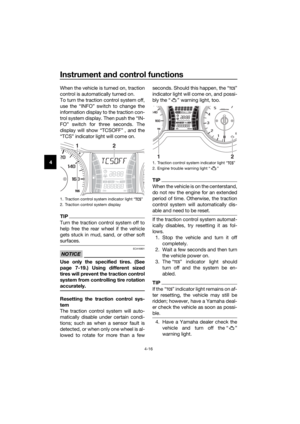 42
42 43
43 44
44 45
45 46
46 47
47 48
48 49
49 50
50 51
51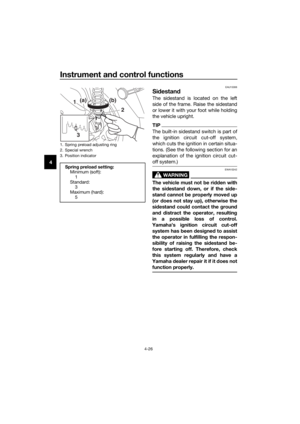 52
52 53
53 54
54 55
55 56
56 57
57 58
58 59
59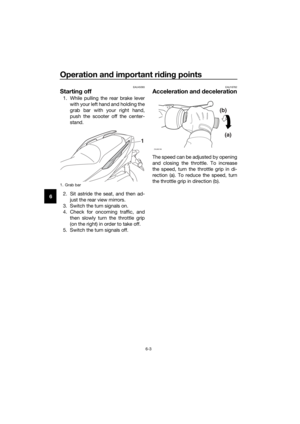 60
60 61
61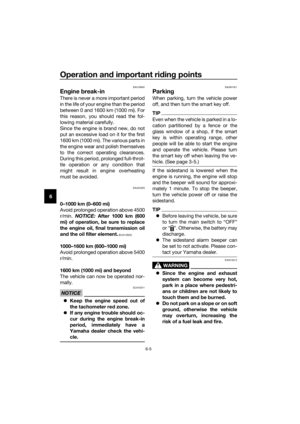 62
62 63
63 64
64 65
65 66
66 67
67 68
68 69
69 70
70 71
71 72
72 73
73 74
74 75
75 76
76 77
77 78
78 79
79 80
80 81
81 82
82 83
83 84
84 85
85 86
86 87
87 88
88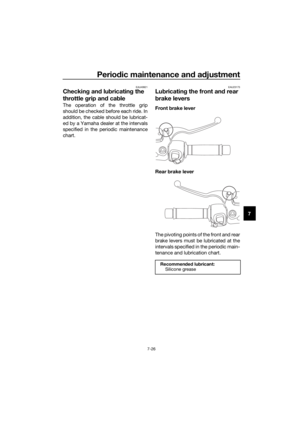 89
89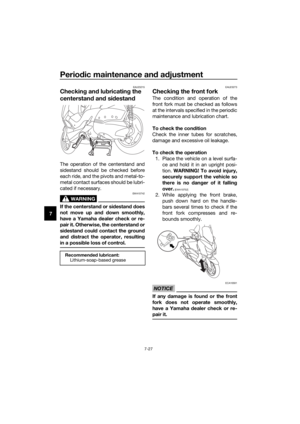 90
90 91
91 92
92 93
93 94
94 95
95 96
96 97
97 98
98 99
99 100
100 101
101 102
102 103
103 104
104 105
105 106
106 107
107 108
108 109
109 110
110 111
111 112
112 113
113 114
114 115
115


