Page 305 of 398

WHEELS AND TIRES
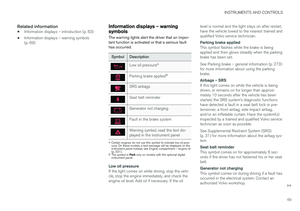
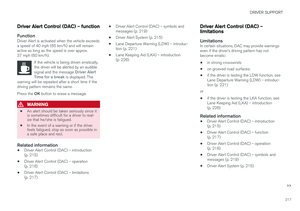
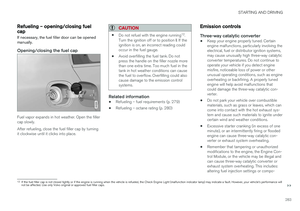
303
1.
215 : the width of the tire (in millimeters)
from sidewall edge to sidewall edge. The larger the number, the wider the tire.
2. 65: The ratio of the tire's height to its width
in percent.
3. R: Radial tire (the designation RF and the
symbol indicate that the vehicle is
equipped with optional self-supporting run flat tires 4
.
4. 15: The diameter of the wheel rim (in
inches).
5. 95: The tire's load index. In this example, a
load index of 95 equals a maximum load of 1521 lbs (690 kg).
6. H: The tire's speed rating, or the maximum
speed at which the tire is designed to bedriven for extended periods of time, carryinga permissible load for the vehicle, and withcorrect inflation pressure. For example, Hindicates a speed rating of 130 mph(210 km/h).
NOTE
The tire's load index and speed rating may not appear on the sidewall because they arenot required by law.
7. M+S or M/S = Mud and Snow, AT = All Ter-
rain, AS = All Season
8. U.S. DOT Tire Identification Number (TIN) : This begins with the letters "DOT" and
indicates that the tire meets all federalstandards. The next two numbers or lettersare the plant code where it was manufac-tured, the next two are the tire size code andthe last four numbers represent the weekand year the tire was built. For example,1510 means that the tire was manufacturedduring week 15 of 2010. The numbers inbetween are marketing codes used at themanufacturer's discretion. This informationhelps a tire manufacturer identify a tire forsafety recall purposes.
9. Tire Ply Composition and MaterialUsed : Indicates the number of plies indi-
cates or the number of layers of rubber-coated fabric in the tire tread and sidewall.Tire manufacturers also must indicate the plymaterials in the tire and the sidewall, whichinclude steel, nylon, polyester, and others.
10. Maximum Load : Indicates the maximum
load in pounds and kilograms that can becarried by the tire. Refer to the vehicle's tireinformation placard located on the B-Pillarfor the correct tire pressure for your vehicle. 11.
Treadwear, Traction, and Temperaturegrades : see Tire specifications – Uniform
Tire Quality Grading (p. 306) for more infor-mation.
12. Maximum permissible inflationpressure: the greatest amount of air pres-
sure that should ever be put in the tire. Thislimit is set by the tire manufacturer.
4 Self-supporting run flat tires may not be available on all models
Page 306 of 398

WHEELS AND TIRES
304
Loading specifications Properly loading your vehicle will provide maxi- mum return of vehicle design performance.
Before loading your vehicle, familiarize yourself with the following terms for determining yourvehicle's weight ratings, with or without a trailer,from the vehicle's Federal/Canadian Motor Vehi-cle Safety Standards (FMVSS/CMVSS) label, andthe vehicle's tire information placard:
Curb weightThe weight of the vehicle including a full tank offuel and all standard equipment. It does notinclude passengers, cargo, or optional equipment.
Capacity weightAll weight added to the curb weight, includingcargo and optional equipment. When towing,trailer hitch tongue load is also part of cargoweight.
Permissible axle weightThe maximum allowable weight that can be car-ried by a single axle (front or rear). These num-bers are shown on the Federal/Canadian MotorVehicle Safety Standards (FMVSS/CMVSS) label.The total load on each axle must never exceed itsmaximum permissible weight.
Gross vehicle weight (GVW)The vehicle's curb weight + cargo + passengers.
NOTE
•The location of the various labels in your vehicle, see Label information (p. 368).
• A table listing important weight limits foryour vehicle, see Weights (p. 373).
Loading specifications – load limit The load limit of your vehicle is the combined weight of the occupants and cargo.
Steps for Determining Correct Load
Limit
1. Locate the statement "the combined weight of occupants and cargo should never exceed XXX kg or XXX lbs." on your vehicle's plac-ard.
2. Determine the combined weight of the driver and passengers that will be riding in yourvehicle.
3. Subtract the combined weight of the driver and passengers from XXX kg or XXX lbs.
4. The resulting figure equals the available amount of cargo and luggage load capacity.For example, if the "XXX" amount equals1400 lbs. and there will be five 150 lb. pas-sengers in your vehicle, the amount of availa-ble cargo and luggage load capacity is650 lbs. (1400 – 750 (5 × 150) = 650 lbs.)
5. Determine the combined weight of luggage and cargo being loaded on the vehicle. Thatweight may not safely exceed the availablecargo and luggage load capacity calculatedin Step 4.
Page 307 of 398

WHEELS AND TIRES
}}
305
6. If your vehicle will be towing a trailer, load
from your trailer will be transferred to your vehicle. Consult this manual to determinehow this reduces the available cargo and lug-gage load capacity of your vehicle.
WARNING
• Exceeding the permissible axle weight, gross vehicle weight, or any other weightrating limits can cause tire overheatingresulting in permanent deformation orcatastrophic failure.
• Do not use replacement tires with lowerload carrying capacities than the tires thatwere original equipment on the vehiclebecause this will lower the vehicle's GVWrating. Use only tires with the correct loadcarrying capacity. Consult your Volvoretailer for information.
Tire specifications – terminology
The following is a glossary of tire-related terms.
The tire suppliers may have additional markings, notes or warnings such as standard load, radialtubeless, etc.
• Tire information placard
: A placard show-
ing the OE (Original Equipment) tire sizes,recommended inflation pressure, and themaximum weight the vehicle can carry.
• Tire Identification Number (TIN)
: A number
on the sidewall of each tire providing infor-mation about the tire brand and manufactur-ing plant, tire size and date of manufacturer.
• Inflation pressure
: A measure of the
amount of air in a tire.
• Standard load
: A class of P-metric or Metric
tires designed to carry a maximum load at35 psi [37 psi (2.5 bar) for Metric tires].Increasing the inflation pressure beyond thispressure will not increase the tires load car-rying capability.
• Extra load
: A class of P-metric or Metric
tires designed to carry a heavier maximumload at 41 psi [43 psi (2.9 bar) for Metrictires]. Increasing the inflation pressurebeyond this pressure will not increase thetire's load carrying capability.
• kPa
: Kilopascal, a metric unit of air pressure.
• PSI
: Pounds per square inch, a standard unit
of air pressure. •
B-pillar
: The structural member at the side
of the vehicle behind the front door.
• Bead area of the tire
: Area of the tire next
to the rim.
• Sidewall of the tire
: Area between the bead
area and the tread.
• Tread area of the tire
: Area of the perime-
ter of the tire that contacts the road whenmounted on the vehicle.
• Rim
: The metal support (wheel) for a tire or a
tire and tube assembly upon which the tirebeads are seated.
• Maximum load rating
: a figure indicating
the maximum load in pounds and kilogramsthat can be carried by the tire. This rating isestablished by the tire manufacturer.
• Maximum permissible inflation pressure
:
the greatest amount of air pressure thatshould ever be put in the tire. This limit is setby the tire manufacturer.
• Recommended tire inflation pressure
:
inflation pressure, established by Volvo,which is based on the type of tires that aremounted on a vehicle at the factory. Thisinformation can be found on the tire inflationplacard(s) located on the driver's side B-pillarand in the tire inflation table in this chapter.
• Cold tires
: The tires are considered to be
cold when they have the same temperatureas the surrounding (ambient) air. This tem-
Page 308 of 398

WHEELS AND TIRES
306perature is normally reached after the vehicle has been parked for at least 3 hours.
Tire specifications – Uniform Tire Quality Grading ALL PASSENGER VEHICLE TIRES MUST CONFORM TO FEDERAL SAFETY REQUIRE-MENTS IN ADDITION TO THESE GRADES
.
Quality grades can be found, where applica- ble, on the tire sidewall between the treadshoulder and maximum section width. Forexample: Treadwear 200 Traction AA Temperature A
TREADWEARThe treadwear grade is a comparative rating based on the wear rate of the tire when testedunder controlled conditions on a specified gov-ernment test course. For example, a tire graded150 would wear one and one half (1 ½) times aswell on the government course as a tire graded100. The relative performance of tires dependsupon the actual conditions of their use, however,and many depart significantly from the norm dueto variation in driving habits, maintenance practi-ces and differences in road characteristics andclimate.
TRACTIONThe traction grades, from highest to lowest, areAA, A, B, and C, as measured under controlledconditions on specified government test surfacesof asphalt and concrete. A tire marked C mayhave poor traction performance. The traction grade assigned to this tire is based on braking(straight-ahead) traction tests and is not a meas-ure of cornering (turning) traction.
WARNING
The traction grade assigned to this tire is based on braking (straight-ahead) tractiontests and is not a measure of cornering (turn-ing) traction.
TEMPERATUREThe temperature grades are A (the highest), B, and C, representing the tire's resistance to thegeneration of heat and its ability to dissipate heatwhen tested under controlled conditions on aspecified indoor laboratory test wheel. Sustainedhigh temperature can cause the material of thetire to degenerate and reduce tire life, and exces-sive temperature can lead to sudden tire failure.The grade C corresponds to a minimum level ofperformance that all passenger vehicle tires mustmeet under the Federal Motor Safety StandardNo. 109. Grades B and A represent higher levelsof performance on the laboratory test wheel thanthe minimum required by law.
Page 309 of 398

WHEELS AND TIRES
307
WARNING
The temperature grade for this tire is estab- lished for a tire that is properly inflated andnot overloaded. Excessive speed, under-infla-tion, or excessive loading, either separately orin combination, can cause heat buildup andtire failure.
Snow chains
Snow chains can be used on your Volvo with the following restrictions:
• Snow chains should be installed on front wheels only. Use only Volvo approved snowchains.
• If accessory, aftermarket or "custom" tiresand wheels are installed and are of a size dif-ferent than the original tires and wheels,chains in some cases CANNOT be used.Sufficient clearances between chains andbrakes, suspension and body componentsmust be maintained.
• Some strap-on type chains will interfere withbrake components and therefore CANNOTbe used.
• All Wheel Drive models
: Snow chains
should only be installed on the front wheels.
• Certain size tires may not allow the assemblyof snow chains/traction devices.
Consult your Volvo retailer for additional snowchain information.
CAUTION
• Check local regulations regarding the use of snow chains before installing.
• Use single-sided snow chains only.
• Always follow the chain manufacturer'sinstallation instructions carefully. Installchains as tightly as possible andretighten periodically.
• Never exceed the chain manufacturer'sspecified maximum speed limit. (Underno circumstances should you exceed31 mph (50 km/h).
• Avoid bumps, holes or sharp turns whendriving with snow chains.
• The handling of the vehicle can beadversely affected when driving withchains. Avoid fast or sharp turns as wellas locked wheel braking.
Page 310 of 398

WHEELS AND TIRES
308
Snow tires/studded tires5
Owners who live in or regularly commute through areas with sustained periods of snow oricy driving conditions are strongly advised to fitsuitable winter tires to help retain the highestdegree of traction.
Tires for winter use:
• It is important to install winter tires on all four wheels to help retain traction during corner-ing, braking, and accelerating. Failure to doso could reduce traction to an unsafe level oradversely affect handling.
• Do not mix tires of different design as thiscould also negatively affect overall tire roadgrip.
• Winter tires wear more quickly on dry roadsin warm weather. They should be removedwhen the winter driving season has ended.
• Studded tires should be run-in 300 – 600 miles (500 – 1000 km) during whichthe vehicle should be driven as smoothly aspossible to give the studs the opportunity toseat properly in the tires. The tires shouldhave the same rotational direction through-out their entire lifetime.
NOTE
Please consult state or provincial regulations restricting the use of studded winter tiresbefore installing such tires.
Tire pressure monitoring - overview
Volvo provides two different systems to monitor tire pressure: Tire Pressure Monitoring System(TPMS) or Tire Monitor.
Determining which tire monitoring system is in your vehicle
To see which system is installed in your vehicle, press the MY CAR button on the center console.
Go to
SettingsCar settings.
• If your vehicle has a menu called
Tire
monitoring, see Tire Monitor - introduction
(p. 309).
• If your vehicle has a menu called
Tire
pressure, see Tire Pressure Monitoring Sys-
tem (TPMS) – general information (p. 312).
Introduction
Each tire, including the spare 6
(if provided),
should be checked monthly when cold and infla- ted to the inflation pressure recommended by thevehicle manufacturer on the vehicle placard ortire inflation pressure label. (If your vehicle hastires of a different size than the size indicated onthe vehicle placard or tire inflation pressure label,you should determine the proper tire inflationpressure for those tires.) As an added safety feature, your vehicle has been equipped with a tire pressure monitoring
5 Where permitted
6 Available as an accessory
Page 311 of 398

WHEELS AND TIRES
}}
309
system that illuminates a low tire pressure telltale (
) when one or more of your tires is signifi-
cantly under-inflated. Accordingly, when the low tire pressure telltale illuminates, you should stopand check your tires as soon as possible, andinflate them to the proper pressure. Driving on a significantly under-inflated tire cau- ses the tire to overheat and can lead to tire fail-ure. Under-inflation also reduces fuel efficiencyand tire tread life, and may affect the vehicle'shandling and stopping ability. Please note that atire pressure monitoring system is not a substi-tute for proper tire maintenance, and it is the driv-er's responsibility to maintain correct tire pres-sure, even if under-inflation has not reached thelevel to trigger illumination of the system's lowtire pressure telltale. Your vehicle has also been equipped with a TPMS malfunction indicator to indicate when thesystem is not operating properly. The monitoringsystem's malfunction indicator is combined withthe low tire pressure telltale. When the system detects a malfunction, the tell- tale will flash for approximately one minute andthen remain continuously illuminated. Thissequence will continue upon subsequent vehiclestart-ups as long as the malfunction exists. Whenthe malfunction indicator is illuminated, the sys-tem may not be able to detect or signal low tirepressure as intended. System malfunctions may occur for a variety ofreasons, including the installation of replacementor alternate tires or wheels on the vehicle thatprevent the tire pressure monitoring system fromfunctioning properly. Always check the system's malfunction telltale after replacing one or more tires or wheels onyour vehicle to ensure that the replacement oralternate tires and wheels allow the system tocontinue to function properly.
NOTE
The system indicates low tire pressure but does not replace normal tire maintenance. Forinformation on correct tire pressure, pleaserefer to the tire inflation decal on the driver'sdoor opening or consult your Volvo retailer.
WARNING
Incorrect inflation pressure could lead to tire failure, resulting in a loss of control of thevehicle.
Related information
•
Tire Monitor - introduction (p. 309)
• Tire Pressure Monitoring System (TPMS) – general information (p. 312)
Tire Monitor - introduction Tire Monitor uses the rotational speed of the tires in combination with signal analysis of theABS sensor signals to determine if they areproperly inflated.
When a tire is under-inflated, its diameter (and consequently also its rotational speed) changes.By comparing the individual tires with each otherit is possible to determine if one or more tires areunder inflated. When low inflation pressure is detected or if the system is not functioning properly, Tire Monitorwill light up the tire pressure warning light (
) (also referred to as a telltale) in the
instrument panel and will display one of several messages in the text window, for example:
Tire
pressure low Check tires. Adjust the inflation
pressure and recalibrate if necessary.
NOTE
If a malfunction occurs in the system, the tire pressure warning light will flash for approxi-mately 1 minute and then remain illuminated.
Tire press. syst Service required will be
displayed.
Page 312 of 398

||
WHEELS AND TIRES
310
NOTE
The system indicates low tire pressure but does not replace normal tire maintenance. Forinformation on correct tire pressure, pleaserefer to the tire inflation decal on the driver'sdoor opening or consult your Volvo retailer.
Related information
•Tire pressure monitoring - overview (p. 308)
• Calibrating Tire Monitor (p. 310)
Calibrating Tire Monitor In order for Tire Monitor to work correctly, tire pressure reference values must be set. Thismust be done each time wheels or tire pressuresare changed.
Calibration1. Switch off the engine.
2. Inflate the tires to the desired pressure (con-
sult tire pressure placard located on the driv- er's side B-pillar (the structural member atthe side of the vehicle) and put the ignition in mode II, see Ignition modes (p. 74).
3. Press the MY CAR button on the center
console control panel and select
Settings
Car settingsTire monitoring.
4. Press OK/MENU , select
Calibrate tire
pressure and press OK/MENU again after
all of the tires have been checked and rein- flated.
5. Drive away. > The calibration process will be completedwhile driving and will be interrupted if thevehicle is parked and the engine isswitched off. Calibration continues auto-matically when driving resumes. The sys-tem will not give any confirmation whencalibration is finished although it will stateif calibration fails. When driving with heavy loads or at sustainedhighway speeds, the tire pressure should beadjusted to the recommended inflation pressuresaccording to the tire inflation pressure placardlocated on the driver's side B-pillar (the structuralmember at the side of the vehicle, at the rear ofthe driver's door opening) or to the tire inflationpressure table in the owner's information. After adjusting inflation pressure, repeat steps 1-5 above.
NOTE
Always remember to calibrate Tire Monitor when the wheels have been changed or thetire pressure has been corrected according totire pressure placard or tire pressure table. Ifcorrect reference values have not been set,the system cannot issue low tire pressurealerts correctly.