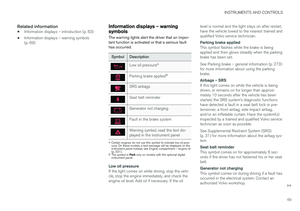
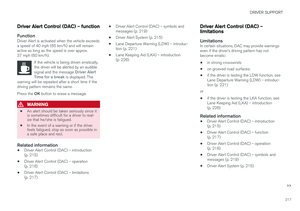
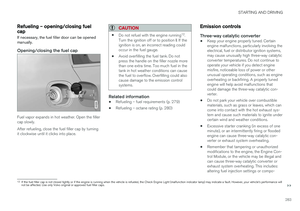
Page 297 of 398

WHEELS AND TIRES
}}
* Option/accessory, for more information, see Introduction.295
Changing a wheel – direction of rotation Incorrectly mounted tires impair the car's braking properties and ability to force aside rain, snowand slush.
Summer and winter tires
G021778
The arrows shows the direction of rotation of the tire
•The tires with the most tread should always be on the rear axle (to help reduce the risk ofskidding).
• When switching between summer and wintertires, mark the tires to indicate where theywere mounted on the car, e.g., LF = left front,RR = right rear
• Tires with tread designed to roll in only onedirection are marked with an arrow on thesidewall.
• Contact a Volvo workshop if you are unsureabout the tread depth.
Related information
•Tire specifications (p. 302)
• Tires – storage and age (p. 293)
• Tires – tread wear indicator (p. 294)
Changing a wheel – removing wheel Wheel changes should always be carried out correctly.
The jack
*, towing eyelet and tools * are stowed
under the floor of the trunk.
Changing a wheel1. Apply the parking brake and put the gear
selector in P.
2. Take out the jack *, lug wrench *, the tool for
removing the plastic covers on the wheel nuts, the towing eyelet and the wheel coverremoval tool (certain models only) stowedunder the floor of the trunk.
Page 298 of 398
||
WHEELS AND TIRES
2963.
Tool for removing the plastic covers on the wheel nuts
Remove the wheel cover (where applicable) using the removal tool or remove the wheelcover by hand.
4. Block the wheels that are on the ground with wooden blocks or large stones.
Lug wrench and towing eyelet
5. Screw the towing eyelet into the lug wrenchas shown in the illustration.
CAUTION
The towing eyelet must be screwed into the lug wrench as far as possible.
6. With the vehicle still on the ground, remove the plastic covers on the wheel nuts with the tool provided and use the lug wrench/towingeyelet to loosen the wheel nuts ½ – 1 turn byexerting downward (counterclockwise) pres-sure.
Jack attachment points
Page 299 of 398

WHEELS AND TIRES
297
7. There are two jack attachment points on
each side of the vehicle. Position the jack under the attachment point to be used on alevel, firm, non-slippery surface and crank itup until it is correctly aligned and seated inthe attachment point. Before raising the vehi-cle, check that the jack is still correctly posi-tioned in the attachment.
8. Raise the vehicle until the wheel to be changed is lifted off the ground.
9. Unscrew the wheel nuts completely and remove the wheel.
WARNING
• The jack must correctly engage the jack attachment.
• Be sure the jack is on a firm, level, non-slippery surface.
• Never allow any part of your body to beextended under a vehicle supported by ajack.
• Use the jack intended for the vehiclewhen changing a tire. For any other job,use stands to support the vehicle.
• Apply the parking brake and put the gear selector in the Park (
P) position.
• Block the wheels standing on the ground, use rigid wooden blocks or large stones.
• The jack should be kept well-greased andclean, and should not be damaged.
• No objects should be placed between thebase of jack and the ground, or betweenthe jack and the attachment bar on thevehicle.
NOTE
The jack provided with your vehicle is intended to be used only in temporary situa-tions such as changing wheels in the event ofa flat tire. Only the jack that came with yourparticular model should be used to lift thevehicle. If the vehicle needs to be lifted morefrequently or for a prolonged period, using agarage jack or hoist is recommended. Alwaysfollow this device
Page 300 of 398

WHEELS AND TIRES
* Option/accessory, for more information, see Introduction.
298
Changing a wheel – spare wheel Wheel changes should always be carried out correctly.
Spare tireA spare tire can be purchased for your vehicle as an accessory. Follow the instructions includedwith the spare tire regarding use and stowing inthe vehicle. See also Changing a wheel – remov-ing wheel (p. 295) for additional information.
Spare wheelThe following instructions only apply if you have purchased a temporary spare wheel * for your
vehicle. If there is no temporary spare wheel in your vehi- cle, please see Tire sealing system * – general
information (p. 316) for instructions on using the tire sealing system. The accessory temporary spare wheel is provided in a bag that must be securely strapped in placein the trunk while the vehicle is being driven. The spare wheel is only intended for temporary use. Replace it with a normal wheel as soon aspossible. The vehicle's handling may be alteredby the use of the spare wheel. The correct tirepressure is stated in the tire pressure table, seethe tire inflation decal on the driver's door open-ing.Turn the handle on the spare wheel bag in toward the rear seat. Secure the stitched straphooks in the loading eyelets. Secure the longstrap in one of the loading eyelets, wrap the straparound the spare wheel and through the lowerhandle. Secure the short strap on the long strap.Secure in the other loading eyelet and tighten.
WARNING
Current legislation prohibits the use of the “Temporary Spare” tire other than as a tempo-rary replacement for a punctured tire. It mustbe replaced as soon as possible by a stand-ard tire. Road holding and handling may beaffected with the “Temporary Spare” in use.
CAUTION
The vehicle must never be driven with more than one temporary spare wheel.
Related information
• Changing a wheel – installing a wheel (p. 299)
• Changing a wheel – removing wheel (p. 295)
Page 301 of 398

WHEELS AND TIRES
}}
* Option/accessory, for more information, see Introduction.299
Changing a wheel – accessing the spare wheel
The following procedure explains how to access the spare wheel (where applicable).
1. Release the bag's retaining straps.
2. Lift the bag out of the vehicle and remove the spare wheel from the bag.
3. Fold up the floor hatch in the trunk.4. Remove the jack * and tools * from the foam
block and change the wheels (see the instructions in the following section "Chang-ing a wheel").
5. After changing wheels, return the jack and tools to the foam block and close the floorhatch.
6. If possible, place the wheel with the punc- tured tire in the bag. 7. If there is a wheel in the bag, strap the bag
securely in place in the trunk.
WARNING
•If there is a wheel in the bag, the bag must be securely restrained using its straps andthe load anchoring eyelets in the trunk.See (p. 298) and carefully follow theinstructions.
• If the wheel with the punctured tire is toobig to fit in the bag, it should be securelyrestrained in the trunk using suitablestraps, a net for anchoring cargo, etc.
Changing a wheel – installing a wheel
It is important to re-install wheels properly.
Re-installing the wheel1. Clean the contact surfaces on the wheel and hub.
2. Lift the wheel and place it on the hub.
Tighten the wheel nuts
3. Install the wheel nuts and tighten hand-tight. Using the lug wrench, tighten crosswise until all nuts are snug.
4. Lower the vehicle to the ground and alter- nately tighten the bolts crosswise to103 ft. lbs. (140 Nm).
Page 302 of 398

||
WHEELS AND TIRES
3005. Press the plastic covers onto the wheel nuts
and Install the wheel cover (where applica- ble). The opening in the wheel cover for thetire's inflation valve must be positioned overthe valve.
Related information
• Changing a wheel – spare wheel (p. 298)
• Changing a wheel – removing wheel (p. 295)
Tire inflation – general information
Check tire inflation pressure regularly.
Inflation placard
G032521
Tire inflation placard
Tire inflationSee the tire inflation decal on the driver's door opening. This decal indicates the designation ofthe factory-mounted tires on your vehicle, as wellas load limits and inflation pressure.
NOTE
• The placards shown indicate inflation pressure for the tires installed on thevehicle at the factory only.
• A certain amount of air seepage from thetires occurs naturally and tire pressurefluctuates with seasonal changes in tem-perature. Always check tire pressure reg-ularly.
•Use a tire gauge to check the tire inflation pressure, including the spare 2
, at least once
a month and before long trips. You are strongly urged to buy a reliable tire pressuregauge, as automatic service station gaugesmay be inaccurate.
• Use the recommended cold inflation pres-sure for optimum tire performance and wear.
• Under-inflation or over-inflation may causeuneven treadwear patterns.
2
Available as an accessory
Page 303 of 398

WHEELS AND TIRES
}}}}
301
WARNING
•Under-inflation is the most common cause of tire failure and may result insevere tire cracking, tread separation, or"blow-out," with unexpected loss of vehi-cle control and increased risk of injury.
• Under-inflated tires reduce the load car-rying capacity of your vehicle.
When weather temperature changes occur, tire inflation pressures also change. A 10-degreetemperature drop causes a corresponding dropof 1 psi (7 kPa) in inflation pressure. Check yourtire pressures frequently and adjust them to theproper pressure, which can be found on the vehi-cle's tire information placard or certification label.
Related information
• Tire specifications (p. 302)
• Tires – storage and age (p. 293)
• Tires – tread wear indicator (p. 294)
Tire inflation – checking pressure
Inflation pressure should be checked when the tires are cold.
Cold tires
The tires are considered to be cold when they have the same temperature as the sur-rounding (ambient) air. This temperature is normally reached after the vehicle has been parked for at least 3 hours. After driving a distance of approximately 1 mile (1.6 km), the tires are considered to be hot. If youhave to drive farther than this distance to pumpyour tire(s), check and record the tire pressurefirst and add the appropriate air pressure whenyou get to the pump. If checking tire pressure when the tire is hot, never "bleed" or reduce air pressure. The tiresare hot from driving and it is normal for pressuresto increase above recommended cold pressures.A hot tire at or below recommended cold inflationpressure could be significantly under-inflated.
To check inflation pressure:
1. Remove the cap from the valve on one tire, then firmly press the tire gauge onto the valve.
2. Add air to reach the recommended air pres- sure. 3. Replace the valve cap.
CAUTION
•
After inflating the tires, always reinstall the valve cap to help avoid damage to thevalve from dirt, gravel, etc.
• Use plastic valve caps only. Metal capscould corrode and become difficult toremove.
4. Visually inspect the tires to make sure there
are no nails or other objects embedded that could puncture the tire and cause an air leak.
5. Check the sidewalls to make sure there are no gouges, cuts, bulges or other irregulari-ties.
6. Repeat this procedure for each tire, including the spare 3
.
NOTE
• If you overfill the tire, release air by push- ing on the metal stem in the center of thevalve. Then recheck the pressure withyour tire gauge.
• Some spare tires (available as an acces-sory) require higher inflation pressurethan the other tires. Consult the tire infla-
3
Available as an accessory
Page 304 of 398
||
WHEELS AND TIRES
302
tion pressure table or see the inflation pressure placard.
Related information
•Tire specifications (p. 302)
• Tires – storage and age (p. 293)
• Tires – tread wear indicator (p. 294)
Tire specifications
The following information can be found on a tire's sidewall.
Tire ratings
Speed ratings
The speed ratings in the table translate as follow:
Speed ratings
M81 mph (130 km/h)
Q100 mph (160 km/h)
T118 mph (190 km/h)
H130 mph (210 km/h)
V149 mph (240 km/h)
W168 mph (270 km/h)
Y186 mph (300 km/h)
Information on the sidewall
Federal law mandates that tire manufacturers place standardized information on the sidewall ofall tires (see the illustration). The following information is listed on the tire sidewall: The tire designation:
NOTE
Please be aware that the following tire desig- nation is an example only and that this par-
ticular tire may not be available on your vehi- cle.