2017 TOYOTA TACOMA ECO mode
[x] Cancel search: ECO modePage 463 of 640

4637-3. Do-it-yourself maintenance
7
Maintenance and care
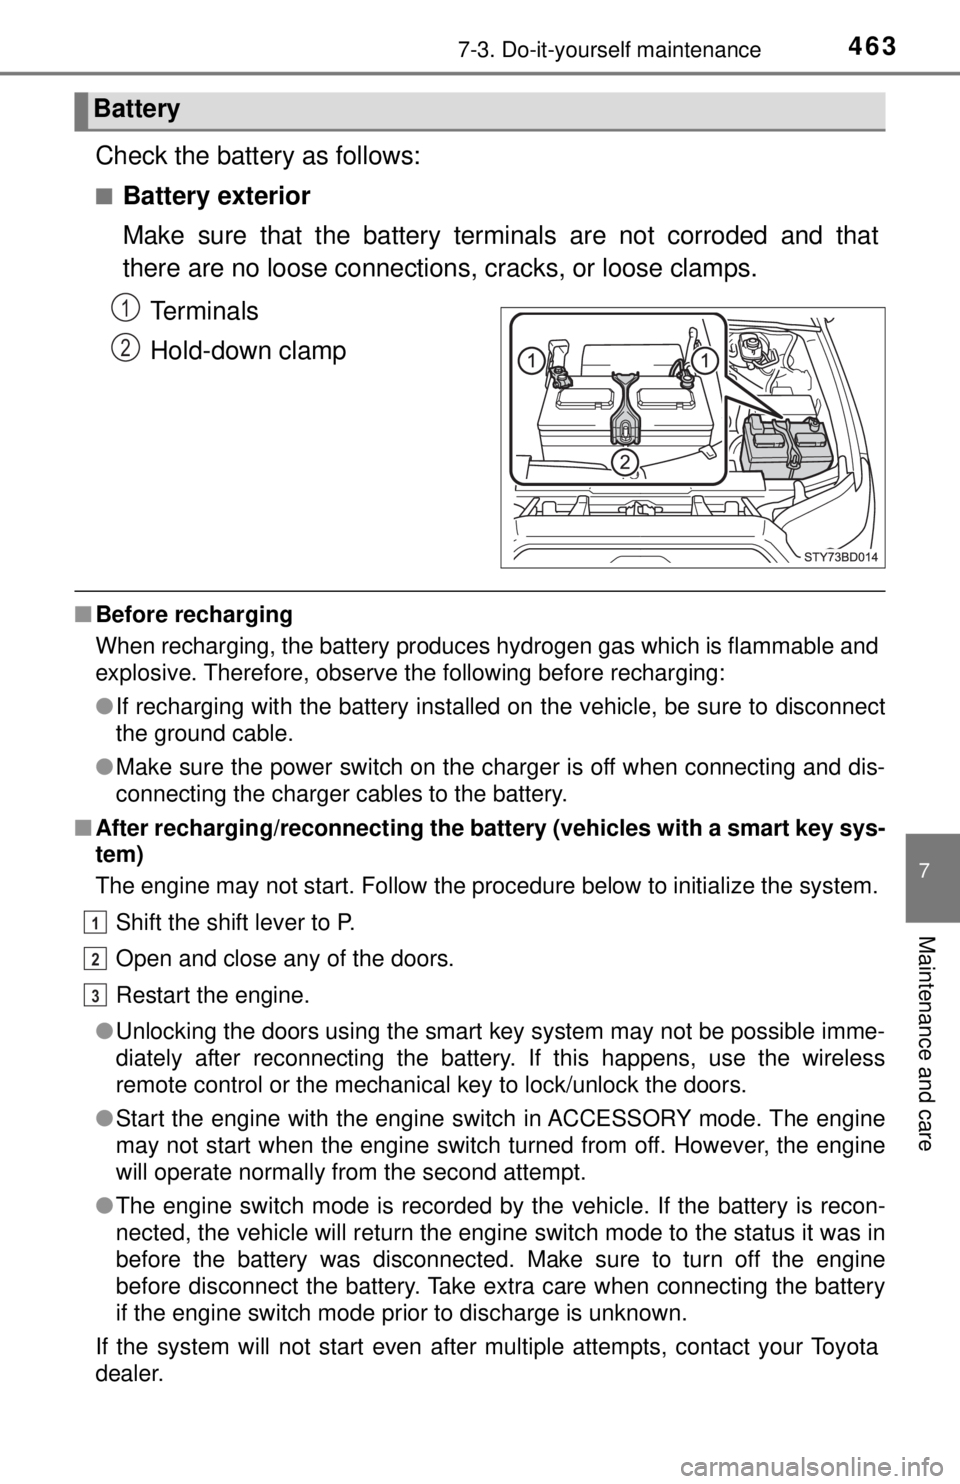
Check the battery as follows:
■Battery exterior
Make sure that the battery terminals are not corroded and that
there are no loose connections, cracks, or loose clamps.
Terminals
Hold-down clamp
■ Before recharging
When recharging, the battery produces hydrogen gas which is flammable and
explosive. Therefore, observe the following before recharging:
●If recharging with the battery installed on the vehicle, be sure to disconnect
the ground cable.
● Make sure the power switch on the charger is off when connecting and dis-
connecting the charger cables to the battery.
■ After recharging/reconnecting the ba ttery (vehicles with a smart key sys-
tem)
The engine may not start. Follow the procedure below to initialize the system.
Shift the shift lever to P.
Open and close any of the doors.
Restart the engine.
● Unlocking the doors using the smart key system may not be possible imme-
diately after reconnecting the battery. If this happens, use the wireless
remote control or the mechanical key to lock/unlock the doors.
● Start the engine with the engine switch in ACCESSORY mode. The engine
may not start when the engine switch turned from off. However, the engine
will operate normally from the second attempt.
● The engine switch mode is recorded by the vehicle. If the battery is recon-
nected, the vehicle will return the engine switch mode to the status it was in
before the battery was disconnected. Make sure to turn off the engine
before disconnect the battery. Take extra care when connecting the battery
if the engine switch mode prior to discharge is unknown.
If the system will not start even after multiple attempts, contact your Toyota
dealer.
Battery
1
2
1
2
3
Page 471 of 640

4717-3. Do-it-yourself maintenance
7
Maintenance and care
■Maximum load of tire
Check that the number given by dividing the maximum load by 1.10 of the
replacement tire is greater than 1/2 of the Gross Axle Weight Ratings
(GAWR) of either the front axle or the rear axle, whichever is greater.
■Tire types
●Summer tires
Summer tires are high-speed performance tires best suited to highway
driving under dry conditions. Since summer tires do not have the same
traction performance as snow tires, summer tires are inadequate for
driving on snow-covered or icy ro ads. For driving on snow-covered
roads or icy roads, the use of snow tires is recommended. When install-
ing snow tires, be sure to replace all four tires.
●All season tires
All season tires are designed to provide better traction in snow and to
be adequate for driving in most winter conditions as well as for use
year-round. All season tires, however, do not have adequate traction
performance compared with snow tires in heavy or loose snow. Also, all
season tires fall short in acceleration and handling performance com-
pared with summer tires in highway driving.
●Snow tires
For driving on snow-covered roads or icy roads, we recommend using
snow tires. If you need snow tires, select tires of the same size, con-
struction and load capacity as the or iginally installed tires. Since your
vehicle has radial tires as original equipment, make sure your snow
tires also have radial construction. Do not install studded tires without
first checking local regulations fo r possible restrictions. Snow tires
should be installed on all wheels. ( →P. 273)
For the GAWR, see the Certification
Label. For the maximum load of the tire,
see the load limit at maximum cold tire
inflation pressure mentioned on the
sidewall of the tire. (
→P. 584)
Access Cab models
Double Cab models
Page 473 of 640

4737-3. Do-it-yourself maintenance
7
Maintenance and care
■The initialization operation (vehicles with the tire pressure warning
system)
●Make sure to carry out in itialization after adjusting the tire inflation pres-
sure.
Also, make sure the tires are cold be fore carrying out initialization or tire
inflation pressure adjustment.
●If you have accidentally turned the engine switch to the “LOCK” position
(vehicles without a smart key system) or off (vehicles with a smart key
system) during initialization, it is no t necessary to press the reset switch
again as initialization will restart aut omatically when the engine switch
has been turned to the “ON” position (vehicles without a smart key sys-
tem) or IGNITION ON mode (vehic les with a smart key system) for the
next time.
●If you accidentally press the reset s witch when initialization is not neces-
sary, adjust the tire inflation pressu re to the specified level when the
tires are cold, and conduct initialization again.
■Warning performance of the tire pressure warning system (vehicles
with a multi-information display)
The warning of the tire pressure warning system will change in accor-
dance with the conditions under which it was initialized. For this reason,
the system may give a warning even if the tire pressure does not reach a
low enough level, or if the pressure is higher than the pressure that was
adjusted to when the system was initialized.
■When initialization of the tire pressure warning system has failed (if
equipped)
Initialization may take longer to comp lete if the vehicle is driven on an
unpaved road. When performing initialization, drive on a paved road if
possible. Depending on the driving environment and condition of the tires,
initialization will be completed in approx imately 10 minutes. If initialization
is not complete after driving approxima tely 10 minutes, continue driving
for a while.
If the inflation pressure of each tire is not displayed after driving for
approximately 1 hour, perform the following procedure.
●Park the vehicle in a safe place for approximately 20 minutes. Then
drive straight (with occasional left and right turns) at approximately
25mph (40 km/h) or more for approximately 10 to 20 minutes.
However, in the following situations, the tire inflation pressure will not be
recorded and the system will not operate properly. Perform initialization
again.
●When operating the tire pressure wa rning reset switch, the tire pressure
warning light does not blink 3 times.
●After performing init ialization, the tire pressure warning light blinks for 1
minute then stays on while driving.
If the inflation pressure of each tire is still not displayed, have the vehicle
inspected by your Toyota dealer.
Page 474 of 640

4747-3. Do-it-yourself maintenance
■Tire pressure warning system certification (if equipped)
For vehicles sold in U.S.A.
FCC ID: HYQ23AAK
FCC ID: PAXPMVC015
NOTE:
This device complies with part 15 of the FCC Rules. Operation is subject
to the following two conditions: (1) This device may not cause harmful
interference, and (2) this device must accept any interference received,
including interference that may cause undesired operation.
FCC WARNING:
Changes or modifications not ex pressly approved by the party
responsible for compliance could void the user’s authority to operate the
equipment.
For vehicles sold in Canada
Model: PMV-C015
NOTE:
This device complies with Indust ry Canada licence-exempt RSS
standard(s). Operation is subject to the following two conditions: (1) this
device may not cause interference, a nd (2) this device must accept any
interference, including interference that may cause undesired operation
of the device.
WARNING
■When inspecting or replacing tires
Observe the following precautions to prevent accidents.
Failure to do so may cause damage to parts of the drive train as well as
dangerous handling characteristics, which may lead to an accident
resulting in death or serious injury.
●Do not mix tires of different makes, models or tread patterns.
Also, do not mix tires of remarkably different treadwear.
●Do not use tire sizes other than those recommended by Toyota.
●Do not mix differently constructed ti res (radial, bias-belted or bias-ply
tires).
●Do not mix summer, all season and snow tires.
●Do not use tires that have been used on another vehicle.
Do not use tires if you do not know how they were used previously.
■When initializing the tire pressure warning system (if equipped)
Do not operate the tire pressure warning reset switch without first
adjusting the tire inflation pressure to the specified level. Otherwise, the
tire pressure warning light may not come on even if the tire inflation
pressure is low, or it may come on when the tire inflation pressure is
actually normal.
Page 476 of 640

4767-3. Do-it-yourself maintenance
Tire inflation pressure
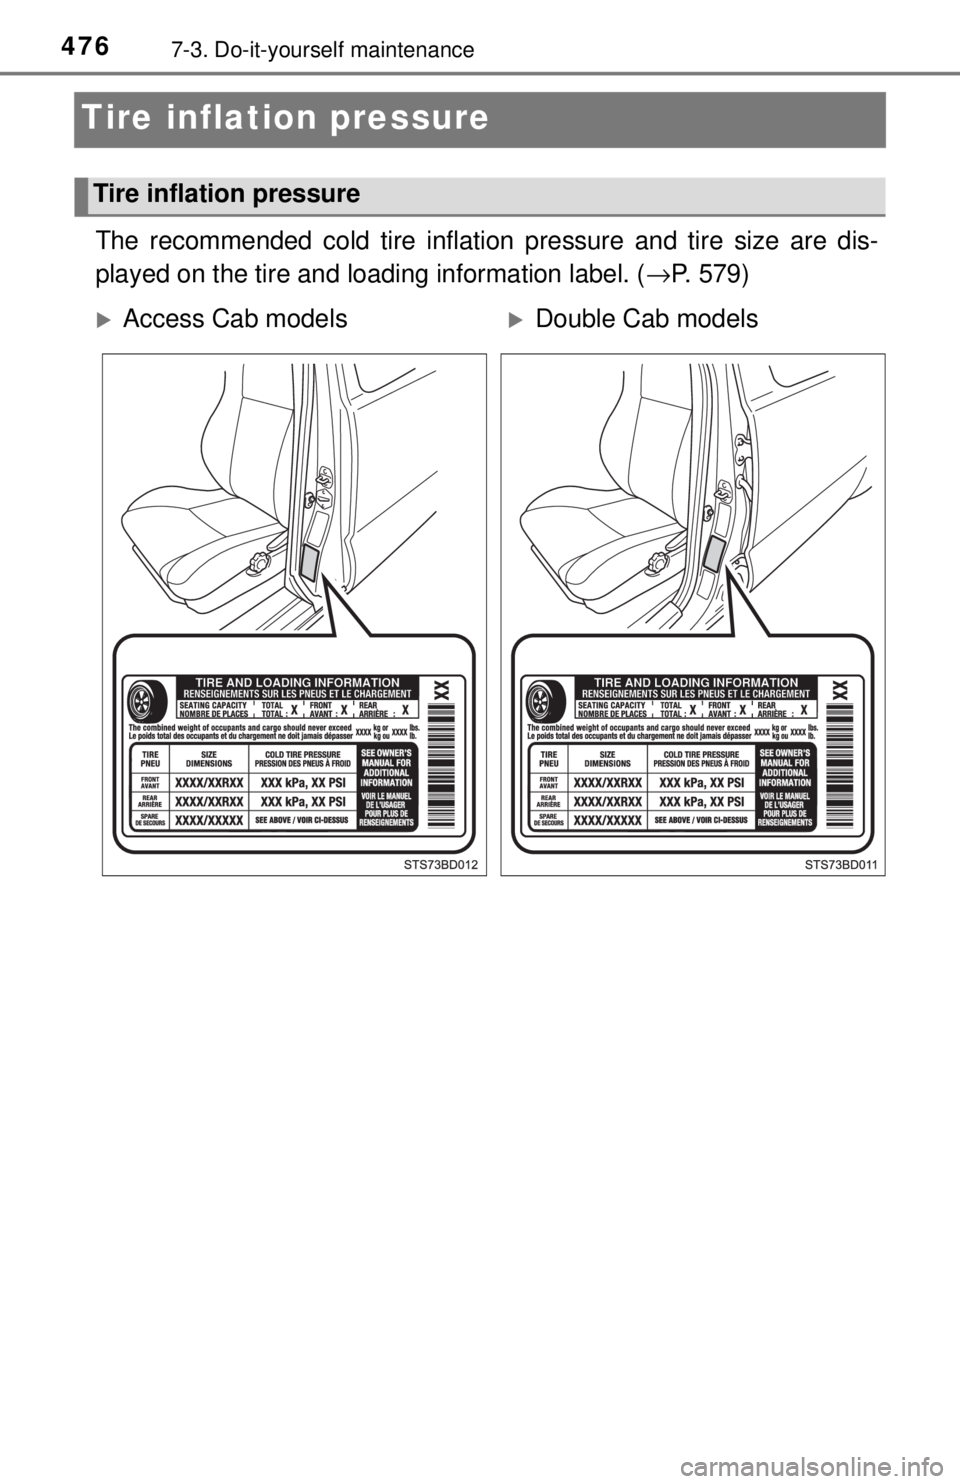
The recommended cold tire inflation pressure and tire size are dis-
played on the tire and loading information label. (→P. 579)
Tire inflation pressure
Access Cab modelsDouble Cab models
Page 510 of 640

5108-2. Steps to take in an emergency
WARNING
Observe the following precautions.
Failure to do so may result in death or serious injury.
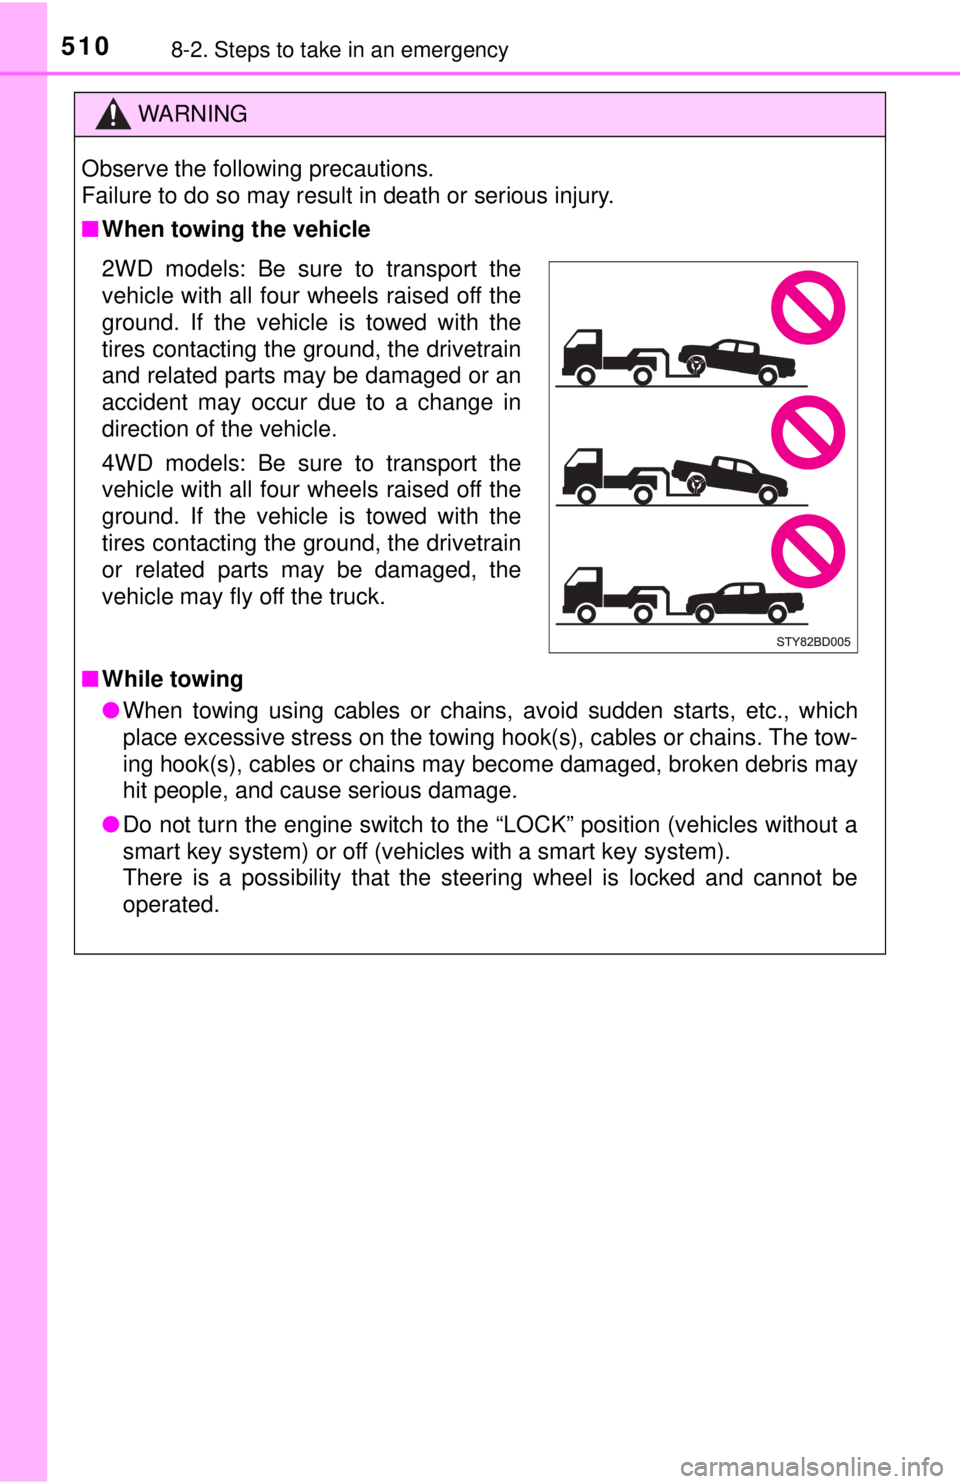
■When towing the vehicle
2WD models: Be sure to transport the
vehicle with all four wheels raised off the
ground. If the vehicle is towed with the
tires contacting the ground, the drivetrain
and related parts may be damaged or an
accident may occur due to a change in
direction of the vehicle.
4WD models: Be sure to transport the
vehicle with all four wheels raised off the
ground. If the vehicle is towed with the
tires contacting the ground, the drivetrain
or related parts may be damaged, the
vehicle may fly off the truck.
■ While towing
● When towing using cables or chains, avoid sudden starts, etc., which
place excessive stress on the towing hook(s), cables or chains. The tow-
ing hook(s), cables or chains may become damaged, broken debris may
hit people, and cause serious damage.
● Do not turn the engine switch to the “LOCK” position (vehicles without a
smart key system) or off (vehicles with a smart key system).
There is a possibility that the steering wheel is locked and cannot be
operated.
Page 518 of 640

5188-2. Steps to take in an emergency
*1: The buzzer sounds when Multi-terrain Select or active traction control isequipped.
*2: Vehicles without a multi-information display.
*3: Vehicles with an automatic transmission.
*4: 4WD models only
*5: Vehicles with a multi-information display.
*6: Vehicles without a multi-information display:
The light flashes rapidly in yellow to indicate a malfunction.
Vehicles with a multi-information display:
The light flashes to indicate a malfunction.
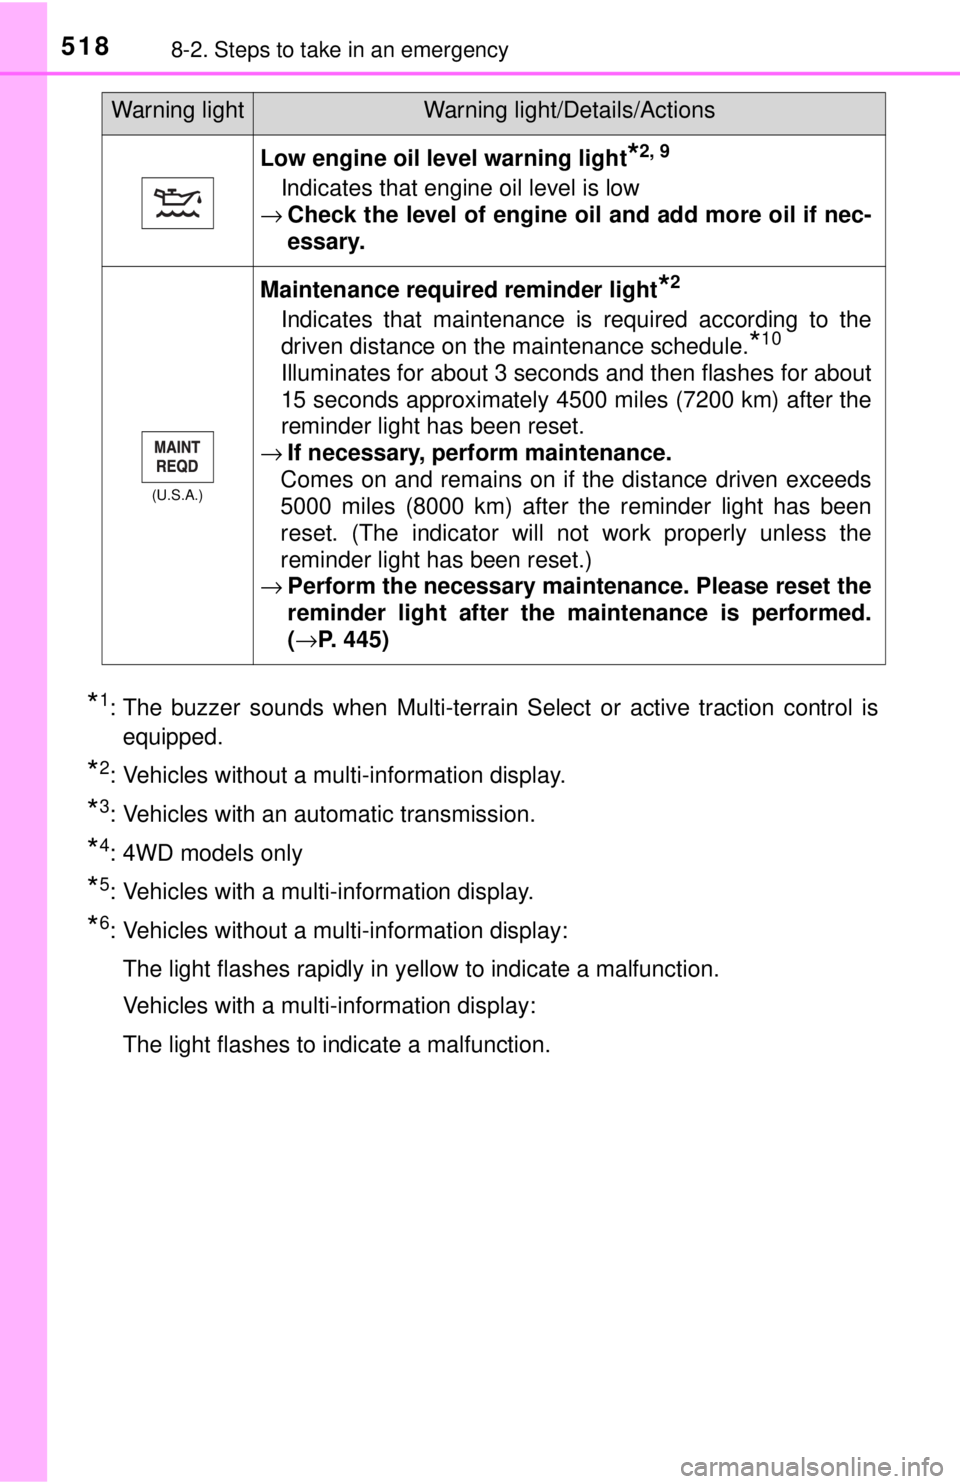
Low engine oil level warning light*2, 9
Indicates that engine oil level is low
→ Check the level of engine oil and add more oil if nec-
essary.
(U.S.A.)
Maintenance required reminder light*2
Indicates that maintenance is required according to the
driven distance on the maintenance schedule.
*10
Illuminates for about 3 seconds and then flashes for about
15 seconds approximately 4500 miles (7200 km) after the
reminder light has been reset.
→ If necessary, perform maintenance.
Comes on and remains on if the distance driven exceeds
5000 miles (8000 km) after the reminder light has been
reset. (The indicator will not work properly unless the
reminder light has been reset.)
→ Perform the necessary maintenance. Please reset the
reminder light after the maintenance is performed.
(→P. 445)
Warning lightWarning light/Details/Actions
Page 519 of 640

5198-2. Steps to take in an emergency
8
When trouble arises
*7: Driver’s seat belt buzzer:The driver’s seat belt buzzer sounds to alert the driver that his or her seat
belt is not fastened. Once the engine switch is turned to the “ON” position
(vehicles without a smart key system) or IGNITION ON mode (vehicles
with a smart key system), the buzzer sounds for 6 seconds. If the vehicle
reaches a speed of 12 mph (20 km/h), the buzzer sounds once. If the seat
belt is still unfastened after 24 seconds, the buzzer will sound intermittently
for 10 seconds. Then, if the seat belt is still unfastened, the buzzer will
sound in a different tone for 20 more seconds.
Front passenger’s seat belt buzzer:
The front passenger’s seat belt buzzer sounds to alert the front passenger
that his or her seat belt is not fastened. The buzzer sounds once if the
vehicle reaches a speed of 12 mph (20 km/h). If the seat belt is sill unfas-
tened after 24 seconds, the buzzer will sound intermittently for 10 seconds.
Then, if the seat belt is still unfastened, the buzzer will sound in a different
tone for 20 more seconds.
*8: Parking brake engaged warning buzzer:
A buzzer will sound if the vehicle is driven at a speed of approximately
3 mph (5 km/h) or more.
*9: 2GR-FKS engine only
*10: Refer to the separate “Scheduled Maintenance Guide” or “Owner’s ManualSupplement” for the maintenance interval applicable to your vehicle.
■ SRS warning light
This warning light system monitors the airbag sensor assembly, front impact
sensors, side impact sensors (front), side impact sensors (rear), driver’s seat
position sensor, driver’s seat belt buckle switch, front passenger occupant
classification system (ECU and sensors), “AIR BAG ON” indicator light, “AIR
BAG OFF” indicator light, front passenger’s seat belt buckle switch, seat belt
pretensioners assemblies, airbags, interconnecting wiring and power
sources. ( →P. 36)
■ Front passenger detection sensor, seat belt reminder and warning
buzzer
● If luggage is placed on the front passenger seat, the front passenger de\
tec-
tion sensor may cause the warning light to flash and the warning buzzer to
sound even if a passenger is not sitting in the seat.
● If a cushion is placed on the seat, the sensor may not detect a passenger,
and the warning light may not operate properly.