Page 254 of 640

2544-5. Using the driving support systems
Manual transmission
4WD models: Before using the rear differential lock system.
Stop the vehicle or reduce your speed to less than 2 mph (3 km/h).
Depress the clutch pedal and turn the front-wheel drive control
switch in the “4L” position to see if this is sufficient. If this has no
effect, additionally use the rear differential lock system.
Be sure to stop the wheels.
Depress the clutch pedal.
Press the rear differential lock switch.
After the rear differential is locked, the indicator will come on.
Slowly release the clutch pedal.
Unlock the rear differential as soon as the vehicle moves.
To unlock the rear differential, press the switch again.
■ Locking the rear differential
●When the rear differential is locked, VSC is automatically turned off.
(The rear differential lock and VSC off indicators come on.)
● The following systems do not operate when the rear differential is locked. It
is normal operation for the ABS warning light and VSC off indicator to be on
at this time.
•ABS
• Multi Terrain ABS (if equipped)
• Brake assist system
•VSC
•TRAC
• Hill-start assist control (if equipped on 4WD models)
■ The rear differential lock is disengaged when
●Vehicles without a smart key system: When the engine switch is turned to
the “LOCK” position
● Vehicles with a smart key system: When the engine switch is turned off
● 4WD models only: Turn the front-wheel drive control switch to “2WD” or “4H”
position.
Never forget to turn off the switch after using this feature.
■ After unlocking the rear differential
Vehicles without a smart key system
To check that the indicator goes off, turn the engine switch to the “ON” posi-
tion, but do not start the engine.
Vehicles with a smart key system
To check that the indicator goes off, turn the engine switch to IGNITION ON
mode, but do not start the engine.
1
2
3
4
5
Page 268 of 640
2684-5. Using the driving support systems
◆Hill-start assist control (if equipped)
Helps to prevent the vehicle from rolling backward when starting on
an incline or slippery slope
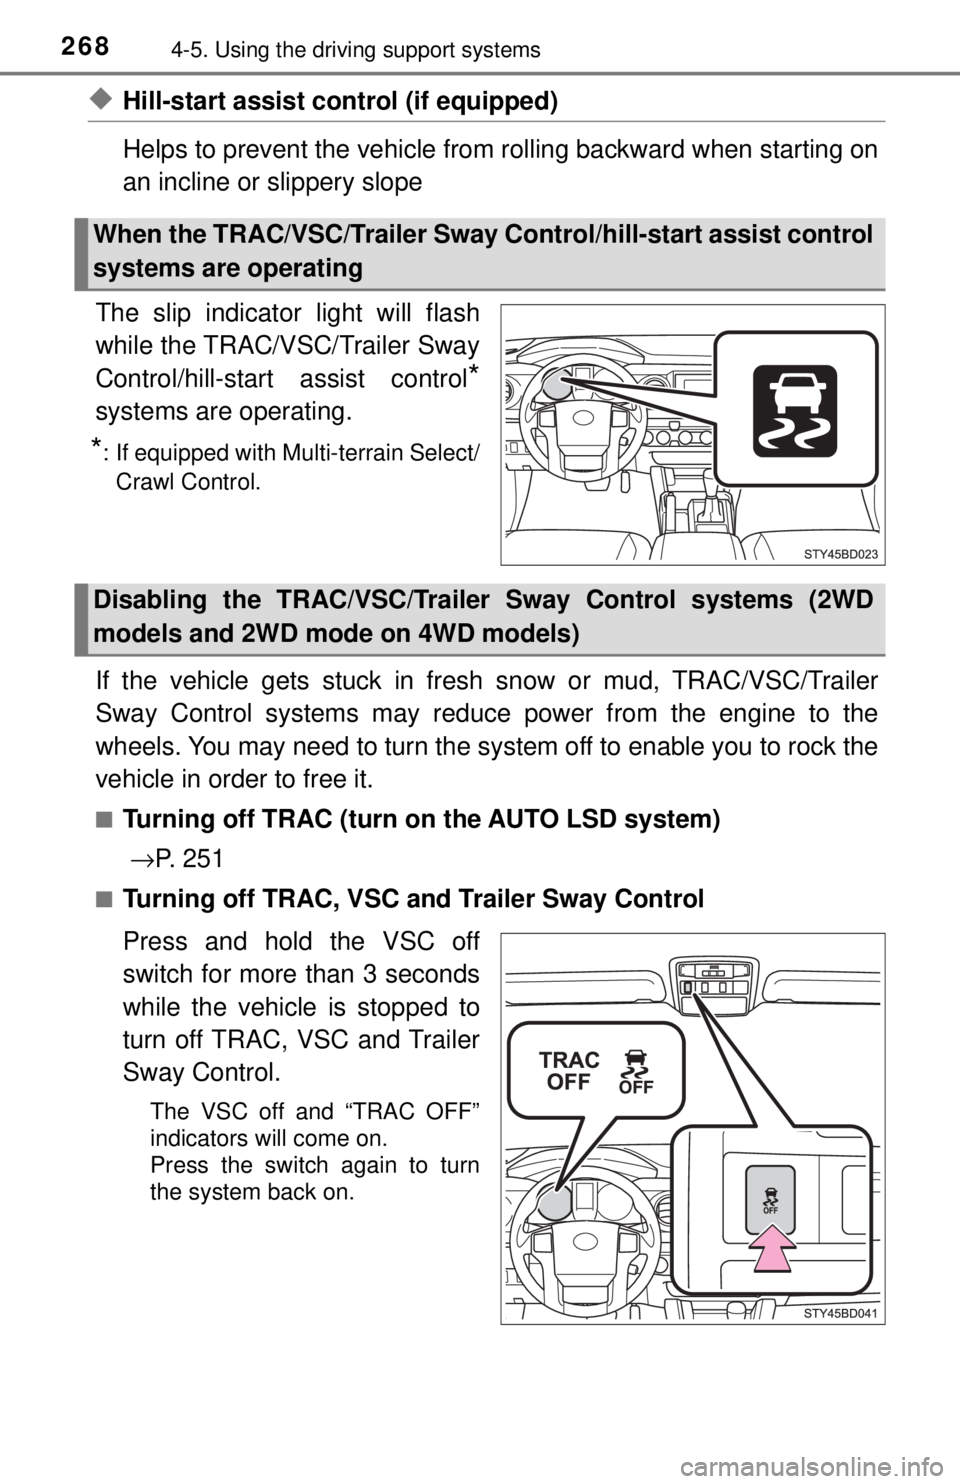
The slip indicator light will flash
while the TRAC/VSC/Trailer Sway
Control/hill-start assist control
*
systems are operating.
*: If equipped with Multi-terrain Select/ Crawl Control.
If the vehicle gets stuck in fres h snow or mud, TRAC/VSC/Trailer
Sway Control systems may reduce power from the engine to the
wheels. You may need to turn the system off to enable you to rock the
vehicle in order to free it.
■Turning off TRAC (turn on the AUTO LSD system)
→ P. 2 5 1
■Turning off TRAC, VSC a nd Trailer Sway Control
Press and hold the VSC off
switch for more than 3 seconds
while the vehicle is stopped to
turn off TRAC, VSC and Trailer
Sway Control.
The VSC off and “TRAC OFF”
indicators will come on.
Press the switch again to turn
the system back on.
When the TRAC/VSC/Trailer Sway Control/hill-start assist control
systems are operating
Disabling the TRAC/VSC/Traile r Sway Control systems (2WD
models and 2WD mode on 4WD models)
Page 269 of 640
2694-5. Using the driving support systems
4
Driving
If the vehicle gets stuck in fresh snow or mud, TRAC/VSC/Trailer
Sway Control systems may reduce power from the engine to the
wheels. You may need to turn the system off to enable you to rock the
vehicle in order to free it.
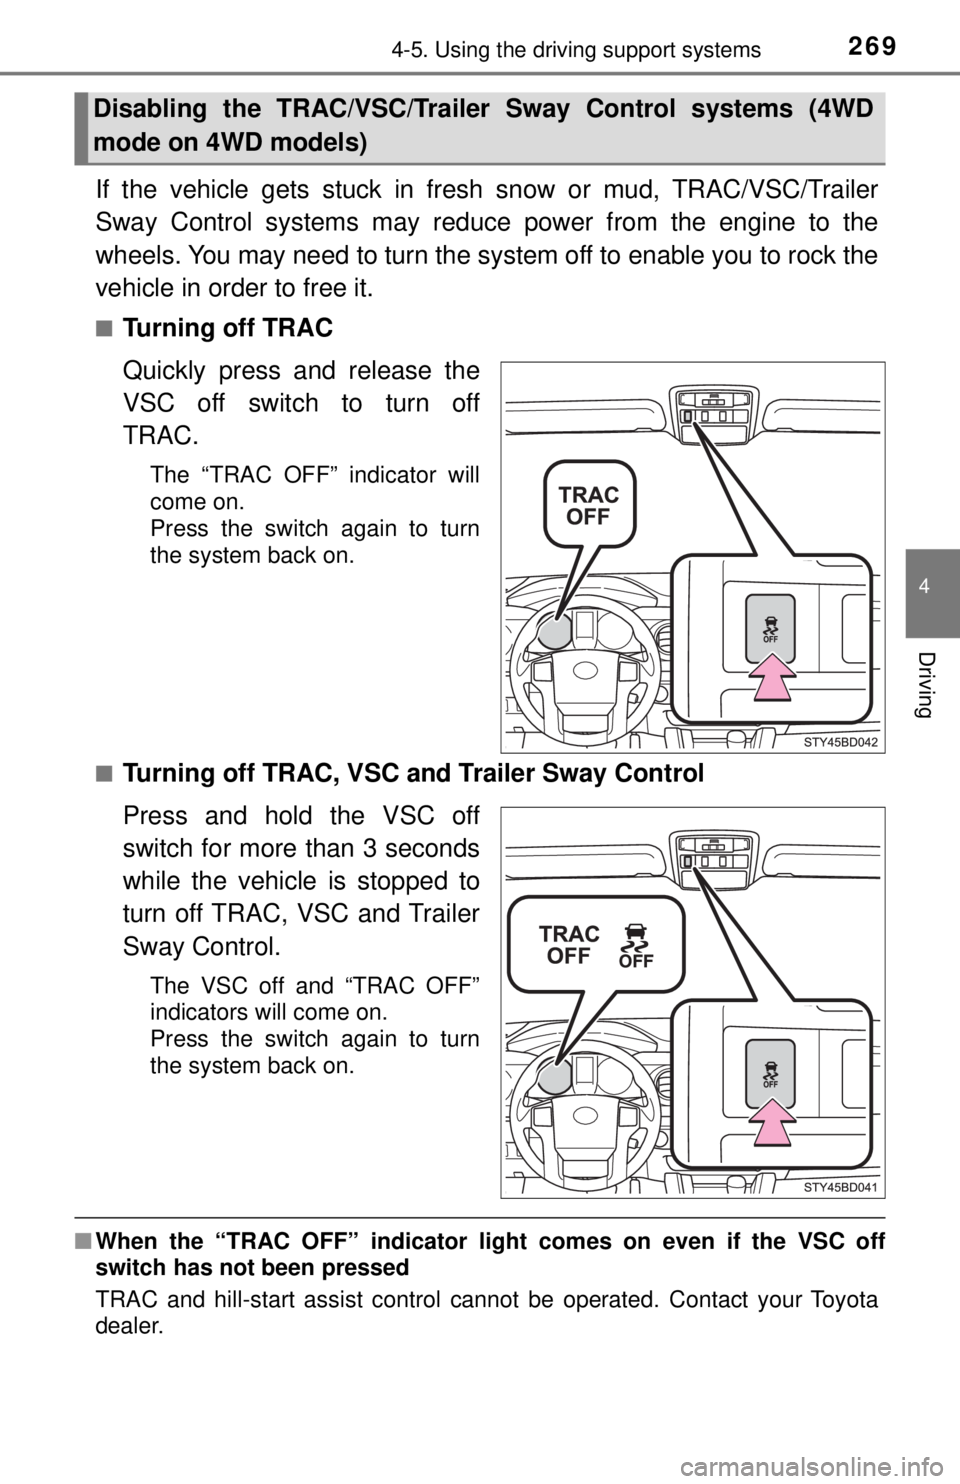
■Turning off TRAC
Quickly press and release the
VSC off switch to turn off
TRAC.
The “TRAC OFF” indicator will
come on.
Press the switch again to turn
the system back on.
■
Turning off TRAC, VSC a nd Trailer Sway Control
Press and hold the VSC off
switch for more than 3 seconds
while the vehicle is stopped to
turn off TRAC, VSC and Trailer
Sway Control.
The VSC off and “TRAC OFF”
indicators will come on.
Press the switch again to turn
the system back on.
■ When the “TRAC OFF” indicator lig ht comes on even if the VSC off
switch has not been pressed
TRAC and hill-start assist control cannot be operated. Contact your Toyota
dealer.
Disabling the TRAC/VSC/Traile r Sway Control systems (4WD
mode on 4WD models)
Page 275 of 640

2754-6. Driving tips
4
Driving
■Tire chain installation
Observe the following precautions when installing and removing chains:
●Install and remove tire chains in a safe location.
● Install tire chains on the rear tires. Do not install tire chains on the front tires.
● Install tire chains on rear tires as tightly as possible. Retighten chai\
ns after
driving 1/4 ⎯ 1/2 mile (0.5 ⎯ 1.0 km).
● Install tire chains following the instructions provided with the tire ch\
ains.
WARNING
■Driving with snow tires
Observe the following precautions to reduce the risk of accidents.
Failure to do so may result in a loss of vehicle control and cause death or
serious injury.
● Use tires of the specified size.
● Maintain the recommended level of air pressure.
● Do not drive in excess of 75 mph (120 km/h), regardless of the type of
snow tires being used.
● Use snow tires on all, not just some wheels.
● 4WD models: Do not mix tires of different makes, models, tread patterns
or treadwear.
■ Driving with tire chains
Observe the following precautions to reduce the risk of accidents.
Failure to do so may result in the vehicle being unable to be driven safely,
and may cause death or serious injury.
● Do not drive in excess of the speed limit specified for the tire chains being
used, or 30 mph (50 km/h), whichever is lower.
● Avoid driving on bumpy road surfaces or over potholes.
● Avoid sudden acceleration, abrupt steering, sudden braking and shifting
operations that cause sudden engine braking.
● Slow down sufficiently before entering a curve to ensure that vehicle con-
trol is maintained.
Page 509 of 640
5098-2. Steps to take in an emergency
8
When trouble arises
If a tow truck is not available in an emergency, your vehicle may be
temporarily towed using cables or chains secured to the emergency
towing hook(s). This should only be attempted on hard surfaced roads
for at most 50 miles (80 km) at under 18 mph (30 km/h).
A driver must be in the vehicle to steer and operate the brakes. The
vehicle’s wheels, drivetrain, axles, steering and brakes must be in
good condition.
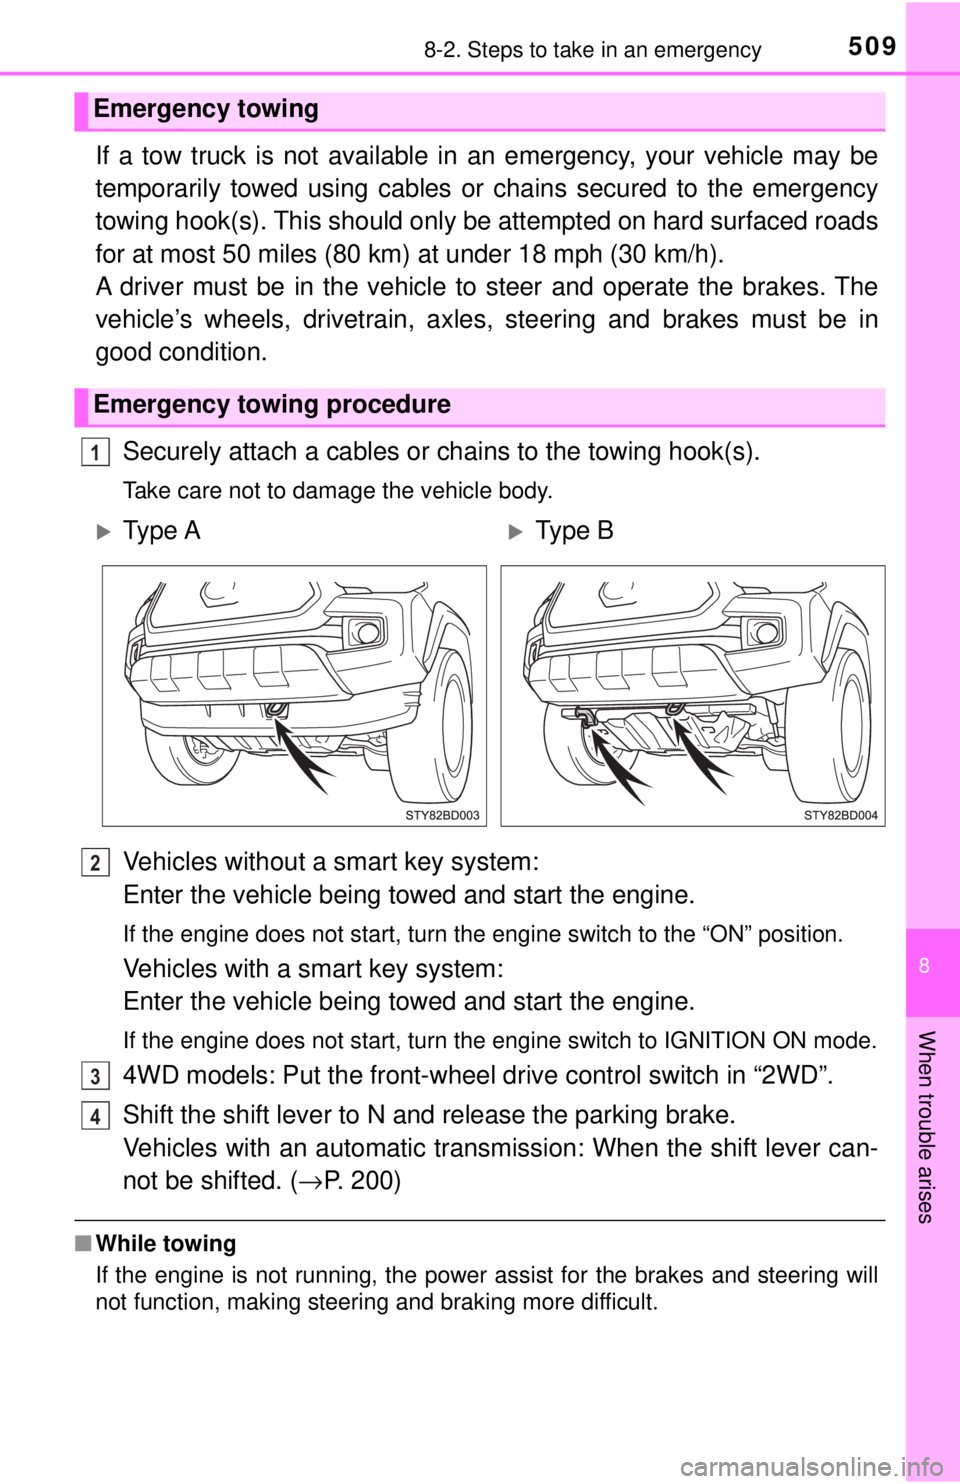
Securely attach a cables or chains to the towing hook(s).
Take care not to damage the vehicle body.
Vehicles without a smart key system:
Enter the vehicle being towed and start the engine.
If the engine does not start, turn the engine switch to the “ON” p\
osition.
Vehicles with a smart key system:
Enter the vehicle being towed and start the engine.
If the engine does not start, turn the engine switch to IGNITION ON mode\
.
4WD models: Put the front-wheel dr ive control switch in “2WD”.
Shift the shift lever to N and release the parking brake.
Vehicles with an automatic transmission: When the shift lever can-
not be shifted. (→ P. 200)
■While towing
If the engine is not running, the power assist for the brakes and steering will
not function, making steering and braking more difficult.
Emergency towing
Emergency towing procedure
1
Ty p e AType B
2
3
4
Page 510 of 640
5108-2. Steps to take in an emergency
WARNING
Observe the following precautions.
Failure to do so may result in death or serious injury.
■When towing the vehicle
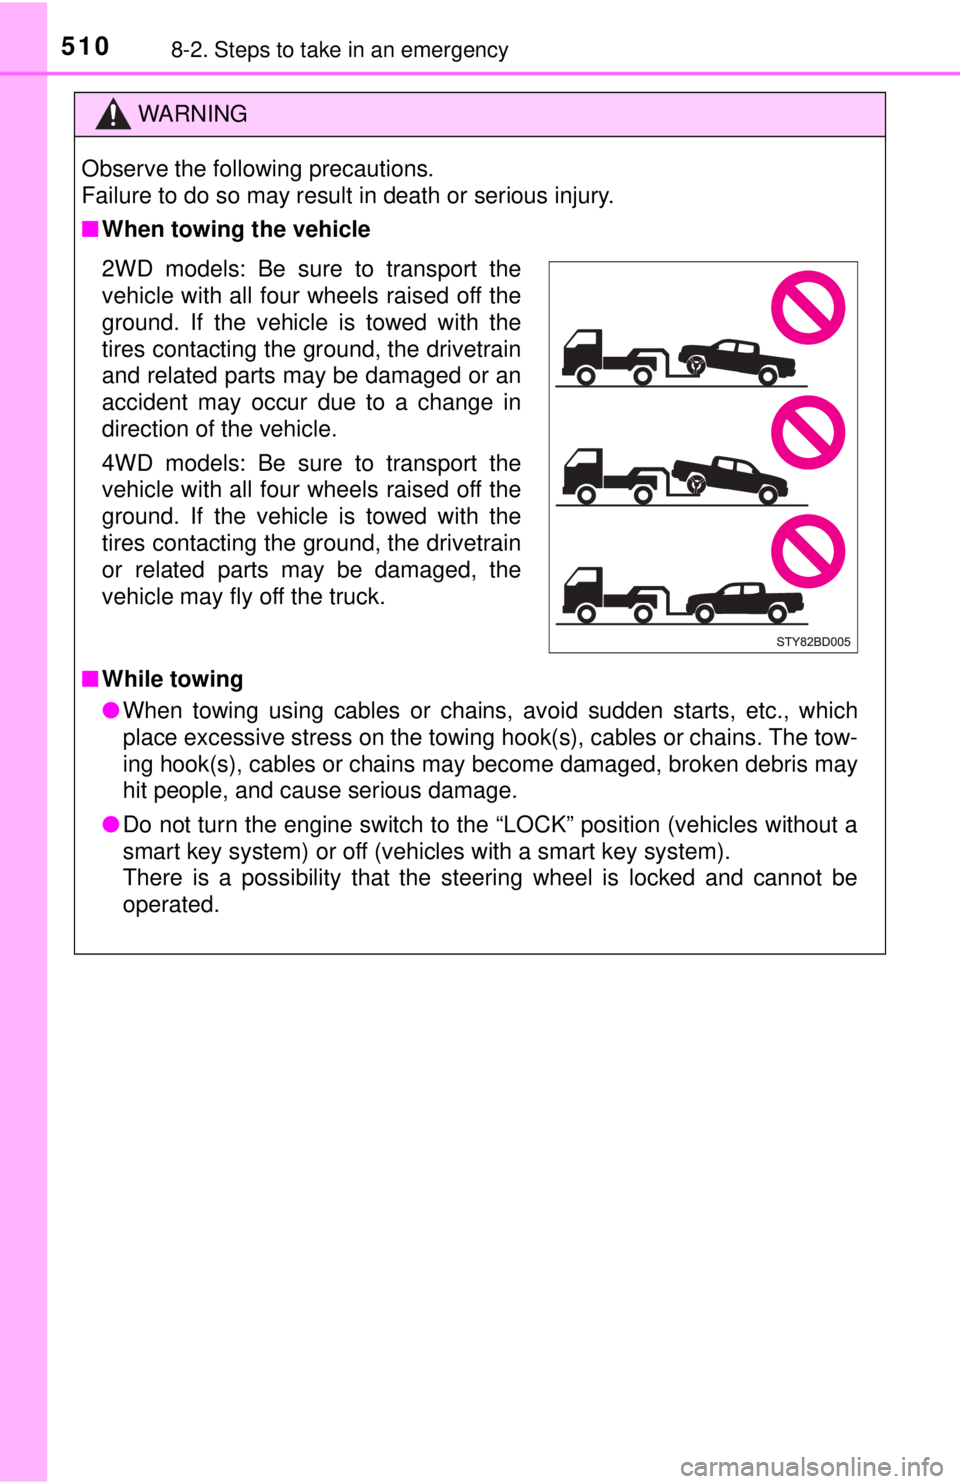
2WD models: Be sure to transport the
vehicle with all four wheels raised off the
ground. If the vehicle is towed with the
tires contacting the ground, the drivetrain
and related parts may be damaged or an
accident may occur due to a change in
direction of the vehicle.
4WD models: Be sure to transport the
vehicle with all four wheels raised off the
ground. If the vehicle is towed with the
tires contacting the ground, the drivetrain
or related parts may be damaged, the
vehicle may fly off the truck.
■ While towing
● When towing using cables or chains, avoid sudden starts, etc., which
place excessive stress on the towing hook(s), cables or chains. The tow-
ing hook(s), cables or chains may become damaged, broken debris may
hit people, and cause serious damage.
● Do not turn the engine switch to the “LOCK” position (vehicles without a
smart key system) or off (vehicles with a smart key system).
There is a possibility that the steering wheel is locked and cannot be
operated.
Page 518 of 640
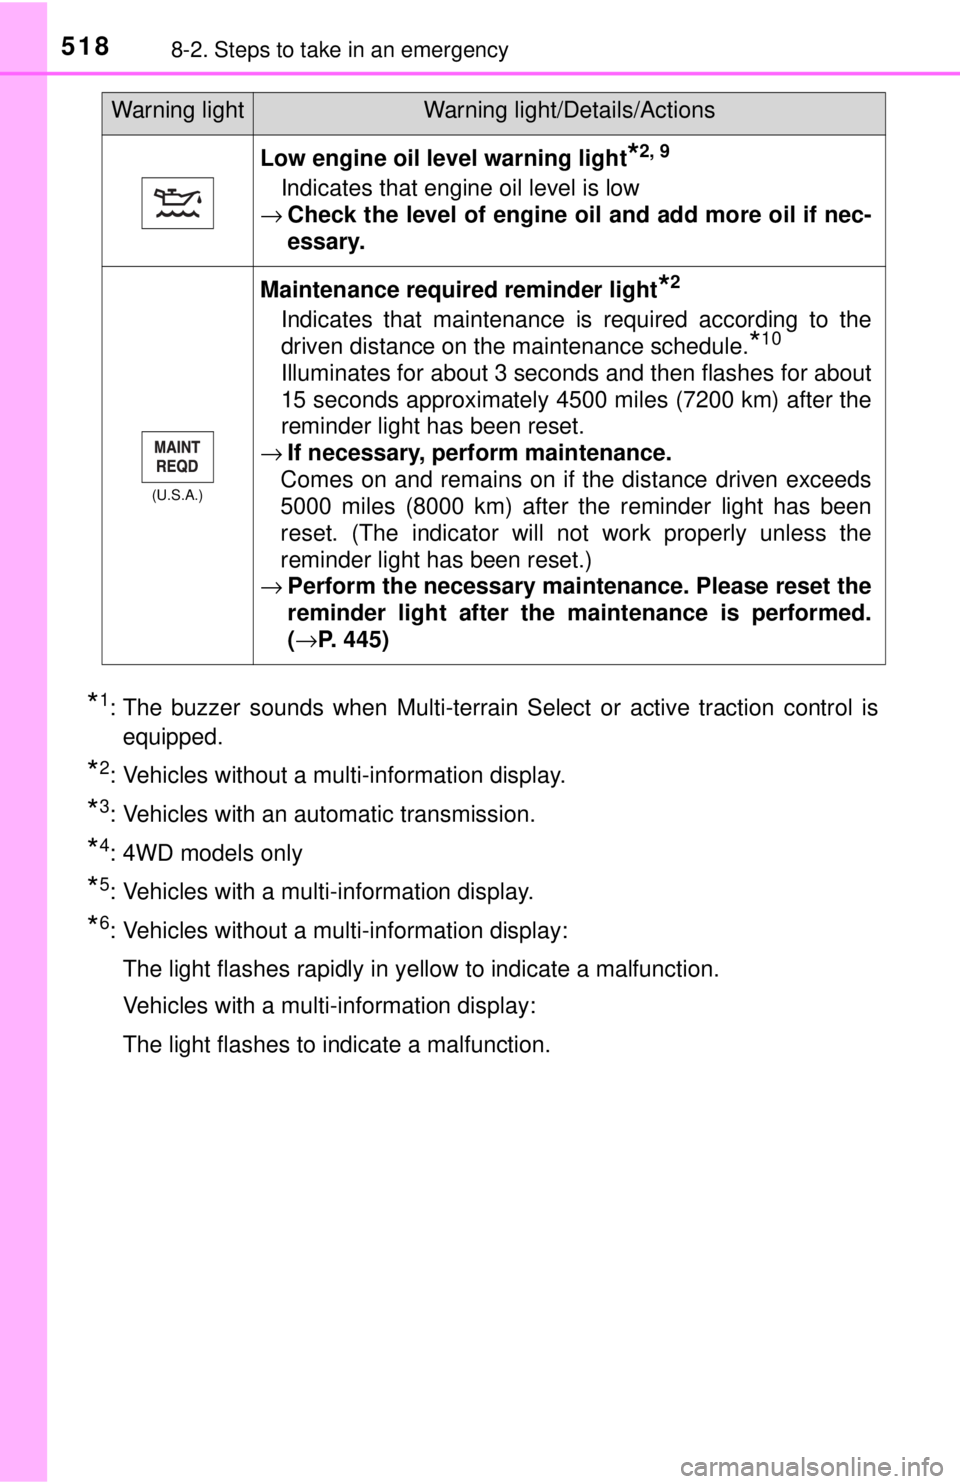
5188-2. Steps to take in an emergency
*1: The buzzer sounds when Multi-terrain Select or active traction control isequipped.
*2: Vehicles without a multi-information display.
*3: Vehicles with an automatic transmission.
*4: 4WD models only
*5: Vehicles with a multi-information display.
*6: Vehicles without a multi-information display:
The light flashes rapidly in yellow to indicate a malfunction.
Vehicles with a multi-information display:
The light flashes to indicate a malfunction.
Low engine oil level warning light*2, 9
Indicates that engine oil level is low
→ Check the level of engine oil and add more oil if nec-
essary.
(U.S.A.)
Maintenance required reminder light*2
Indicates that maintenance is required according to the
driven distance on the maintenance schedule.
*10
Illuminates for about 3 seconds and then flashes for about
15 seconds approximately 4500 miles (7200 km) after the
reminder light has been reset.
→ If necessary, perform maintenance.
Comes on and remains on if the distance driven exceeds
5000 miles (8000 km) after the reminder light has been
reset. (The indicator will not work properly unless the
reminder light has been reset.)
→ Perform the necessary maintenance. Please reset the
reminder light after the maintenance is performed.
(→P. 445)
Warning lightWarning light/Details/Actions
Page 527 of 640
5278-2. Steps to take in an emergency
8
When trouble arises
(If equipped)
Indicates that the tire inflation pressure is low.
→Check the tire inflation pressure, and
adjust to the appropriate level.
(Canada only)
Indicates that the washer fluid level is low.
→Add washer fluid.
Indicates that remaining fuel is approximately
3.2 gal. (12.0 L, 2.6 Imp.gal.) or less
→Refuel the vehicle.
(4WD models only)
Indicates that the transfer mode may not suc-
cessfully change.
→Operate the front-wh eel drive control
switch again. ( →P. 247)
Warning messageDetails/Actions
(Flashes)