Page 392 of 796
392
PRIUS_OM_OM47B54U_(U)
4-5. Using the driving support systems
Rear view monitor system
The rear view image is displayed
when the shift lever is in R and the
power switch is in ON mode.
The rear view monitor system will
be deactivated when the shift lever
is in any position other than R.
The rear view monitor system assists the driver by displaying an
image of the view behind the veh icle with fixed guide lines on
the screen while backing up, for example while parking.
The screen illustrations used in this text are intended as examples,
and may differ from the image that is actually displayed on the
screen.
Page 393 of 796
PRIUS_OM_OM47B54U_(U)
3934-5. Using the driving support systems
4
Driving
■Screen description
The rear view monitor system scr een will be displayed if the shift
lever is shifted to R while the power switch is in ON mode.
Vehicle width extension guide line
Displays a guide path when the vehicle is being backed straight up.
The displayed width is wider than the actual vehicle width.
Vehicle center guide line
This line indicates the estimated vehicle center on the ground.
Distance guide line
Displays a point approximately 1.5 ft. (0.5 m) (red) from the edge of the
bumper.
Distance guide line
Displays a point approximately 3 ft. (1 m) (blue) from the edge of the
bumper.
Using the rear view monitor system
1
2
3
4
Page 394 of 796
394
PRIUS_OM_OM47B54U_(U)
4-5. Using the driving support systems
■Area displayed on screen
The rear view monitor system
displays an image of the view
from the bumper of the rear
area of the vehicle.
The image adjustment proce-
dure for the rear view monitor
system screen is the same as
the procedure for adjusting the
screen. (→P. 430)
• The area displayed on the
screen may vary according to
vehicle orientation conditions.
• Objects which are close to either corner of the bumper or under
the bumper cannot be dis-
played.
• The camera uses a special lens. The distance of the image that appears
on the screen differs from the actual distance.
• Items which are located higher than the camera may not be displayed on the monitor.
Rear view monitor system precautions
Corners of bumper
Page 397 of 796

PRIUS_OM_OM47B54U_(U)
3974-5. Using the driving support systems
4
Driving
●When any part of the vehicle sags
When any part of the vehicle
sags due to the number of
passengers or the distribu-
tion of the load, there is a
margin of error between the
fixed guide lines on the
screen and the actual dis-
tance/course on the road.
■When approaching thre e-dimensional objects
The distance guide lines are displayed according to flat surfaced
objects (such as the road). It is not possible to determine the posi-
tion of three-dimensional objects (s uch as vehicles) using the vehi-
cle width guide lines and distance guide lines. When approaching a
three-dimensional object that extends outward (such as the flatbed
of a truck), be careful of the following.
● Vehicle width guide lines
Visually check the surround-
ings and the area behind the
vehicle. In the case shown
below, the truck appears to
be outside of the vehicle
width guide lines and the
vehicle does not look as if it
hits the truck. However, the
rear body of the truck may
actually cross over the vehi-
cle width guide lines. In real-
ity if you back up as guided
by the vehicle width guide
lines, the vehicle may hit the
truck.
A margin of error
Page 400 of 796

400
PRIUS_OM_OM47B54U_(U)
4-5. Using the driving support systems
WARNING
■When using the rear view monitor system
The rear view monitor system is a supplemental device intended to assist
the driver when backing up. When backing up, be sure to visually check all
around the vehicle both directly and using the mirrors before proceeding.
Observe the following precautions to avoid an accident that could result in
death or serious injuries.
● Never depend on the rear view monitor system entirely when backing up.
The image and the position of the guide lines displayed on the screen may
differ from the actual state.
Use caution, just as you would when backing up any vehicle.
● Be sure to back up slowly, depressing the brake pedal to control vehicle
speed.
● The instructions given are only guide lines.
When and how much to turn the steering wheel will vary according to traf-
fic conditions, road surface conditions, vehicle condition, etc. when park-
ing. It is necessary to be fully aware of this before using the rear view
monitor system.
● When parking, be sure to check that the parking space will accommodate
your vehicle before maneuvering into it.
● Do not use the rear view monitor system in the following cases:
• On icy or slick road surfaces, or in snow
• When using tire chains or emergency tires
• When the back door is not closed completely
• On roads that are not flat or straight, such as curves or slopes
● In low temperatures, the screen may darken or the image may become
faint. The image could distort when the vehicle is moving, or you may
become unable to see the image on the screen. Be sure to visually check
all around the vehicle both directly and using the mirrors before proceed-
ing.
● If the tire sizes are changed, the position of the fixed guide lines displayed
on the screen may change.
● The camera uses a special lens. The distances between objects and
pedestrians that appear in the image displayed on the screen will differ
from the actual distances. ( →P. 395)
Page 404 of 796

404
PRIUS_OM_OM47B54U_(U)
4-5. Using the driving support systems
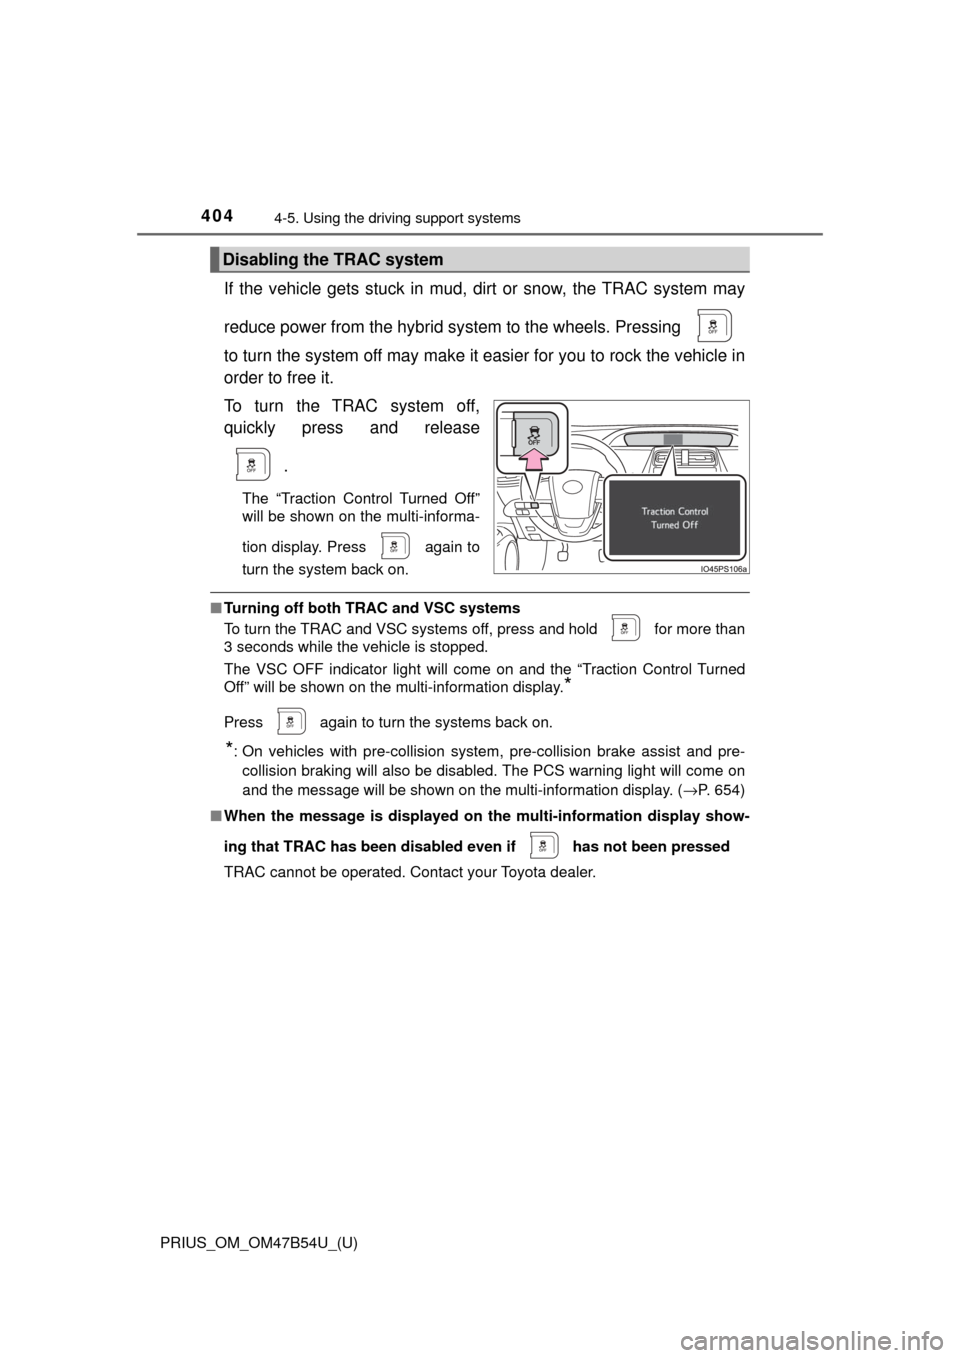
If the vehicle gets stuck in mud, di rt or snow, the TRAC system may
reduce power from the hybrid sy stem to the wheels. Pressing
to turn the system off may make it easier for you to rock the vehicle in
order to free it.
To turn the TRAC system off,
quickly press and release
.
The “Traction Control Turned Off”
will be shown on the multi-informa-
tion display. Press
again to
turn the system back on.
■ Turning off both TRAC and VSC systems
To turn the TRAC and VSC systems off, press and hold for more than
3 seconds while the vehicle is stopped.
The VSC OFF indicator light will come on and the “Traction Control Turned
Off” will be shown on the multi-information display.
*
Press again to turn the systems back on.
*: On vehicles with pre-collision system, pre-collision brake assist and pre-
collision braking will also be disabled. The PCS warning light will come on
and the message will be shown on the multi-information display. ( →P. 654)
■ When the message is displayed on th e multi-information display show-
ing that TRAC has been disable d even if has not been pressed
TRAC cannot be operated. Contact your Toyota dealer.
Disabling the TRAC system
Page 416 of 796
416
PRIUS_OM_OM47B54U_(U)
5-1. Basic OperationsAudio system types .......... 418
Audio system .................... 419
Using the steering wheel audio switches ................ 422
AUX Port/USB Port .......... 423
Basic audio operations ..... 424
5-2. Setup Setup menu ...................... 426
General settings ............... 427
Audio settings ................... 429
Display settings ................ 430
Voice settings ................... 431
5-3. Using the Multimedia system
Selecting the audio source............................. 432
List screen operation ........ 433
Optimal use of the audio system ............................ 435
5-4. Using the radio Radio operation ................ 436
5Audio system
Page 417 of 796

417
PRIUS_OM_OM47B54U_(U)
5Audio system
5-5. Playing an audio CD and MP3/WMA/AAC discs
CD player operation.......... 438
5-6. Using an external device iPod player operation........ 444
USB memory device player operation.............. 449
Using the AUX .................. 454
5-7. Connecting Bluetooth
®
Preparations to use wireless
communication ............... 455
Registering a Bluetooth
®
audio player for the
first time .......................... 458
Registering a Bluetooth
®
phone for the first time.... 459
Registering a Bluetooth
® device ........... 460
Connecting a Bluetooth
® device ........... 462
Displaying a Bluetooth®
device details.................. 464
Detailed Bluetooth
®
settings ........................... 465 5-8. Bluetooth
® Audio
Listening to Bluetooth®
Audio .............................. 466
5-9. Bluetooth
® phone
Using a Bluetooth®
Phone ............................. 468
Making a call .................... 471
Receiving a call ................ 474
Speaking on the phone .... 475
Bluetooth
® phone
message function ........... 478
Using the steering wheel switches.......................... 482
Bluetooth
® phone
settings ........................... 483
Contact/Call History Settings .......................... 484
What to do if... (Troubleshooting) ........... 493
5-10. Bluetooth
®
Bluetooth®........................ 497
5-11. Using the voice command system
Voice command system ............................ 503