Page 4 of 608

TABLE OF CONTENTS4
LC200_OM_OM60P24U_(U)5-1. Using the air conditioning
system and defogger
Front automatic air conditioning system ........ 374
Rear air conditioning system............................. 385
Heated steering wheel/ seat heaters/
seat ventilators ................ 389
5-2. Using the interior lights Interior lights list ................ 393• Interior lights ................. 394
• Personal lights .............. 395
5-3. Using the storage features List of storage features...... 396• Glove box...................... 397
• Console box .................. 398
• Overhead console ......... 399
• Cup holders .................. 400
• Bottle holders ................ 402
• Card holders ................. 403
• Auxiliary boxes .............. 403
Luggage compartment features ........................... 404 5-4. Using the other interior
features
Other interior features........ 406 • Cool box ........................ 406
• Sun visors ..................... 408
• Vanity mirror .................. 408
• Clock ............................. 409
• Outside temperature
display ........................... 409
• Power outlets ................ 410
• Wireless charger ........... 412
• Armrest.......................... 420
• Coat hooks .................... 420
• Assist grips .................... 421
Garage door opener .......... 422
Safety Connect .................. 427
5Interior features
Page 169 of 608
169
LC200_OM_OM60P24U_(U)
4-1. Before driving
4
Driving
Cargo and luggage
Roof rails
Cross rails
Turn the knobs counterclock-
wise to release the cross rails.
Slide the cross rails to the
appropriate position for loading
luggage and turn the knobs
clockwise to tighten the cross
rails securely.
Take notice of the following information about storage precau-
tions, cargo capacity and load:
Roof luggage carrier (if equipped)
1
2
Adjusting the position of cross rails (if equipped)
1
2
Page 282 of 608

282
LC200_OM_OM60P24U_(U)
4-5. Using the driving support systems
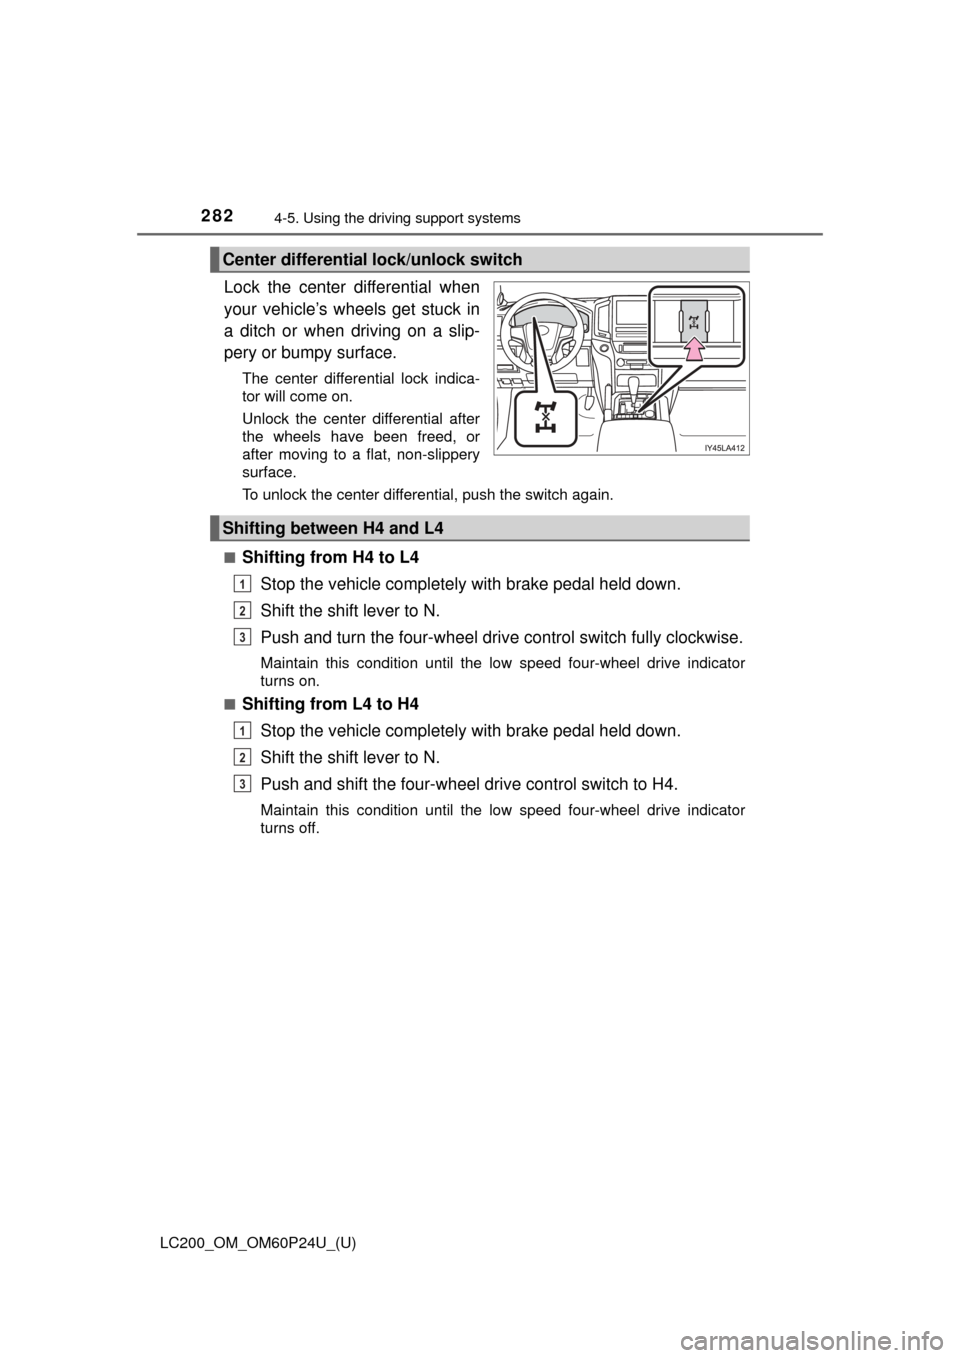
Lock the center differential when
your vehicle’s wheels get stuck in
a ditch or when driving on a slip-
pery or bumpy surface.
The center differential lock indica-
tor will come on.
Unlock the center differential after
the wheels have been freed, or
after moving to a flat, non-slippery
surface.
To unlock the center differential, push the switch again.
■
Shifting from H4 to L4 Stop the vehicle completely with brake pedal held down.
Shift the shift lever to N.
Push and turn the four-wheel driv e control switch fully clockwise.
Maintain this condition until the low speed four-wheel drive indicator
turns on.
■
Shifting from L4 to H4
Stop the vehicle completely with brake pedal held down.
Shift the shift lever to N.
Push and shift the four-wheel drive control switch to H4.
Maintain this condition until the low speed four-wheel drive indicator
turns off.
Center differential lock/unlock switch
Shifting between H4 and L4
1
2
3
1
2
3
Page 373 of 608

373
LC200_OM_OM60P24U_(U)
5Interior features
5-1. Using the air conditioning system and defogger
Front automatic air conditioning system ........ 374
Rear air conditioning system............................. 385
Heated steering wheel/ seat heaters/
seat ventilators ................ 389
5-2. Using the interior lights Interior lights list ................ 393• Interior lights ................. 394
• Personal lights .............. 395 5-3. Using the storage features
List of storage features ..... 396• Glove box...................... 397
• Console box .................. 398
• Overhead console......... 399
• Cup holders .................. 400
• Bottle holders ................ 402
• Card holders ................. 403
• Auxiliary boxes.............. 403
Luggage compartment features ........................... 404
5-4. Using the other interior features
Other interior features ....... 406 • Cool box........................ 406
• Sun visors ..................... 408
• Vanity mirror ................. 408
• Clock ............................. 409
• Outside temperature display........................... 409
• Power outlets ................ 410
• Wireless charger ........... 412
• Armrest ......................... 420
• Coat hooks.................... 420
• Assist grips ................... 421
Garage door opener.......... 422
Safety Connect ................. 427
Page 409 of 608
LC200_OM_OM60P24U_(U)
4095-4. Using the other interior features
5
Interior features
Refer to “NAVIGATION SYSTEM
OWNER’S MANUAL” for adjust-
ment.
■The clock is displayed when
The engine switch is in ACCESSORY or IGNITION ON mode.
The displayed temperature
ranges from -22 °F (-30°C) up to
122 °F (50 °C).
■The outside temperatur e is displayed when
The engine switch is in IGNITION ON mode.
■ When --- is displayed
The system may be malfunctioning. Take your vehicle to your Toyota dealer.
■ Display
In the following situations, the correct outside temperature may not be \
dis-
played, or the display may take longer than normal to change.
●When stopped, or driving at low speeds (less than 12 mph [20 km/h])
● When the outside temperature has changed suddenly (at the entrance/exit
of a garage, tunnel, etc.)
Clock
Outside temperature display
Page 453 of 608

LC200_OM_OM60P24U_(U)
4536-3. Do-it-yourself maintenance
6
Maintenance and care
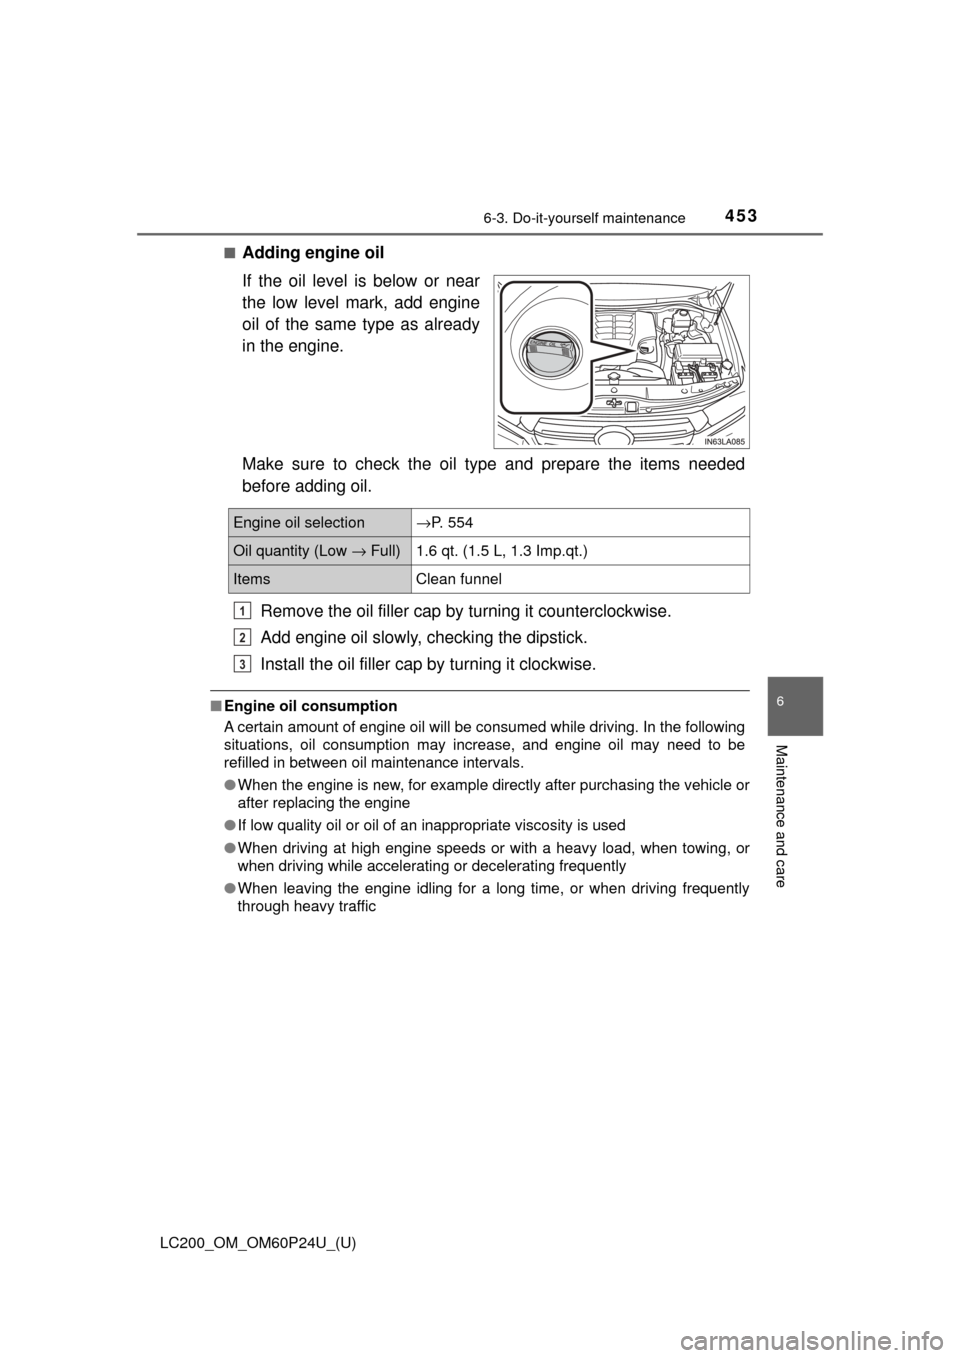
■Adding engine oil
If the oil level is below or near
the low level mark, add engine
oil of the same type as already
in the engine.
Make sure to check the oil type and prepare the items needed
before adding oil.Remove the oil filler cap by turning it counterclockwise.
Add engine oil slowly, c hecking the dipstick.
Install the oil filler cap by turning it clockwise.
■Engine oil consumption
A certain amount of engine oil will be consumed while driving. In the following
situations, oil consumption may increase, and engine oil may need to be
refilled in between oil maintenance intervals.
●When the engine is new, for example directly after purchasing the vehicle or
after replacing the engine
● If low quality oil or oil of an inappropriate viscosity is used
● When driving at high engine speeds or with a heavy load, when towing, or
when driving while accelerating or decelerating frequently
● When leaving the engine idling for a long time, or when driving frequently
through heavy traffic
Engine oil selection→P. 554
Oil quantity (Low → Full)1.6 qt. (1.5 L, 1.3 Imp.qt.)
ItemsClean funnel
1
2
3
Page 458 of 608
458
LC200_OM_OM60P24U_(U)
6-3. Do-it-yourself maintenance
■Fluid level
The fluid level should be within the appropriate range.Full (when hot)
Add fluid (when hot)
Full (when cold)
Add fluid (when cold)
Hot: The vehicles has been driven around 50 mph (80 km/h) for 20 minutes, or slightly longe r in frigid temperatures.
(Fluid temperature, 140 °F - 175°F [60°C - 80 °C]).
Cold: The engine has not been run for about 5 hours. (Room temperature, 50 °F - 85°F [10°C - 30 °C]).
■Checking the fluid level
Make sure to check the fluid type and prepare the necessary items.
Clean all dirt off the reservoir.
Remove the cap by turn ing it counterclockwise.
Wipe the dipstick clean.
Reinstall the cap and remove it again.
Check the fluid level.
Power steering fluid
1
2
3
4
Fluid typeAutomatic transmission fluid DEXRON® II or III
ItemsRag or paper, clean funnel (only for adding fluid)
1
2
3
4
5
Page 489 of 608
LC200_OM_OM60P24U_(U)
4896-3. Do-it-yourself maintenance
6
Maintenance and care
■Front side marker lightFor the left side only:
Remove the securing clip
and move the washer fluid
filler opening.
Turn the bulb base counter-
clockwise.
Remove the light bulb.
When installing, reve rse the steps listed.
Replacing light bulbs
1
2
3
4