2017 SUZUKI SWIFT hands free
[x] Cancel search: hands freePage 151 of 336

5-24
OTHER CONTROLS AND EQUIPMENT
74LH0-74E
NOTE:
Please consult your place of purchase
for details about whether a given auxil-
iary audio source can be connected and
the proper auxiliary cord to use.
The volume and tone controls of the
auxiliary audio source can be adjusted
on the unit.
In AUX mode, the volume setting is dif-
ferent from another mode.
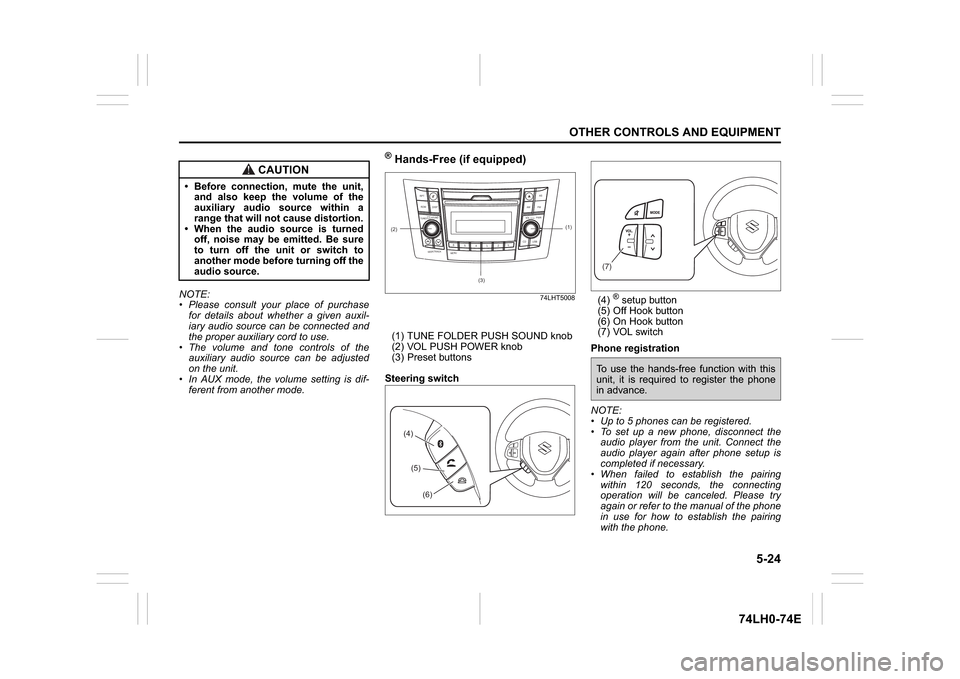
® Hands-Free (if equipped)
74LHT5008
(1) TUNE FOLDER PUSH SOUND knob
(2) VOL PUSH POWER knob
(3) Preset buttons
Steering switch(4)
® setup button
(5) Off Hook button
(6) On Hook button
(7) VOL switch
Phone registration
NOTE:
Up to 5 phones can be registered.
To set up a new phone, disconnect the
audio player from the unit. Connect the
audio player again after phone setup is
completed if necessary.
When failed to establish the pairing
within 120 seconds, the connecting
operation will be canceled. Please try
again or refer to the manual of the phone
in use for how to establish the pairing
with the phone.
CAUTION
Before connection, mute the unit,
and also keep the volume of the
auxiliary audio source within a
range that will not cause distortion.
When the audio source is turned
off, noise may be emitted. Be sure
to turn off the unit or switch to
another mode before turning off the
audio source.
(2)
B S U
CD
2
3 4 5 6
SEEK/TRACK
AS
AMFM RPT
RDM
DISP
PUSHSOUND
TUNE/FLD
VOLPWRPUSH
11
MENU
(3)
(1)
(4)(5)
(6)
(7)To use the hands-free function with this
unit, it is required to register the phone
in advance.
Page 158 of 336

5-31OTHER CONTROLS AND EQUIPMENT
74LH0-74E
Steering switch
Display
(1) CD button
(2)TUNE FOLDER PUSH SOUND knob
(3)UP button
(4) Down button
(5) DISP button
(6) setup button
(A) Track number
(B) Play timeRegistration of audio devices
NOTE:
To set up a new audio player, disconnect
the phone from the unit. Connect the
phone after audio player setup is com-
pleted if necessary.
When failed to establish the connection
within 120 seconds, the connecting
operation will be canceled. Please try
again or refer to the audio player manual
for assistance with the pairing process.
A separate audio mobile device can be
selected for audio, even if a phone is
already connected to the hands free pro-
file.
1) Press the
® setup button (6).
The
® setup menu will be displayed.
2) Turn the TUNE FOLDER PUSH
SOUND knob (2) to select “Setup ”, and
press the knob (2) to determine the
selection.
3) Turn the TUNE FOLDER PUSH
SOUND knob (2) to select “Pairing”,
and press the knob (2) to determine the
selection.
4) Select “CAR AUDIO” from the
® menu
of the audio player and establish the
pairing.
Refer to the manual of the audio player
in use for further information.5) Enter the Passkey displayed on the unit
to the audio player. (For phones with
version 2.1 or above passkey input is
not required)
NOTE:
When selecting “Go Back”, the previous
menu will be displayed.
When additionally registering audio
devices, operate the same step from 1).
(6)
(B)(A)
To use
® ready audio devices with this
unit, it is required to register the devices.
Page 171 of 336

5-44
OTHER CONTROLS AND EQUIPMENT
74LH0-74E
MP3/WMA/AAC
No playbackThe disc contains unsupported formatted
data.Check the file format.
Sound skips or noise producedSound skipping may occur when playing
VBR (Variable Bit Rate) files.It is not recommended to play VBR files.
USB
Playback does not start when the USB
device is connected.There is no supported format file to play
on this unit.Check the file format.
The current consumption of the USB
device exceeds 1.0 A.Use an USB device with a current con-
sumption lower than 1.0 A.®Pairing failedThe distance between this unit and the
®
ready device is too far, or a metallic
object may be located between the
®
ready device and this unit.Change the location of the
® ready
device.
The
® function of the
® ready device is
off.Refer to the manual of the
® ready
device. (Some devices have the power
saving function that automatically acti-
vates after a certain time.)
Unable to receive a call.Your current location may be out of ser-
vice area.Drive your vehicle to the service area of
the phone.
The voice quality of hands-free is low
(Distortion, noise etc.).Another wireless device may be located
near the unit.Switch off the wireless device or keep it
away from the unit.
Problem
Possible cause
Possible solution
Page 231 of 336

8-8
EMERGENCY SERVICE
74LH0-74E
For Diesel
65D350D
Warning Triangle
MHO-07-001
In case of vehicle break-down or during
emergency stopping, where, your vehicle
could become a potential traffic hazard,
keep the warning triangle, provided with
your vehicle, on the road free from any
obstacles behind your vehicle so as to
warn the approaching traffic, at an approxi-
mate distance of 50-100 m. The reflecting
side of the triangle should face the on com-
ing traffic. Please activate the hazard
warning lamps before alighting the vehicle
to keep the warning triangle.
MHO-07-014
Remove the warning triangle carefully
from the cover as shown by arrow 1.
Open both the reflector arms as shown
by arrow and lock the arms with each
other with the clip provided in the right
arm. Open the bottom stand in counter
clock-wise direction as shown by arrow
3. Position the warning triangle behind
the vehicle on a plain surface.
Reverse the removal procedure for keep-
ing inside the cover.
MHO-07-014
WA R N I N G
It is hazardous to remove the radia-
tor cap (or degassing tank cap for a
diesel engine) when the water tem-
perature is high, because scalding
fluid and steam may be blown out
under pressure. The cap should
only be taken off when the coolant
temperature has lowered.
To help prevent personal injury,
keep hands, tools and clothing
away from the engine cooling fan
and air-conditioner fan (if
equipped). These electric fans can
automatically turn on without warn-
ing.
EXAMPLE
Page 236 of 336

9-3APPEARANCE CARE
74LH0-74E
Cleaning the ExteriorCaring for Aluminum Wheels
NOTE:
Do not use an acidic or alkaline deter-
gent to wash aluminum wheels. These
types of detergent will cause permanent
spots, discoloration and cracks on fin-
ished surfaces.
Do not use a bristle brush and soap con-
taining an abrasive material. These will
damage finished surfaces.Washing
60B212S
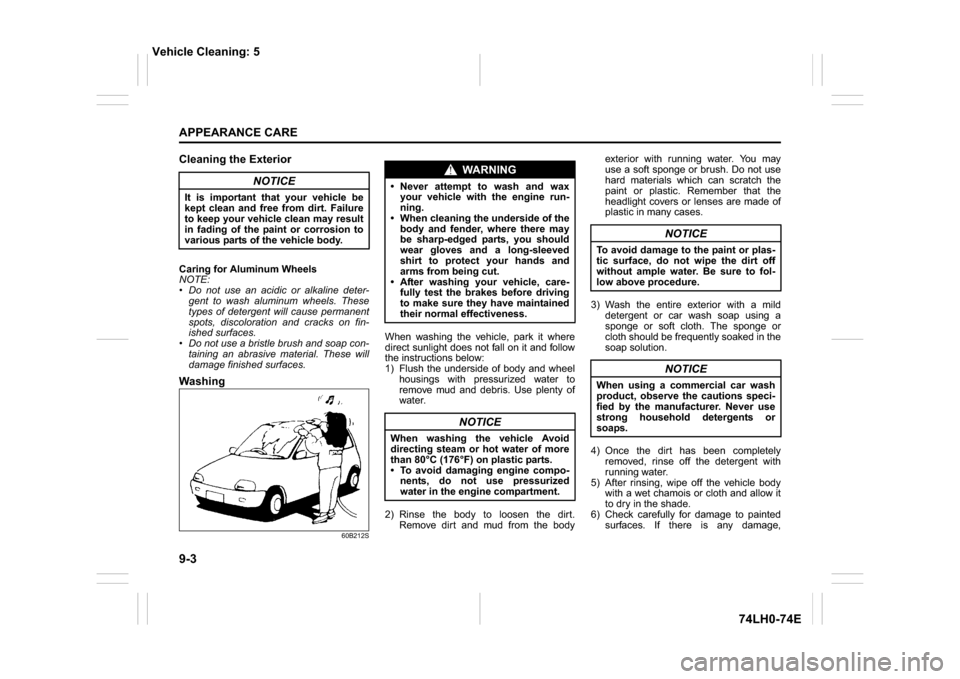
When washing the vehicle, park it where
direct sunlight does not fall on it and follow
the instructions below:
1) Flush the underside of body and wheel
housings with pressurized water to
remove mud and debris. Use plenty of
water.
2) Rinse the body to loosen the dirt.
Remove dirt and mud from the bodyexterior with running water. You may
use a soft sponge or brush. Do not use
hard materials which can scratch the
paint or plastic. Remember that the
headlight covers or lenses are made of
plastic in many cases.
3) Wash the entire exterior with a mild
detergent or car wash soap using a
sponge or soft cloth. The sponge or
cloth should be frequently soaked in the
soap solution.
4) Once the dirt has been completely
removed, rinse off the detergent with
running water.
5) After rinsing, wipe off the vehicle body
with a wet chamois or cloth and allow it
to dry in the shade.
6) Check carefully for damage to painted
surfaces. If there is any damage,
NOTICE
It is important that your vehicle be
kept clean and free from dirt. Failure
to keep your vehicle clean may result
in fading of the paint or corrosion to
various parts of the vehicle body.
WA R N I N G
Never attempt to wash and wax
your vehicle with the engine run-
ning.
When cleaning the underside of the
body and fender, where there may
be sharp-edged parts, you should
wear gloves and a long-sleeved
shirt to protect your hands and
arms from being cut.
After washing your vehicle, care-
fully test the brakes before driving
to make sure they have maintained
their normal effectiveness.
NOTICE
When washing the vehicle Avoid
directing steam or hot water of more
than 80°C (176°F) on plastic parts.
To avoid damaging engine compo-
nents, do not use pressurized
water in the engine compartment.
NOTICE
To avoid damage to the paint or plas-
tic surface, do not wipe the dirt off
without ample water. Be sure to fol-
low above procedure.
NOTICE
When using a commercial car wash
product, observe the cautions speci-
fied by the manufacturer. Never use
strong household detergents or
soaps.
Vehicle Cleaning: 5