2017 SUZUKI SWIFT acc
[x] Cancel search: accPage 124 of 336

4-7DRIVING TIPS
67LH3-74E
74LHM0411
9) Do not attempt sharp handling duringhigh speed driving. You may lose your
control over your vehicle.10) When overtaking or changing lanes
while driving at a high speed, keep
ample vehicle-to-vehicle distance.
Braking
74LHM0412
1) Use the parking brake firmly when park-
ing your vehicle and shift the gear shift
lever into the first gear or reverse gear
position for the sake of safety and con-
firm the gear position by checking the
gear position indicator before turn igni-
tion switch OFF. Remember, even
though the transaxle is in gear, you
must see the gear, you must set the
parking brake firmly.
2) Don’t use hand-braking unless unavoidable. It causes the vehicle to skid and a collision may occur. It is
especially dangerous when the tyres
are worn out as they skid more.
74LHM0413
Use foot brake in three stages
1. Warn the vehicle behind you
2. Gradually apply the brake.
3. Bring the vehicle to a halt.
3) When driving downhill, try not to apply the brake but use the engine brake
effectively. Overuse of the foot-brake
may result in reduction of brake effec-
tiveness.Long distance driving1) Be sure to perform safety checks
before starting a trip.
2) Take rest at regular intervals to prevent accidents which may occur due to feel-
ing sleepy or tired.
EXAMPLE
EXAMPLE
EXAMPLE
Page 125 of 336

4-8
DRIVING TIPS
67LH3-74E
Night time driving
74LHM0414
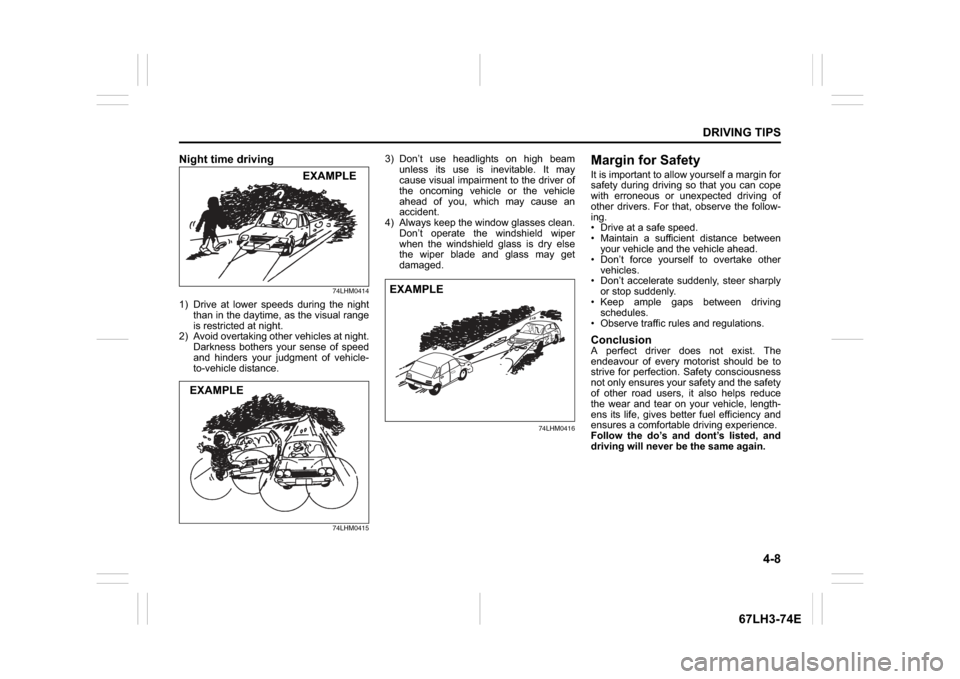
1) Drive at lower speeds during the nightthan in the daytime, as the visual range
is restricted at night.
2) Avoid overtaking other vehicles at night.
Darkness bothers your sense of speed
and hinders your judgment of vehicle-
to-vehicle distance.
74LHM0415
3) Don’t use headlights on high beamunless its use is inevitable. It may
cause visual impairment to the driver of
the oncoming vehicle or the vehicle
ahead of you, which may cause an
accident.
4) Always keep the window glasses clean.
Don’t operate the windshield wiper
when the windshield glass is dry else
the wiper blade and glass may get
damaged.
74LHM0416
Margin for SafetyIt is important to allow yourself a margin for
safety during driving so that you can cope
with erroneous or unexpected driving of
other drivers. For that, observe the follow-
ing.
Drive at a safe speed.
Maintain a sufficient distance betweenyour vehicle and the vehicle ahead.
Don’t force yourself to overtake other
vehicles.
Don’t accelerate suddenly, steer sharply or stop suddenly.
Keep ample gaps between driving schedules.
Observe traffic rules and regulations.ConclusionA perfect driver does not exist. The
endeavour of every motorist should be to
strive for perfection. Safety consciousness
not only ensures your safety and the safety
of other road users, it also helps reduce
the wear and tear on your vehicle, length-
ens its life, gives better fuel efficiency and
ensures a comfortable driving experience.
Follow the do’s and dont’s listed, and
driving will never be the same again.
EXAMPLE
EXAMPLE
EXAMPLE
Page 127 of 336

OTHER CONTROLS AND EQUIPMENT
OTHER CONTROLS AND EQUIPMENT
Heating and Air Conditioning System (if equipped) ........ 5-1
Manual Heating and Air Conditioning System
(if equipped) ......................................................................... 5-2
Automatic Heating and Air Conditioning System
(Climate Control) (if equipped) .......................................... 5-5
Radio Antenna ..................................................................... 5-9
Installation of Radio Frequency Transmitters .................. 5-9
5
Audio System (if equipped) ................................................ 5-10
Fuel Filler Cap ..................................................................... 5-47
Engine Bonnet ..................................................................... 5-48
Sun Visor ............................................................................. 5-48
Interior Light ........................................................................ 5-49
Luggage Compartment Light (if equipped) ...................... 5-50
Accessory Socket (if equipped) ......................................... 5-50
Assist Grips ......................................................................... 5-51
Glove Box ............................................................................ 5-51
Cup Holder and Storage Area ............................................ 5-51
Front Seat Back Pocket (if equipped) ............................... 5-52
Floor Mats (if equipped) ..................................................... 5-52
Shopping Hook (if equipped) ............................................. 5-53
Luggage Area Cover (if equipped) .................................... 5-53
Frame Hooks ....................................................................... 5-53
Luggage Carpet Hook (if equipped) ................................... 5-55
74LH0-74E
Page 135 of 336

5-8
OTHER CONTROLS AND EQUIPMENT
74LH0-74E
You can use the air conditioning switch (6)
to manually turn the air conditioner on or off
according to your preference. When you
turn the air conditioning switch off, the cli-
mate control system cannot lower the inside
temperature below outside temperature.
To turn the climate control system off, push
the “OFF” switch (7).
NOTE:
If the “AUTO” on the display blinks, there is
a problem in the heating system and/or air
conditioning system. You should have the
system inspected by an authorized MAR-
UTI SUZUKI dealer.
NOTE:
To find the temperature at which you are
most comfortable, start with the 25°C
(75°F) setting.
If you turn the temperature selector (1)
until “HI” or “LO” appears on the display,
the climate control system will operate at
maximum heating or cooling and the
blower will run at full speed.
To avoid blowing cold air in cold weather
or hot air in hot weather, the system will
delay turning on the blower until warmed
or chilled air is available.
If your vehicle has been left in the sun
with the windows closed, it will cool
faster if you open the windows briefly. Even under the automatic operation, you
can set individual selectors to the man-
ual mode. The manually selected func-
tions are maintained, and the other
functions remain under automatic opera-
tion.
To return the blower speed selector (2),
air intake selector (3), and air flow selec-
tor (4) to automatic operation, push the
“AUTO” switch (8).
74LHT0510
Be careful not to cover the interior tem-
perature sensor (10) located between the
steering wheel and the climate control
panel, or the solar sensor (11) located at
the top of the driver’s side dashboard.
These sensors are used by the automatic
system to regulate temperature.
Even if the engine is turned OFF, the
temperature Setting remains in the
memory.
Manual operationYou can manually control the climate con-
trol system. Set the selectors to the
desired positions.
74LHT0509
NOTE:
If you need maximum defrosting:
push the defrost switch (5) to turn on the
defroster (the air conditioning system will
come on and the “FRESH AIR” mode will
be selected automatically),
set the blower speed selector to HIGH,
adjust the temperature selector to the
“HI” indication on the display, and
adjust the side outlets so the air blows
on the side windows.MaintenanceIf you do not use the air conditioner for a
long period, such as during winter, it may
not give the best performance when you
start using it again. To help maintain opti-
(10)(11)
EXAMPLE
EXAMPLE
Folding Rear Seats: 3
Page 138 of 336

5-11OTHER CONTROLS AND EQUIPMENT
74LH0-74E
Safety Information Notes on Discs
Precautions
When the inside of the vehicle is very
cold and the player is used soon after
switching on the heater, condensation
may form on the disc or the optical parts
of the player and proper playback may
not be possible. If condensation forms
on the disc, wipe it off with a soft cloth. If
condensation forms on the optical parts
of the player, do not use the player for
about one hour. This will allow the con-
densation to disappear normally.
Driving on extremely bumpy roads which
cause severe vibrations may cause
sound to skip.
This unit uses a precision mechanism.
Even in the event that trouble arises,
never open the case, disassemble the
unit, or lubricate the rotating parts.
Please bring the unit to an authorized
MARUTI SUZUKI dealer.Cautions on Handling
This unit has been designed specifically for
playback of compact discs bearing mark
(A) shown above.
No other discs can be played.
To remove the compact disc from its stor-
age case, press down on the center of the
case and lift the disc out, holding it care-
fully by the edges.
Always handle the compact disc by the
edges. Never touch the surface.
WA R N I N G
If you pay extended attention to oper-
ating the audio system or viewing the
audio system display while driving,
an accident can occur. If you set the
sound volume too loud, it could pre-
vent you from being aware of road
and traffic conditions.
Keep your eyes on the road and
your mind on the drive. Avoid pay-
ing extended attention to operating
the audio system or viewing the
audio system display.
Familiarize yourself with the audio
system controls and operation of
the audio system before driving.
Preset your favorite radio stations
before driving so that you can
quickly tune to them using the pre-
sets.
Set the sound volume to a level
that will allow you to continue to be
aware of road and traffic conditions
while driving.
(A)
Removing the disc
Proper way to hold
the compact disc
Page 141 of 336

5-14
OTHER CONTROLS AND EQUIPMENT
74LH0-74E
Adjusting the AVC (Auto volume con-
trol)The Auto Volume Control (AVC) function
automatically adjusts (increases/decreases)
the sound volume in accordance with vehicle
speed. The AVC control is provided with
three selectable levels (LEVEL OFF, 1, 2, 3).
The range of volume adjustment increases
together with the LEVEL number.1) Press the TUNE FOLDER PUSH
SOUND knob (2) until the AVC adjust-
ment mode is selected.
2) Turn the TUNE FOLDER PUSH
SOUND knob (2) to select the desired
AVC adjustment level. (Initial setting:
LEVEL 2)
Preset-EQ
Preset-EQ calls up various sound types in
accordance with the listening music type.
1) Press the TUNE FOLDER PUSH
SOUND knob (2) several times until
“PRESET-EQ” appears.
2) Turn the TUNE FOLDER PUSH
SOUND knob (2).
Each time the knob is turned, preset
EQ mode will change as follows:
Listening to the RadioDisplay(1) FM button
(2) AM button
(3) Up button
(4) Down button
(5) TUNE FOLDER PUSH SOUND knob
(6) Preset buttons ([1] to [6])
(7) AST button
(A) Band
(B) Frequency
Selecting the FM band
Press the FM button (1).
Each time the button is pressed, the recep-
tion band will change as follows:
Selecting the AM band
Press the AM button (2).
Seek tuning
Press the seek Up button (3) or the seek
Down button (4).
The unit stops searching for a station at a
frequency where a broadcast station is
available.
Manual tuning
Turn the TUNE FOLDER PUSH SOUND
knob (5).
The frequency being received is displayed.
Preset memory
1) Select the desired station. OFF (FLAT)
JAZZ
ROCK
POP
CLASSIC
HIP-HOP(5)
(6)(7)
B S U
CD
2
3 4 5 6
SEEK/TRACK
AS
AMFM RPT
RDM
DISP
PUSHSOUND
TUNE/FLD
VOL PWRPUSH
11
MENU
(1)(2)
(3)
(4)(A)
(B)
FM1 FM2
Page 148 of 336

5-21OTHER CONTROLS AND EQUIPMENT
74LH0-74E
Notes on USB deviceCompatible USB devices
USB Mass Storage Class
For details as to whether your USB
memory/USB Audio is compatible with
USB Mass Storage Class, please con-
tact the USB memory/USB Audio manu-
facturer.
USB Standard Compatibility 1.1/2.0 Full
Speed
File System FAT12/16/32, VFAT
Maximum current less than 1.0 A
If devices such as USB hub, extension
cable are connected to the audio sys-
tem, it may not be recognized. In such
case connect the USB device directly to
the audio system.
Devices such as MP3 player/Mobile
phone/digital camera may not be recog-
nized by the audio system for playing
music.
USB device connection
When connecting a USB device, make
sure that the connector is pushed all the
way into the port.
Do not leave the USB device for long
periods of time in places inside the vehi-
cle where the temperature can rise too
high.
Back up any important data beforehand.
We cannot accept responsibility for any
lost data.
It is recommended not to connect a USB
device that contains data files other than
MP3/WMA/AAC format.Recording MP3/WMA/AAC files on a
USB device
Playback or display may not be possible
depending on the type of USB device in
use or the condition of the recording.
Depending on the connected USB mem-
ory, the files may be played in different
order from the order that the files were
stored.
Compression formats
MP3
Bit rate
:
MPEG1 Audio Layer III: 32 k - 320 kbps
MPEG2 Audio Layer III: 8 k - 160 kbps
MPEG2.5 Audio Layer III: 8 k - 160 kbps Sampling frequency
:
MPEG1 Audio Layer III: 32 k/44.1 k/48 kHz
MPEG2 Audio Layer III: 16 k/22.05 k/24 kHz
MPEG2.5 Audio Layer III: 8 k/11.025 k/12 kHzWMA (Ver. 7, Ver. 8, Ver. 9*)
Bit rate: CBR 32 k -320 kbps
Sampling frequency: 32 k/44.1 k/48 kHz
* WMA 9 Professional/LossLess/Voice are
not supported.
AAC*
Bit rate: ABR 16k - 320 kbbs
Sampling frequency: 32 k/44.1 k/48 kHz
* Apple Lossless is not supported.
Maximum number of files/folders
Maximum number of files: 2500
Maximum number of files in a folder: 255
Maximum depth of tree structure: 8
Maximum number of folders: 255
(Root folder is included.)
Listening to an iPod
®
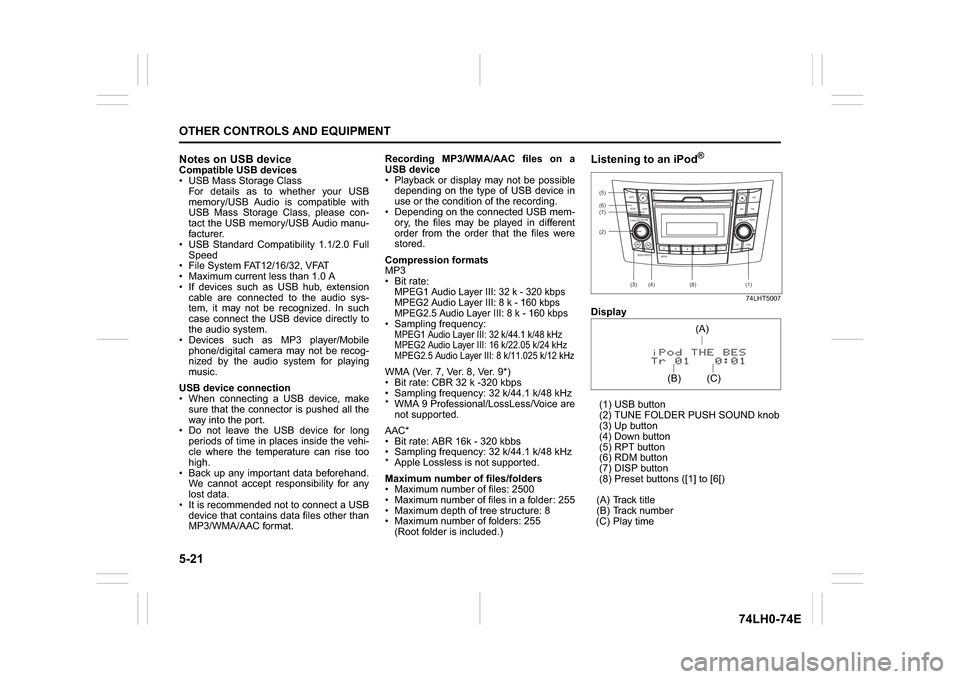
74LHT5007
Display
(1) USB button
(2) TUNE FOLDER PUSH SOUND knob
(3) Up button
(4) Down button
(5) RPT button
(6) RDM button
(7) DISP button
(8) Preset buttons ([1] to [6[)
(A) Track title
(B) Track number
(C) Play time(2) (6)
B S U
CD
2
3 4 5 6
SEEK/TRACK
AS
AMFM RPT
RDM
DISP
PUSHSOUND
TUNE/FLD
VOLPWRPUSH
11
MENU
(3)
(5)
(4) (7)
(1)
(8)
(C)(A)
(B)
Page 150 of 336

5-23OTHER CONTROLS AND EQUIPMENT
74LH0-74E
Notes on iPod
®
Supported iPod
®
® touch (5th generation)
® touch (4th generation)
® touch (3rd generation)
® touch (2nd generation)
® touch (1st generation)
® classic
® nano (7th generation)
® nano (6th generation)
® nano (5th generation)
® nano (4th generation)
® nano (3rd generation)
® nano (2nd generation)
® nano (1st generation)
® (5th generation)
iPhone® 6 Plus
iPhone® 6
iPhone® 5S
iPhone® 5
iPhone® 4S
iPhone® 4
iPhone® 3GS
iPhone® 3G
iPhone®
* Some functions may not be available
depending on the model of iPod
®.
*iPod
® is a trademark of Apple Inc., regis-
tered in the U.S. and other countries.
* iPhone® is a trademark of Apple Inc.,
registered in the U.S. and other coun-
tries.
* Apple is not responsible for the operation
of this device or its compliance with
safety and regulatory standards.iPod
® connection
Make sure to detach the iPod
® after
pressing the engine switch to change the
ignition mode to LOCK. The iPod® may
not be shut down when it is being con-
nected and may result in battery deple-
tion.
Please do not connect iPod
® accesso-
ries such as an iPod
® remote control or
headphones while connecting the iPod
®
with the unit. The unit may not operate
correctly.
AUX Function
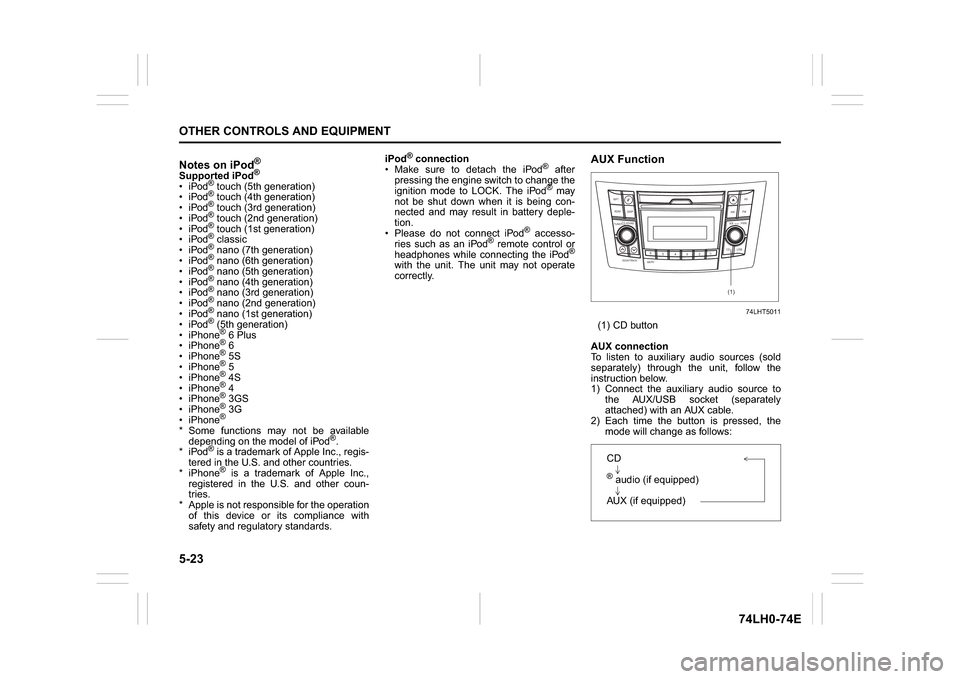
74LHT5011
(1) CD button
AUX connection
To listen to auxiliary audio sources (sold
separately) through the unit, follow the
instruction below.
1) Connect the auxiliary audio source to
the AUX/USB socket (separately
attached) with an AUX cable.
2) Each time the button is pressed, the
mode will change as follows:
B S U
CD
2
3 4 5 6
SEEK/TRACK
AS
AMFM RPT
RDM
DISP
PUSHSOUND
TUNE/FLD
VOL
PWRPUSH
11
MENU
(1)
CD® audio (if equipped)
AUX (if equipped)