Page 280 of 610

.The radio automatically blends to an
HD Radio signal (if equipped) in AM or
FM where available.
! How to change the source
Select the “AM”or “FM ”key on the source
select screen. Refer to “Selecting an audio
source” F5-18.
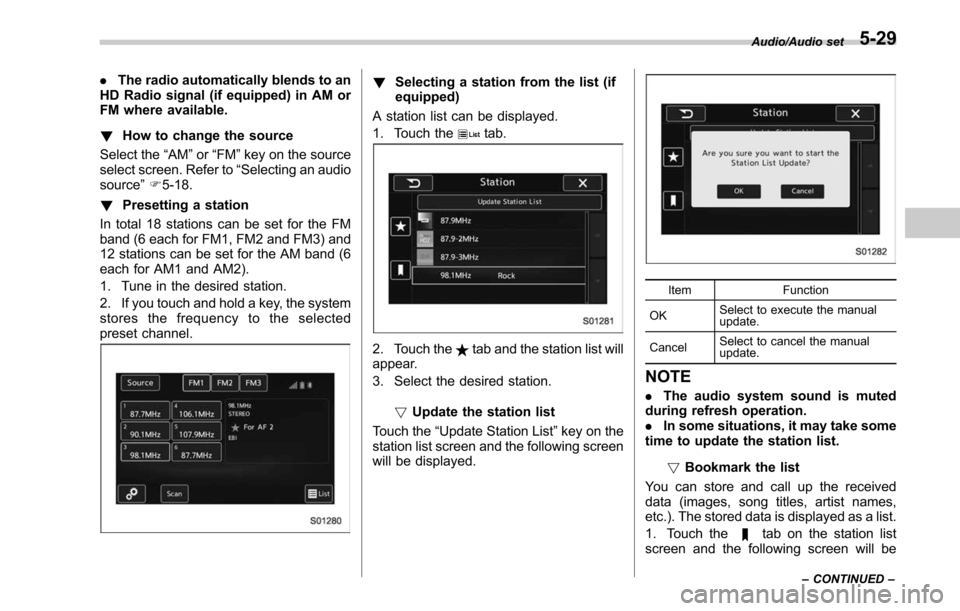
! Presetting a station
In total 18 stations can be set for the FM
band (6 each for FM1, FM2 and FM3) and
12 stations can be set for the AM band (6
each for AM1 and AM2).
1. Tune in the desired station.
2. If you touch and hold a key, the system
stores the frequency to the selected
preset channel.! Selecting a station from the list (if
equipped)
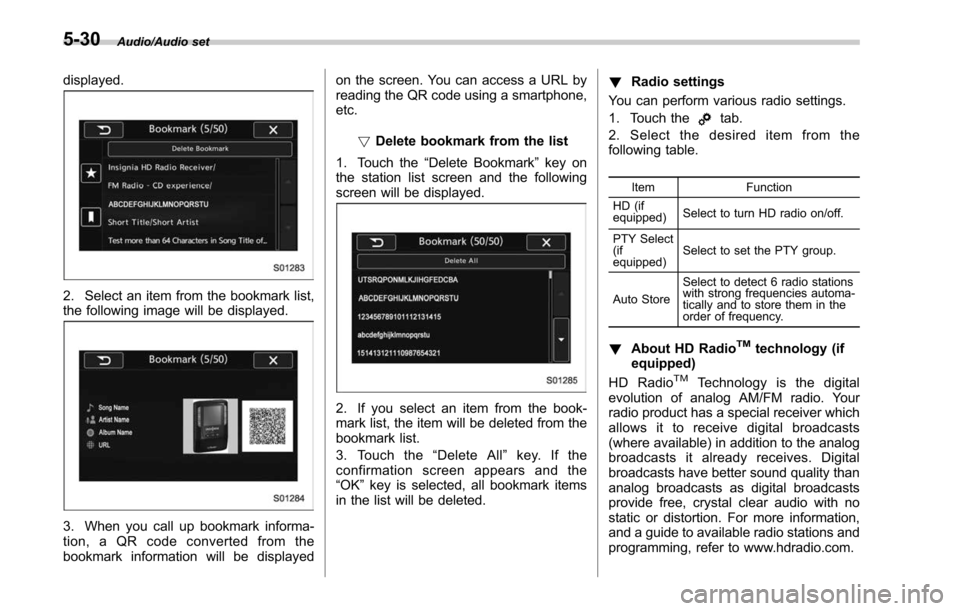
A station list can be displayed.
1. Touch the
tab.
2. Touch thetab and the station list will
appear.
3. Select the desired station.
!Update the station list
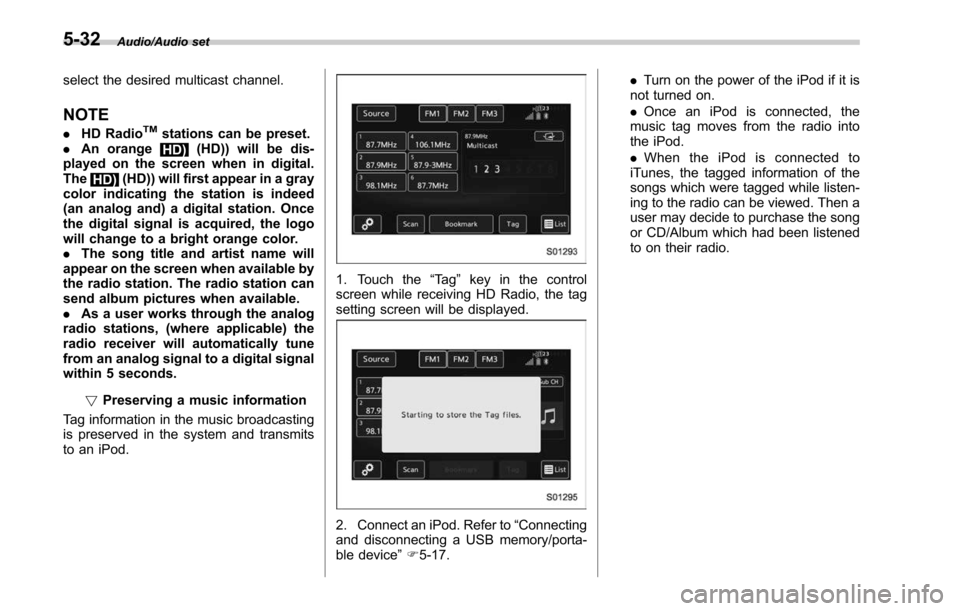
Touch the “Update Station List ”key on the
station list screen and the following screen
will be displayed.
Item Function
OK Select to execute the manual
update.
Cancel Select to cancel the manual
update.
NOTE
.
The audio system sound is muted
during refresh operation.
. In some situations, it may take some
time to update the station list.
!Bookmark the list
You can store and call up the received
data (images, song titles, artist names,
etc.). The stored data is displayed as a list.
1. Touch the
tab on the station list
screen and the following screen will be
Audio/Audio set
–CONTINUED –5-29
Page 281 of 610

Audio/Audio set
displayed.
2. Select an item from the bookmark list,
the following image will be displayed.
3. When you call up bookmark informa-
tion, a QR code converted from the
bookmark information will be displayedon the screen. You can access a URL by
reading the QR code using a smartphone,
etc.
!Delete bookmark from the list
1. Touch the “Delete Bookmark ”key on
the station list screen and the following
screen will be displayed.
2. If you select an item from the book-
mark list, the item will be deleted from the
bookmark list.
3. Touch the “Delete All ”key. If the
confirmation screen appears and the
“OK ”key is selected, all bookmark items
in the list will be deleted. !
Radio settings
You can perform various radio settings.
1. Touch the
tab.
2. Select the desired item from the
following table.
Item Function
HD (if
equipped) Select to turn HD radio on/off.
PTY Select
(if
equipped) Select to set the PTY group.
Auto Store Select to detect 6 radio stations
with strong frequencies automa-
tically and to store them in the
order of frequency.
!
About HD RadioTMtechnology (if
equipped)
HD Radio
TMTechnology is the digital
evolution of analog AM/FM radio. Your
radio product has a special receiver which
allows it to receive digital broadcasts
(where available) in addition to the analog
broadcasts it already receives. Digital
broadcasts have better sound quality than
analog broadcasts as digital broadcasts
provide free, crystal clear audio with no
static or distortion. For more information,
and a guide to available radio stations and
programming, refer to www.hdradio.com.
5-30
Page 282 of 610
AM and FM broadcast sound quality is
now crystal clear, with AM sound quality
that virtually matches FM quality of the
past, and FM broadcasts that have near
CD-level sound quality.
HD Radio Technology manufactured un-
der license from iBiquity Digital Corpora-
tion. Foreign Patents. HD Radio
TMand the
HD, HD Radio, and “Arc ”logos are
proprietary trademarks of iBiquity Digital
Corp.
FM stations can provide additional digital-
only audio programming on HD2/HD3
Channels.
! Available HD Radio
TMtechnology (if
equipped)
! Multicast
On the FM radio frequency most digital
stations have “multiple”or supplemental
programs on one FM station.
1. Touch the “Sub CH ”key on the control
screen and the following screen will be
displayed.
2. The indication that shows whether the
current broadcast is digital or analog is
displayed on the top right of the control
screen.
3. Select the desired channel.
Turning the AUDIO/TUNE knob can also
Audio/Audio set
–CONTINUED –5-31
Page 283 of 610

Audio/Audio set
select the desired multicast channel.
NOTE
.HD RadioTMstations can be preset.
. An orange
HD) (HD)) will be dis-
played on the screen when in digital.
The
HD) (HD)) will first appear in a gray
color indicating the station is indeed
(an analog and) a digital station. Once
the digital signal is acquired, the logo
will change to a bright orange color.
. The song title and artist name will
appear on the screen when available by
the radio station. The radio station can
send album pictures when available.
. As a user works through the analog
radio stations, (where applicable) the
radio receiver will automatically tune
from an analog signal to a digital signal
within 5 seconds.
!Preserving a music information
Tag information in the music broadcasting
is preserved in the system and transmits
to an iPod.
1. Touch the “Ta g”key in the control
screen while receiving HD Radio, the tag
setting screen will be displayed.
2. Connect an iPod. Refer to “Connecting
and disconnecting a USB memory/porta-
ble device ”F 5-17. .
Turn on the power of the iPod if it is
not turned on.
. Once an iPod is connected, the
music tag moves from the radio into
the iPod.
. When the iPod is connected to
iTunes, the tagged information of the
songs which were tagged while listen-
ing to the radio can be viewed. Then a
user may decide to purchase the song
or CD/Album which had been listened
to on their radio.
5-32
Page 291 of 610

Audio/Audio set
NOTE
.SiriusXM Satellite Services —De-
scriptions
–Only SiriusXM Satellite Radio
®
brings you more of what you love,
all in one place. Get over 175
channels, including commercial-
free music, plus the best sports,
news, talk, comedy and entertain-
ment. Welcome to the world of
satellite radio. More information
about SiriusXM Satellite Radio is
available online at www.siriusxm.
com (U.S.) and www.siriusxm.ca
(Canada).
. SiriusXM Satellite Services —Sub-
scription Instructions
–For SiriusXM Services requiring
a subscription (such as SiriusXM
Satellite Radio, and some Infotain-
ment & data services), the following
paragraph shall be included.
Required SiriusXM Satellite Radio
and some Infotainment & data ser-
vices monthly subscriptions sold
separately after trial period. Sub-
scription fee is consumer only. All
fees and programming subject to
change. Subscriptions are subject
to the Customer Agreement avail-
able at www.siriusxm.com (U.S.) or
www.siriusxm.ca (Canada). Sirius, XM and all related marks and logos
are trademarks of Sirius XM Radio
Inc. All other marks, channel names
and logos are the property of their
respective owners.
For more information, program
schedules, and to subscribe or
extend subscription after compli-
mentary trial period; more informa-
tion is available at:
.
U.S. customers:
Visit www.siriusxm.com or call
1-866-635-2349
. Canadian customers:
Visit www.siriusxm.ca or call
1-877-209-0079
. SiriusXM Satellite Radio is solely
responsible for the quality, availability
and content of the satellite radio ser-
vices provided, which are subject to
the terms and conditions of the
SiriusXM Satellite Radio customer ser-
vice agreement.
. Customers should have their radio
ID ready; the radio ID can be found by
tuning to “Ch 000” on the radio. For
details, see “DISPLAYING THE RADIO
ID ”below.
. All fees and programming are the
responsibility of SiriusXM Satellite
Radio and are subject to change. !
How to change the source
Select the “Sirius XM”key on the source
select screen. Refer to “Selecting an audio
source” F5-18.
5-40
Page 292 of 610
!Presetting a channel
1. The presets list is displayed via either
of the following procedures. .When you touch the
tab in the
SiriusXM main screen (if the list that
was displayed the last time is Presets).
. When you select the
tab in each
list screen.
2. The current channel is stored if you
touch and hold the preset list key. You can
store up to 30 channels (A beep sounds
when a channel stored).
The playing icon is displayed for the
currently selected channel. !
Selecting a channel from the list
1. The categories list is displayed via
either of the following procedures. .When you touch the
tab in the
SiriusXM main screen (if the list that
was displayed the last time is Cate-
gories).
. When you select the
tab in each
list screen.
2. Each channel list is displayed when
you select each category item.
Audio/Audio set
–CONTINUED –5-41
Page 293 of 610

Audio/Audio set
In addition, the following messages appear.
Display MessageContents
“ Subscription Update ”
“ Press OK to Continue ” An update to your SiriusXM subscription has
been received by the SiriusXM tuner. Touch
any key to continue.
“ Channel XXX Not Available ”
( “ XXX ”refers to the selected channel number.) This channel is not a valid SiriusXM channel.
The channel number has been entered incor-
rectly, or the channel was removed from the
SiriusXM channel lineup.
“ Channel XXX Not Subscribed Call. ”
“ Call SiriusXM to Subscribed. ”
( “ XXX ”refers to the selected channel number.) This channel is not included in your SiriusXM
subscription plan.
“ Ch Locked ”
“ Lock Code? ” The selected channel has been locked by the
parental controls.
A prompt to enter the unlock code will appear.
“ Check Antenna ” Ensure the SiriusXM antenna cable is con-
nected to the SiriusXM tuner correctly.
Check the SiriusXM antenna wire for breaks or
sharp bends.
Replace the antenna if necessary.
“ No Signal ” The vehicle must be outside, and the antenna
must have a clear view of the southern sky.
NOTEContact SiriusXM
.
Listener Care Center (U.S. customers):
1-866-635-2349
. Listener Care Centre (Canadian customers):
1-877-209-0079 !
Direct Tune
1. A channel input screen is displayed
when you touch the
tab.
2. Input any number and touch the “OK”
key, receive the channel which input.
5-42
Page 294 of 610
!SXM setting
1. An option menu screen is displayed
when you touch the
tab on the lower
left side of the screen. The “Options ”
screen will appear.
Option menu screen
No. Function
&1Set the lock function of each chan-
nel. Input the password is necessary
for operation.
&2Set the password of the lock func-
tion.
2. A password input screen is displayed
when you touch the “Set”key of the
Channel Lock function.
Password input screen
3. When the input password is approved,
change to the lock channel selection
screen.
Lock channel selection screen
4. In the channel list, touch the channel
that should be locked.
! Displaying the Radio ID
Each SiriusXM tuner is identified with a
unique radio ID. The “Radio ID”is required
when activating an SiriusXM Satellite
Services or when reporting a problem.
. If“Ch 000 ”is selected using the
AUDIO/TUNE knob, the ID code will be
displayed.
. Touch the
key. The Radio ID will be
displayed on the “Options”screen.
Audio/Audio set
–CONTINUED –5-43