2017 SUBARU FORESTER fuel type
[x] Cancel search: fuel typePage 187 of 634
Instruments and controls/Information display (Mexico–spec. models)
the average rate of fuel consumption.
When the low fuel warning light illumi-
nates, the driving range display flashes for
5 seconds. (The display first switches to
the driving range value if a different value
was previously displayed.)
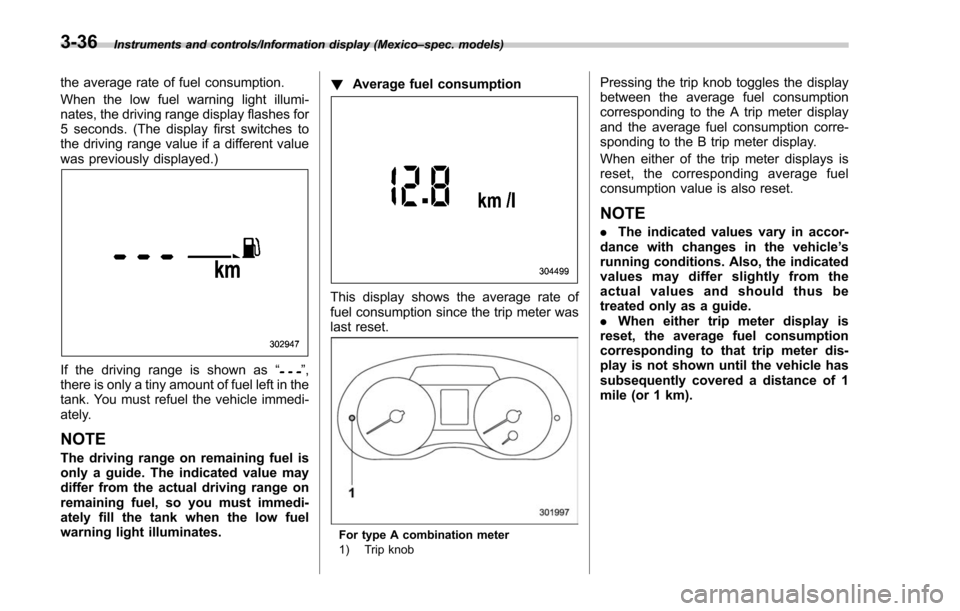
If the driving range is shown as “”,
there is only a tiny amount of fuel left in the
tank. You must refuel the vehicle immedi-
ately.
NOTE
The driving range on remaining fuel is
only a guide. The indicated value may
differ from the actual driving range on
remaining fuel, so you must immedi-
ately fill the tank when the low fuel
warning light illuminates. !
Average fuel consumption
This display shows the average rate of
fuel consumption since the trip meter was
last reset.
For type A combination meter
1) Trip knob
Pressing the trip knob toggles the display
between the average fuel consumption
corresponding to the A trip meter display
and the average fuel consumption corre-
sponding to the B trip meter display.
When either of the trip meter displays is
reset, the corresponding average fuel
consumption value is also reset.
NOTE
.The indicated values vary in accor-
dance with changes in the vehicle ’s
running conditions. Also, the indicated
values may differ slightly from the
actual values and should thus be
treated only as a guide.
. When either trip meter display is
reset, the average fuel consumption
corresponding to that trip meter dis-
play is not shown until the vehicle has
subsequently covered a distance of 1
mile (or 1 km).
3-36
Page 189 of 634
Instruments and controls/Information display (Mexico–spec. models)
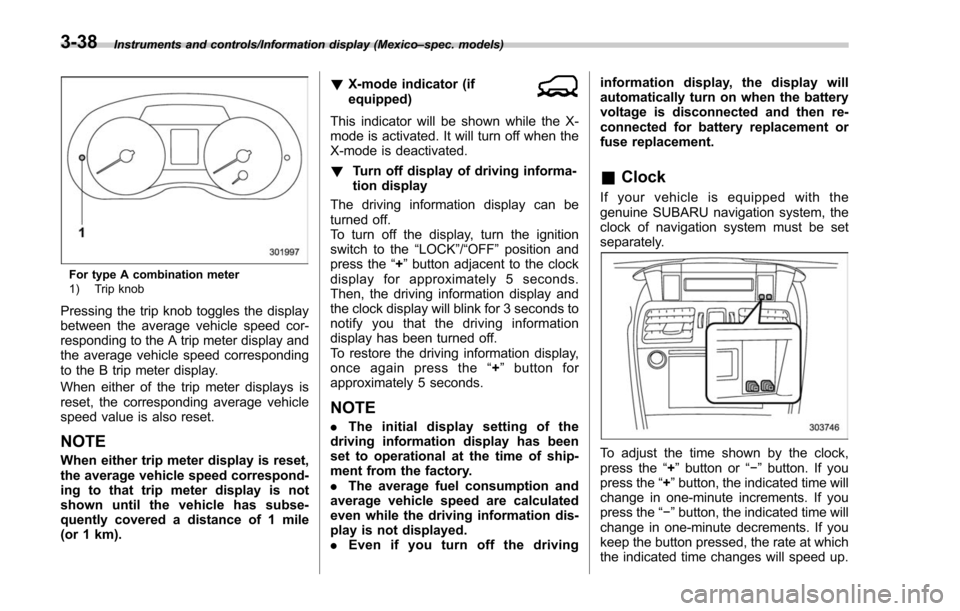
For type A combination meter
1) Trip knob
Pressing the trip knob toggles the display
between the average vehicle speed cor-
responding to the A trip meter display and
the average vehicle speed corresponding
to the B trip meter display.
When either of the trip meter displays is
reset, the corresponding average vehicle
speed value is also reset.
NOTE
When either trip meter display is reset,
the average vehicle speed correspond-
ing to that trip meter display is not
shown until the vehicle has subse-
quently covered a distance of 1 mile
(or 1 km). !
X-mode indicator (if
equipped)
This indicator will be shown while the X-
mode is activated. It will turn off when the
X-mode is deactivated.
! Turn off display of driving informa-
tion display
The driving information display can be
turned off.
To turn off the display, turn the ignition
switch to the “LOCK”/“OFF”position and
press the “+”button adjacent to the clock
display for approximately 5 seconds.
Then, the driving information display and
the clock display will blink for 3 seconds to
notify you that the driving information
display has been turned off.
To restore the driving information display,
once again press the “+ ” button for
approximately 5 seconds.
NOTE
. The initial display setting of the
driving information display has been
set to operational at the time of ship-
ment from the factory.
. The average fuel consumption and
average vehicle speed are calculated
even while the driving information dis-
play is not displayed.
. Even if you turn off the driving information display, the display will
automatically turn on when the battery
voltage is disconnected and then re-
connected for battery replacement or
fuse replacement.
&
Clock
If your vehicle is equipped with the
genuine SUBARU navigation system, the
clock of navigation system must be set
separately.
To adjust the time shown by the clock,
press the “+”button or “− ” button. If you
press the “+ ”button, the indicated time will
change in one-minute increments. If you
press the “− ”button, the indicated time will
change in one-minute decrements. If you
keep the button pressed, the rate at which
the indicated time changes will speed up.
3-38
Page 190 of 634
The clock can be set to 12-hour or 24-hour
clock displays. Perform the following
procedure to switch the display format.
1. Place the ignition switch in the
“LOCK”/“OFF”position.
2. Press and hold the “−”button that is
located near the clock display for approxi-
mately 5 seconds. The clock display will
then start to flash.
3. While the clock display is flashing,
press and hold the “+”button for approxi-
mately 2 seconds. The clock format will
then change.
4. The clock display will continue to flash
for approximately 3 seconds to inform you
that the clock display has been changed.
If you want to change the clock display
again, press and hold the “+”button for
approximately 2 seconds while the clock
display is flashing.Multi information display
(models with type B combi-
nation meter)
WARNING
Always pay adequate attention to
safe driving when operating the
multi information display while the
vehicle is in motion. When operation
of the multi information display
interferes with your ability to con-
centrate on driving, stop the vehicle
before performing operations on the
screen. Also, do not concentrate on
the display while driving. Doing so
may cause you to look away from
the road and could result in an
accident.
Various information will be shown on the
multi information display. Also, a warning
message will appear on the display if a
malfunction, etc. is detected. In addition,
several settings for the displayed content
can be performed.
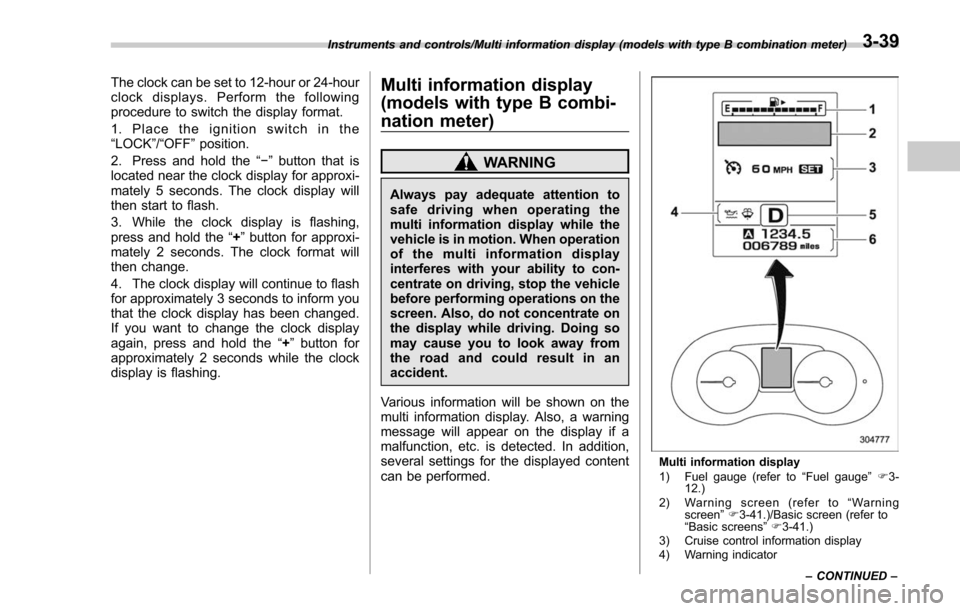
Multi information display
1) Fuel gauge (refer to “Fuel gauge ”F 3-
12.)
2) Warning screen (refer to “Warning
screen ”F 3-41.)/Basic screen (refer to
“ Basic screens ”F 3-41.)
3) Cruise control information display
4) Warning indicator
Instruments and controls/Multi information display (models with type B combination meter)
–CONTINUED –
3-39
Page 200 of 634

!Information bar
1) Information bar
2) Outside temperature indicator
3) Information reminder (models with type A
combination meter)
4) Top display
5) Clock
While the ignition switch is in the “ACC ”or
“ON ”position, the outside temperature
indicator, clock, etc. will be shown on the
information bar.
!Outside temperature indicator
This displays the outside temperature
between −408 F( −408 C) and 122 8F
(50 8C).
Icy road surface warning screen
When the outside temperature becomes
37 8F(3 8C) or less, the icy road surface
warning screen interrupts to inform the
driver that the road surface may be frozen.
NOTE
. The outside temperature indicator
shows the temperature around the
sensor. Therefore, the temperature in-
dication may differ from the actual
outside air temperature.
. The icy road surface warning screen
should be treated only as a guide. Be
sure to check the condition of the road
surface before driving.
. Once the icy road surface warning
screen is displayed, it will not be
displayed again unless the ignition switch is turned to the
“ACC ”or “ON ”
position after it has been turned to
“ LOCK ”/“ OFF ”position.
! Information reminder
The screen returns to the original screen
several seconds after the interruption
screen has been displayed. If the inter-
ruption screen can be displayed once
more even after the original screen has
appeared, an information reminder should
be displayed. For details about the inter-
ruption screen, refer to “Interruption
screen” F3-48.
! Top display
One of the following items can be dis-
played on the top display.
. Average fuel consumption correspond-
ing to the driving distance of each trip
meter
. Current fuel consumption (This may
not be displayed when driving at a low
speed.)
. Driving range on remaining fuel
For details about the setting of the top
display, refer to “Top display setting ”F 3-
68.
Instruments and controls/Multi function display
–CONTINUED –3-49
Page 205 of 634
Instruments and controls/Multi function display
ItemDetails
Average vehicle speed (Average
vehicle speed for the entire driving
time from when the trip meter was
reset)
Lifetime fuel consumption
Engine oil temperature
Accelerator opening ratio
Boost pressure (turbo models
only)
Journey time (the time that has
elapsed since the ignition switch
was turned to the“ON ”position)
Journey distance (the distance
that has been driven since the
ignition switch was turned to the
“ON ”position)
Average fuel consumption for the
entire driving distance from when
the ignition switch was turned to
the “ON ”position
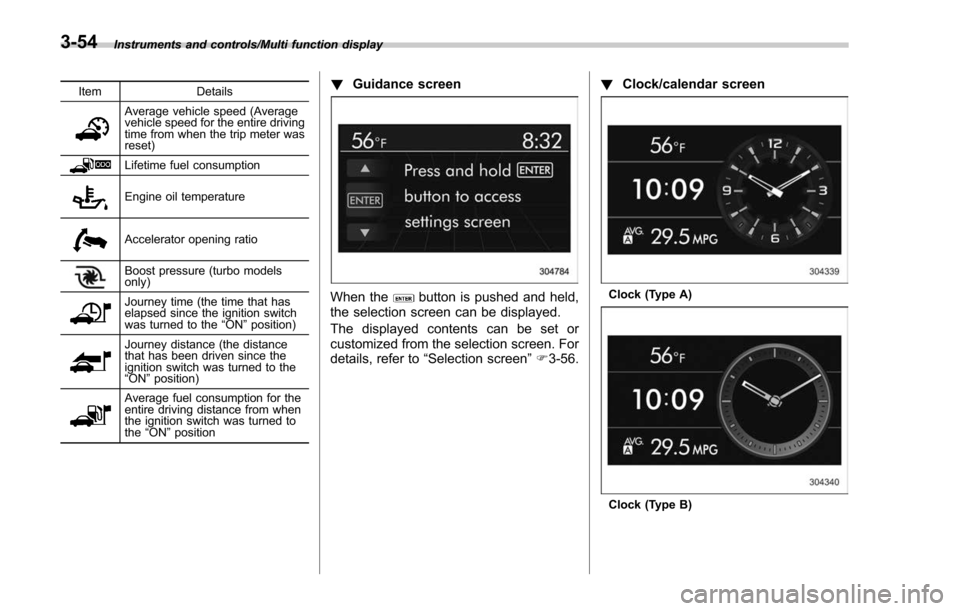
! Guidance screen
When thebutton is pushed and held,
the selection screen can be displayed.
The displayed contents can be set or
customized from the selection screen. For
details, refer to “Selection screen” F3-56. !
Clock/calendar screenClock (Type A)
Clock (Type B)
3-54
Page 206 of 634
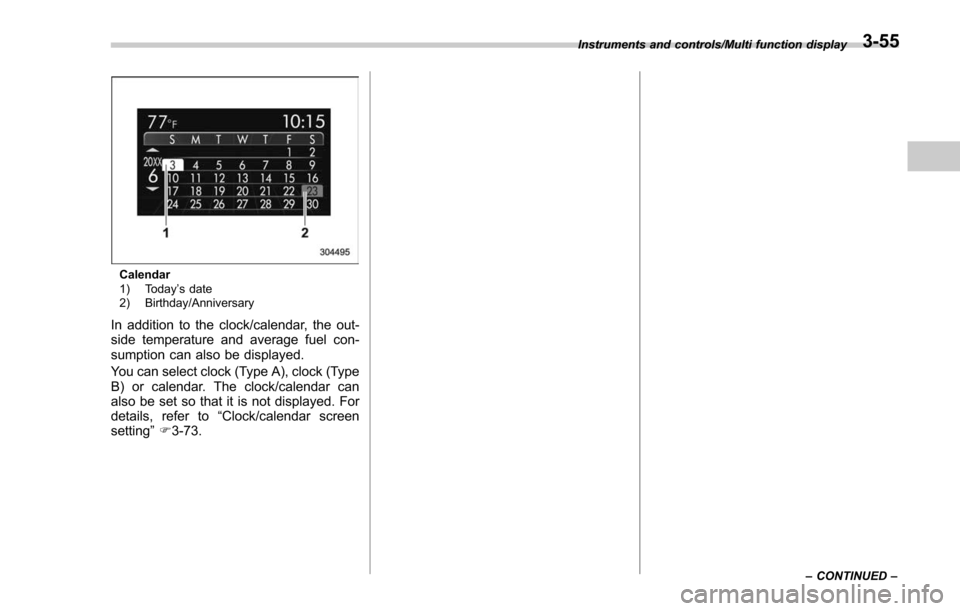
Calendar
1) Today’s date
2) Birthday/Anniversary
In addition to the clock/calendar, the out-
side temperature and average fuel con-
sumption can also be displayed.
You can select clock (Type A), clock (Type
B) or calendar. The clock/calendar can
also be set so that it is not displayed. For
details, refer to “Clock/calendar screen
setting ”F 3-73.
Instruments and controls/Multi function display
–CONTINUED –3-55
Page 207 of 634
Instruments and controls/Multi function display
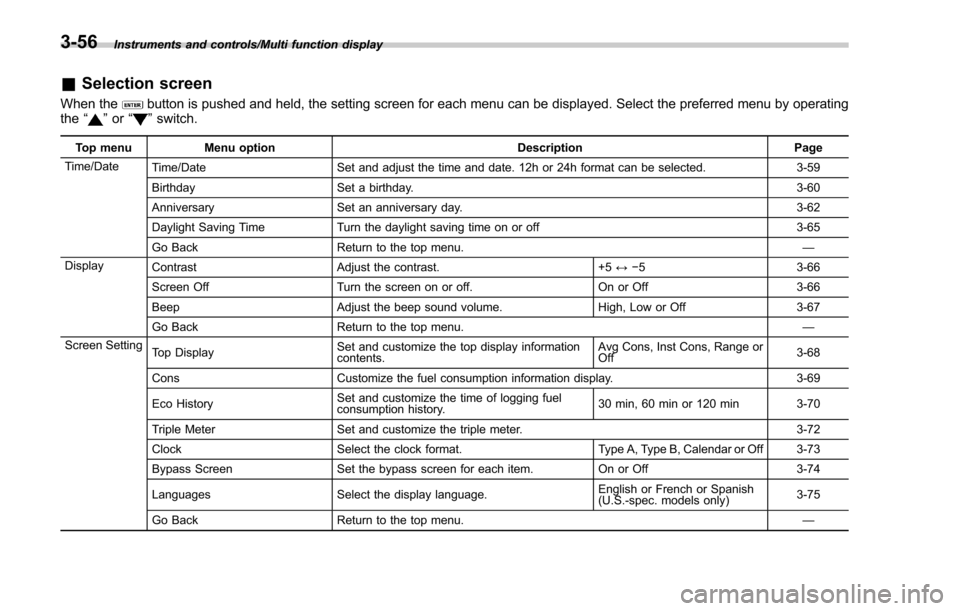
&Selection screen
When thebutton is pushed and held, the setting screen for each menu can be displayed. Select the preferred menu by operating
the “”or “”switch.
Top menu Menu option DescriptionPage
Time/Date Time/Date Set and adjust the time and date. 12h or 24h format can be selected. 3-59
Birthday Set a birthday. 3-60
Anniversary Set an anniversary day. 3-62
Daylight Saving Time Turn the daylight saving time on or off 3-65
Go Back Return to the top menu. —
Display Contrast Adjust the contrast. +5↔−53 -6 6
Screen Off Turn the screen on or off. On or Off3-66
Beep Adjust the beep sound volume. High, Low or Off3-67
Go Back Return to the top menu. —
Screen Setting Top Display Set and customize the top display information
contents. Avg Cons, Inst Cons, Range or
Off
3-68
Cons Customize the fuel consumption information display. 3-69
Eco History Set and customize the time of logging fuel
consumption history. 30 min, 60 min or 120 min 3-70
Triple Meter Set and customize the triple meter. 3-72
Clock Select the clock format. Type A, Type B, Calendar or Off 3-73
Bypass Screen Set the bypass screen for each item. On or Off3-74
Languages Select the display language. English or French or Spanish
(U.S.-spec. models only)
3-75
Go Back Return to the top menu. —
3-56
Page 255 of 634
Instruments and controls/Wiper and washer
Wiper and washer
WARNING
In freezing weather, do not use the
windshield washer until the wind-
shield is sufficiently warmed by the
defroster.
Otherwise the washer fluid can
freeze on the windshield, blocking
your view.
CAUTION
.Do not operate the washer con-
tinuously for more than 10 sec-
onds, or when the washer fluid
tank is empty. This may cause
overheating of the washer motor.
Check the washer fluid level
frequently, such as at fuel stops.
. Do not operate the wipers when
the windshield or rear window is
dry. This may scratch the glass,
damage the wiper blades and
might cause the wiper motor to
fail. Before operating the wiper
on a dry windshield or rear
window, always use the wind-
shield washer. .
In freezing weather, be sure that
the wiper blades are not frozen to
the windshield or rear window
before switching on the wipers.
Attempting to operate the wiper
with the blades frozen to the
window glass could cause not
only the wiper blades to be
damaged but also might cause
the wiper motor to fail. If the
wiper blades are frozen to the
window glass, be sure to operate
the defroster, windshield wiper
deicer (if equipped) or rear win-
dow defogger before turning on
the wiper.
. If the wipers stop during opera-
tion because of ice or some other
obstruction on the window, this
might cause the wiper motor to
fail even if the wiper switch is
turned off. If this occurs,
promptly stop the vehicle in a
safe place, turn the ignition
switch to the “LOCK ”/“ OFF ”po-
sition and clean the window
glass to allow proper wiper op-
eration.
. Use clean water if windshield
washer fluid is unavailable. In
areas where water freezes in
winter, use SUBARU Windshield Washer Fluid or the equivalent.
Refer to
“Windshield washer
fluid ”F 11-30.
Also, when driving the vehicle
when there are freezing tempera-
tures, use non-freezing type wi-
per blades.
. Do not clean the wiper blades
with gasoline or a solvent, such
as paint thinner or benzine. This
will cause deterioration of the
wiper blades.
NOTE
. The windshield wiper motor is pro-
tected against overloads by a circuit
breaker. If the motor operates continu-
ously under an unusually heavy load,
the circuit breaker may trip to stop the
motor temporarily. If this happens, park
your vehicle in a safe place, turn off the
wiper switch, and wait for approxi-
mately 10 minutes. The circuit breaker
will reset itself, and the wipers will
again operate normally.
. Clean your wiper blades and win-
dow glass periodically with a washer
solution to prevent streaking, and to
remove accumulations of road salt or
road film. Operate the windshield
washer for at least 1 second so that
3-104