2017 SUBARU FORESTER washer fluid
[x] Cancel search: washer fluidPage 29 of 634

MarkName Page
X-mode indicator light
(if equipped) 3-33
Hill descent control in-
dicator light (if
equipped)3-33
Low fuel warning light 3-22
Low tire pressure
warning light
(U.S.-spec. models)3-19
Windshield washer
fluid warning light
3-19
Sport (S) mode indi-
cator light (if equipped)3-31
Intelligent (I) mode in-
dicator light (if
equipped)3-31
Sport Sharp (S#)
mode indicator light (if
equipped)3-31
Steering responsive
fog lights warning in-
dicator/Steering re-
sponsive fog lights
OFF indicator (if
equipped)3-33
BSD/RCTA warning
indicator (if equipped)
3-33Mark Name Page
BSD/RCTA OFF indi-
cator (if equipped)
3-34
RAB warning light (if
equipped)3-34
RAB OFF indicator (if
equipped)3-34
24
Page 152 of 634

Ignition switch (models without push-button start system) ......................................... 3-4
LOCK.................................................................. 3-4
ACC.................................................................... 3-5
ON...................................................................... 3-5
START ................................................................ 3-5
Key reminder chime ............................................ 3-5
Ignition switch light (if equipped) ......................... 3-6
Push-button ignition switch (models with
push-button start system) ............................... 3-6
Safety precautions.............................................. 3-6
Operating range for push-button start system ...... 3-6
Switching power status ....................................... 3-7
When access key does not operate properly ........ 3-8
Hazard warning flasher....................................... 3-8
Meters and gauges. ............................................. 3-9
Combination meter illumination ........................... 3-9
Canceling the function for meter/gauge needle movement upon turning on the ignition
switch ............................................................... 3-9
Speedometer ...................................................... 3-10
Odometer ........................................................... 3-10
Double trip meter ............................................... 3-10
Tachometer ........................................................ 3-11
Fuel gauge ......................................................... 3-12
ECO gauge (if equipped) .................................... 3-12
Warning and indicator lights ............................. 3-13Seatbelt warning light and chime ........................ 3-14
SRS airbag system warning light ........................ 3-15
Front passenger ’s frontal airbag ON and OFF
indicators ......................................................... 3-16 CHECK ENGINE warning light/Malfunction
indicator light .................................................. 3-16
Coolant temperature low indicator light/Coolant temperature high warning light ......................... 3-17
Charge warning light .......................................... 3-18
Oil pressure warning light .................................. 3-18
Engine low oil level warning light ....................... 3-18
Windshield washer fluid warning light ................ 3-19
AT OIL TEMP warning light (CVT models) ........... 3-19
Low tire pressure warning light (U.S.-spec. models) ........................................................... 3-19
ABS warning light .............................................. 3-21
Brake system warning light ................................ 3-21
Low fuel warning light ....................................... 3-22
Hill start assist warning light/Hill start assist OFF indicator light .................................................. 3-23
Door open warning light .................................... 3-23
All-Wheel Drive warning light (CVT models) ... ..... 3-23
Power steering warning light .............................. 3-23
Vehicle Dynamics Control warning light/Vehicle Dynamics Control operation indicator light .. ..... 3-24
Vehicle Dynamics Control OFF indicator light ..... 3-25
Warning chimes and warning light of the keyless access with push-button start system (if
equipped) ........................................................ 3-25
Security indicator light ....................................... 3-30
SI-DRIVE indicator light (if equipped) .................. 3-31
Select lever/gear position indicator (CVT models) ........................................................... 3-31
Turn signal indicator lights ................................. 3-32
High beam indicator light ................................... 3-32
High beam assist indicator light (if equipped) ..... 3-32
Instruments and controls
3
Page 164 of 634

Warning and indicator lights
Several of the warning and indicator lights
illuminate when the ignition switch is
initially turned to the“ON”position. This
permits checking the operation of the
bulbs.
Apply the parking brake and turn the
ignition switch to the “ON”position. For
the system check, several of the following
lights illuminate and then turn off after
several seconds or after the engine has
started.
: Seatbelt warning light (The seatbelt warning light turns off
only when the driver fastens the
seatbelt.)
: Front passenger ’s seatbelt warning
light
(The seatbelt warning light turns off
only when the front seat passenger
fastens the seatbelt.)
: SRS airbag system warning light
ON /
: Front passenger ’s frontal airbag
ON indicator light
/: Front passenger ’s frontal airbag
OFF indicator light
: CHECK ENGINE warning light/Mal- function indicator light
: Coolant temperature low indicator light/Coolant temperature high warn-
ing light
: Charge warning light
: Oil pressure warning light
: Engine low oil level warning light*
: Windshield washer fluid warning light*
: AT OIL TEMP warning light(CVT models)
: Low tire pressure warning light(U.S.-spec. models)
/: ABS warning light
/: Brake system warning light
: Low fuel warning light
: Hill start assist warning light/Hill startassist OFF indicator light
: Door open warning light
: AWD warning light (CVT models)
: Power steering warning light
: Vehicle Dynamics Control warning light/Vehicle Dynamics Control opera-
tion indicator light
: Vehicle Dynamics Control OFF indica-tor light
: Cruise control indicator light(if equipped)
: Cruise control set indicator light(if equipped)
: Headlight indicator light (if equipped)
: Automatic headlight beam leveler warning light (if equipped)
: Steering Responsive Headlight warn-ing light/Steering Responsive Head-
light OFF indicator light (if equipped)*
: High beam assist indicator light (if equipped)
: Access key warning light
(if equipped)
: X-mode indicator light (if equipped)
: Hill descent control indicator light (if equipped)*
*: Applies to models with type A combina- tion meter.
If any lights fail to illuminate, it indicates a
burned-out bulb or a malfunction of the
corresponding system.
Consult your authorized SUBARU dealer
for repair.
Instruments and controls/Warning and indicator lights
–CONTINUED –3-13
Page 170 of 634

.The warning light may illuminate
temporarily in the following conditions
because a low oil level may be detected
as a result of significant oil movement
in the engine.
–when the vehicle is considerably
inclined on an uphill or steep slope
– when the vehicle has continu-
ously accelerated and decelerated
– when the vehicle is continuously
turned
– when the vehicle is driven on a
road that alternates continuously
between uphill and downhill
&Windshield washer
fluid warning light
This light illuminates when the fluid level in
the windshield washer fluid tank de-
creases to the lower limit (approximately
1.1 US qt, 1.0 liter, 0.9 Imp qt).
&AT OIL TEMP warning
light (CVT models)
If this light illuminates when the engine is
running, it may indicate that the transmis-
sion fluid temperature is too hot.
If the light illuminates while driving, im-
mediately stop the vehicle in a safe place
and let the engine idle until the warning light turns off.
!
Transmission control system warn-
ing
If the “AT OIL TEMP ”warning light flashes
after the engine has started, it may
indicate that the transmission control
system is not working properly. Contact
your nearest SUBARU dealer for service
immediately.
&Low tire pressure
warning light (U.S.-spec.
models)
When the ignition switch is turned to the
“ON ”position, the low tire pressure warn-
ing light will illuminate for approximately 2
seconds to check that the tire pressure
monitoring system (TPMS) is functioning
properly. If there is no problem and all tires
are properly inflated, the light will turn off.
Each tire, including the spare (if provided),
should be checked monthly when cold
and inflated to the inflation pressure
recommended by the vehicle manufac-
turer on the vehicle placard or tire inflation
pressure label. (If your vehicle has tires of
a different size than the size indicated on
the vehicle placard or tire inflation pres-
sure label, you should determine the
proper tire inflation pressure for those
tires.) As an added safety feature, your vehicle
has been equipped with a tire pressure
monitoring system (TPMS) that illuminates
a low tire pressure telltale when one or
more of your tires is significantly under-
inflated. Accordingly, when the low tire
pressure telltale illuminates, you should
stop and check your tires as soon as
possible, and inflate them to the proper
pressure. Driving on a significantly under-
inflated tire causes the tire to overheat and
can lead to tire failure. Under-inflation also
reduces fuel efficiency and tire tread life,
and may affect the vehicle
’s handling and
stopping ability.
Please note that the TPMS is not a
substitute for proper tire maintenance,
and it is the driver ’s responsibility to
maintain correct tire pressure, even if
under-inflation has not reached the level
to trigger illumination of the TPMS low tire
pressure telltale.
Your vehicle has also been equipped with
a TPMS malfunction indicator to indicate
when the system is not operating properly.
The TPMS malfunction indicator is com-
bined with the low tire pressure telltale.
When the system detects a malfunction,
the telltale will flash for approximately one
minute and then remain continuously
illuminated. This sequence will continue
upon subsequent vehicle start-ups as long
Instruments and controls/Warning and indicator lights
–CONTINUED –3-19
Page 198 of 634

Type A combination meter
1) Engine oil: Checks the interval of engineoil replacement.
2) Oil filter: Checks the interval of oil filter replacement.
3) Tires: Checks the interval of tire rotation.
4) Inspection and maintenance: Checks the interval of inspection and maintenance.Type B combination meter
1) Windshield washer fluid: Checks thelevel of windshield washer fluid.
2) Brake fluid: Checks the level of brake fluid.
3) Engine oil: Checks the interval of engine oil replacement.
4) Oil filter: Checks the interval of oil filter replacement.
5) Tires: Checks the interval of tire rotation.
6) Inspection and maintenance: Checks the interval of inspection and maintenance.
When the checks are performed, the color
of the icon corresponding to the checked
item will turn green.
If there is no warning message, the self-
check will complete without notification.
Example of notification
If there is a warning message or a
maintenance notification, the color of the
icon corresponding to the item will turn
yellow and the warning message or the
maintenance notification will be displayed.
Take the appropriate actions based on the
messages indicated.
NOTE
.The self-check screen can be set to
on or off. For details, refer to “On/Off
setting ”F 3-77.
. After performing the maintenance,
change the setting of the correspond-
ing maintenance item. For details, refer
to “Maintenance settings ”F 3-76.
. The maintenance notification screen
will be displayed under either of the
Instruments and controls/Multi function display
–CONTINUED –3-47
Page 255 of 634

Instruments and controls/Wiper and washer
Wiper and washer
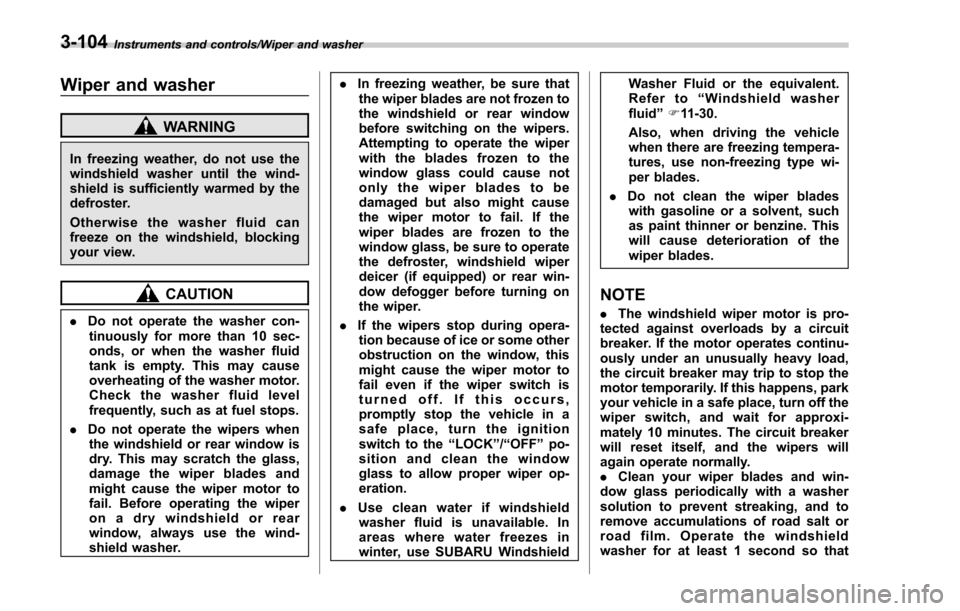
WARNING
In freezing weather, do not use the
windshield washer until the wind-
shield is sufficiently warmed by the
defroster.
Otherwise the washer fluid can
freeze on the windshield, blocking
your view.
CAUTION
.Do not operate the washer con-
tinuously for more than 10 sec-
onds, or when the washer fluid
tank is empty. This may cause
overheating of the washer motor.
Check the washer fluid level
frequently, such as at fuel stops.
. Do not operate the wipers when
the windshield or rear window is
dry. This may scratch the glass,
damage the wiper blades and
might cause the wiper motor to
fail. Before operating the wiper
on a dry windshield or rear
window, always use the wind-
shield washer. .
In freezing weather, be sure that
the wiper blades are not frozen to
the windshield or rear window
before switching on the wipers.
Attempting to operate the wiper
with the blades frozen to the
window glass could cause not
only the wiper blades to be
damaged but also might cause
the wiper motor to fail. If the
wiper blades are frozen to the
window glass, be sure to operate
the defroster, windshield wiper
deicer (if equipped) or rear win-
dow defogger before turning on
the wiper.
. If the wipers stop during opera-
tion because of ice or some other
obstruction on the window, this
might cause the wiper motor to
fail even if the wiper switch is
turned off. If this occurs,
promptly stop the vehicle in a
safe place, turn the ignition
switch to the “LOCK ”/“ OFF ”po-
sition and clean the window
glass to allow proper wiper op-
eration.
. Use clean water if windshield
washer fluid is unavailable. In
areas where water freezes in
winter, use SUBARU Windshield Washer Fluid or the equivalent.
Refer to
“Windshield washer
fluid ”F 11-30.
Also, when driving the vehicle
when there are freezing tempera-
tures, use non-freezing type wi-
per blades.
. Do not clean the wiper blades
with gasoline or a solvent, such
as paint thinner or benzine. This
will cause deterioration of the
wiper blades.
NOTE
. The windshield wiper motor is pro-
tected against overloads by a circuit
breaker. If the motor operates continu-
ously under an unusually heavy load,
the circuit breaker may trip to stop the
motor temporarily. If this happens, park
your vehicle in a safe place, turn off the
wiper switch, and wait for approxi-
mately 10 minutes. The circuit breaker
will reset itself, and the wipers will
again operate normally.
. Clean your wiper blades and win-
dow glass periodically with a washer
solution to prevent streaking, and to
remove accumulations of road salt or
road film. Operate the windshield
washer for at least 1 second so that
3-104
Page 257 of 634

Instruments and controls/Wiper and washer
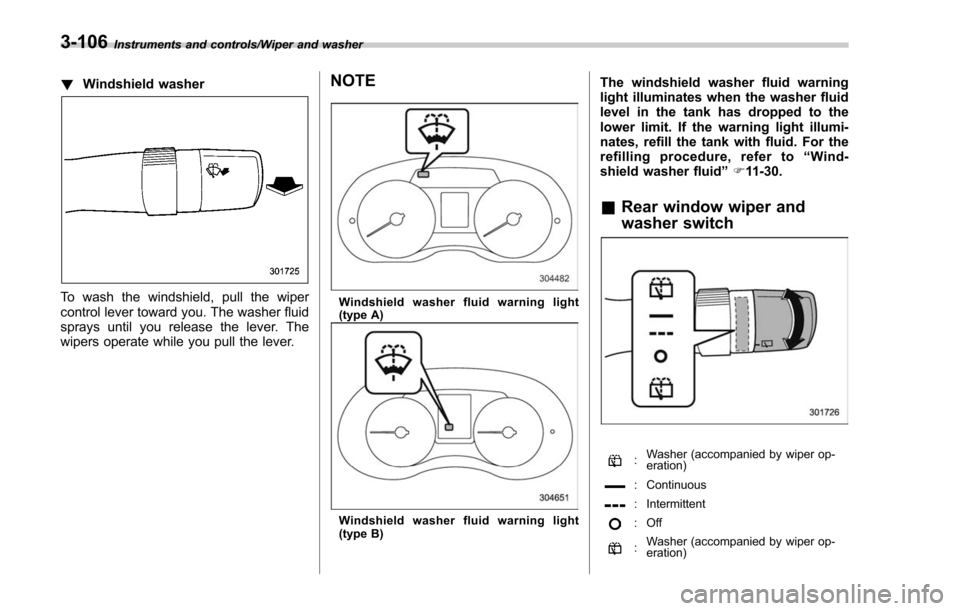
!Windshield washer
To wash the windshield, pull the wiper
control lever toward you. The washer fluid
sprays until you release the lever. The
wipers operate while you pull the lever.
NOTE
Windshield washer fluid warning light
(type A)
Windshield washer fluid warning light
(type B)
The windshield washer fluid warning
light illuminates when the washer fluid
level in the tank has dropped to the
lower limit. If the warning light illumi-
nates, refill the tank with fluid. For the
refilling procedure, refer to “Wind-
shield washer fluid ”F 11-30.
& Rear window wiper and
washer switch
:Washer (accompanied by wiper op-
eration)
: Continuous
: Intermittent
:Off
:Washer (accompanied by wiper op-
eration)
3-106
Page 258 of 634

!Rear wiper
To turn the rear wiper on, turn the knob
switch upward.
To turn the wiper off, return the knob
switch to the “
”position.
With the switch turned to the “
”posi-
tion, the rear wiper will operate intermit-
tently at intervals corresponding to the
vehicle speed. In this position, when you
move the select lever to the “R ” position
(CVT models) or the shift lever to the
reverse position (MT models), the rear
wiper will switch to continuous operation.
When you move the select lever/shift lever
from the “R”(reverse) position to another
position, the rear wiper will return to
intermittent operation.
CAUTION
Do not attach anything that disturbs
the rear wiper operation on the rear
gate. Doing so may damage the rear
wiper when it operates.
NOTE
Even if the rear wiper switch is in the
“” position, while the shift lever/
select lever is in the “R ” position with
the windshield wiper operating con-
tinuously, the rear wiper will operate intermittently.
!
Washer
To wash the rear window while the rear
wiper is operating, turn the knob switch
upward to the “
”position. The washer
fluid sprays until you release the knob.
To wash the rear window when the rear
wiper is not in use, turn the knob switch
downward to the “
”position. The washer
fluid sprays and the wiper operates until
you release the knob.
Mirrors
Always check that the inside and outside
mirrors are properly adjusted before you
start driving.
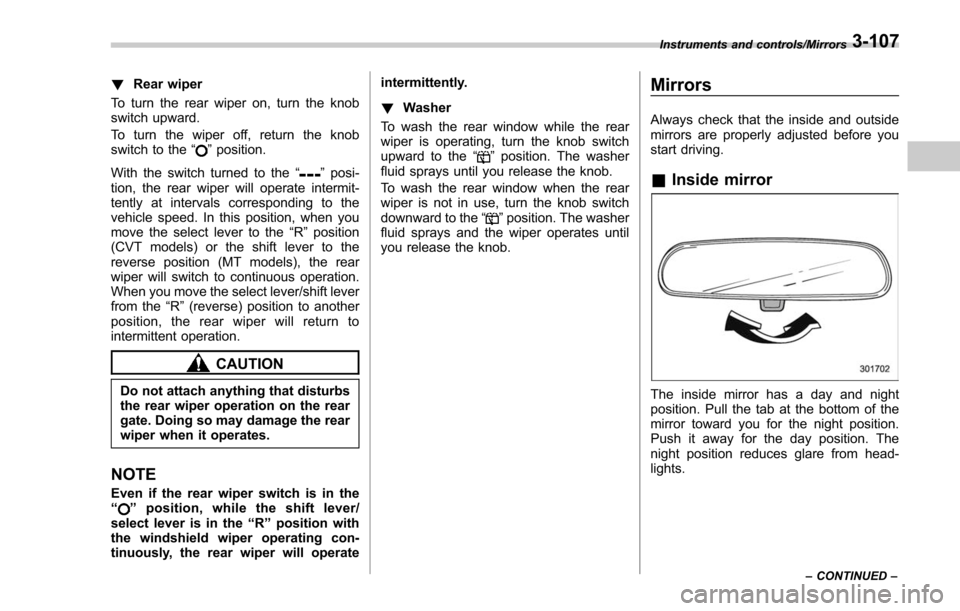
& Inside mirror
The inside mirror has a day and night
position. Pull the tab at the bottom of the
mirror toward you for the night position.
Push it away for the day position. The
night position reduces glare from head-
lights.
Instruments and controls/Mirrors
–CONTINUED –3-107