Page 138 of 220

3.12
Stopping the programmed air
conditioning
The air conditioning stops automati-
cally around ten minutes after the set
end time.
However, the function can be deacti-
vated if:
– the charging socket is disconnected;
– the “Remote Activation” function is activated – please see the informa-
tion on “Air conditioning: remote acti-
vation” in Section 2;
– the traction battery charging level is lower than 15% or, depending on the
vehicle, 30%Driver’s responsibility
when parking or stopping
the vehicle
Never leave an animal,
child or adult who is not self-suffi-
cient alone on your vehicle, even for
a short time.
In hot and/or sunny weather, please
remember that the temperature
inside the passenger compartment
increases very quickly.
RISK OF DEATH OR SERIOUS
INJURY.
AIR CONDITIONING: programming (4/4)
Connected services
The air conditioning can also be acti-
vated using the connected services.
For more information regarding the op-
erating conditions, please contact an
authorised dealer.
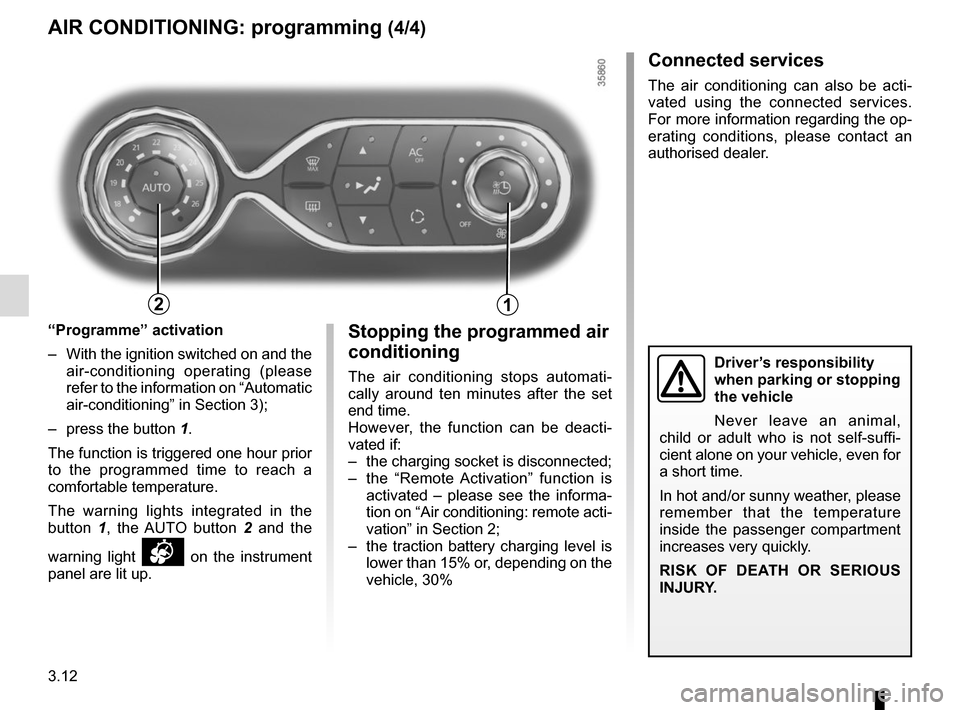
“Programme” activation
– With the ignition switched on and the air-conditioning operating (please
refer to the information on “Automatic
air-conditioning” in Section 3);
– press the button 1.
The function is triggered one hour prior
to the programmed time to reach a
comfortable temperature.
The warning lights integrated in the
button 1, the AUTO button 2 and the
warning light
on the instrument
panel are lit up.
12
Page 139 of 220

3.13
1
2
FRAGRANCE DIFFUSER.
Controls
1 Fragrance diffuser outlet
2 Capsule housing
Fragrance selection
On the display A, select “Menu”, “vehi-
cle”, “well-being”, “fragrance diffuser”,
then one of the two fragrances.
Fragrance diffuser intensity
settings
Select one of the five fragrance intensi-
ties by pressing “-” or “+”.
The intensity and uniformity will also
vary depending on the air distribution
and the air-conditioning control.
To stop distribution, select “Stop”.
NB: If the fan control is in position 0
(stop), the fragrance diffuser is not ac-
tivated.
Replacing a fragrance
diffuser capsule
Press the capsule housing 2 to open it.
Replace capsule, then press the cap-
sule housing 2 to close it.
NB: if used for 1 hour a day, a capsule
may last for approximately 3 months.
You can buy capsules from Authorised
Dealers.
Precautions
– Always use capsules recommended by our Technical Department.
– Do not open or refill the diffuser cap- sule.
– Keep out of reach for children.
– Do not expose the diffuser capsule to direct sunlight.
– In the event of contact with the eyes or skin, rinse in plenty of safe drink-
ing water. If necessary, consult a
doctor.
– Do not use the fragrance diffuser capsule for anything other than its
intended purpose.
For safety reasons, do not
replace the fragrance dif-
fuser capsule while driving.
A
Page 144 of 220
3.18
INTERIOR LIGHTING/SUN VISOR
When the doors or luggage com-
partment are unlocked and opened
the courtesy and footwell lights
come on temporarily.
123
Courtesy light
Tilt switch 2 to move it to the position
for:
– permanent lighting;
– lighting controlled by opening one of the doors. This switches off after
a time delay, once the doors con-
cerned have been closed correctly;
– immediate switching off.
Map reading lights
Move switches 1 or 3.
4
Luggage compartment light
Light 4 comes on when the boot is
opened.
6
Sun visor
Lower the sun visor 5 over the wind-
screen or unclip it and turn it over the
side window.
Courtesy mirrors
Depending on the vehicle, lift or slide
the cover 6.
5
When driving, ensure the
courtesy mirror cover is
closed. Risk of injury.
Page 152 of 220
3.26
The luggage compartment cover con-
sists of a rigid section A and a folding
section B.
The luggage cover is in the unfolded
position . The luggage compartment cover is
removed.
To remove it: with the cover in the folded
position and holding it horizontally:
– pull one side of the luggage compart- ment cover towards you, pivoting it
slightly;
– then pull the other side of the lug- gage compartment cover to com-
pletely detach it from its housing.
LUGGAGE COMPARTMENT COVER: utility versions
Do not place any objects,
especially heavy or solid
objects on the luggage
compartment cover. These
may pose a risk to the vehicle occu-
pants if the driver has to brake sud-
denly or if the vehicle is involved in
an accident.
The luggage compartment cover is
in the folded position .
To fold it:
– lift shelf A slightly and pull it towards
you to remove;
– then fold section B back on itself.
AB
Page 158 of 220
4.2
To open, pull handle 1, located on the
left-hand side of the dashboard.
BONNET (1/2)
1
When working in the engine
compartment, certain parts
may be hot. In addition,
the engine cooling fan can
come on at any moment.
Risk of burns or serious injury.
In the event of even a slight
impact involving the radia-
tor grille or bonnet, have the
bonnet lock checked by an
authorised dealer as soon as pos-
sible.
Do not do any work under
the bonnet when the vehicle
is charging or when the igni-
tion is switched on.
Unlocking the bonnet catch
Lift the bonnet by several centimetres
and push lever 2 to the left.
2
When working in the engine
compartment, ensure that
the windscreen wiper stalk
is in the park position.
Risk of injury.
Page 161 of 220

4.5
Windscreen washer reservoir
Topping up
Open cap 3, fill until you can see the
fluid, then refit the cap.
Liquid
Screen wash product (product with
antifreeze in winter).
Jets
Use a tool such as a needle to adjust
the height of the windscreen washer
jets.
3
2
Brake fluid level
The level should be read with the engine
switched off and on level ground. This
should be checked frequently, and im-
mediately if you notice even the slight-
est loss in braking efficiency.
Consult your approved dealer at
once if you notice an abnormal or
repeated drop in any of the fluid
levels.
Topping up
After any operation on the hydraulic cir-
cuit, a specialist must replace the fluid.
Only use fluids approved by our
Technical Department (and taken from
a sealed container).
Replacement intervals
Refer to the Maintenance Document for
your vehicle.
Level 2
It is normal for the level to drop as
the linings become worn, but it should
never drop below the “MIN” warning
line.
If you wish to check the disc wear your-
self, you should obtain the document
explaining the checking procedure from
our network or from the manufacturer’s
website.
LEVELS (2/2)
When working in the engine
compartment, certain parts
may be hot. In addition,
the engine cooling fan can
come on at any moment.
Risk of burns or serious injury.
Page 162 of 220

4.6
The secondary battery is a 12 V battery:
this supplies the energy required to op-
erate vehicle equipment (lights, wind-
screen wipers, audio system, etc) and
certain safety systems, such as ABS.
You should not open it or add any
fluid.
SECONDARY 12 V BATTERY (1/2)
1
When working in the engine
compartment, certain parts
may be hot. In addition,
the engine cooling fan can
come on at any moment.
Risk of burns or serious injury.
Do not do any work under
the bonnet when the vehicle
is charging or when the igni-
tion is switched on.
For your own safety and for
the proper operation of the
vehicle’s electrical equip-
ment (lights, windscreen
wipers, ABS, etc.), any interven-
tion on the secondary 12 V battery
(removal, disconnection, etc.) must
categorically be performed by a
specialist professional.
Risk of serious burns or electric
shocks.
Respect categorically the replace-
ment intervals (without exceeding
them) as stated in the maintenance
document.
The battery is a specific type.
Please ensure it is replaced with the
same type.
Contact an Authorised Dealer.
Maintenance/replacementThe charge status of the 12 volt bat-
tery 1 can decrease, especially if you
use your vehicle:
– when the outside temperature drops;
– after extended use of energy-con- suming devices with the engine
switched off.
Page 164 of 220

4.8
TYRE PRESSURE
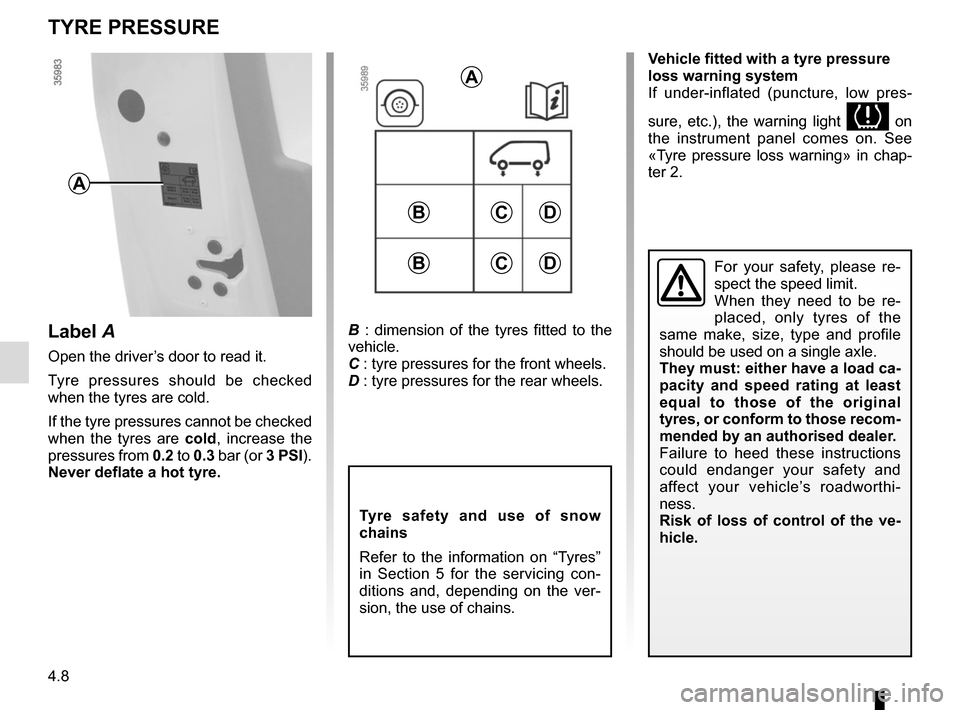
B : dimension of the tyres fitted to the
vehicle.
C : tyre pressures for the front wheels.
D : tyre pressures for the rear wheels.
Tyre safety and use of snow
chains
Refer to the information on “Tyres”
in Section 5 for the servicing con-
ditions and, depending on the ver-
sion, the use of chains.
CD
A
A
For your safety, please re-
spect the speed limit.
When they need to be re-
placed, only tyres of the
same make, size, type and profile
should be used on a single axle.
They must: either have a load ca-
pacity and speed rating at least
equal to those of the original
tyres, or conform to those recom-
mended by an authorised dealer.
Failure to heed these instructions
could endanger your safety and
affect your vehicle’s roadworthi-
ness.
Risk of loss of control of the ve-
hicle.
Label A
Open the driver’s door to read it.
Tyre pressures should be checked
when the tyres are cold.
If the tyre pressures cannot be checked
when the tyres are cold, increase the
pressures from 0.2 to 0.3 bar (or 3 PSI).
Never deflate a hot tyre.
B
CDB
Vehicle fitted with a tyre pressure
loss warning system
If under-inflated (puncture, low pres-
sure, etc.), the warning light
on
the instrument panel comes on. See
«Tyre pressure loss warning» in chap-
ter 2.