Page 317 of 734

Setting NameSelectable Options
Flash Lights With Lock
NOTE: When the “Flash Lights With Lock” feature is selected, the exterior lamps will flash when the doors are
locked or unlocked with the key fob. This feature may be selected with or without the sound horn on lock feature
selected.
Doors & Locks
After pressing the “Doors & Locks” button on the touch-
screen, the following settings will be available:
Setting Name Selectable Options
Auto Door Locks
NOTE: When the “Auto Door Locks” feature is selected, all doors will lock automatically when the vehicle reaches a
speed of 15 mph (24 km/h).
Auto Unlock On Exit
NOTE: When the “Auto Unlock On Exit” feature is selected, all doors will unlock when the vehicle is stopped and
the transmission is in the PARK or NEUTRAL position and the driver’s door is opened.
Flash Lights With Lock
NOTE: When the “Flash Lights With Lock” feature is selected, the front and rear turn signals will flash when the
doors are locked or unlocked with the key fob. This feature may be selected with or without the “Sound Horn With
Lock” feature selected.
4
UNDERSTANDING YOUR INSTRUMENT PANEL 315
Page 318 of 734

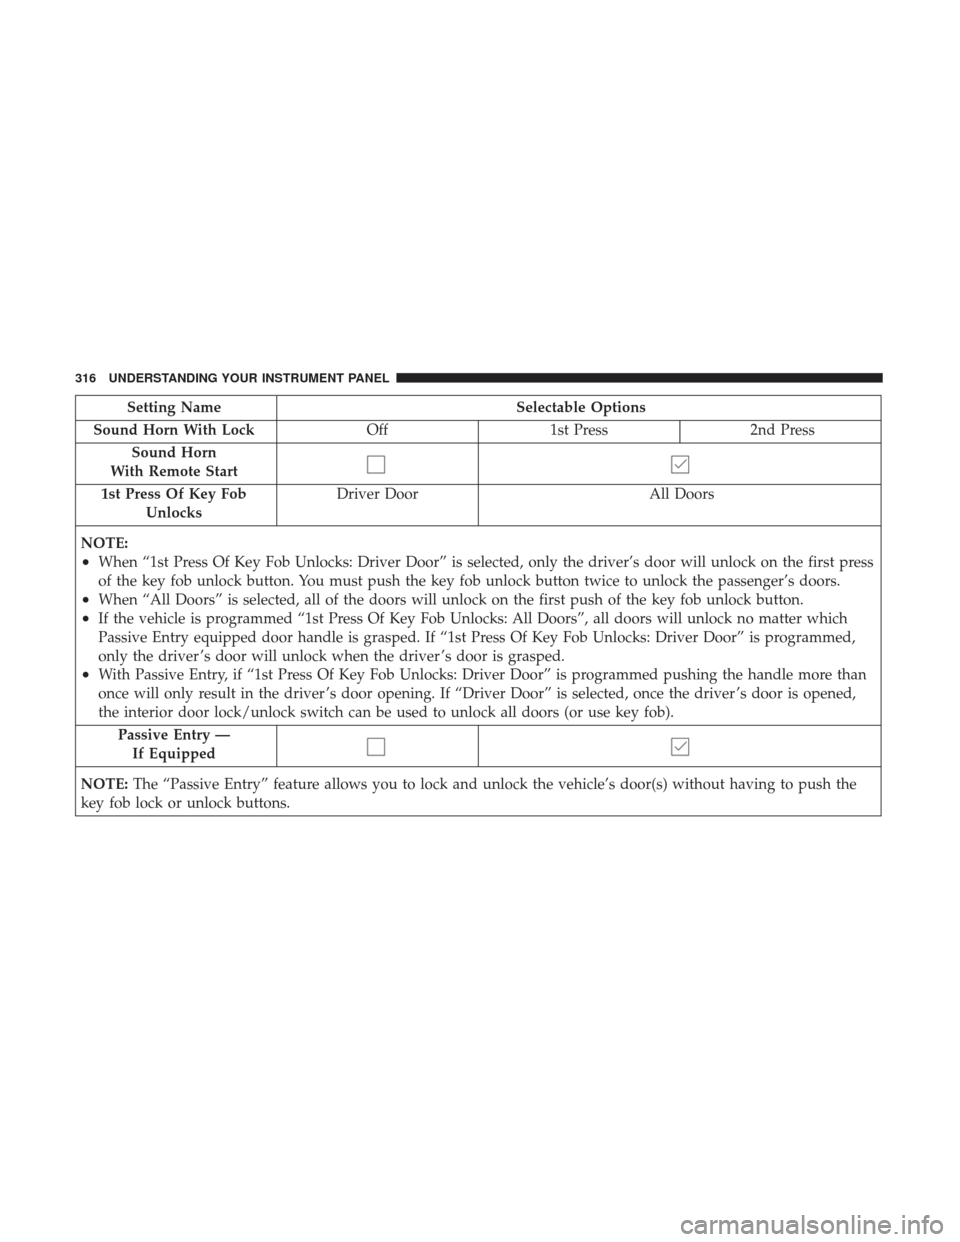
Setting NameSelectable Options
Sound Horn With Lock Off1st Press 2nd Press
Sound Horn
With Remote Start
1st Press Of Key Fob Unlocks Driver Door
All Doors
NOTE:
•When “1st Press Of Key Fob Unlocks: Driver Door” is selected, only the driver’s door will unlock on the first press
of the key fob unlock button. You must push the key fob unlock button twice to unlock the passenger’s doors.
•When “All Doors” is selected, all of the doors will unlock on the first push of the key fob unlock button.
•If the vehicle is programmed “1st Press Of Key Fob Unlocks: All Doors”, all doors will unlock no matter which
Passive Entry equipped door handle is grasped. If “1st Press Of Key Fob Unlocks: Driver Door” is programmed,
only the driver ’s door will unlock when the driver ’s door is grasped.
•With Passive Entry, if “1st Press Of Key Fob Unlocks: Driver Door” is programmed pushing the handle more than
once will only result in the driver ’s door opening. If “Driver Door” is selected, once the driver ’s door is opened,
the interior door lock/unlock switch can be used to unlock all doors (or use key fob). Passive Entry —If Equipped
NOTE: The “Passive Entry” feature allows you to lock and unlock the vehicle’s door(s) without having to push the
key fob lock or unlock buttons.
316 UNDERSTANDING YOUR INSTRUMENT PANEL
Page 319 of 734

Setting NameSelectable Options
Personal Settings Linked To Key Fob —If Equipped
NOTE:
•The “Personal Settings Linked To Key Fob” feature provides automatic driver seat positioning to enhance driver
mobility when entering and exiting the vehicle.
•The seat will return to the memorized seat location (if “Personal Settings Linked To Key Fob” is set to on) when
the key fob is used to unlock the door.
Auto Comfort Systems — If Equipped
After pressing the “Auto-On Comfort” button on the
touchscreen, the following settings will be available:
Setting Name Selectable Options
Auto-On Driver Heated/
Ventilated Seat & Steering Wheel With Vehicle Start — If Equipped Off
Remote Start All Starts
NOTE: When the “Auto-On Driver Heated/Ventilated Seat & Steering Wheel With Vehicle Start” feature is selected
the driver’s heated seat and heated steering wheel will automatically turn on when temperatures are below 40° F
(4.4° C). When temperatures are above 80° F (26.7° C), the driver vented seat will turn on.
4
UNDERSTANDING YOUR INSTRUMENT PANEL 317
Page 333 of 734

Manual Climate Control Descriptions
IconDescription
MAX A/C Setting
Rotate the Temperature Control Knob counterclockwise until it is set to MAX A/C. This is the
coldest setting and will put the A/C to its maximum power.
A/C Button
Push the A/C button to engage the Air Conditioning (A/C). A LED will illuminate when the
A/C system is engaged.
Recirculation Button
Push and release this button to change the system between recirculation mode and outside air
mode. Recirculation can be used when outside conditions such as smoke, odors, dust, or high
humidity are present.
NOTE:
•Continuous use of the Recirculation mode may make the inside air stuffy and window fog-
ging may occur. Extended use of this mode is not recommended.
•The use of the Recirculation mode in cold or damp weather could cause windows to fog on
the inside, because of moisture buildup inside the vehicle. Select the outside air position for
maximum defogging.
•Recirculation can be used in all modes except for Defrost.
•The A/C can be deselected manually without disturbing the mode control selection.
4
UNDERSTANDING YOUR INSTRUMENT PANEL 331
Page 334 of 734

IconDescription
Front Defrost Setting
Turn the Mode Control knob to the Defrost mode. Air comes from the windshield and side win-
dow demist outlets. When the defrost setting is selected, the blower level will increase. Use De-
frost mode with maximum temperature settings for best windshield and side window defrosting
and defogging.
Rear Defrost Button
Push and release the Rear Defrost Control button to turn on the rear window defroster and the
heated outside mirrors (if equipped). An indicator will illuminate when the rear window de-
froster is on. The rear window defroster automatically turns off after 10 minutes.
Temperature Control
Use this control knob to regulate the temperature of the air inside the passenger compartment.
Rotating the knob counterclockwise, from top center into the blue area of the scale, indicates
cooler temperatures. Rotating the knob clockwise, into the red area, indicates warmer tempera-
tures.
Blower Control
There are seven blower speeds. Use this control knob to regulate the amount of air forced
through the system in any mode you select. The blower speed increases as you move the con-
trol clockwise from the off position.
NOTE:Depending on the configuration, your vehicle may be equipped with four blower
speeds.
332 UNDERSTANDING YOUR INSTRUMENT PANEL
Page 344 of 734

IconDescription
Faceplate Knob
Touchscreen Buttons
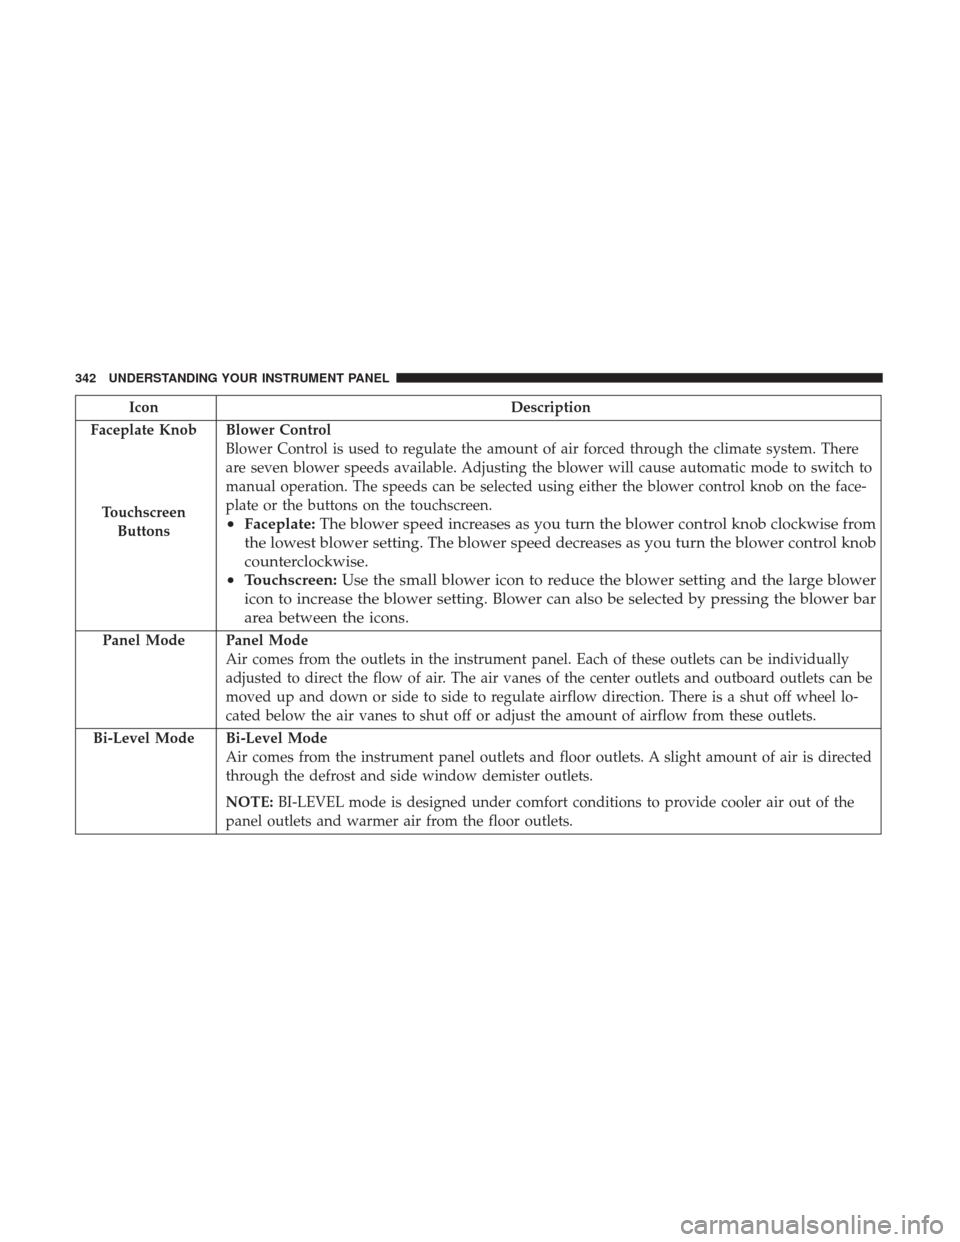
Blower Control
Blower Control is used to regulate the amount of air forced through the climate system. There
are seven blower speeds available. Adjusting the blower will cause automatic mode to switch to
manual operation. The speeds can be selected using either the blower control knob on the face-
plate or the buttons on the touchscreen.
• Faceplate: The blower speed increases as you turn the blower control knob clockwise from
the lowest blower setting. The blower speed decreases as you turn the blower control knob
counterclockwise.
• Touchscreen: Use the small blower icon to reduce the blower setting and the large blower
icon to increase the blower setting. Blower can also be selected by pressing the blower bar
area between the icons.
Panel ModePanel Mode
Air comes from the outlets in the instrument panel. Each of these outlets can be individually
adjusted to direct the flow of air. The air vanes of the center outlets and outboard outlets can be
moved up and down or side to side to regulate airflow direction. There is a shut off wheel lo-
cated below the air vanes to shut off or adjust the amount of airflow from these outlets.
Bi-Level Mode
Bi-Level Mode
Air comes from the instrument panel outlets and floor outlets. A slight amount of air is directed
through the defrost and side window demister outlets.
NOTE: BI-LEVEL mode is designed under comfort conditions to provide cooler air out of the
panel outlets and warmer air from the floor outlets.
342 UNDERSTANDING YOUR INSTRUMENT PANEL
Page 365 of 734

Uconnect Access (8.4/8.4 NAV)
WARNING!
ALWAYS obey traffic laws and pay attention to the
road. Some Uconnect Access services, including 9-1-1
and Assist, will NOT work without an operable
1X(voice/data) or 3G(data) network connection.
NOTE: Your vehicle may be transmitting data as autho-
rized by the subscriber.
An included trial and/or subscription is required to take
advantage of the Uconnect Access services in the next
section of this guide. To register with Uconnect Access,
press the Apps button on the 8.4-inch touchscreen to get
started. Detailed registration instructions can be found on
the next page.
NOTE: Uconnect Access is available only on equipped
vehicles purchased within the continental United States,
Alaska and Hawaii. Services can only be used where
coverage is available; see coverage map for details.
9-1-1 Call
Security Alarm Notification
Remote Door Lock/Unlock
Stolen Vehicle Assistance
Remote Vehicle Start**
Remote Horn and Lights
Vehicle Finder
Send ‘N Go
Yelp Search
Voice Texting
Roadside Assistance Call
3G Wi-Fi Hotspot***
**If vehicle is equipped.
***Extra charges apply.
Vehicle Health Alert
Your vehicle will send you an email alert if it senses a
problem under the hood with one of your vehicles key
systems. For further information go to the Mopar Owner
Connect website moparownerconnect.com.
4
UNDERSTANDING YOUR INSTRUMENT PANEL 363
Page 366 of 734
Register (8.4/8.4 NAV)
To unlock the full potential of Uconnect Access in your
vehicle, you first need to register with Uconnect Access.
1. Push the ASSIST button on your rearview mirror.2. Press the “Uconnect Care” button on the touchscreen.
3. A helpful Uconnect Care Agent will register your ve-
hicle and handle all of the details.
Signing up is easy! Simply follow the steps above. Or,
press the “Apps
” button on the touchscreen to
“Register By Web” to complete the process using your
smartphone or computer.
For further information please visit DriveUconnect.com.
Assist Button
364 UNDERSTANDING YOUR INSTRUMENT PANEL