Page 29 of 252
27
Ancillaries battery
All other electrical components on your vehicle
are powered by the ancillaries battery.
It is located in the front compartment under the
bonnet and is charged by the traction battery,
during the operation ("Ready" lamp in the
instrument panel) and charging phases.If the ancillaries battery is discharged,
the electric motor cannot be started and
charging of the traction battery is no
longer possible.
It is recommended that the ancillaries
battery be disconnected if the vehicle is
not to be used for more than a month.
Access to the battery Starting using an external battery
Ensure that the backup battery is a 12 volt
b attery.
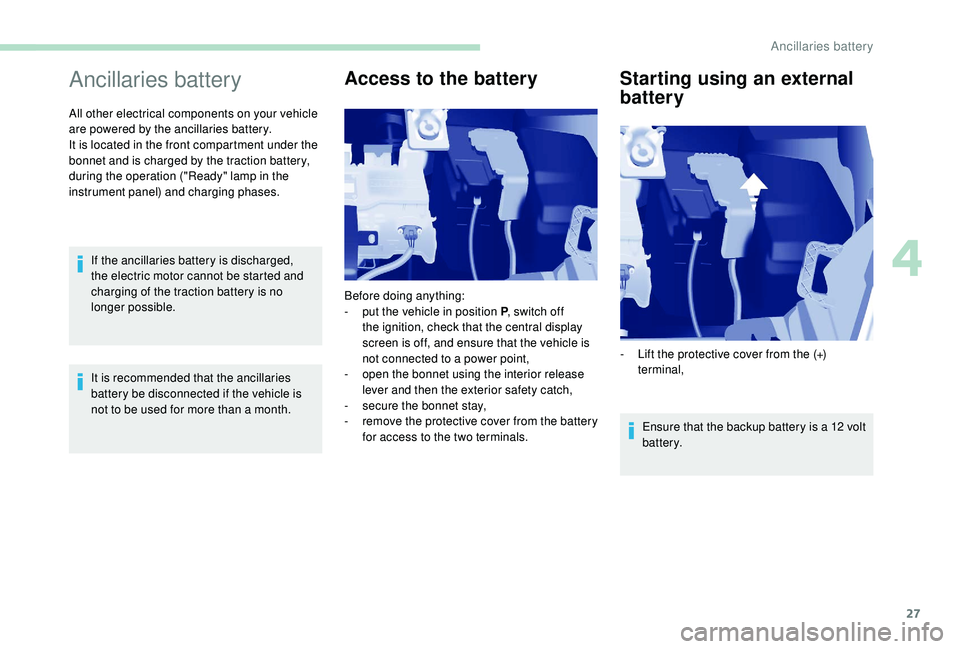
Before doing anything:
-
p
ut the vehicle in position P
, switch off
the ignition, check that the central display
screen is off, and ensure that the vehicle is
not connected to a power point,
-
o
pen the bonnet using the interior release
lever and then the exterior safety catch,
-
s
ecure the bonnet stay,
-
r
emove the protective cover from the battery
for access to the two terminals. -
L
ift the protective cover from the (+)
terminal,
4
Ancillaries battery
Page 30 of 252
28
Charging the battery using
a battery charger
Do not charge the battery without first
disconnecting the terminals and removing the
battery from the front compartment.
Do not disconnect the terminals
when this indicator lamp is on, nor
when the vehicle itself is on charge.Before disconnecting the battery
Wait 2
minutes after switching off the ignition
before disconnecting the battery.
After reconnecting the battery
Following reconnection of the battery, switch
on the ignition and wait 1 minute before
starting to permit initialisation of the electronic
systems. However, if some minor problems
remain after carrying out this operation, contact
a franchised dealer or a qualified workshop.
Remember to enter the radio pre-sets yourself,
referring to the corresponding section in the
handbook.
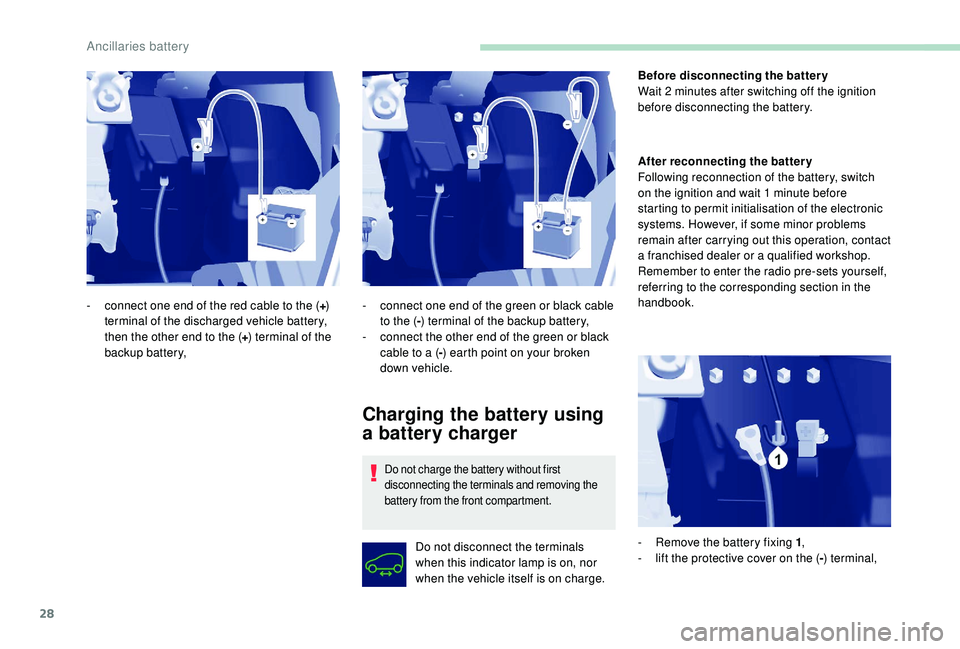
-
c
onnect one end of the red cable to the (
+)
terminal of the discharged vehicle battery,
then the other end to the ( +) terminal of the
backup battery, -
c
onnect one end of the green or black cable
to the ( -) terminal of the backup battery,
-
c
onnect the other end of the green or black
cable to a ( -) earth point on your broken
down vehicle.
- R emove the battery fixing 1
,
- l ift the protective cover on the (-) terminal,
Ancillaries battery
Page 33 of 252
31
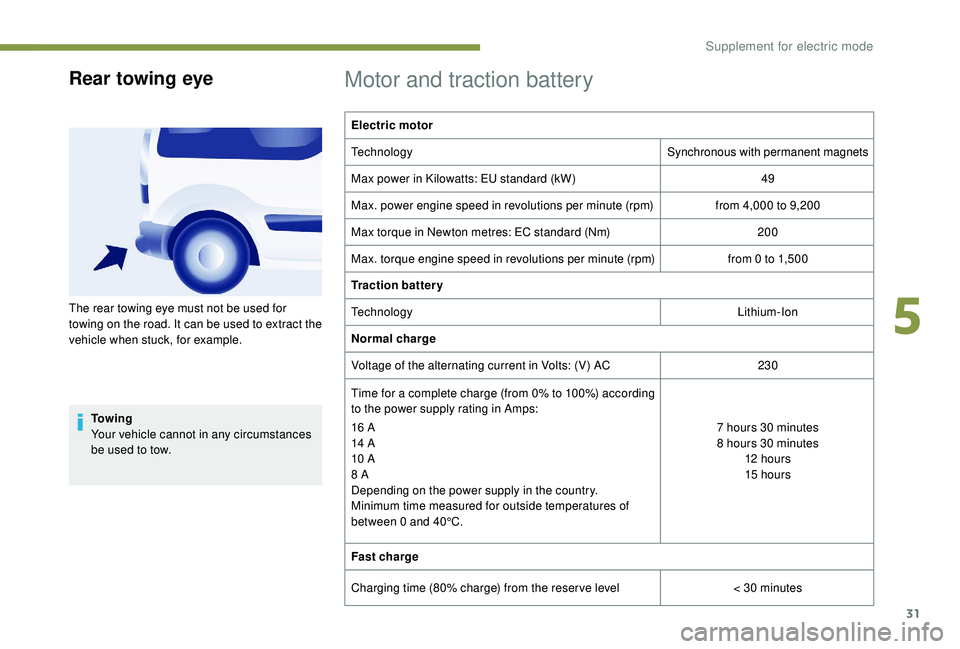
Rear towing eye
To w i n g
Your vehicle cannot in any circumstances
be used to tow.
Motor and traction battery
Electric motor
TechnologySynchronous with permanent magnets
Max power in Kilowatts: EU standard (kW) 49
Max. power engine speed in revolutions per minute (rpm) from 4,000
to 9,200
Max torque in Newton metres: EC standard (Nm) 200
Max. torque engine speed in revolutions per minute (rpm) from 0
to 1,500
Traction battery
Technology Lithium-Ion
Normal charge
Voltage of the alternating current in Volts: (V) AC 230
Time for a complete charge (from 0% to 100%) according
to the power supply rating in Amps:
16
A
14
A
10
A
8
A
Depending on the power supply in the country.
Minimum time measured for outside temperatures of
between 0
and 40°C. 7
hours 30 minutes
8
hours 30 minutes
12
hour s
15
hours
Fast charge
Charging time (80% charge) from the reser ve level < 30
minutes
The rear towing eye must not be used for
towing on the road. It can be used to extract the
vehicle when stuck, for example.
5
Supplement for electric mode
Page 47 of 252
9
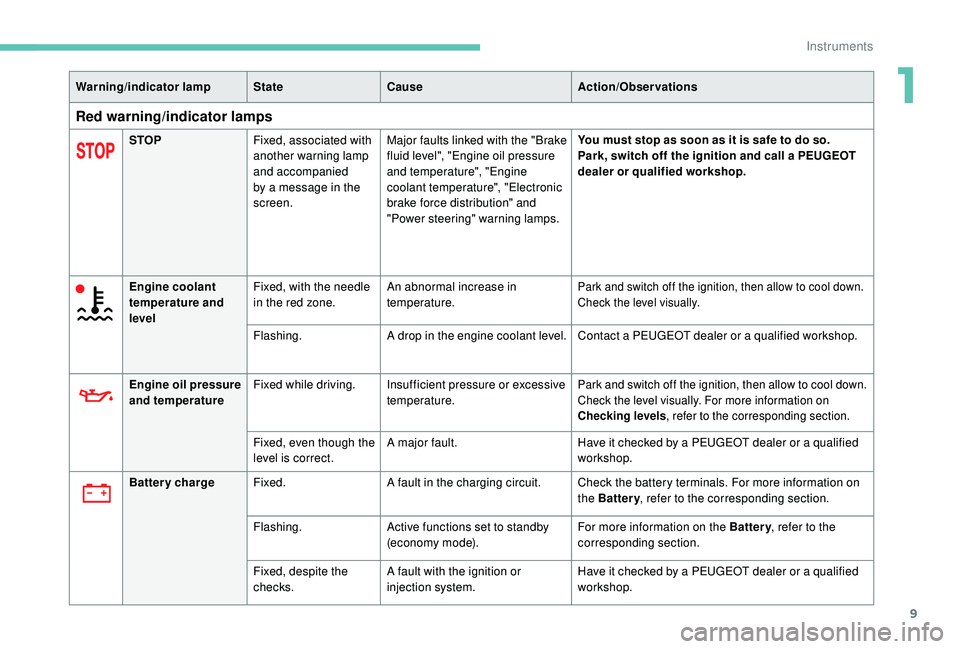
Warning/indicator lampStateCause Action/Observations
Red warning/indicator lamps
STOPFixed, associated with
another warning lamp
and accompanied
by a message in the
screen. Major faults linked with the "Brake
fluid level", "Engine oil pressure
and temperature", "Engine
coolant temperature", "Electronic
brake force distribution" and
"Power steering" warning lamps. You must stop as soon as it is safe to do so.
Park, switch off the ignition and call a PEUGEOT
dealer or qualified workshop.
Engine coolant
temperature and
level Fixed, with the needle
in the red zone.
An abnormal increase in
temperature.
Park and switch off the ignition, then allow to cool down.
Check the level visually.
Flashing.
A drop in the engine coolant level. Contact a PEUGEOT dealer or a qualified workshop.
Engine oil pressure
and temperature Fixed while driving. Insufficient pressure or excessive
temperature.
Park and switch off the ignition, then allow to cool down.
Check the level visually. For more information on
Checking levels, refer to the corresponding section.
Fixed, even though the
level is correct. A major fault.
Have it checked by a PEUGEOT dealer or a qualified
workshop.
Battery charge Fixed. A fault in the charging circuit. Check the battery terminals. For more information on
the Battery, refer to the corresponding section.
Flashing. Active functions set to standby
(economy mode). For more information on the Battery
, refer to the
corresponding section.
Fixed, despite the
checks. A fault with the ignition or
injection system. Have it checked by a PEUGEOT dealer or a qualified
workshop.
1
Instruments
Page 98 of 252
60
Rear fittings (5 seats)
Load space cover
To fold it
F Fold the half-shelf from the boot, lifting it up to release it from the catch C .
To remove it
To refit it
F Place the load space cover in front of A and B .F Push for ward to insert the lugs into the
catches.
F
U
nfold and clip into catches C .
To store it
(depending on version)
There is a space in the rear seat backrest to
accommodate the folded load space cover.
This rigid shelf conceals the items stored in the
boot.
F
F
old it.
F
R
elease it from catches A and B by pulling
towards you.
F
L
ift it up and remove the assembly.
When sharp deceleration occurs, objects
placed on the luggage cover can turn into
projectiles.
12 volt socket (120 W max)
F Slide it vertically between the side guides
located at mid-height of the backrests.
F
I
nsert the hinge first with the floating folds
facing upwards.
It is advisable to limit its use to avoid
discharging the battery.
Ease of use and comfort
Page 99 of 252
61
The connection of an electrical device
not approved by PEUGEOT, such as a
USB charger, may adversely affect the
operation of vehicle electrical systems,
causing faults such as poor radio
reception or inter ference with displays in
the screens.
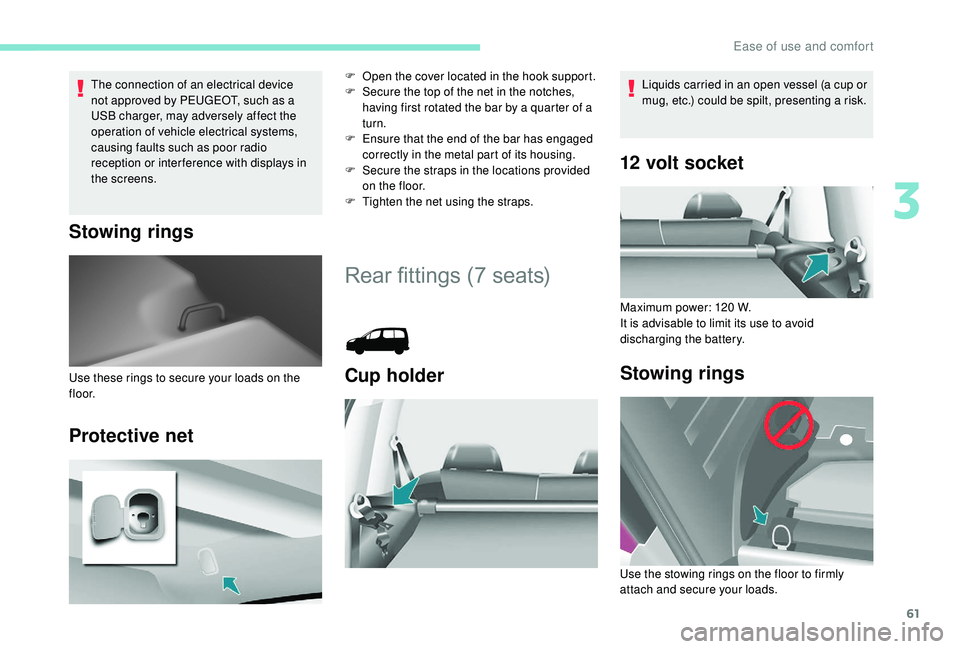
Stowing rings
Protective net
F Open the cover located in the hook support.
F S ecure the top of the net in the notches,
having first rotated the bar by a quarter of a
turn.
F
E
nsure that the end of the bar has engaged
correctly in the metal part of its housing.
F
S
ecure the straps in the locations provided
on the floor.
F
T
ighten the net using the straps.
Rear fittings (7 seats)
Cup holderUse these rings to secure your loads on the
f l o o r.
12 volt socket
Maximum power: 120 W.
I t is advisable to limit its use to avoid
discharging the battery.
Stowing rings
Liquids carried in an open vessel (a cup or
mug, etc.) could be spilt, presenting a risk.
Use the stowing rings on the floor to firmly
attach and secure your loads.
3
Ease of use and comfort
Page 102 of 252
64
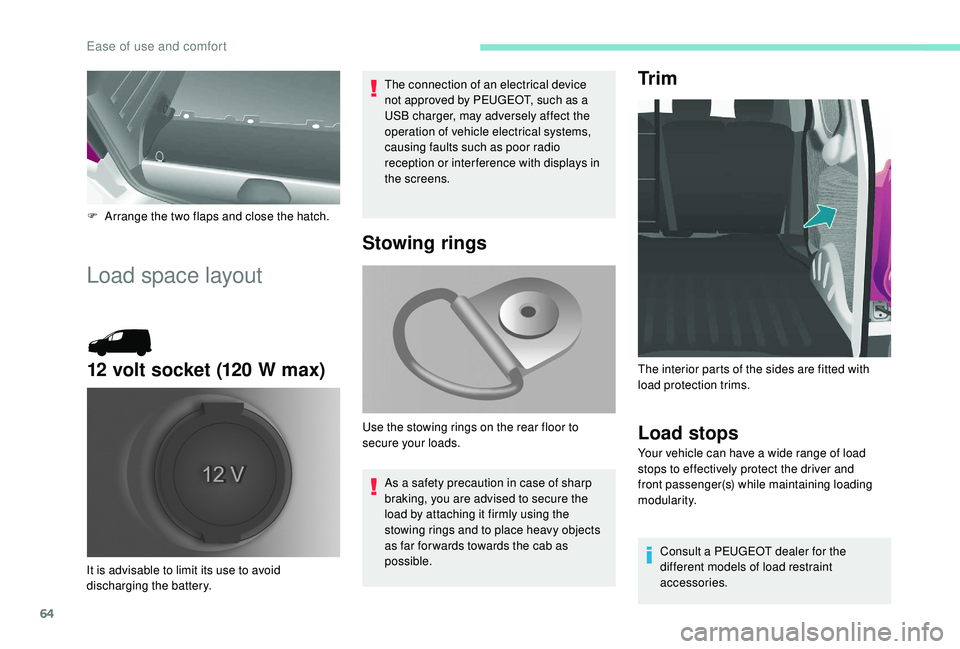
F Arrange the two flaps and close the hatch.
Load space layout
12 volt socket (120 W max)
The connection of an electrical device
not approved by PEUGEOT, such as a
USB charger, may adversely affect the
operation of vehicle electrical systems,
causing faults such as poor radio
reception or inter ference with displays in
the screens.
It is advisable to limit its use to avoid
discharging the battery.
Stowing rings
As a safety precaution in case of sharp
braking, you are advised to secure the
load by attaching it firmly using the
stowing rings and to place heavy objects
as far for wards towards the cab as
possible.
Use the stowing rings on the rear floor to
secure your loads.
Tr i m
Load stops
Your vehicle can have a wide range of load
stops to effectively protect the driver and
front passenger(s) while maintaining loading
modularity.
Consult a PEUGEOT dealer for the
different models of load restraint
accessories.
The interior parts of the sides are fitted with
load protection trims.
Ease of use and comfort
Page 109 of 252
71
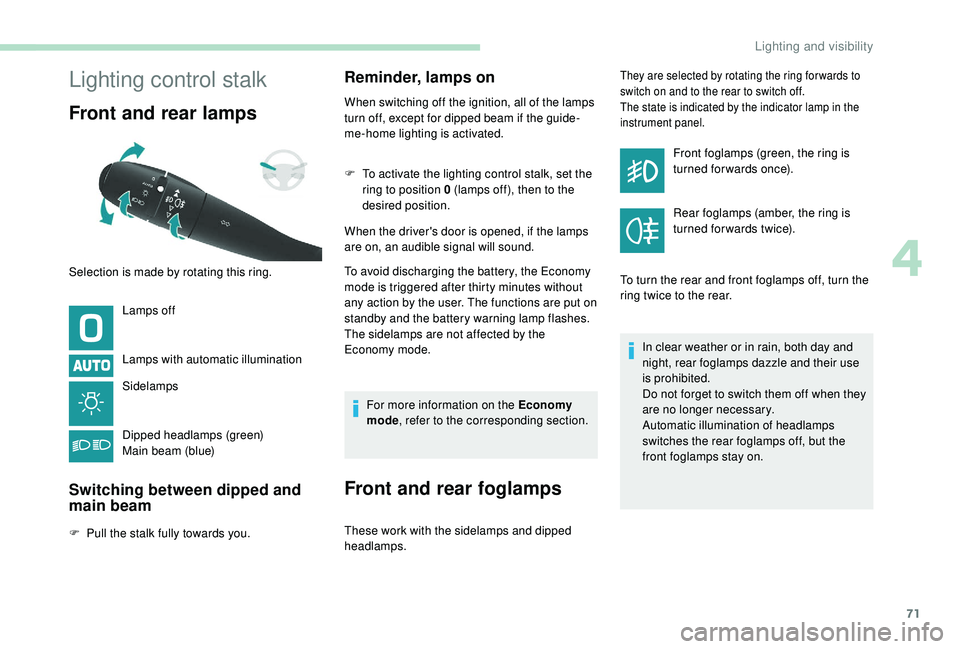
Lighting control stalk
Front and rear lamps
Lamps off
Lamps with automatic illumination
Sidelamps
Dipped headlamps (green)
Main beam (blue)
Switching between dipped and
main beam
F Pull the stalk fully towards you.
Reminder, lamps on
When switching off the ignition, all of the lamps
turn off, except for dipped beam if the guide-
me-home lighting is activated.
F
T
o activate the lighting control stalk, set the
ring to position 0 (lamps off), then to the
desired position.
When the driver's door is opened, if the lamps
are on, an audible signal will sound.
To avoid discharging the battery, the Economy
mode is triggered after thirty minutes without
any action by the user. The functions are put on
standby and the battery warning lamp flashes.
The sidelamps are not affected by the
Economy mode.
For more information on the Economy
mode , refer to the corresponding section.
Front and rear foglamps
These work with the sidelamps and dipped
headlamps.
They are selected by rotating the ring for wards to
switch on and to the rear to switch off.
The state is indicated by the indicator lamp in the
instrument panel.
Front foglamps (green, the ring is
turned forwards once).
Rear foglamps (amber, the ring is
turned for wards twice).
To turn the rear and front foglamps off, turn the
ring twice to the rear.
In clear weather or in rain, both day and
night, rear foglamps dazzle and their use
is prohibited.
Do not forget to switch them off when they
are no longer necessary.
Automatic illumination of headlamps
switches the rear foglamps off, but the
front foglamps stay on.
Selection is made by rotating this ring.
4
Lighting and visibility