2017 PEUGEOT 5008 instrument panel
[x] Cancel search: instrument panelPage 60 of 404
58
Reinitialising the remote
control
Following replacement of the battery or in
the event of a remote control fault, it may be
necessary to reinitialise the remote control.
Without central locking
These procedures should be used in the
following cases:
-
c
entral locking fault,
-
b
attery disconnected or discharged.
Driver's door
F Turn the key towards the rear of the vehicle to lock it, or towards the front to unlock it.
Passenger doors
Unlocking a door
F P ull the interior opening control for the door.
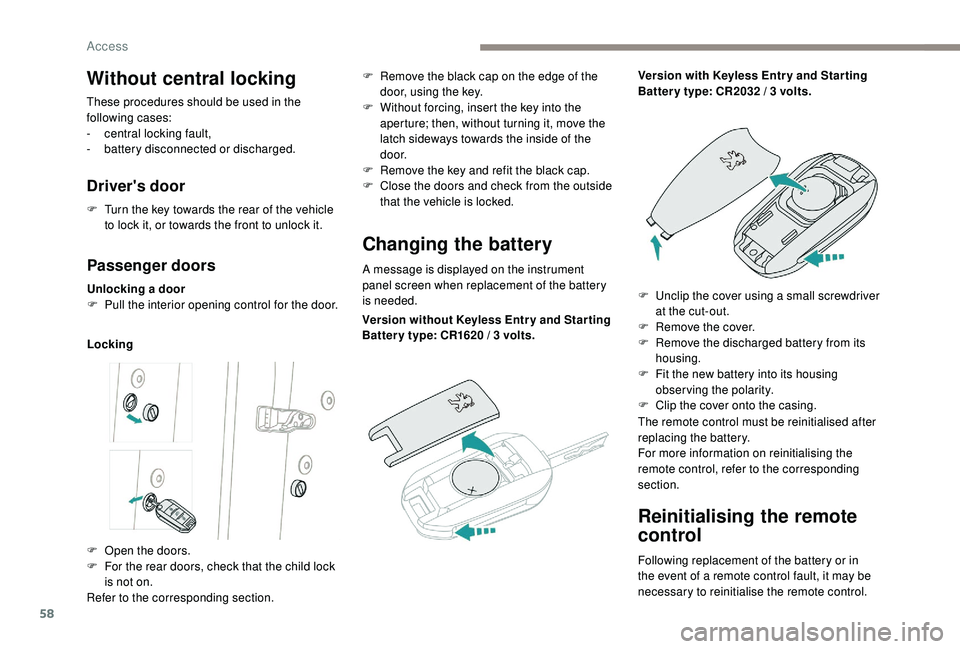
Locking
Changing the battery
A message is displayed on the instrument
panel screen when replacement of the battery
is needed.
F
O
pen the doors.
F
F
or the rear doors, check that the child lock
is not on.
Refer to the corresponding section. F
R
emove the black cap on the edge of the
door, using the key.
F
W
ithout forcing, insert the key into the
aperture; then, without turning it, move the
latch sideways towards the inside of the
d o o r.
F
R
emove the key and refit the black cap.
F
C
lose the doors and check from the outside
that the vehicle is locked.
Version without
K
eyless Entr y and Star ting
Batter y type: CR1620
/ 3 volts.Version with
K
eyless Entr y and Star ting
Batter y type: CR2032 / 3 volts.
F
U
nclip the cover using a small screwdriver
at the cut-out.
F
R
emove the cover.
F
R
emove the discharged battery from its
housing.
F
F
it the new battery into its housing
observing the polarity.
F
C
lip the cover onto the casing.
The remote control must be reinitialised after
replacing the battery.
For more information on reinitialising the
remote control, refer to the corresponding
section.
Access
Page 62 of 404
60
Anti-intrusion security
Operation
If one of the doors or the boot is open, the
automatic central locking does not take place.This is signalled by the sound of
the locks rebounding, accompanied
by illumination of this symbol in the
instrument panel, an audible signal
and the display of an alert message.
Carrying long or voluminous objects
If you want to drive with the boot open, you
should press the central locking button
to lock the doors. Other wise, every time
the speed of the vehicle exceeds 6
mph
(10
km/h), the locks will rebound and the
alerts mentioned above will appear.
Pressing the central locking button
unlocks the vehicle.
Above 6
mph (10 km/h), this unlocking is
te m p o r a r y.
This system allows automatic simultaneous
locking of the doors and boot as soon as the
speed of the vehicle exceeds 6
mph (10 km/h).
Unlocking
Central locking
This function allows the doors and boot to be
locked or unlocked simultaneously from inside
the vehicle.
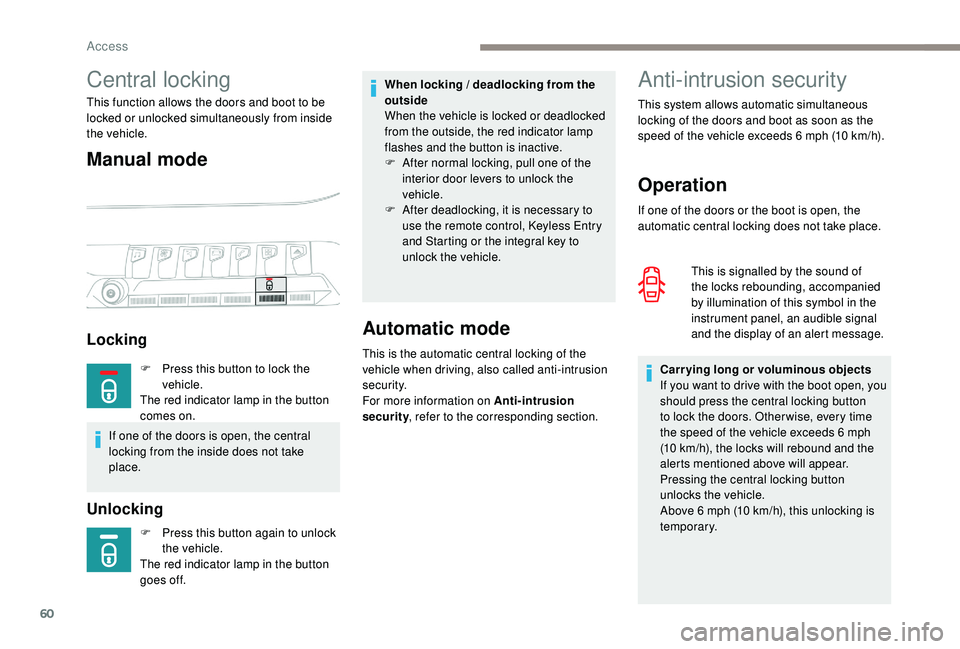
Manual mode
Locking
F Press this button again to unlock
the vehicle.
The red indicator lamp in the button
goes off.
Automatic mode
This is the automatic central locking of the
vehicle when driving, also called anti-intrusion
s e c u r i t y.
For more information on Anti-intrusion
security , refer to the corresponding section.
When locking / deadlocking from the
outside
When the vehicle is locked or deadlocked
from the outside, the red indicator lamp
flashes and the button is inactive.
F
A
fter normal locking, pull one of the
interior door levers to unlock the
vehicle.
F
A
fter deadlocking, it is necessary to
use the remote control,
K
eyless Entry
and Starting or the integral key to
unlock the vehicle.
F
P
ress this button to lock the
vehicle.
The red indicator lamp in the button
comes on.
If one of the doors is open, the central
locking from the inside does not take
place.
Access
Page 67 of 404
65
Closing the tailgate
F Lower the tailgate using the interior grips.
F R elease the grips and press down on the
outside of the tailgate to close it.
If the tailgate is not properly closed: -
e
ngine running, this warning
lamp and a message appear in
the instrument panel for a few
seconds,
-
v
ehicle moving (speed above
6
mph (10 km/h)), this warning
lamp and a message appear in
the instrument panel for a few
seconds, accompanied by an
audible signal.
Hands-free tailgate
General points
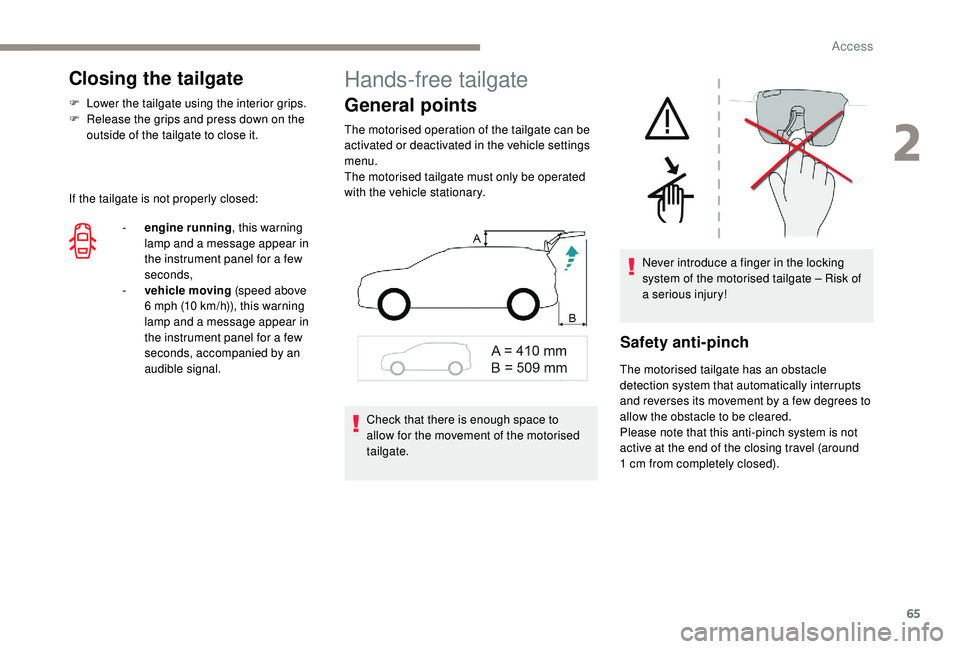
The motorised operation of the tailgate can be
activated or deactivated in the vehicle settings
menu.
The motorised tailgate must only be operated
with the vehicle stationary.
Safety anti-pinch
The motorised tailgate has an obstacle
detection system that automatically interrupts
and reverses its movement by a few degrees to
allow the obstacle to be cleared.
Please note that this anti-pinch system is not
active at the end of the closing travel (around
1
cm from completely closed).
Check that there is enough space to
allow for the movement of the motorised
tailgate. Never introduce a finger in the locking
system of the motorised tailgate – Risk of
a serious injury!
2
Access
Page 76 of 404
74
Driving position
Adopting a good driving position helps improve
your comfort and protection.
It also optimises interior and exterior visibility
as well as access to controls.
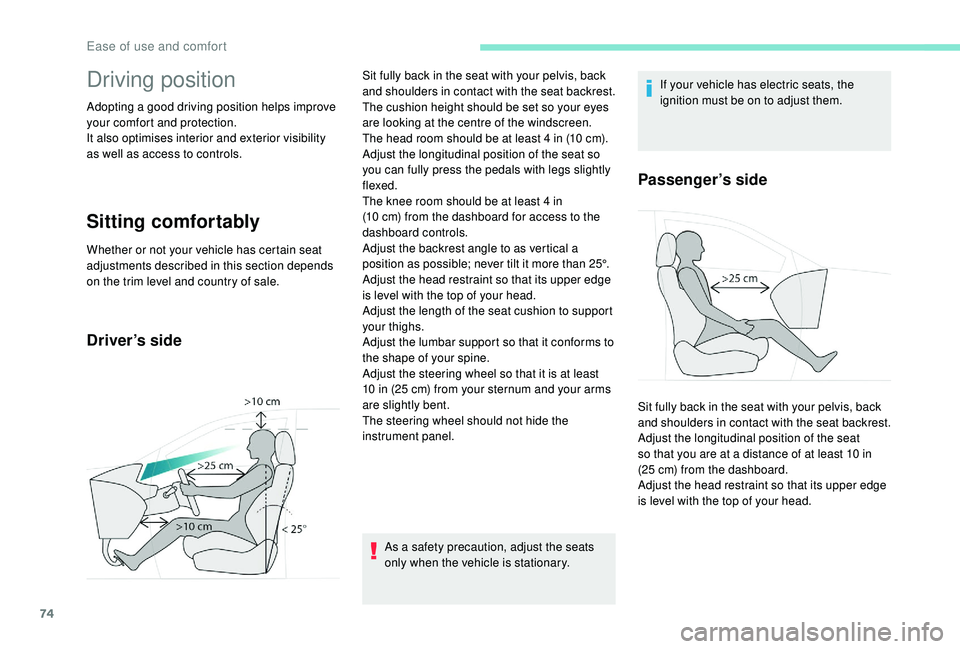
Sitting comfortably
Whether or not your vehicle has certain seat
adjustments described in this section depends
on the trim level and country of sale.
Driver’s side
As a safety precaution, adjust the seats
only when the vehicle is stationary.If your vehicle has electric seats, the
ignition must be on to adjust them.
Passenger’s side
Sit fully back in the seat with your pelvis, back
and shoulders in contact with the seat backrest.
The cushion height should be set so your eyes
are looking at the centre of the windscreen.
The head room should be at least 4
in (10 cm).
Adjust the longitudinal position of the seat so
you can fully press the pedals with legs slightly
flexed.
The knee room should be at least 4
in
(10
cm) from the dashboard for access to the
dashboard controls.
Adjust the backrest angle to as vertical a
position as possible; never tilt it more than 25°.
Adjust the head restraint so that its upper edge
is level with the top of your head.
Adjust the length of the seat cushion to support
your thighs.
Adjust the lumbar support so that it conforms to
the shape of your spine.
Adjust the steering wheel so that it is at least
10
in (25 cm) from your sternum and your arms
are slightly bent.
The steering wheel should not hide the
instrument panel. Sit fully back in the seat with your pelvis, back
and shoulders in contact with the seat backrest.
Adjust the longitudinal position of the seat
so that you are at a distance of at least 10
in
(25
cm) from the dashboard.
Adjust the head restraint so that its upper edge
is level with the top of your head.
Ease of use and comfort
Page 126 of 404
124
Exterior lighting control
stalk
Main lighting
Selection of main lighting mode
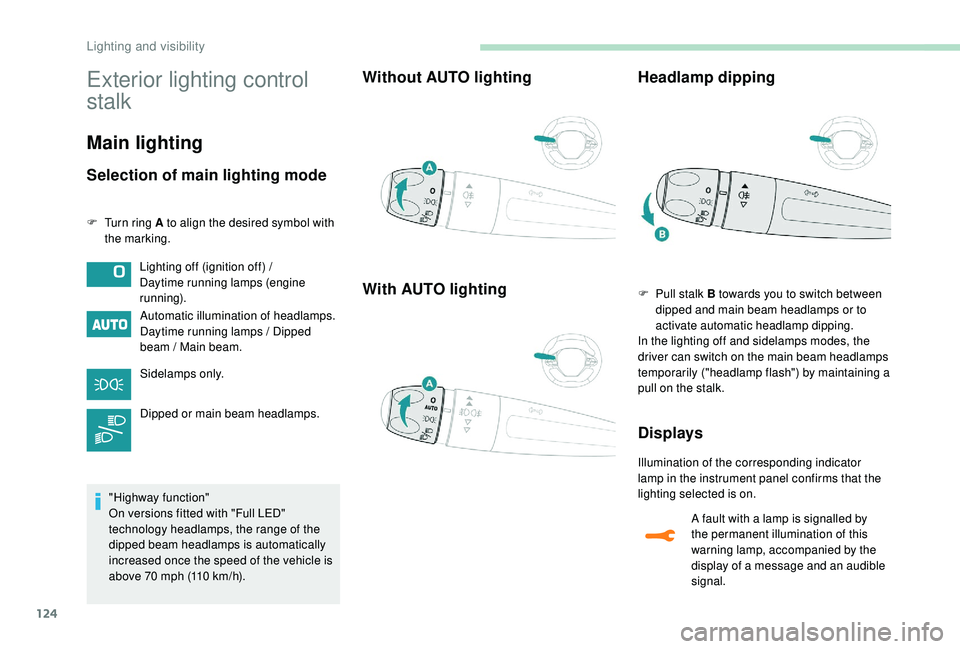
F Turn ring A to align the desired symbol with the marking.
Automatic illumination of headlamps.
Daytime running lamps / Dipped
beam / Main beam.
Sidelamps only.
Dipped or main beam headlamps.
"Highway function"
On versions fitted with "Full LED"
technology headlamps, the range of the
dipped beam headlamps is automatically
increased once the speed of the vehicle is
above 70
mph (110 km/h).
Without AUTO lighting
With AUTO lighting Headlamp dipping
F Pull stalk B towards you to switch between
dipped and main beam headlamps or to
activate automatic headlamp dipping.
In the lighting off and sidelamps modes, the
driver can switch on the main beam headlamps
temporarily ("headlamp flash") by maintaining a
pull on the stalk.
Displays
Illumination of the corresponding indicator
lamp in the instrument panel confirms that the
lighting selected is on.
Lighting off (ignition off) /
Daytime running lamps (engine
running).
A fault with a lamp is signalled by
the permanent illumination of this
warning lamp, accompanied by the
display of a message and an audible
signal.
Lighting and visibility
Page 129 of 404
127
Direction indicators
If you forget to cancel the direction
indicators for more than twenty seconds,
the volume of the audible signal will
increase if the speed is above 40 mph
(60
km/h).
Three flashes
F Press briefly upwards or downwards, without going beyond the point of
resistance; the direction indicators will flash
3
times. On versions fitted with LED direction indicators,
the line of LEDs is illuminated sequentially.
The brightness of the daytime running lamps
is reduced during sequential operation of the
direction indicators.
Parking lamps
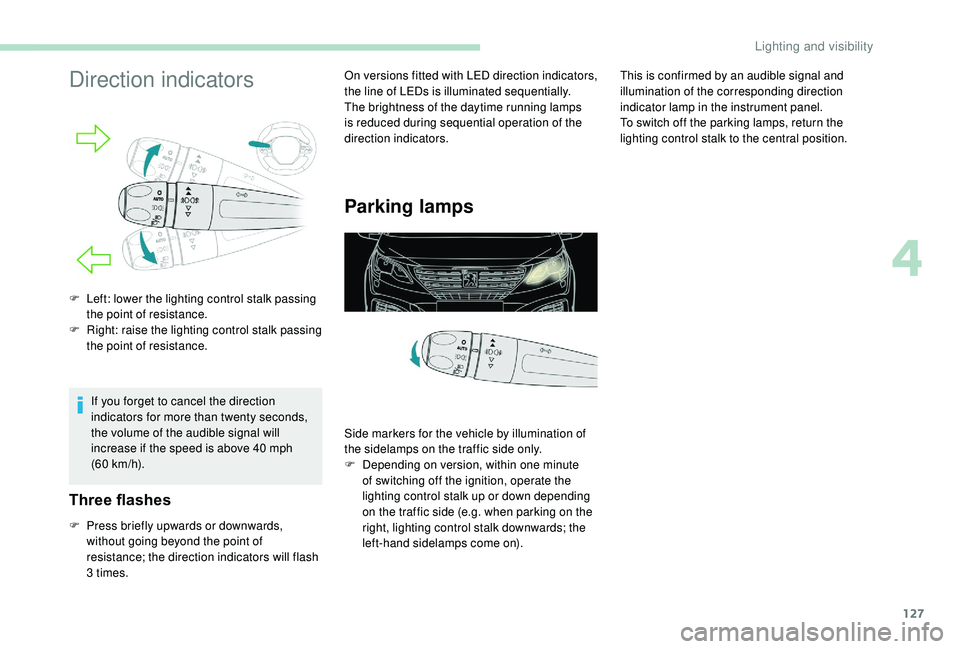
F Left: lower the lighting control stalk passing
the point of resistance.
F
R
ight: raise the lighting control stalk passing
the point of resistance.
Side markers for the vehicle by illumination of
the sidelamps on the traffic side only.
F
D
epending on version, within one minute
of switching off the ignition, operate the
lighting control stalk up or down depending
on the traffic side (e.g. when parking on the
right, lighting control stalk downwards; the
left-hand sidelamps come on). This is confirmed by an audible signal and
illumination of the corresponding direction
indicator lamp in the instrument panel.
To switch off the parking lamps, return the
lighting control stalk to the central position.
4
Lighting and visibility
Page 130 of 404
128
Headlamp adjustment
Manual adjustment of the
halogen headlamps
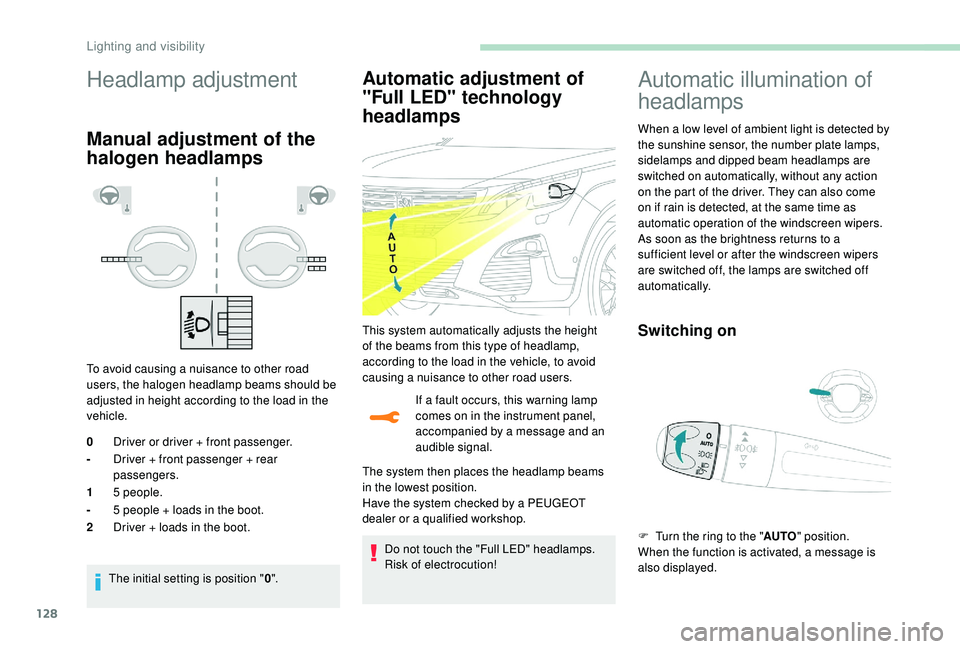
To avoid causing a nuisance to other road
users, the halogen headlamp beams should be
adjusted in height according to the load in the
vehicle.The initial setting is position " 0".
Automatic adjustment of
"Full LED" technology
headlamps
If a fault occurs, this warning lamp
comes on in the instrument panel,
accompanied by a message and an
audible signal.
The system then places the headlamp beams
in the lowest position.
Have the system checked by a PEUGEOT
dealer or a qualified workshop.
Do not touch the "Full LED" headlamps.
Risk of electrocution!
0
Driver or driver + front passenger.
- Driver + front passenger + rear
passengers.
1 5
people.
- 5
people + loads in the boot.
2 Driver + loads in the boot.
Automatic illumination of
headlamps
When a low level of ambient light is detected by
the sunshine sensor, the number plate lamps,
sidelamps and dipped beam headlamps are
switched on automatically, without any action
on the part of the driver. They can also come
on if rain is detected, at the same time as
automatic operation of the windscreen wipers.
As soon as the brightness returns to a
sufficient level or after the windscreen wipers
are switched off, the lamps are switched off
automatically.
Switching onThis system automatically adjusts the height
of the beams from this type of headlamp,
according to the load in the vehicle, to avoid
causing a nuisance to other road users.
F
T
urn the ring to the "AUTO" position.
When the function is activated, a message is
also displayed.
Lighting and visibility
Page 131 of 404
129
Switching off
F Turn the ring to another position.
Deactivation of the function is accompanied by
the display of a message.
Operating fault
In the event of a malfunction of the
sunshine sensor, the lighting comes
on, this warning lamp is displayed in
the instrument panel accompanied
by an audible signal and/or a
message.
Contact a PEUGEOT dealer or a
qualified workshop.
Do not cover the sunshine sensor, linked
with the rain sensor and located at the
top centre of the windscreen behind the
rear view mirror; the associated functions
would no longer be controlled.
In fog or snow, the sunshine sensor may
detect sufficient light. In this case, the
lighting will not come on automatically.
Automatic guide-me-home
lighting
With the "Automatic illumination of headlamps"
function activated, under low ambient light, the
sidelamps, dipped beam headlamps and door
mirror spotlamps come on automatically when
the ignition is switched off.
Activation, deactivation and the duration of the
guide-me-home lighting are set in the vehicle
parameters menu in the screen.
Manual guide-me-home
lighting
The temporary illumination of the dipped beam
headlamps after the vehicle's ignition has been
switched off makes the driver's exit easier
when the light is poor.
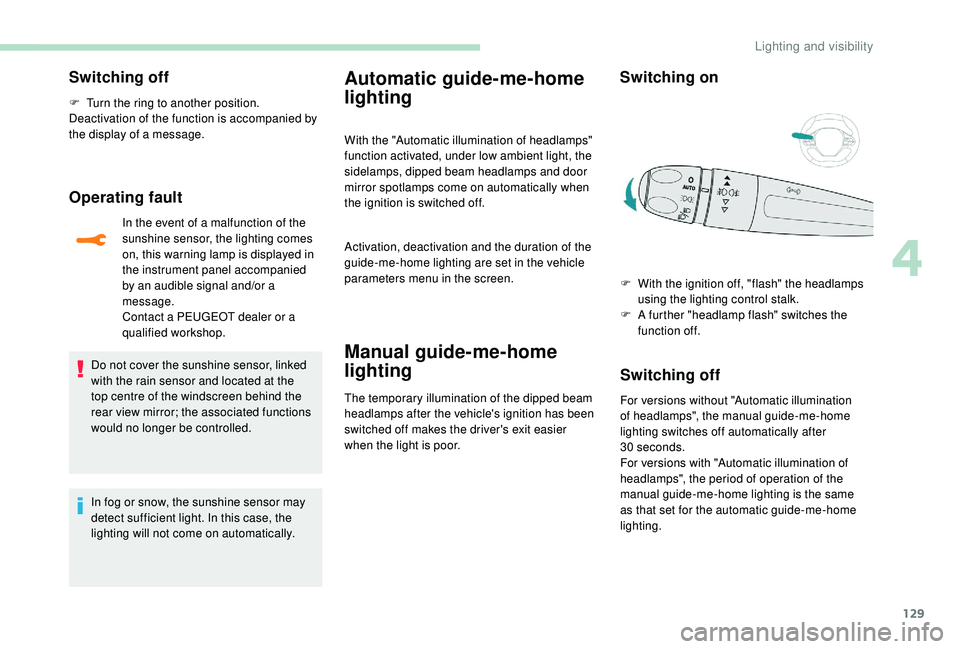
Switching on
Switching off
For versions without "Automatic illumination
of headlamps", the manual guide-me-home
lighting switches off automatically after
30
seconds.
For versions with "Automatic illumination of
headlamps", the period of operation of the
manual guide-me-home lighting is the same
as that set for the automatic guide-me-home
lighting. F
W
ith the ignition off, "flash" the headlamps
using the lighting control stalk.
F
A f
urther "headlamp flash" switches the
function off.
4
Lighting and visibility